35 Art Deco Nail Designs To Inspire Your Next Manicure

Introduction

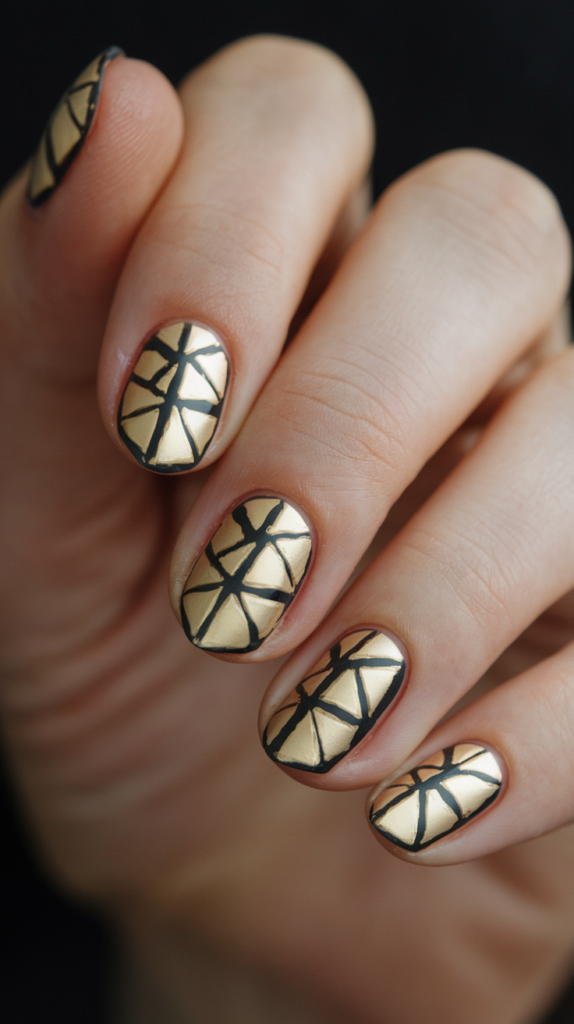
Art Deco, a design movement that emerged in the 1920s, is renowned for its bold geometric shapes, luxurious materials, and glamorous flair.

It influenced everything from architecture and fashion to jewelry and interior design—and nail art is no exception.

In recent years, Art Deco-inspired nails have gained popularity for their elegance and structured aesthetics.

With the perfect blend of sharp lines, metallic accents, and rich color palettes, these designs evoke the opulence of the Roaring ’20s while maintaining a modern, chic appeal.

In this blog post, we’ll take you through 35 stunning Art Deco nail art designs that can inspire your next manicure.

Whether you’re looking for something bold, understated, or whimsical, there’s a design here to suit every taste and occasion.

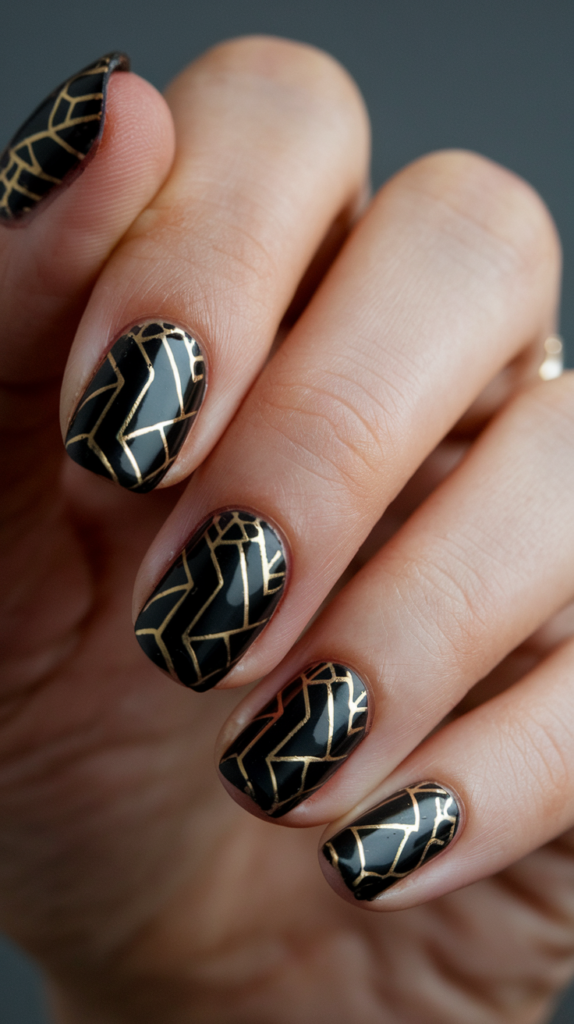
1. Gatsby Gold & Black: Classic Roaring ’20s Nail Art

Black nails with intricate gold geometric lines inspired by 1920s Art Deco design, creating a glamorous and elegant look.

Design Inspiration: Overview Of The Roaring ’20s Influence On Nail Art

The Roaring ’20s were a time of great exuberance and luxury, and nowhere was this more apparent than in the rise of the Art Deco movement.

Art Deco, with its bold geometric patterns and opulent use of metallics, permeated every aspect of design, including fashion and nail art.

The “Gatsby Gold & Black” design takes direct inspiration from this era, evoking the luxurious parties and high-end fashion of the time.

The combination of rich black with decadent gold mimics the lavish style that defined the 1920s, a perfect embodiment of elegance and flair.

How To Achieve The Look: Step-By-Step Guide To Creating The Black And Gold Geometric Design

To recreate this timeless look, start with a glossy black base.

This bold backdrop will allow the gold geometric accents to stand out.

Once the black polish has dried completely, use gold striping tape or a fine nail art brush to carefully draw intricate geometric patterns, such as triangles, lines, or even small rectangles, across the nails.

Ensure the lines are crisp and symmetrical, as precision is key in Art Deco designs.

After applying the gold accents, finish the manicure with a high-gloss top coat to lock in the design and enhance the contrast between the black and gold.

Styling Tips: Ideal Occasions And Outfit Pairings

This Gatsby-inspired nail design pairs beautifully with glamorous evening wear, especially for formal occasions such as parties, weddings, or cocktail events.

It also works well with little black dresses, sequined gowns, or even velvet outfits.

The boldness of the design calls for equally striking accessories, so opt for gold jewelry and metallic accents in your outfit to complete the look.

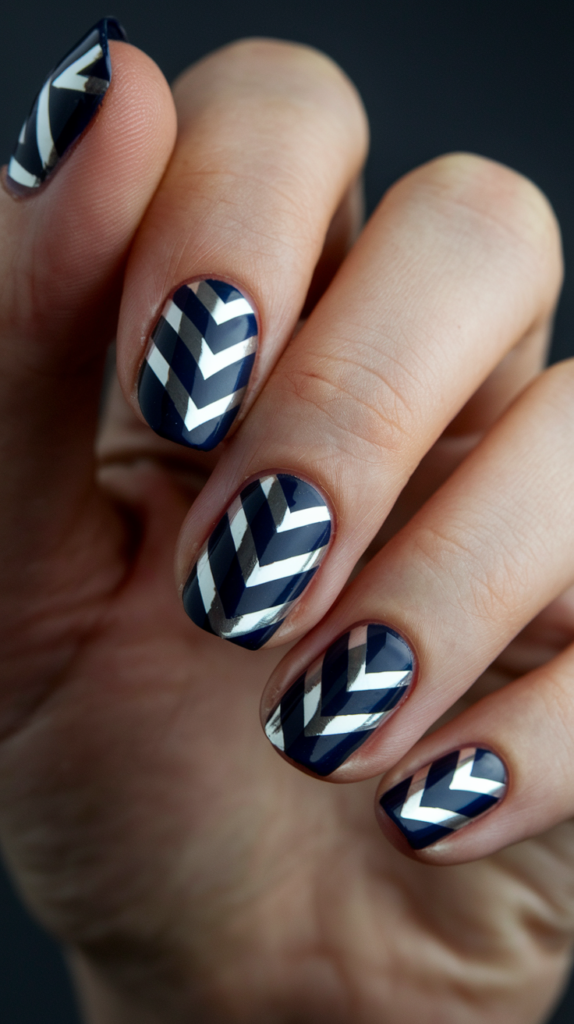
2. Silver Chevron Stripes: Bold Metallic Nails With A Modern Twist

Metallic silver chevron stripes on a deep navy background, showcasing a bold and modern twist on Art Deco nails.

Design Inspiration: The Role Of Metallics In Art Deco Fashion

Metallics played a significant role in Art Deco fashion, symbolizing wealth and modernity.

Silver, in particular, was a favorite among designers who wanted to evoke a futuristic and sleek aesthetic.

Chevron patterns, with their sharp angles and symmetrical lines, were also central to the Art Deco style.

Combining metallic silver with chevron stripes on nails creates a contemporary take on this timeless trend, blending the past with modern elegance.

How To Get Perfect Chevron Stripes: Pro Tips For Creating Sharp Lines With Metallic Polish

To achieve the perfect silver chevron stripes, start by applying a deep navy or dark base color to create a striking contrast.

Once the base color is dry, use striping tape to outline the chevron shapes on each nail.

Apply metallic silver polish within the taped-off sections, ensuring an even application.

Remove the tape carefully before the polish fully dries to keep the edges clean and sharp.

For extra precision, use a nail art brush to touch up any imperfections.

Seal the design with a high-gloss top coat for added shine and durability.

Best Color Combinations: Alternatives To Silver And Navy

While silver and navy create a classic, bold contrast, there are many other color combinations you can try for this design.

For a softer look, consider using metallic rose gold over a blush or nude base.

Alternatively, opt for a more daring combination like silver and deep burgundy for a rich, opulent feel.

Gold on black or white also makes for an elegant variation of the chevron design.

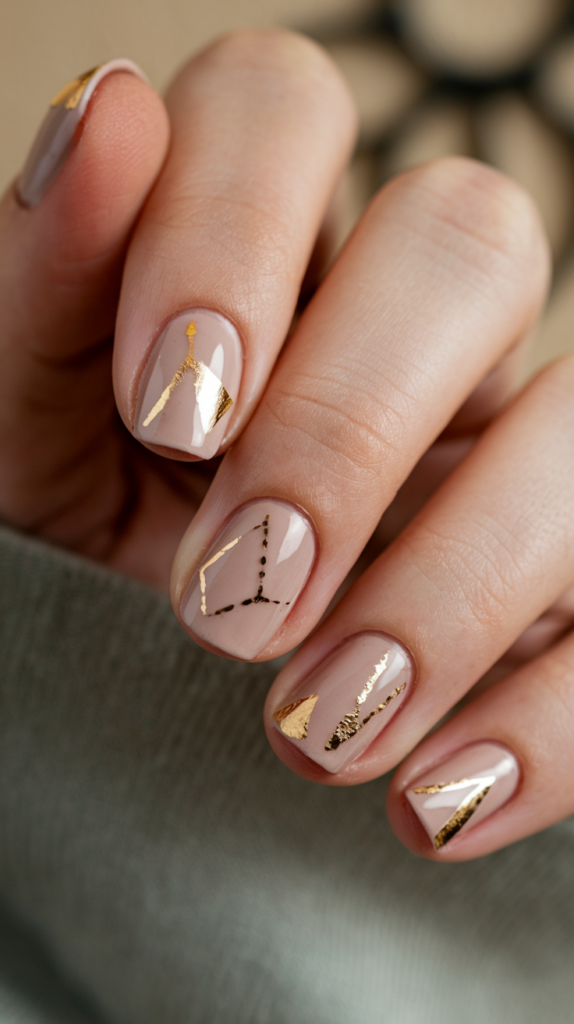
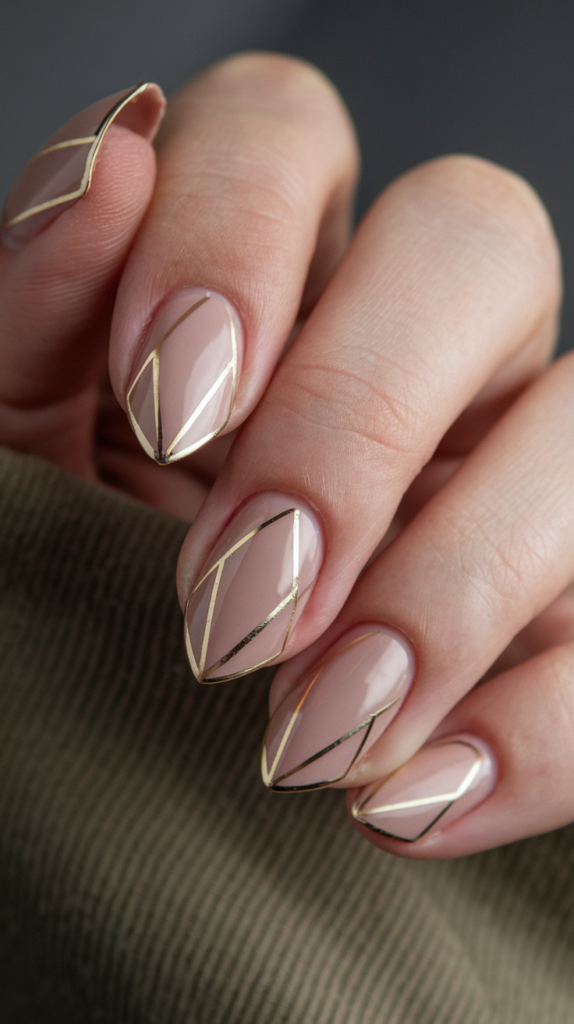
3. Geometric Gold Foil: Elevate Your Nude Nails

Nude nails adorned with sharp, geometric gold foil accents, offering a minimalist yet luxurious Art Deco-inspired design.

Design Inspiration: Why Gold Foil Was A Key Element In Art Deco Decor

Gold foil was a hallmark of Art Deco decor, appearing in everything from furniture to jewelry.

Its reflective, luxurious quality symbolized wealth and status, which made it a favorite for designers looking to create opulent environments.

Translating this to nail art, gold foil accents can instantly elevate any manicure, giving even a simple nude base a glamorous, high-fashion feel.

This design blends understated elegance with intricate detailing, making it perfect for both casual and formal settings.

How To Apply Gold Foil Accents: Techniques For A Clean, Long-Lasting Finish

To start, apply a neutral, nude base coat and allow it to dry fully.

Once set, use a thin nail art brush or tweezers to carefully place pieces of gold foil onto the nails in geometric shapes, such as triangles, squares, or stripes.

For clean, sharp lines, consider using nail art tape as a guide.

Once the foil is in place, gently press it down to ensure it adheres to the nail.

Finish with a clear top coat to seal in the foil and give the manicure a polished, long-lasting finish.

When To Wear It: Best Settings To Showcase Nude And Gold Nails

The Geometric Gold Foil design is versatile and can be worn for a variety of occasions.

It’s subtle enough for everyday wear but also sophisticated enough for formal events like weddings, dinner parties, or work functions.

Pair it with gold accessories to enhance the metallic elements of the design, and opt for neutral or monochrome outfits to let the nails stand out as the main accessory.

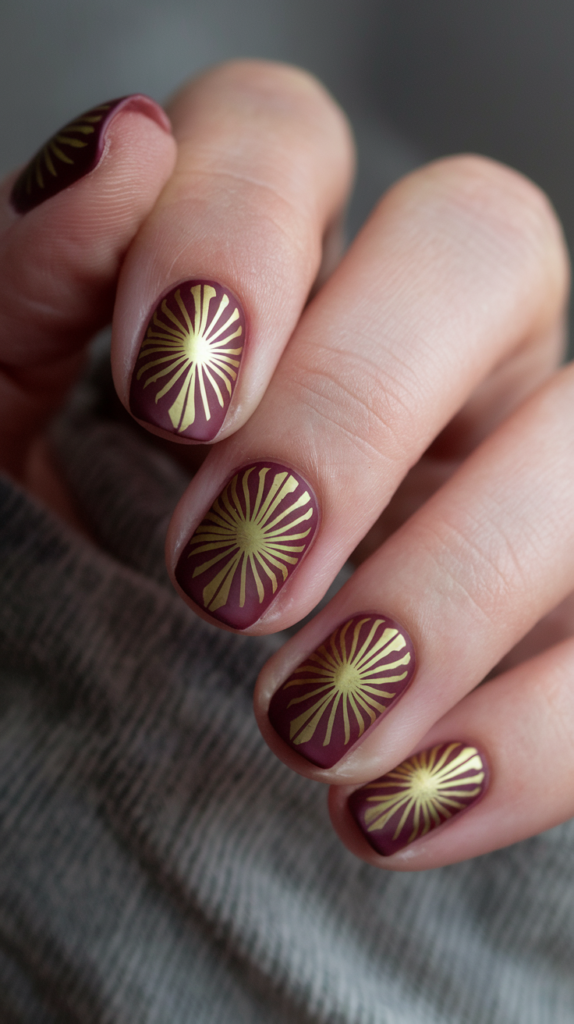
4. Art Deco Sunburst: Bold And Beautiful Burgundy

Matte burgundy nails featuring bold sunburst patterns in gold and black, mimicking the radiant designs of Art Deco architecture.

Design Inspiration: The Symbolism Of The Sunburst In Art Deco Architecture

The sunburst motif is one of the most recognizable symbols of the Art Deco movement.

Representing hope, progress, and modernity, it frequently appeared in architecture, jewelry, and design throughout the 1920s.

The “Art Deco Sunburst” nail design takes this iconic symbol and adapts it into a bold, burgundy manicure, blending rich colors with sharp, symmetrical lines that radiate outward like the sun.

Creating The Perfect Sunburst: Tools And Techniques For Precise Detailing

To create this striking look, start with a matte burgundy base coat.

Once dry, use a thin nail art brush dipped in gold polish to draw sunburst lines from the base of the nail outward.

The lines should be evenly spaced and symmetrical, mimicking the structured, radiant shape of a sunburst.

For added dimension, consider alternating between thin and thicker lines.

Finish the look with a matte top coat to maintain the bold, muted finish of the burgundy while letting the gold accents shine.

Nail Length Considerations: Why This Design Works Best On Longer Nails

This design works particularly well on longer nails, as the added length allows for more space to create the intricate sunburst pattern.

However, it can be adapted for shorter nails by using finer lines and smaller bursts.

Longer nails also enhance the elegance of the design, giving the manicure a more elongated, luxurious feel.

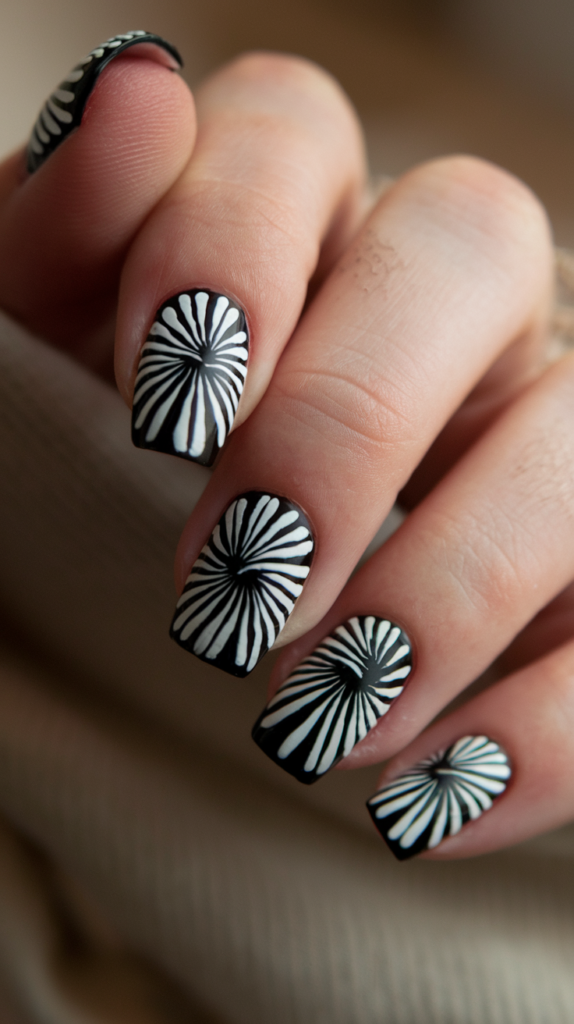
5. Monochrome Fan Design: Chic And Sophisticated

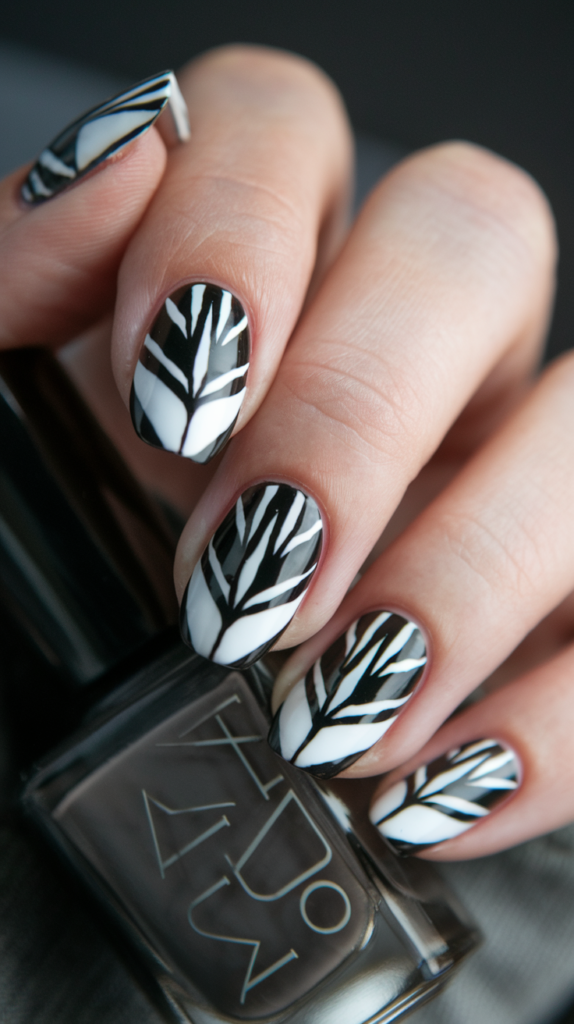
Black and white nails with sharp, angular fan designs, creating a chic and sophisticated monochrome Art Deco look.

Design Inspiration: How Fan Designs Are Rooted In 1920s Style

The fan motif was another key element of Art Deco design, appearing frequently in fashion, jewelry, and architecture.

This monochrome version of the fan design brings a classic black-and-white color palette to the forefront, creating a look that is both chic and sophisticated.

The sharp, angular edges of the fan design reflect the precision and symmetry that defined the Art Deco era.

Black And White Balance: Tips For Creating Bold Contrast With Fan Patterns

To create the Monochrome Fan design, start with a white base coat on all nails.

Once dry, use a fine nail art brush to draw black fan patterns on each nail.

The fans should be sharp and angular, with crisp lines radiating outward from a central point.

To achieve a perfect balance between the black and white, ensure that the fan designs are evenly spaced and symmetrical.

For an extra pop, consider adding small silver or gold accents at the tips of the fans.

Mixing And Matching: How To Combine This Look With Other Monochrome Designs

Monochrome fan designs can easily be combined with other black-and-white nail art patterns, such as stripes or polka dots.

For a more dynamic look, alternate the fan design on one or two nails while keeping the others simple with a solid black or white color.

This creates a more eclectic, yet cohesive, monochrome manicure.

6. Golden Accents: Minimalist Art Deco

Nude nails with delicate gold triangle tips, providing a minimalist and elegant take on Art Deco nail design.

Design Inspiration: Why Minimalism Can Still Be Bold In Art Deco

While Art Deco is often associated with opulence and intricate details, there is a minimalist side to the movement that embraces clean lines and simple, geometric shapes.

The “Golden Accents” nail design embodies this aspect of Art Deco by focusing on small but impactful golden triangle tips.

This design is perfect for those who want to channel the elegance of the 1920s without overwhelming their overall look, making minimalism feel bold and sophisticated.

Perfecting Gold Triangle Tips: How To Create Sharp And Elegant Tips

To achieve this minimalist Art Deco-inspired manicure, start with a nude or light beige base coat.

Allow the base to dry completely before moving on to the accent details.

Using nail tape or a small triangle stencil, carefully apply a thin layer of gold polish to the tips of each nail in the shape of a sharp, symmetrical triangle.

Remove the tape while the polish is still wet for clean lines.

Once the triangles are in place, seal the look with a high-gloss top coat to protect the gold tips and give the nails a polished finish.

Subtle Nail Art For Everyday Glam: Where To Flaunt This Understated Style

The simplicity of the Golden Accents design makes it versatile for everyday wear.

It’s perfect for occasions where you want to look chic and put together without being overly flashy.

Whether it’s for work, a casual brunch, or a dinner date, these minimalist gold-tipped nails add a touch of elegance to any outfit.

The understated yet refined look pairs well with neutral-colored clothing and gold jewelry.

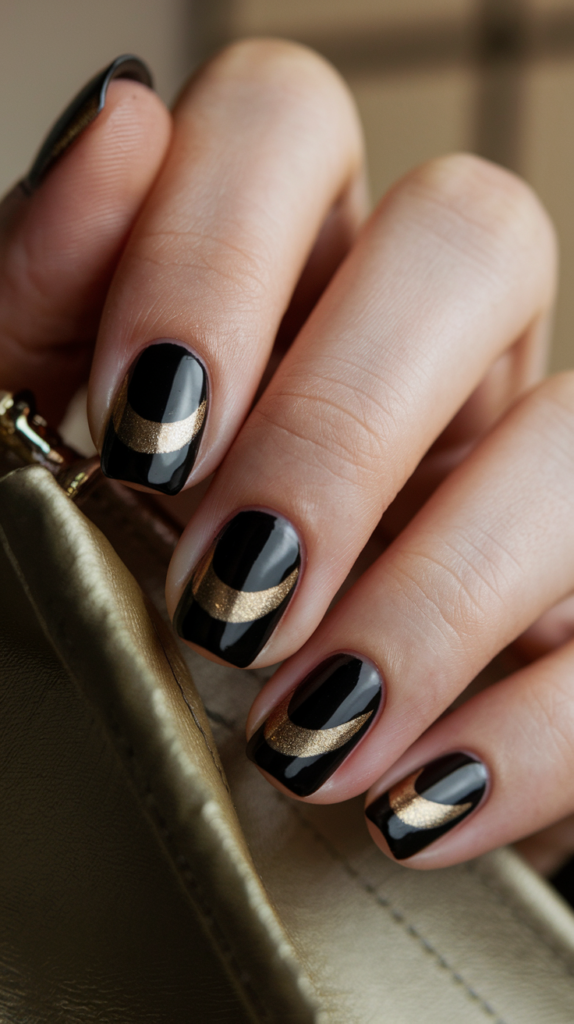
7. Black And Gold Half Moons: Timeless Glamour

Black nails with gold half-moon shapes at the base, offering a classic Art Deco contrast of black and gold.

Design Inspiration: The Significance Of Half-Moon Shapes In Art Deco Motifs

The half-moon shape is a classic motif found in many Art Deco designs.

It represents the geometric precision and symmetry that defined the era.

Incorporating this shape into a manicure with black and gold offers a modern twist on a vintage aesthetic.

The black and gold color scheme adds a sense of timeless glamour, reminiscent of the opulence of the Roaring ’20s.

Creating The Half-Moon Manicure: Essential Tools For A Flawless Design

To create the perfect half-moon manicure, start with a black base coat.

After the black polish has dried, use a half-moon stencil or nail tape to cover the lower part of the nail near the cuticle.

Apply a gold polish over the exposed area, and carefully remove the stencil while the polish is still wet.

This will leave a clean, gold half-moon shape at the base of each nail.

Finish with a clear top coat to give the manicure a high-gloss finish and enhance the contrast between the black and gold.

Why It Works: How Black And Gold Complement Each Other

The black and gold combination is a classic pairing that exudes sophistication and glamour.

The rich, dark black serves as the perfect backdrop for the metallic gold, allowing it to stand out without overwhelming the design.

This color scheme works well for both formal events and casual outings, making it a versatile option for those who want a chic, elegant manicure.

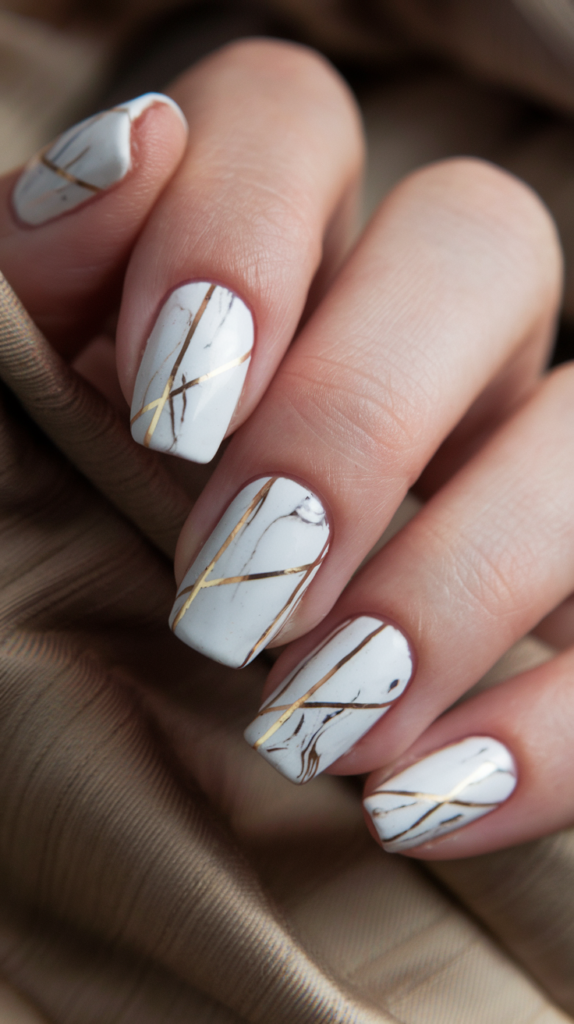
8. Marble & Metallics: Luxurious Texture And Shine

Soft white marble effect nails with gold metallic stripes, blending natural textures with sleek geometric accents.

Design Inspiration: The Influence Of Marble And Metallic Materials In Art Deco

Marble and metallic materials were often used in Art Deco interiors and architecture to create a sense of luxury and modernity.

This combination of textures and finishes translates beautifully into nail art, giving your nails a high-end, polished look.

The soft, swirling patterns of marble paired with the sharp lines of metallic accents create a perfect balance of texture and shine, making this design stand out.

Creating The Marble Effect: DIY Marble Nails Made Easy

To create the marble effect, start with a white or light gray base coat.

Once dry, use a small piece of plastic wrap or a thin nail art brush to apply a mix of gray and black polish in a swirling motion over the base color.

This will create a marbled effect.

For a more natural look, make sure the lines are thin and uneven, mimicking real marble patterns.

Once the marble design is in place, add metallic gold or silver stripes using a striping brush to create geometric patterns on top of the marble base.

Finish with a glossy top coat to enhance the marble texture and metallic accents.

Metallic Accents: How To Strategically Use Metallics Without Overpowering The Design

When adding metallic accents to a marble design, less is often more.

Use thin, delicate lines to frame the marble patterns, focusing on creating geometric shapes like triangles or rectangles.

This will add a subtle yet striking contrast without overpowering the marble effect.

The key is to maintain balance, allowing both the marble texture and metallic shine to complement each other.

9. Deco Diamonds: Sparkle And Structure

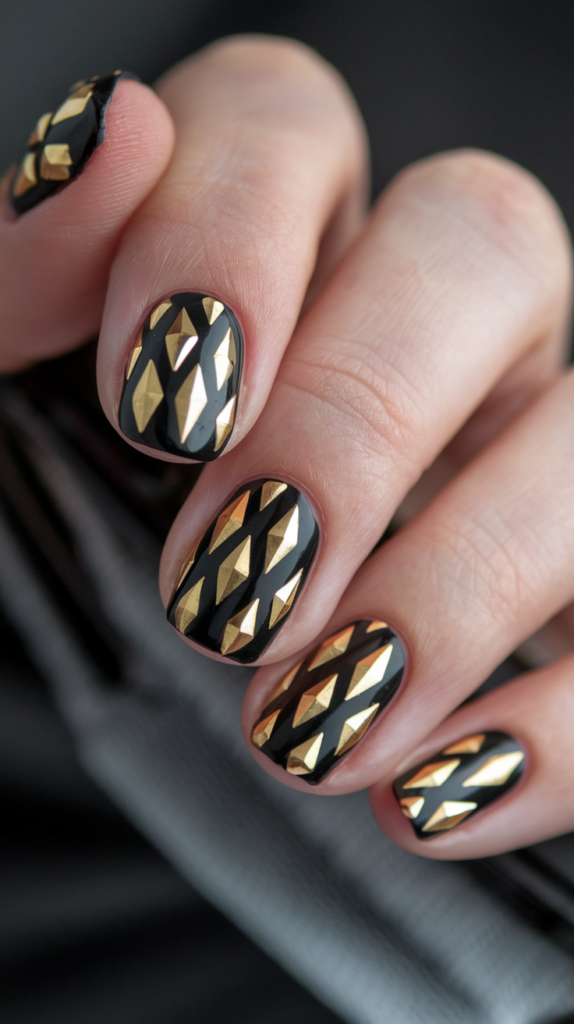
Black nails featuring sparkling gold diamond shapes and angular designs, capturing the opulence of Art Deco-inspired nail art.

Design Inspiration: How Diamonds Were A Girl’s Best Friend In The 1920s

Diamonds and other precious gems were a major part of the Art Deco aesthetic, symbolizing wealth and luxury.

This “Deco Diamonds” nail design brings the sparkle and structure of diamonds into your manicure.

The bold black background with sparkling gold diamond shapes captures the opulence of the era, while the sharp geometric lines reflect the precision and symmetry of Art Deco design.

Precise Geometric Patterns: Best Tools For Creating Sharp, Sparkling Diamond Shapes

To create sharp, sparkling diamond shapes, start with a glossy black base coat.

Once the base is dry, use gold striping tape or a fine nail art brush to outline diamond shapes on each nail.

For added sparkle, fill in the diamonds with a glitter polish or small rhinestones.

Make sure the diamonds are evenly spaced and symmetrical on each nail to maintain the structured look of the design.

Use a clear top coat to seal the design and add extra shine.

Adding Extra Glam: Incorporating Rhinestones For Added Shine

For an extra touch of glam, consider adding small rhinestones to the center of each diamond shape.

This will give the nails a three-dimensional effect, enhancing the sparkle and making the design even more luxurious.

Use a small dot of nail glue to attach each rhinestone, and finish with a top coat to ensure the rhinestones stay in place.

10. Emerald Geometrics: Rich Hues And Gold Lines

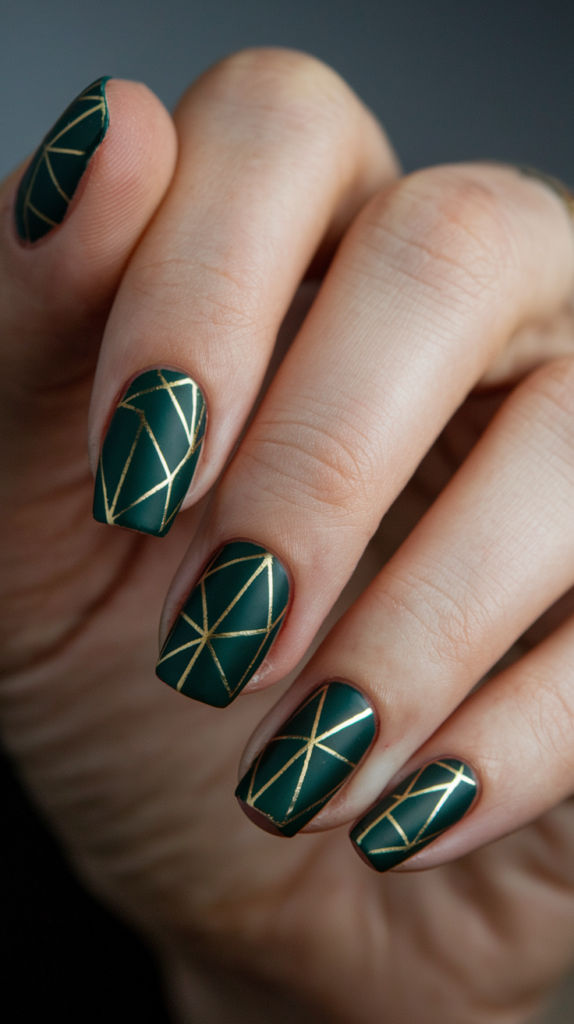
Deep emerald green nails with sharp, geometric gold lines, evoking the luxurious feel of Art Deco jewelry.

Design Inspiration: The Opulence Of Emerald And Gold In Art Deco Jewelry

Emerald green, with its rich, luxurious hue, was a popular color in Art Deco jewelry, often paired with gold to create a striking contrast.

The “Emerald Geometrics” nail design channels this opulent color combination, blending deep emerald green with sharp, geometric gold lines.

This design is perfect for anyone looking to add a touch of vintage glamour to their nails.

Creating Geometric Perfection: How To Get Crisp Gold Lines On A Deep Emerald Base

To achieve this look, start with a deep emerald green base coat.

Once dry, use a fine nail art brush or striping tape to create precise, geometric patterns with gold polish.

Triangles, rectangles, and diagonal lines work particularly well with this design, adding a structured, Art Deco-inspired feel.

For extra precision, use nail tape to outline the shapes before applying the gold polish, ensuring crisp, clean lines.

Finish with a glossy top coat to enhance the shine of the gold against the emerald base.

Styling Ideas: Why This Design Works Best With Evening Wear

The richness of the emerald green paired with the metallic gold makes this design ideal for evening events.

It pairs beautifully with formal dresses, especially those in deep jewel tones or black.

Gold accessories, such as earrings or bracelets, will complement the gold accents in the nail design, creating a cohesive, elegant look.

11. Minimalist Deco: Subtle Yet Striking

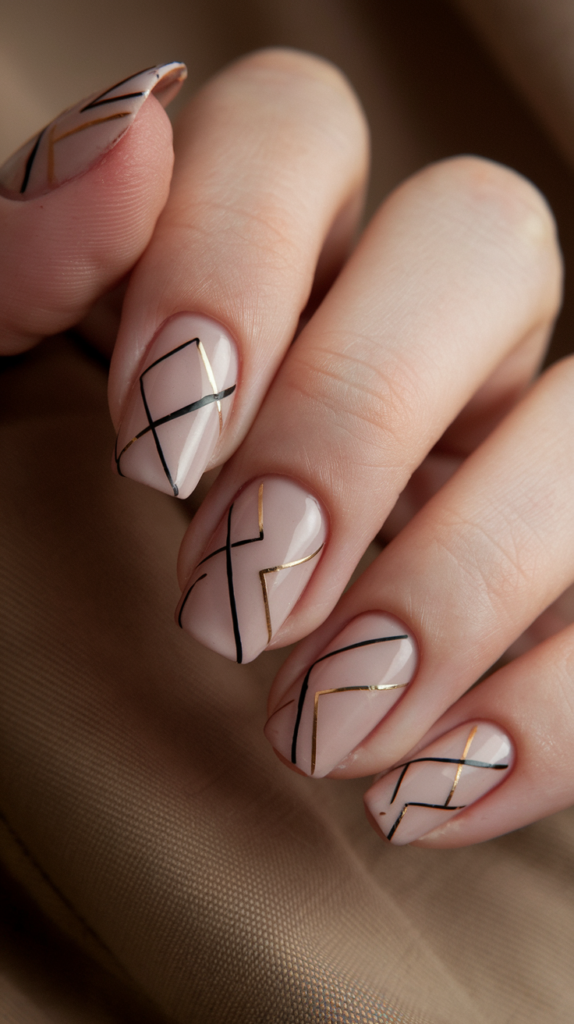
Nude nails with thin black and gold diagonal lines, offering a subtle yet striking minimalist Art Deco design.

Design Inspiration: How Minimalism Was Expressed In 1920s Art

While Art Deco is often associated with intricate patterns and bold designs, minimalism also played a role in the movement.

Clean lines, geometric shapes, and simple yet elegant patterns were frequently used to convey a sense of modernity and sophistication.

The “Minimalist Deco” nail design embraces this concept, using thin black and gold diagonal lines on a nude base to create a look that is both subtle and striking.

Perfecting Diagonal Lines: Tools And Techniques For Clean, Precise Lines

To create the Minimalist Deco design, start with a nude or light beige base coat.

Once dry, use a fine nail art brush or striping tape to carefully apply thin black and gold diagonal lines across each nail.

The lines should be crisp and evenly spaced, with a sharp contrast between the nude base and the dark lines.

For an extra touch of elegance, consider adding a small gold dot or rhinestone at the intersection of the lines.

Finish with a clear top coat to seal the design and give the nails a polished look.

Everyday Elegance: Why Minimalist Art Deco Designs Work For Any Occasion

The simplicity of this design makes it perfect for everyday wear.

It’s understated enough for the office or casual outings, but the gold accents add just enough glamour to make it suitable for evening events as well.

Pair it with neutral outfits or simple jewelry for a chic, modern look.

12. Royal Blue Elegance: Rich Colors Meet Bold Design

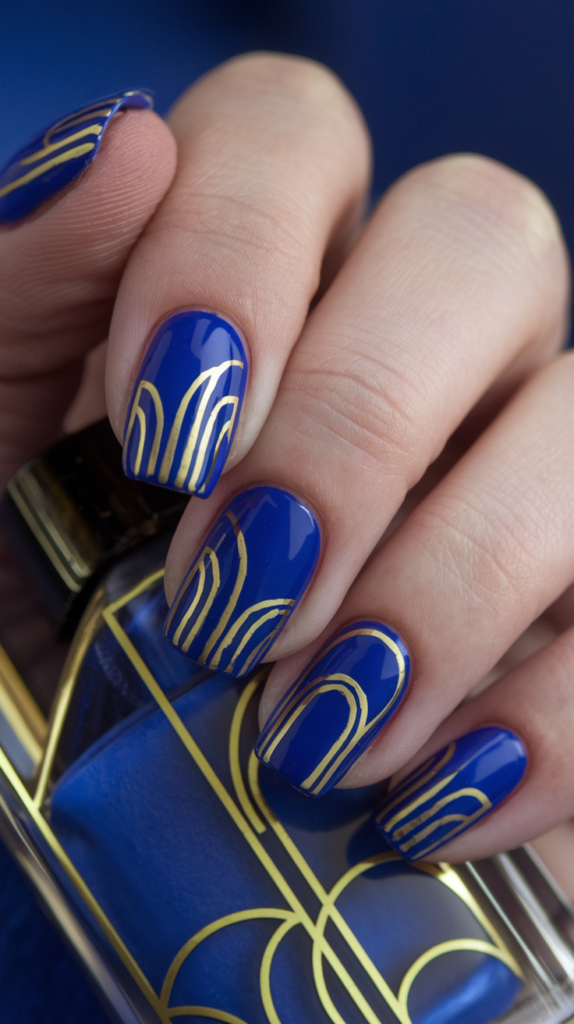
Royal blue nails with gold arches and geometric patterns, creating a bold and elegant Art Deco-inspired look.

Design Inspiration: The Popularity Of Royal Blue In Art Deco Fashion

Royal blue, with its deep and regal hue, was a favorite in Art Deco fashion and design.

This bold color symbolizes wealth and power, which fits perfectly with the opulence of the 1920s.

The “Royal Blue Elegance” nail design brings the richness of this color to your manicure, complemented by the signature geometric gold lines that define Art Deco style.

The combination of royal blue and gold creates a luxurious, sophisticated look that evokes the grandeur of the era.

Getting Perfect Gold Arches: Step-By-Step Instructions For Intricate Arches

Start by applying a rich, royal blue base coat on all your nails.

Once the base has dried, use a thin nail art brush dipped in gold polish to create delicate arches across the nails.

To get the arches just right, you can use a stencil or guide tape for cleaner lines.

Begin each arch from the sides of the nail near the cuticle and curve it upward towards the center.

These arches can be subtle or more exaggerated, depending on your style preference.

Finish with a high-gloss top coat to seal the design and enhance the contrast between the blue and gold.

Why Bold Colors Matter: The Psychology Behind Using Royal Blue In Nail Art

Royal blue is a color often associated with confidence, strength, and power.

By incorporating this color into your nail design, you can evoke these feelings in your overall style.

This bold, striking color also pairs well with a variety of outfits, from elegant evening wear to business attire, making it a versatile choice.

Whether you’re attending a formal event or simply want to add a touch of luxury to your everyday look, royal blue nails will make a strong and stylish statement.

13. Glitter Stripes: Glamorous And Eye-Catching

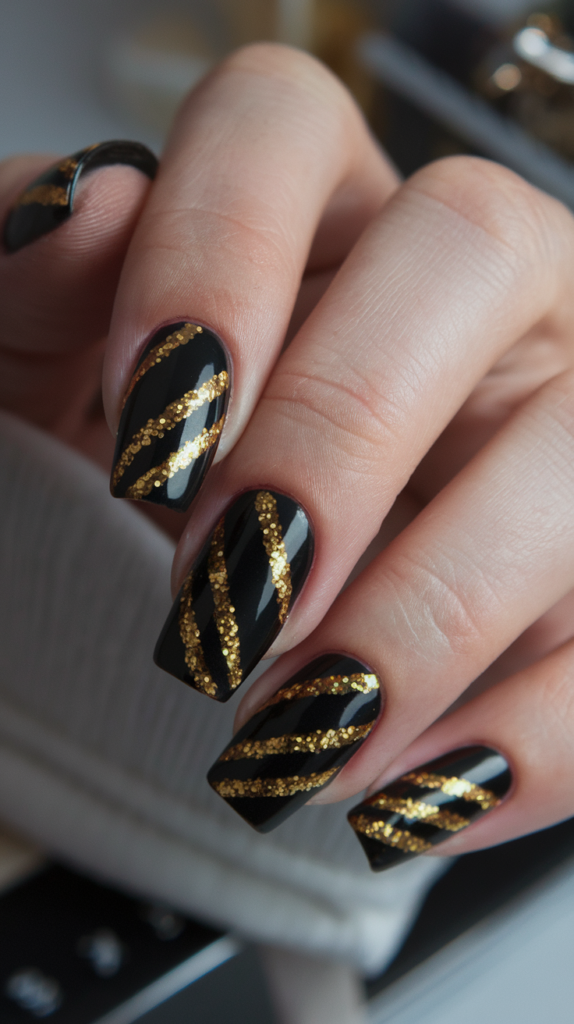
Black nails adorned with bold, glittering gold stripes arranged in a zigzag pattern, offering a glamorous and eye-catching design.

Design Inspiration: The Role Of Glitter In Enhancing Art Deco Designs

Glitter was frequently used in Art Deco fashion and design to add a sense of glamour and luxury.

Reflective surfaces, from clothing to jewelry, helped capture the glitzy spirit of the Roaring ’20s.

The “Glitter Stripes” nail design takes this idea and brings it into modern nail art, using shimmering stripes to create a dynamic and eye-catching look.

The play of light on the glitter adds depth and texture to the design, making it a perfect choice for those who want a bit of sparkle in their style.

Creating Glitter Stripes: Best Practices For A Neat, Long-Lasting Finish

To achieve this look, begin by applying a black or dark-colored base coat to all your nails.

Once dry, use a striping tape or thin nail art brush to apply glitter polish in neat, straight lines across the nails.

You can alternate the thickness of the stripes for a more dynamic look, but make sure the lines are even and well-spaced for a clean finish.

For added longevity, apply a clear top coat to prevent the glitter from chipping or flaking off.

Occasion Ideas: Where And When To Show Off Glitter Nail Art

Glitter stripes are a versatile design that can be worn for both casual and formal events.

For an evening out or a party, this design pairs well with a sleek black dress or metallic accessories, helping to enhance the sparkle of the glitter.

It’s also a fun choice for festive occasions like New Year’s Eve or other celebratory events where you want to add a bit of extra shine to your look.

14. Velvet Matte Gold: Texture Meets Elegance

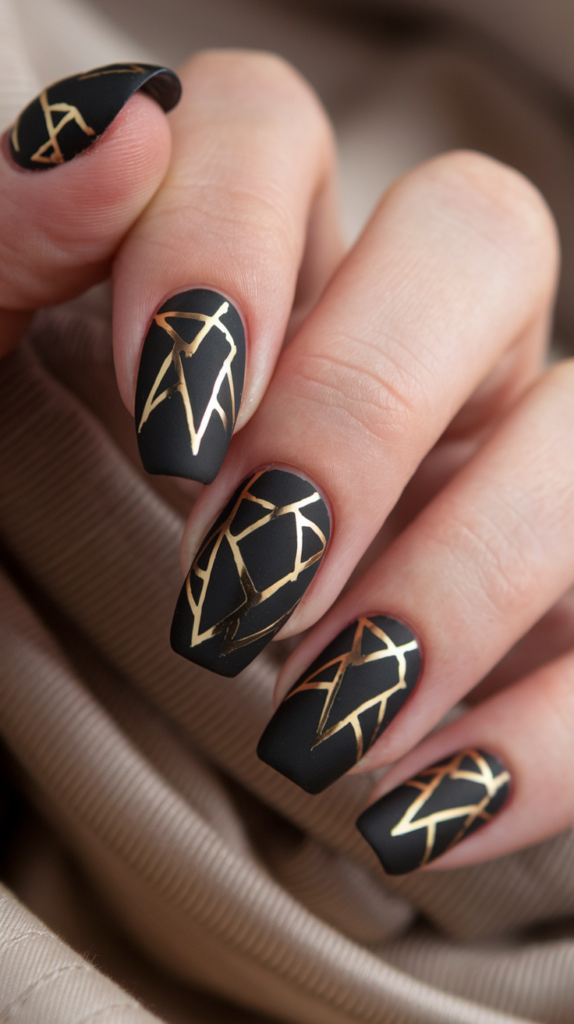
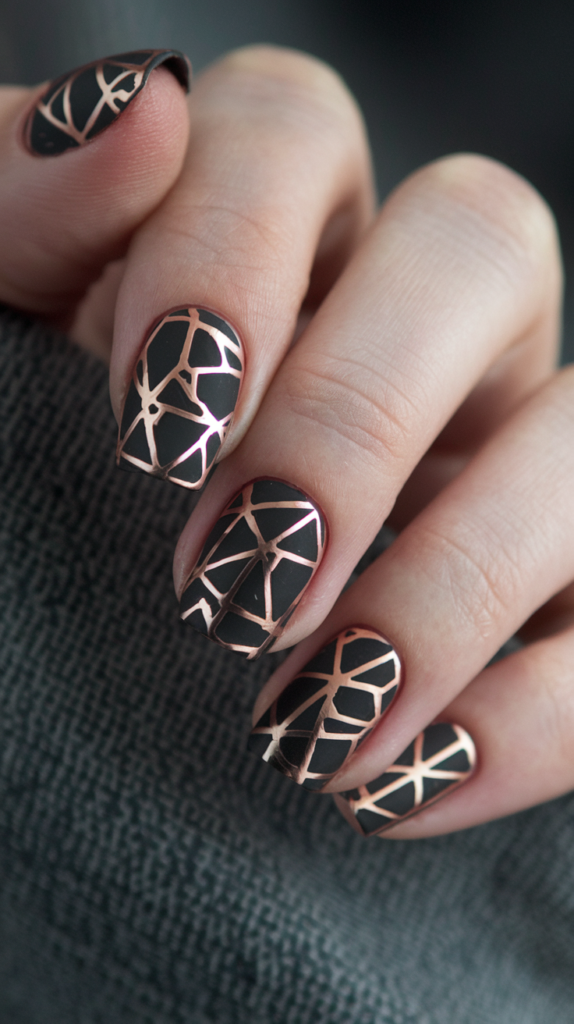
Matte black nails with intricate, shiny gold detailing, blending textures for an elegant Art Deco finish.

Design Inspiration: Matte Finishes And Their Place In Modern Art Deco Trends

Matte finishes are a modern twist on traditional nail art, offering a sophisticated alternative to glossy polish.

The “Velvet Matte Gold” design combines the sleekness of a matte black base with the richness of shiny gold accents, resulting in a manicure that feels luxurious yet understated.

This combination of textures adds depth and interest to the nails, making them perfect for those who appreciate elegance without too much flash.

Shiny Vs. Matte: How To Balance Different Textures In One Design

Start by applying a matte black polish to all your nails as the base coat.

Once the base has dried, use a gold polish to create sharp geometric patterns on top of the matte background.

The contrast between the shiny gold and the matte black will make the gold accents pop, while the matte finish adds a velvety texture to the overall design.

Be sure to use a matte top coat to preserve the texture of the base and a regular glossy top coat for the gold accents to keep the textures distinct.

Perfect For Formal Occasions: Why This Design Is Ideal For Upscale Events

The Velvet Matte Gold design is perfect for formal occasions like galas, weddings, or black-tie events.

The combination of matte and metallic finishes exudes sophistication, and the sleek geometric patterns give the nails an air of refined elegance.

This design pairs beautifully with long evening gowns, tailored suits, and gold accessories, creating a polished and cohesive look for upscale events.

15. Silver Art Deco Arches: A Twist On Metallics

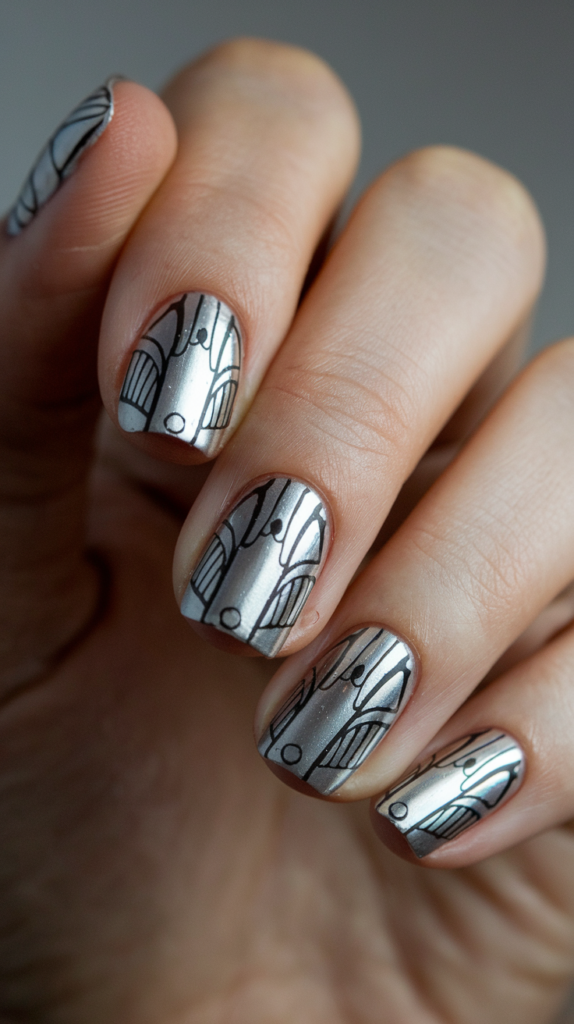
Silver metallic nails featuring curved Art Deco-style arches and patterns, offering a sleek and modern design.

Design Inspiration: How Arches Were Used In Art Deco Architecture

Arches were a prominent motif in Art Deco architecture, symbolizing grandeur and elegance.

These smooth, curved shapes are timeless, and when incorporated into nail art, they offer a soft yet striking design.

The “Silver Art Deco Arches” design brings this architectural inspiration into your manicure, using metallic silver polish to create curved, symmetrical arches on each nail.

Perfecting The Arch: Techniques For Symmetrical, Clean Lines

To recreate the Silver Art Deco Arches look, begin by applying a light or neutral base coat to your nails.

Once dry, use a thin nail art brush or stencil to apply silver arches near the tips of the nails.

For a perfectly symmetrical design, it’s helpful to use nail tape as a guide.

Apply the silver polish carefully within the taped-off sections to ensure clean, even lines.

After the arches have been created, finish with a clear top coat to lock in the design and add shine.

Pairing With Other Designs: How To Mix Silver Arches With Other Patterns

The simplicity of the silver arches allows them to be combined with other designs for a more intricate look.

Consider pairing the arches with thin silver stripes or small dots for added detail.

You can also alternate between nails with arches and nails with other geometric patterns, like triangles or chevrons, to create a more dynamic manicure.

16. Black & Pearl Combination: Vintage Chic

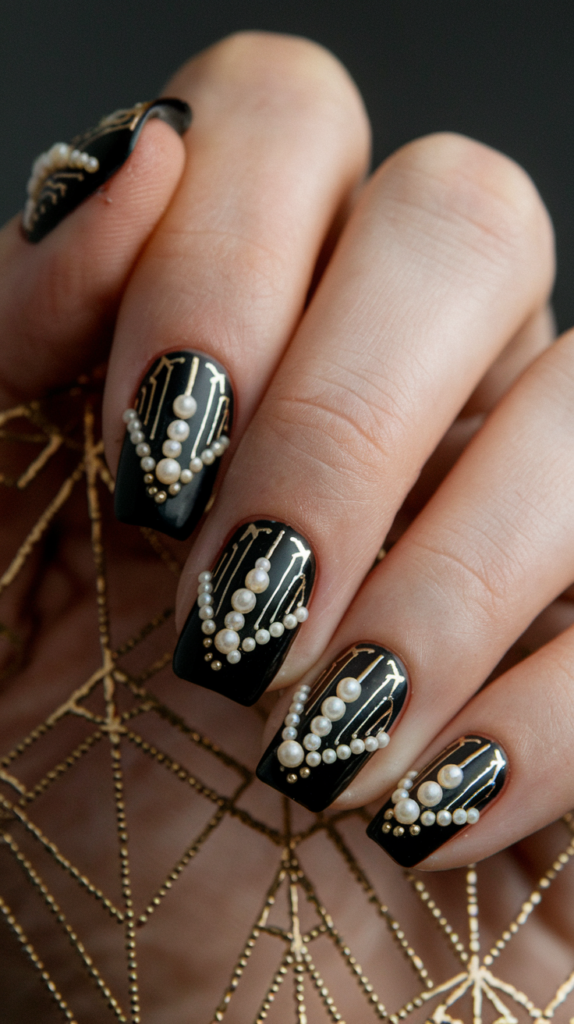
Black nails with small pearl dots arranged in geometric shapes, creating a vintage-inspired and elegant Art Deco design.

Design Inspiration: How Pearls Became A Fashion Staple In The 1920s

Pearls were a symbol of luxury and sophistication in the 1920s, often worn by women who wanted to embody the elegance of the time.

The “Black & Pearl Combination” nail design takes inspiration from this fashion trend, using black as a backdrop to showcase small pearl accents arranged in geometric shapes.

This design is both vintage and modern, blending the timeless appeal of pearls with the boldness of black nail polish.

Creating Geometric Shapes With Pearls: How To Securely Apply Pearls For Long-Lasting Wear

To create this look, start with a glossy black base coat on all nails.

Once the base is dry, use nail glue to carefully place small pearl embellishments in geometric patterns, such as lines, triangles, or squares.

For a secure application, use tweezers to position the pearls precisely, ensuring they are evenly spaced.

After the pearls are in place, apply a clear top coat to seal the design and prevent the pearls from falling off.

When To Wear: Ideal Occasions For Showcasing This Elegant Design

The Black & Pearl Combination design is ideal for formal events like weddings, dinner parties, or any occasion where you want to exude vintage elegance.

The contrast between the black polish and the soft, white pearls creates a sophisticated look that pairs beautifully with pearl jewelry and black evening wear.

It’s also a chic option for a stylish night out or an upscale gathering.

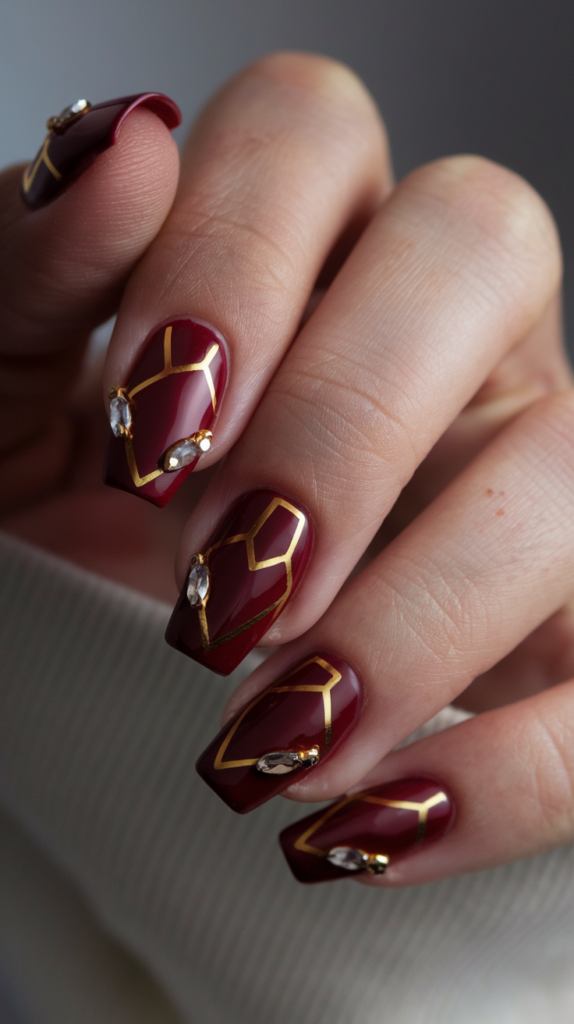
17. Opulent Jewel Tone: Rich Red Nails With Golden Flair

Dark red nails with gold geometric shapes and jewel accents, offering a rich and opulent Art Deco-inspired design.

Design Inspiration: Jewel Tones And Their Prevalence In Art Deco Jewelry

Jewel tones, such as deep reds, emeralds, and sapphires, were a significant part of Art Deco jewelry.

These rich colors, often paired with gold, evoked a sense of luxury and opulence.

The “Opulent Jewel Tone” nail design uses a deep red base with gold geometric accents to bring the grandeur of these precious gemstones to your nails.

This look is bold, sophisticated, and perfect for making a statement.

Gold Geometrics And Jewels: Tips For Applying Gold Shapes And Rhinestones

To create this look, start with a rich, dark red base coat.

Once dry, use a fine nail art brush or striping tape to apply gold geometric shapes—such as triangles, diamonds, or chevrons—across the nails.

For added opulence, consider placing small rhinestones in the center of each geometric shape, using nail glue for secure application.

The rhinestones will add a touch of sparkle, elevating the design even further.

Finish with a high-gloss top coat to lock in the design and add shine.

Making A Statement: Why This Design Is Perfect For Bold Fashion Statements

This design is all about making a bold, stylish statement.

The deep red base paired with gold and rhinestone accents creates a look that’s perfect for special occasions, such as holiday parties, galas, or any event where you want to stand out.

Pair this manicure with jewel-toned dresses or luxurious fabrics like velvet and satin to create a cohesive and glamorous look.

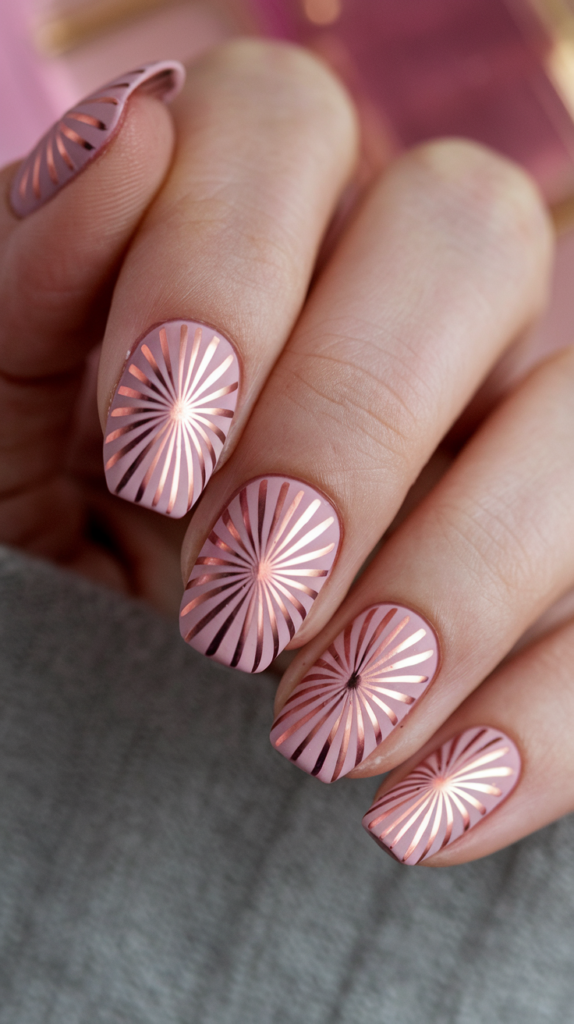
18. Rose Gold Fans: Soft And Feminine

Matte blush nails with delicate rose gold fan designs, providing a soft and feminine take on Art Deco nail art.

Design Inspiration: The Fan Motif And Its Role In 1920s Elegance

The fan motif was a popular symbol of grace and elegance in the 1920s.

It was often used in fashion and decor to convey a sense of refined beauty.

The “Rose Gold Fans” nail design takes this classic Art Deco motif and gives it a modern twist with a soft, feminine rose gold hue.

The result is a manicure that feels luxurious yet delicate, perfect for those who appreciate understated elegance.

Creating Rose Gold Fans: Techniques For A Flawless Metallic Finish

To achieve this look, start with a matte blush or nude base coat.

Once the base is dry, use a fine nail art brush or fan-shaped stencil to apply rose gold polish in fan-like patterns across the nails.

Begin at the base of the nail and extend the fan shapes outward, creating an even, symmetrical design.

For a flawless metallic finish, make sure to apply the rose gold polish in thin, even layers.

Finish with a glossy top coat to enhance the shine of the rose gold.

Best Occasions: Why This Design Is Perfect For Daytime Elegance

The soft and feminine nature of the Rose Gold Fans design makes it perfect for daytime events, such as brunches, garden parties, or weddings.

The subtle rose gold hue adds a touch of glamour without being too bold, making it a great option for more formal daytime occasions.

Pair it with light, pastel-colored outfits and delicate jewelry to complete the look.

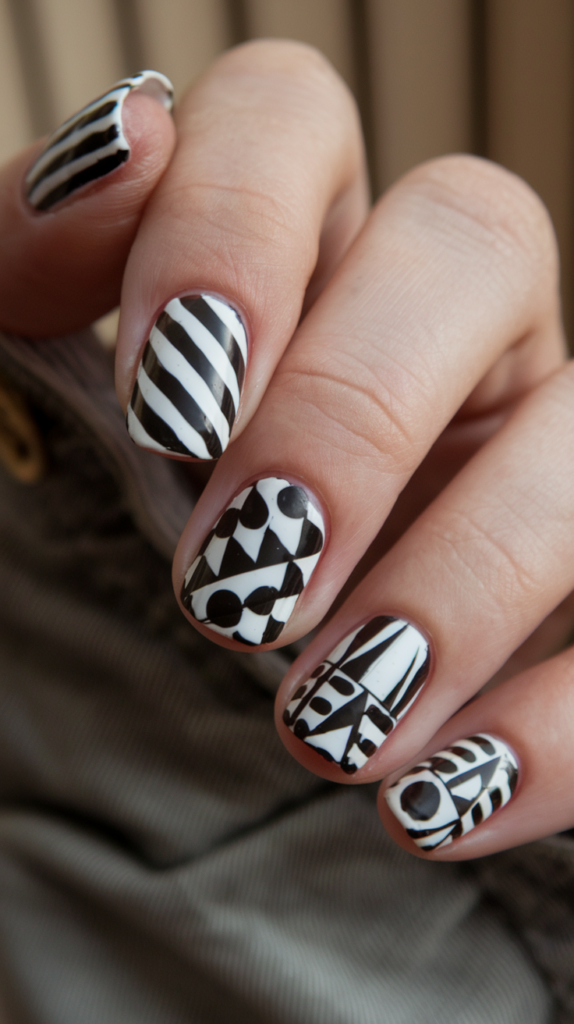
19. Bold Black & White: Graphic Art Deco Contrast

Black and white nails featuring bold geometric patterns, including stripes and triangles, for a striking monochrome Art Deco look

Design Inspiration: The Power Of Monochrome In Art Deco Art

Art Deco design is known for its sharp contrasts, and nothing exemplifies this better than the use of bold black and white patterns.

The monochrome color scheme was a hallmark of the Art Deco movement, offering clean, striking visuals that captured the geometric precision of the era.

The “Bold Black & White” nail design takes inspiration from this iconic look, incorporating graphic stripes and triangles to create a manicure that’s both dramatic and sophisticated.

The interplay between black and white creates a strong visual impact, perfect for those who love high-contrast designs.

Mixing Stripes And Triangles: Tips For Achieving Sharp, Graphic Lines

To create the Bold Black & White design, start by alternating between a black and white base coat on each nail.

Once the base is dry, use nail tape or a fine brush to apply stripes, triangles, and other geometric patterns in the opposite color on each nail.

For example, paint white stripes on black nails and black triangles on white nails.

The key to this design is precision—use thin, even lines to ensure the shapes are sharp and symmetrical.

Finish with a high-gloss top coat to enhance the contrast between the two colors and give the nails a polished look.

Styling Tips: When To Wear Bold Monochrome Nail Designs

The Bold Black & White design is versatile enough to be worn for both casual and formal occasions.

It pairs well with monochrome outfits, allowing the nails to stand out as the focal point of your look.

For a more dramatic effect, consider wearing it with a bold red lip or statement accessories.

This design works particularly well for evening events, such as parties or dinners, where you want to make a striking yet sophisticated impression.

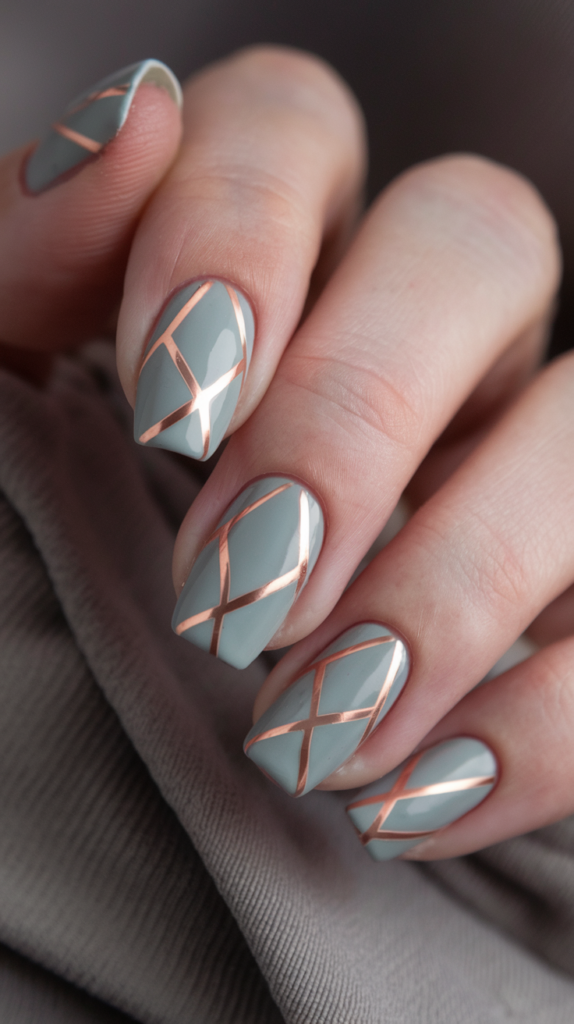
20. Muted Glam: Understated Sophistication

Soft grey nails with delicate rose gold geometric accents, offering a subtle and understated take on Art Deco glamour.

Design Inspiration: Why Muted Tones Still Work In Art Deco Design

While bold colors were a significant part of Art Deco, muted tones also played a role in conveying understated elegance.

Soft greys, blush tones, and taupes were often used in combination with metallic accents to create a sophisticated yet subtle aesthetic.

The “Muted Glam” nail design embraces this quieter side of Art Deco, using soft grey as the base color, with rose gold geometric accents to add a touch of glam without overwhelming the overall look.

Rose Gold Accents: How To Add Just Enough Glam With Rose Gold Lines

To create this look, start with a soft grey or blush base coat.

Once the base is dry, use a fine nail art brush or striping tape to add delicate rose gold geometric shapes, such as triangles or thin diagonal lines, to each nail.

The rose gold adds a subtle shimmer to the muted base, creating a balanced design that feels both refined and modern.

For an extra touch of elegance, consider adding a small rhinestone to the center of one of the shapes.

Finish with a glossy top coat to enhance the metallic accents and give the nails a polished finish.

Subtle Glam For Any Occasion: How To Make Muted Tones Feel Luxurious

The Muted Glam design is perfect for those who prefer a more understated look, but still want to feel polished and glamorous.

It’s ideal for daytime events, such as brunches or work functions, where you want to look put together without being too flashy.

The rose gold accents add just the right amount of glam, making this design versatile enough to transition from day to night.

Pair it with neutral outfits and minimal jewelry for a chic, sophisticated look.

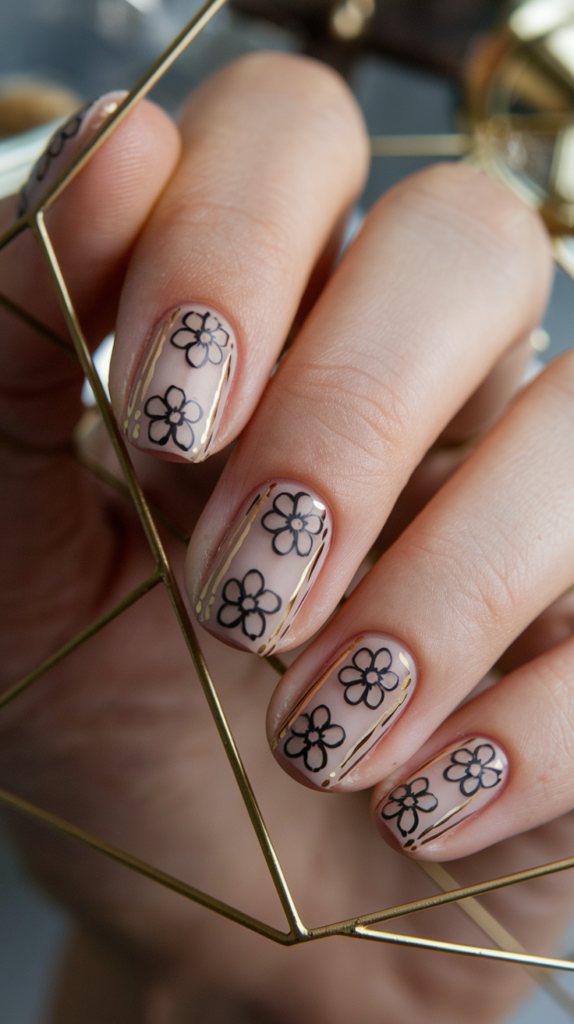
21. Floral Deco Motif: Nature Meets Geometry

Nude nails adorned with simple black floral designs and gold geometric borders, blending nature and structure in an Art Deco style.

Design Inspiration: The Fusion Of Nature And Geometry In Art Deco Design

Art Deco design often drew inspiration from nature, incorporating floral motifs into its otherwise geometric aesthetic.

The “Floral Deco Motif” nail design combines these two elements, using simple black flowers set within gold geometric borders on a nude base.

This design captures the balance between the natural and the structured, making it perfect for those who appreciate both elegance and whimsy.

Perfecting The Floral Geometrics: Techniques For Crisp, Clean Flower Patterns

To create the Floral Deco Motif design, start with a nude or blush base coat.

Once dry, use a fine nail art brush to paint small black flowers on each nail, keeping the designs simple and delicate.

After the flowers are complete, use gold polish or striping tape to create geometric borders around the flowers, such as rectangles or triangles.

The contrast between the soft flowers and the sharp geometric lines gives the design a unique, balanced look.

Finish with a glossy top coat to protect the design and add shine.

Everyday Elegance: How Floral Designs Work For Casual And Formal Settings

Floral nail designs are inherently versatile, and the Floral Deco Motif is no exception.

It’s elegant enough for formal events, such as weddings or dinner parties, but the simplicity of the design also makes it suitable for casual outings or everyday wear.

Pair it with floral or geometric accessories to tie the look together, and opt for neutral-colored outfits to let the nails be the star of your ensemble.

22. Triangular Glam: Sharp, Chic, And Modern

Black nails with bold, metallic gold triangle accents, creating a sharp and chic Art Deco-inspired nail design.

Design Inspiration: The Use Of Triangles In Art Deco Art

Triangles are a key geometric shape in Art Deco design, often used to convey a sense of movement and dynamism.

The sharp, angular lines of triangles make them a perfect choice for nail art, offering a modern, chic look that still feels classic.

The “Triangular Glam” design uses metallic gold triangles set against a black or nude base to create a striking contrast that feels both edgy and sophisticated.

Creating Metallic Triangle Accents: Best Tools For Achieving Precise Shapes

To achieve this look, start with either a black or nude base coat, depending on your style preference.

Once the base is dry, use striping tape or a triangle stencil to apply metallic gold polish in triangular shapes across the nails.

For clean, precise lines, make sure to remove the tape or stencil while the polish is still wet.

You can create a variety of triangle sizes and arrangements, such as placing a single large triangle in the center of each nail or layering smaller triangles at different angles.

Finish with a glossy top coat to enhance the shine of the gold and give the nails a polished finish.

Best Color Bases: How To Pair Metallic Triangles With Different Base Colors

While black and nude are classic base colors for this design, you can experiment with other shades to create different effects.

For a more dramatic look, consider using a deep burgundy or navy base with gold triangles.

If you prefer a softer look, try pairing rose gold triangles with a blush or pastel base.

The key is to choose a base color that contrasts with the metallic triangles, allowing them to stand out and create a bold statement.

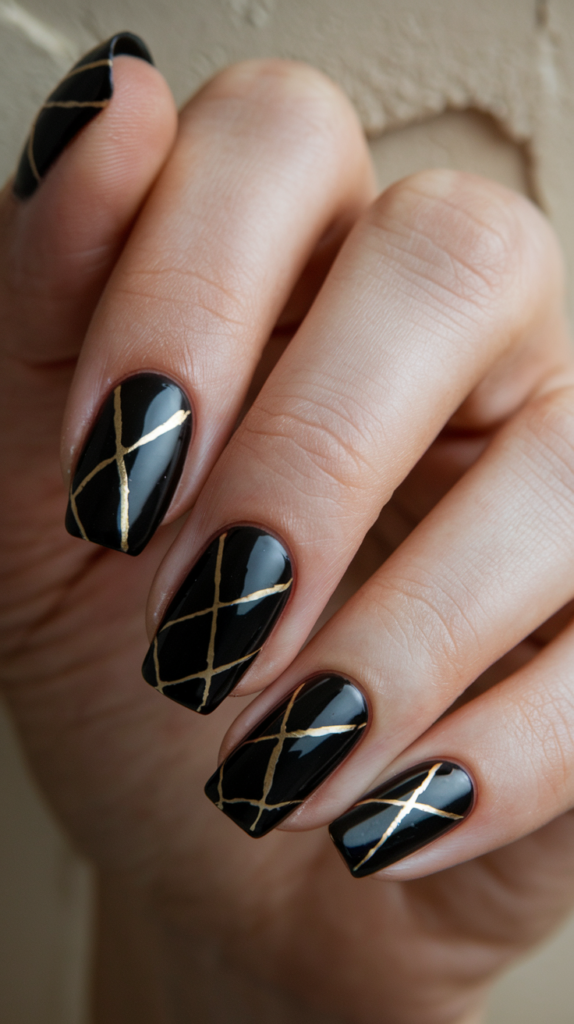
23. Glossy Glamour: Shine And Structure

High-gloss black nails featuring thin golden linear designs, offering a sleek and polished Art Deco look.

Design Inspiration: How Shine Was Used To Enhance Art Deco Elegance

Glossy, reflective surfaces were a hallmark of Art Deco design, symbolizing wealth and modernity.

The “Glossy Glamour” nail design captures this luxurious aesthetic by combining a high-gloss black base with thin golden linear designs.

The interplay between the shine of the base and the structure of the gold lines creates a manicure that feels both polished and refined.

Creating Glossy Linear Designs: Tools For Getting Crisp, High-Gloss Lines

To achieve this look, start with a high-gloss black base coat.

Once the base has dried, use a fine nail art brush to apply thin golden lines across the nails, creating geometric patterns such as stripes, diagonals, or grids.

The key to this design is keeping the lines sharp and symmetrical, so consider using striping tape to guide your brush strokes.

After the gold lines are in place, apply a clear, high-gloss top coat to enhance the shine of the black base and protect the design.

Perfect For Evening Events: When And Where To Flaunt This Glamorous Design

The Glossy Glamour design is ideal for evening events, such as galas, cocktail parties, or fancy dinners.

The high-gloss finish and sleek gold lines create a look that is both sophisticated and eye-catching, making it perfect for formal occasions where you want to stand out.

Pair this manicure with a little black dress and gold accessories for a cohesive, elegant look that exudes luxury.

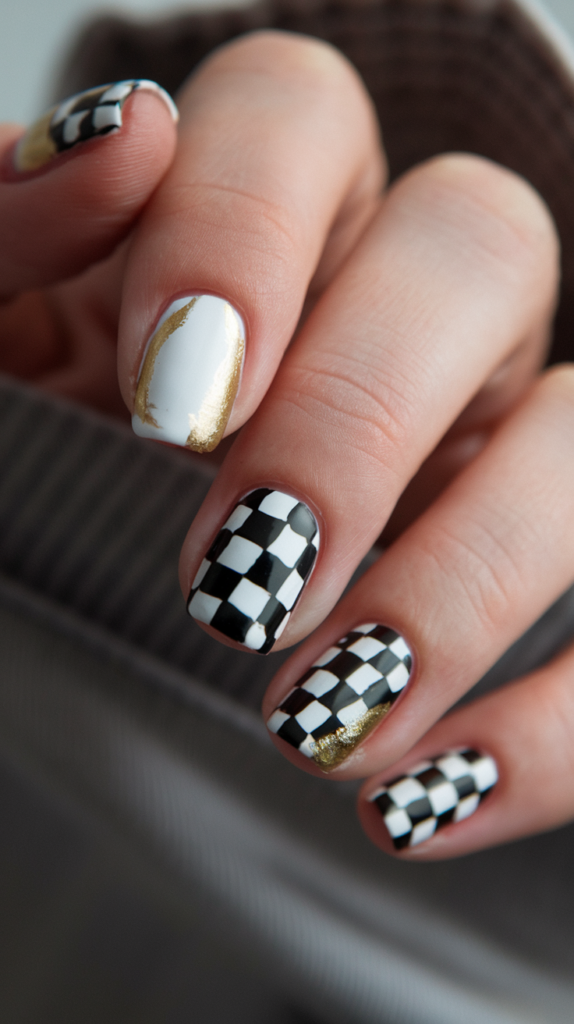
24. Checkerboard Deco: Timeless Black & White

Black and white checkerboard nails with small gold accents at the corners, combining classic and modern Art Deco elements.

Design Inspiration: The Checkerboard Pattern In Art Deco Design

The checkerboard pattern is one of the most iconic motifs of the Art Deco era, symbolizing balance, order, and symmetry.

This bold black and white design has remained timeless, making it a popular choice for everything from fashion to interior design.

The “Checkerboard Deco” nail design brings this classic pattern into nail art, creating a manicure that feels both retro and modern.

Adding Gold Accents: How To Incorporate Gold To Elevate The Checkerboard Look

To create the Checkerboard Deco design, start by applying alternating black and white squares on each nail.

Once the base pattern is in place, use a fine nail art brush or striping tape to add small gold accents to the corners or edges of the squares.

These subtle gold touches will elevate the design, adding a hint of luxury without overwhelming the classic checkerboard pattern.

Finish with a glossy top coat to enhance the contrast between the black, white, and gold.

Bold Yet Simple: Why Checkerboard Designs Work In Modern Nail Art

The simplicity of the checkerboard pattern makes it a versatile choice for modern nail art.

It’s bold enough to make a statement but clean and structured enough to work for everyday wear.

This design pairs well with both casual and formal outfits, and can be easily dressed up with gold jewelry or other metallic accessories.

Whether you’re heading to a party or just running errands, the Checkerboard Deco design is a stylish option that never goes out of fashion.

25. Matte & Metallic Mix: The Best Of Both Worlds

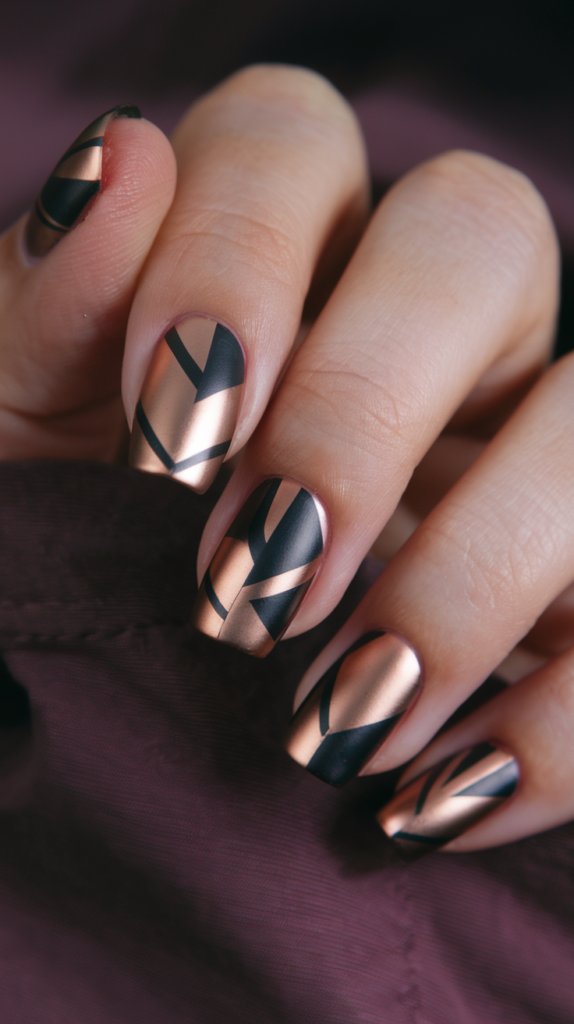
Matte black nails with metallic rose gold geometric patterns, blending bold textures for a chic Art Deco-inspired design.

Design Inspiration: The Interplay Of Matte And Metallic Textures In Art Deco

Art Deco design frequently juxtaposed different textures and finishes to create visual intrigue, and this concept translates beautifully into nail art.

The “Matte & Metallic Mix” design plays on this idea by combining a matte black base with metallic rose gold accents.

This contrast creates a sophisticated and modern look, allowing the metallic elements to pop against the matte backdrop.

The balance of these two finishes evokes the glamorous yet structured aesthetic that defined Art Deco, making it perfect for anyone seeking a chic and versatile manicure.

Perfecting Matte & Metallic Combinations: Tools For Achieving Smooth Finishes

To achieve this look, begin by applying a matte black polish as the base for all your nails.

Once the matte finish has fully dried, use a fine nail art brush or striping tape to apply metallic rose gold accents.

Geometric shapes such as thin lines, triangles, or chevrons work particularly well in this design, as they emphasize the clean, structured feel of Art Deco.

Ensure that the metallic accents are applied in thin, even layers for a polished finish.

To maintain the contrast between the matte and metallic finishes, avoid using a glossy top coat—opt for a matte top coat to seal the design and preserve the texture.

Styling Tips: How To Balance Bold Textures With Your Outfit

The Matte & Metallic Mix design is a bold yet sophisticated choice that can be styled for both casual and formal settings.

For a sleek, modern look, pair this design with minimalist outfits, such as black or white clothing, to let the nails take center stage.

Metallic accessories, like rose gold jewelry or a statement handbag, will complement the metallic elements of the nails and create a cohesive ensemble.

This manicure is perfect for evening events, work functions, or a stylish night out on the town.

26. Jewel Accents: The Opulence Of Rhinestones

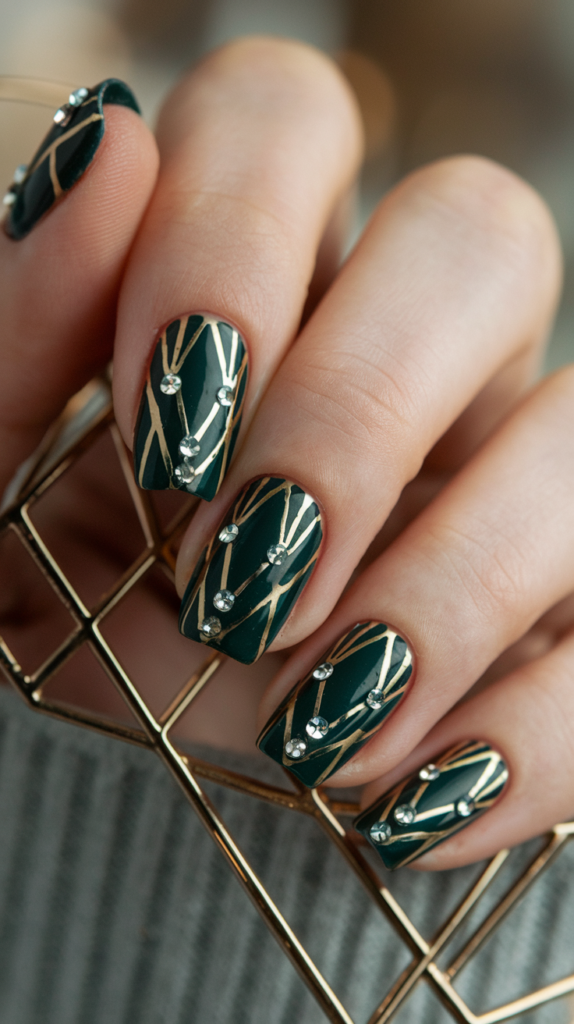
Dark green nails with gold striping and rhinestone embellishments, offering a luxurious and opulent Art Deco-inspired manicure.

Design Inspiration: How Rhinestones Were Used In 1920s Fashion

Rhinestones and other sparkling gemstones were a staple in 1920s fashion, adorning everything from dresses to accessories.

They embodied the glamour and extravagance of the Roaring ’20s, adding sparkle and luxury to every outfit.

The “Jewel Accents” nail design incorporates this same sense of opulence, using dark green polish as a base and adorning the nails with gold striping and rhinestone embellishments.

This design captures the essence of Art Deco’s love for luxury, making it the perfect choice for those who want to add some sparkle to their nails.

Adding Rhinestones To Geometrics: Tips For Secure Rhinestone Placement

To create this look, start with a dark green base coat on all nails.

Once the base has dried, use gold striping tape or a thin nail art brush to create geometric shapes—such as lines or diamonds—across the nails.

After the gold accents are in place, apply small rhinestones at key points within the design, such as at the center of a diamond or at the intersections of the lines.

To ensure that the rhinestones stay in place, use a small dot of nail glue and press the rhinestone down with tweezers for precision.

Seal the design with a clear top coat to add shine and ensure that the rhinestones remain secure.

Best Colors For Rhinestones: How To Choose The Right Hues To Complement Your Nails

When choosing rhinestones for your nail design, consider the overall color palette of your manicure.

Dark green and gold are a classic combination, but you can experiment with other jewel tones, such as deep purple or sapphire blue, for the base color.

Clear or gold rhinestones will add a subtle sparkle, while colorful rhinestones in shades like emerald or ruby can create a more dramatic look.

The key is to choose rhinestones that complement the richness of the base color and metallic accents without overpowering the design.

27. Tuxedo Nails: A Playful Twist On Formalwear

Black and white nails mimicking a tuxedo pattern, complete with small black buttons and bow tie details for a playful, formal look.

Design Inspiration: Tuxedo Fashion And Its Influence On Art Deco Style

The tuxedo, with its sharp lines and sleek silhouette, is one of the most iconic representations of formalwear from the 1920s.

Art Deco design often drew inspiration from fashion, incorporating the clean, structured aesthetic of menswear into various forms of art and architecture.

The “Tuxedo Nails” design takes this inspiration and brings it into nail art, using black and white polish to mimic the look of a classic tuxedo.

This playful yet sophisticated design is perfect for those who want to add a touch of elegance to their nails while still having fun with their manicure.

Creating Sharp Tuxedo Patterns: Step-By-Step Instructions For Clean Lines

To recreate the Tuxedo Nails design, start by applying a glossy black base coat to all nails.

Once the base has dried, use striping tape or a fine nail art brush to create the tuxedo pattern.

Begin by painting a thin white triangle at the tip of each nail, representing the tuxedo shirt.

Then, add two small black dots down the center of the white triangle to mimic buttons.

For extra detail, you can also add a small black bow tie at the base of the triangle using a dotting tool or brush.

Finish with a high-gloss top coat to give the nails a polished, formal finish.

Perfect For Formal Events: Where To Flaunt Tuxedo-Inspired Nail Art

Tuxedo Nails are perfect for formal events, such as black-tie galas, weddings, or cocktail parties.

The clean black and white color scheme is both classic and sophisticated, making it easy to pair with a wide range of formal attire.

This design is especially fun for themed events or holiday parties where you want to showcase a playful yet elegant manicure.

Pair it with a sleek black dress or a tailored suit to complete the look.

28. Bronze Geometric: Warm Metallics And Deep Colors

Deep plum nails with bronze and copper geometric patterns, offering a warm and opulent Art Deco-inspired design.

Design Inspiration: How Bronze And Copper Tones Were Featured In Art Deco Design

Bronze and copper tones were frequently used in Art Deco design to evoke warmth, luxury, and modernity.

These rich, earthy metals added depth and opulence to the sleek geometric shapes that defined the era.

The “Bronze Geometric” nail design brings this concept to life by pairing deep plum polish with bronze and copper geometric patterns.

The combination of warm metallics and deep, saturated colors creates a striking yet elegant manicure that feels both vintage and modern.

Applying Bronze Metallic Shapes: Techniques For A Polished Metallic Finish

To achieve this look, start by applying a deep plum or burgundy base coat to all nails.

Once the base has dried, use a fine nail art brush or striping tape to apply bronze and copper metallic polish in geometric shapes, such as triangles, squares, or lines.

For a more dynamic look, consider layering different metallic shades or alternating between bronze and copper accents.

Ensure that the lines are crisp and symmetrical, as the precision of the geometric patterns is key to achieving the polished, structured look of Art Deco.

Finish with a glossy top coat to enhance the shine of the metallic accents.

Pairing With Plum: Why Bronze Works So Well With Rich, Dark Tones

The combination of bronze and deep plum is a classic Art Deco color pairing, as the warmth of the bronze complements the richness of the plum, creating a balanced yet bold look.

This color scheme works particularly well for fall or winter, when darker tones are in season.

Pair this manicure with jewel-toned outfits, such as emerald green or sapphire blue, to create a luxurious, cohesive look that feels both modern and vintage.

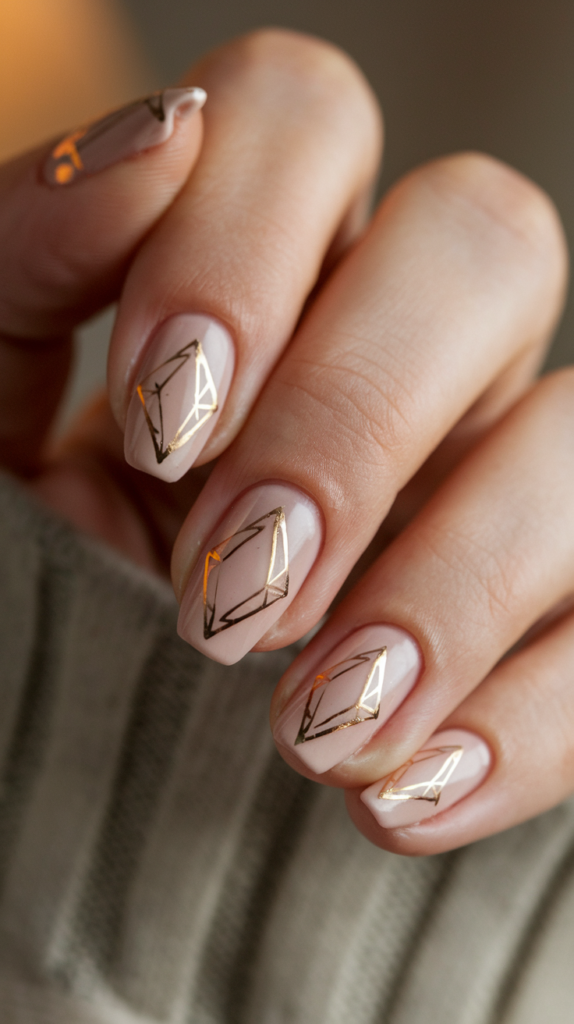
29. Diamond Cut Design: Precision And Perfection

Nude nails featuring sharp, geometric diamond shapes outlined in gold, offering a clean and sophisticated Art Deco look.

Design Inspiration: Diamond Shapes And Their Symbolism In Art Deco Art

Diamonds were a prominent symbol in Art Deco design, representing wealth, luxury, and precision.

The sharp, geometric edges of diamond shapes were frequently used in architecture, jewelry, and fashion to convey a sense of order and modernity.

The “Diamond Cut Design” nail art takes inspiration from this motif, using clean lines and sharp angles to create a manicure that feels both elegant and structured.

This design is perfect for anyone who appreciates the precision and refinement of Art Deco style.

How To Create Sharp Edges: Tools And Tips For Crisp, Geometric Lines

To recreate the Diamond Cut Design, start with a nude or light beige base coat.

Once the base has dried, use striping tape or a fine nail art brush to outline diamond shapes on each nail.

You can vary the size and placement of the diamonds to create visual interest, but the key is to keep the lines sharp and symmetrical.

Fill in the diamonds with metallic gold or silver polish for a touch of sparkle, or leave them empty for a more minimalist look.

Finish with a clear top coat to seal the design and give the nails a polished finish.

Perfect For A Polished Look: Why Diamond Designs Elevate Any Nail Art Style

The Diamond Cut Design is ideal for those who want a sophisticated, polished look that still feels modern and edgy.

The geometric precision of the diamond shapes adds structure and refinement to the nails, while the metallic accents provide a touch of glamour.

This design works well for both formal and casual settings, and can be paired with a variety of outfits, from tailored suits to cocktail dresses.

Whether you’re attending a business meeting or a night out, the Diamond Cut Design will add an elegant finishing touch to your look.

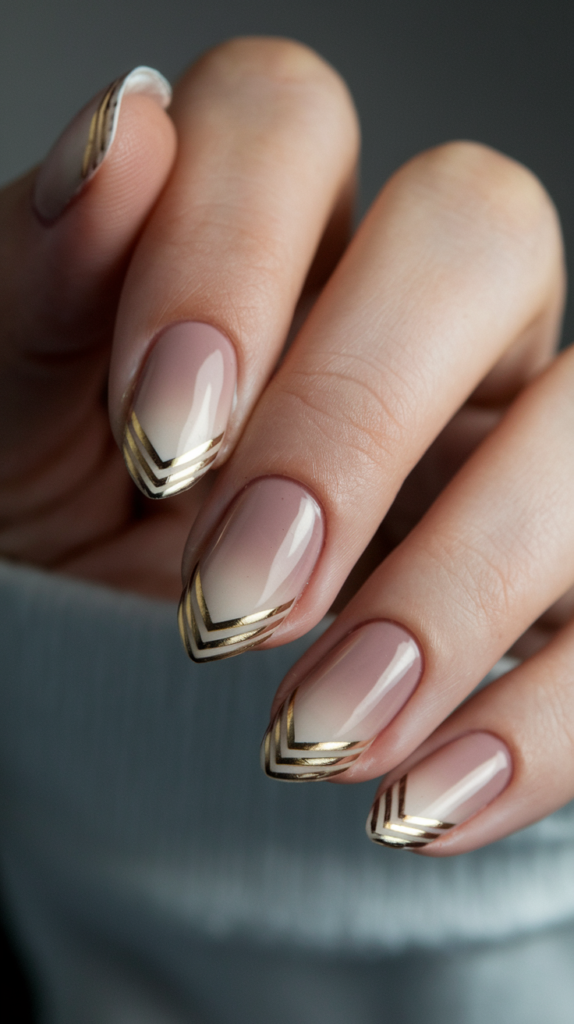
30. Chevron Ombré: Soft And Strong

Soft ombré gradient nails with bold chevron gold accents, blending subtle gradients with sharp geometric patterns.

Design Inspiration: Chevron Patterns In Art Deco Fashion

Chevron patterns were a popular motif in Art Deco fashion and design, symbolizing movement and progress.

The sharp, angular lines of the chevron create a sense of direction and energy, making it a perfect choice for those who want a bold yet refined manicure.

The “Chevron Ombré” nail design combines the classic chevron pattern with a soft ombré gradient, creating a look that is both dynamic and elegant.

The blend of colors adds depth and texture to the design, while the sharp chevrons provide structure and precision.

Creating Ombré Gradients: How To Blend Colors Smoothly On Your Nails

To create the Chevron Ombré design, start by applying a nude or light-colored base coat.

Once the base has dried, use a sponge to apply a gradient of colors, blending from light to dark across the nail.

For example, you can start with a soft pink at the base and blend into a deep burgundy at the tip.

After the gradient is in place, use striping tape or a fine brush to create sharp chevron shapes in a contrasting color, such as gold or black.

The key to this design is ensuring that the gradient is smooth and the chevrons are crisp.

Finish with a glossy top coat to seal the design and enhance the ombré effect.

Perfect Color Combinations: Best Color Palettes For An Ombré Chevron Look

When choosing colors for your Chevron Ombré design, consider using a gradient of complementary shades, such as soft pink and deep red, or light blue and navy.

Metallic colors, such as gold or silver, also work well as accents, providing a striking contrast to the gradient.

For a more subtle look, you can opt for neutral shades like beige and brown, while bold colors like purple and teal will create a more dramatic effect.

The key is to choose colors that blend well together while still allowing the chevron pattern to stand out.

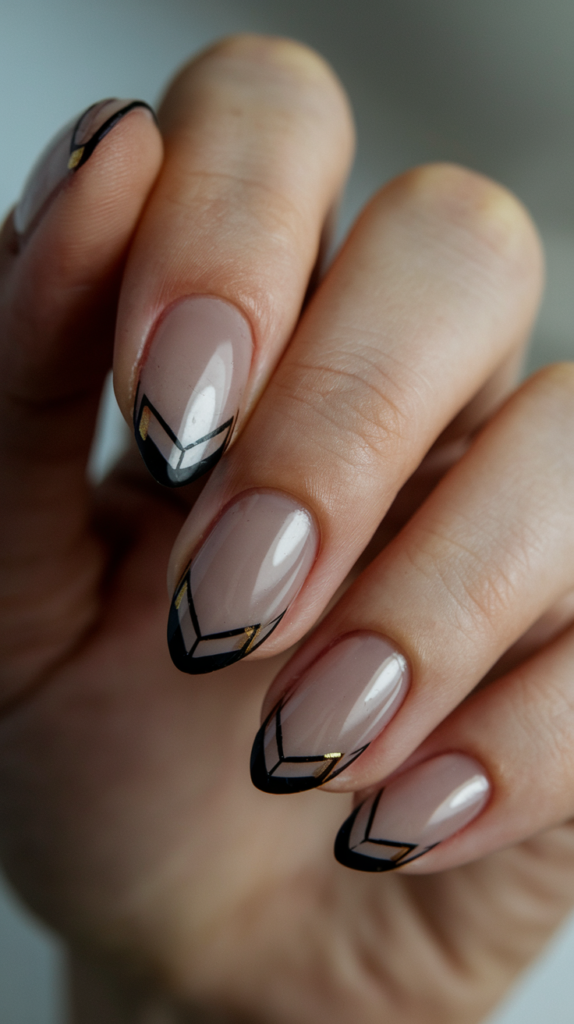
31. Bold Deco Tips: Clear And Geometric

Clear nails with bold black and gold geometric tips, offering a minimalist yet striking Art Deco-inspired manicure.

Design Inspiration: The Rise Of Bold Tips In Art Deco Nail Art

In the Art Deco era, bold and geometric shapes were a key component of design, often used to create striking visual contrasts.

The “Bold Deco Tips” nail design embraces this aesthetic by incorporating bold black and gold geometric tips on clear nails.

The clear base allows the sharp, angular tips to stand out, creating a clean, modern look that still pays homage to the structured elegance of Art Deco.

This design is perfect for those who want to make a statement while keeping the overall look sleek and minimalist.

Clear Base And Bold Tips: How To Balance Transparency With Strong Design

To create the Bold Deco Tips design, start with a clear base coat on all nails.

Once the base has dried, use striping tape or nail guides to mark off the tips of the nails.

Apply black and gold polish in sharp, geometric shapes—such as triangles, chevrons, or diagonal stripes—at the tips of each nail.

For a more dynamic look, alternate the designs on each nail or combine different shapes within the same manicure.

The key to this design is balancing the clear base with bold, structured tips, allowing the geometric shapes to take center stage.

Finish with a glossy top coat to give the nails a polished, glass-like finish.

When To Wear: Best Occasions To Showcase This Bold, Modern Design

Bold Deco Tips are ideal for both casual and formal events, offering a versatile design that can be dressed up or down.

The clean lines and minimalist color palette make this design perfect for everyday wear, while the bold tips add enough visual interest to stand out at parties or evening events.

Pair this manicure with modern, minimalist outfits in neutral or monochrome colors to let the nails be the focal point of your look.

For a more formal occasion, consider adding gold accessories to complement the gold accents in the nail design.

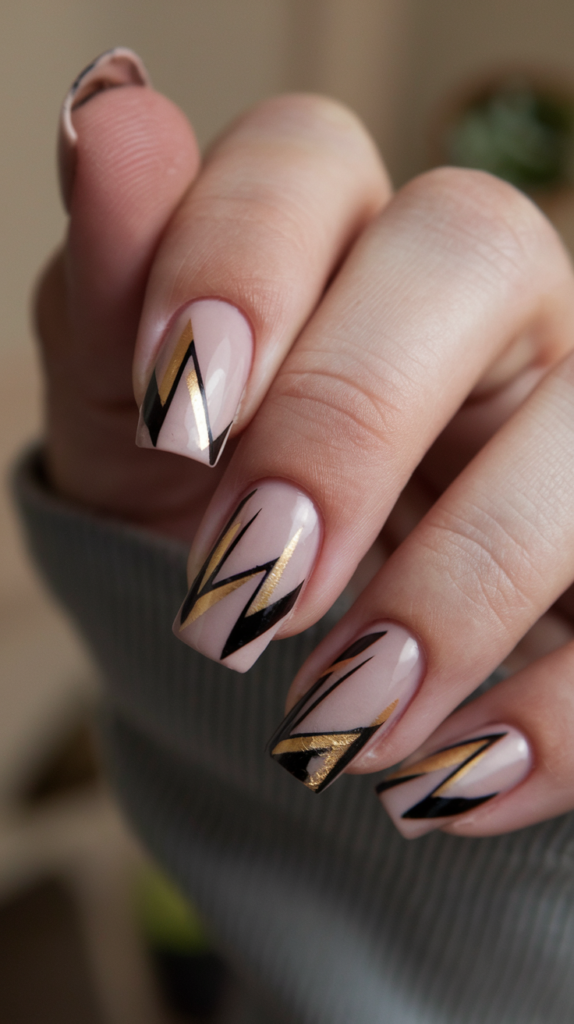
32. Negative Space Deco: Clean And Crisp

Nude nails with black and gold geometric designs, leaving portions of the nail clear for a modern, negative space Art Deco design.

Design Inspiration: How Negative Space Enhances Art Deco Designs

Negative space is a powerful design element in Art Deco, allowing for sharp, clean lines that emphasize geometric patterns.

By leaving portions of the nail bare, negative space designs create a striking contrast between the polish and the natural nail, resulting in a look that feels both modern and timeless.

The “Negative Space Deco” nail design uses black and gold geometric shapes to create a bold, structured manicure, with the negative space serving as a visual break that enhances the overall composition.

Creating Negative Space Patterns: Tips For Leaving Clean, Precise Gaps In Designs

To achieve the Negative Space Deco design, start by applying a clear or nude base coat.

Once the base has dried, use striping tape or a fine nail art brush to outline geometric shapes—such as triangles, squares, or chevrons—on each nail.

Leave portions of the nail bare to create negative space within the design.

For a more intricate look, you can combine different geometric shapes on each nail or alternate between filled and negative space sections.

The key to this design is keeping the lines sharp and the negative space clean, ensuring that the contrast between the polished and bare areas is crisp.

Finish with a glossy top coat to enhance the shine and protect the design.

Why It’s Timeless: How Negative Space Nails Remain Popular In Modern Nail Art

Negative space designs have remained popular in modern nail art due to their clean, minimalist aesthetic.

The use of negative space allows for a wide range of creative possibilities, making it easy to customize the design to suit your personal style.

Whether you prefer bold geometric patterns or subtle, delicate accents, negative space nails offer a versatile and timeless option that works for any occasion.

This design is particularly well-suited for those who want a chic, understated manicure that still makes a statement.

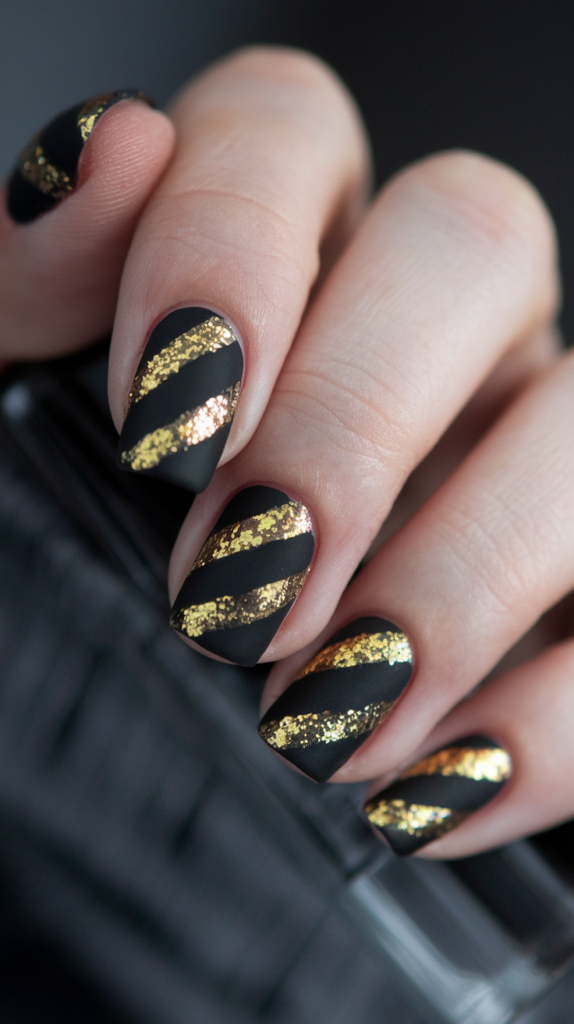
33. Vintage Glam Stripes: Gold Meets Matte

Matte black nails with thin gold glitter stripes arranged in clean, straight lines, offering a chic and vintage-inspired Art Deco look.

Design Inspiration: How Stripes Were Used In Art Deco Fashion

Stripes were a popular motif in Art Deco fashion, often used to create a sense of order and movement within a design.

The clean, straight lines of stripes contrasted with the more intricate patterns of the era, offering a bold yet refined look.

The “Vintage Glam Stripes” nail design combines this classic stripe motif with a modern twist, using matte black polish as a base and applying gold glitter stripes for a touch of sparkle.

This design evokes the glamour of the 1920s while still feeling fresh and contemporary.

Gold Glitter Stripes: Tips For Applying Glitter Without Mess

To create the Vintage Glam Stripes design, start with a matte black base coat on all nails.

Once the base has dried, use striping tape or a fine nail art brush to apply thin gold glitter stripes across the nails.

The stripes can be vertical, horizontal, or diagonal, depending on your preference, but be sure to keep them evenly spaced and straight for a clean, polished look.

When working with glitter polish, apply it in thin layers to prevent clumping, and use a clear top coat to seal in the glitter and prevent it from flaking.

The matte black base will contrast beautifully with the sparkle of the gold glitter, creating a chic and glamorous finish.

Perfect For Glam Events: When To Wear This Vintage-Inspired Design

The Vintage Glam Stripes design is perfect for special occasions where you want to add a touch of sparkle to your look.

It’s an ideal choice for evening events, such as galas, parties, or holiday celebrations, where the gold glitter will catch the light and make your nails shine.

Pair this design with a black or gold dress for a cohesive, vintage-inspired look, and add statement jewelry to enhance the overall glamour.

The combination of matte and glitter finishes makes this design versatile enough to be worn for both formal and semi-formal occasions.

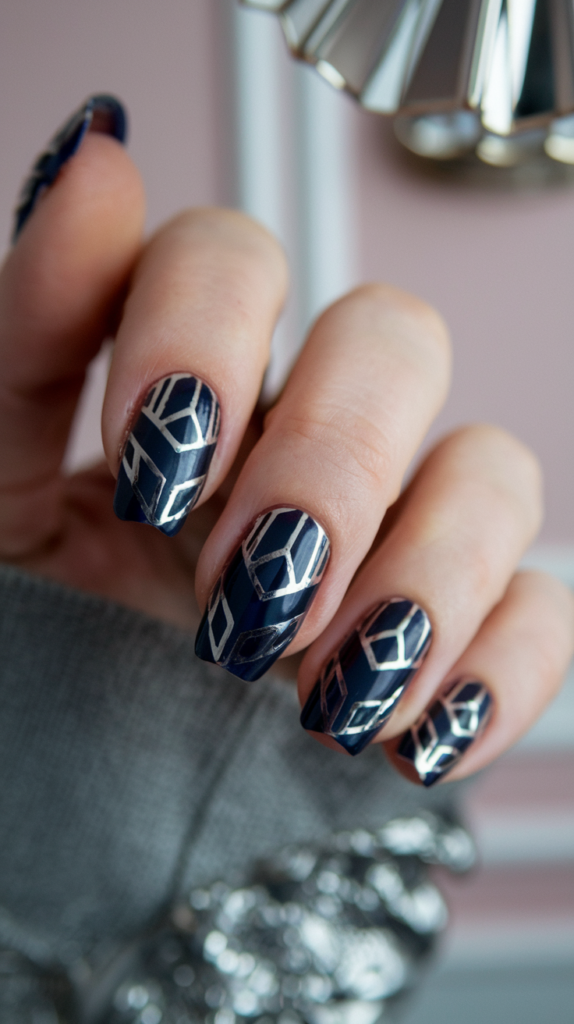
34. Luxe Sapphire: Rich And Regal

sapphire nails with silver metallic geometric shapes, offering a bold and regal Art Deco-inspired manicure.

Design Inspiration: Sapphire Tones In Art Deco Jewelry

Sapphire, with its deep blue hue, was a favorite gemstone in Art Deco jewelry, symbolizing wealth and power.

This rich, regal color was often paired with gold or silver to create striking contrasts in jewelry and accessories.

The “Luxe Sapphire” nail design brings this luxurious color into nail art, using a deep sapphire base coat with silver metallic geometric shapes.

This bold, opulent design is perfect for those who want to channel the glamour of Art Deco while making a statement with their manicure.

Perfecting Silver Metallic Geometrics: Techniques For Crisp Metallic Lines

To achieve the Luxe Sapphire design, start by applying a deep sapphire blue base coat to all nails.

Once the base has dried, use striping tape or a fine nail art brush to apply silver metallic polish in geometric shapes, such as triangles, squares, or diagonal lines.

For extra precision, use a stencil or guide tape to ensure the shapes are sharp and symmetrical.

The contrast between the rich sapphire base and the bright silver accents creates a luxurious, high-impact look.

Finish with a glossy top coat to seal the design and enhance the metallic shine.

The Power Of Blue: Why Sapphire Works As A Bold Color Choice For Nails

Sapphire is a powerful, eye-catching color that exudes confidence and sophistication.

It’s a versatile shade that pairs well with a wide range of outfits, from evening gowns to casual jeans and blouses.

The Luxe Sapphire design is particularly well-suited for formal events, where the rich blue hue will add a touch of elegance to your look.

Pair this manicure with silver or white gold jewelry to complement the silver accents in the design, and opt for darker clothing to let the nails stand out as the focal point of your outfit.

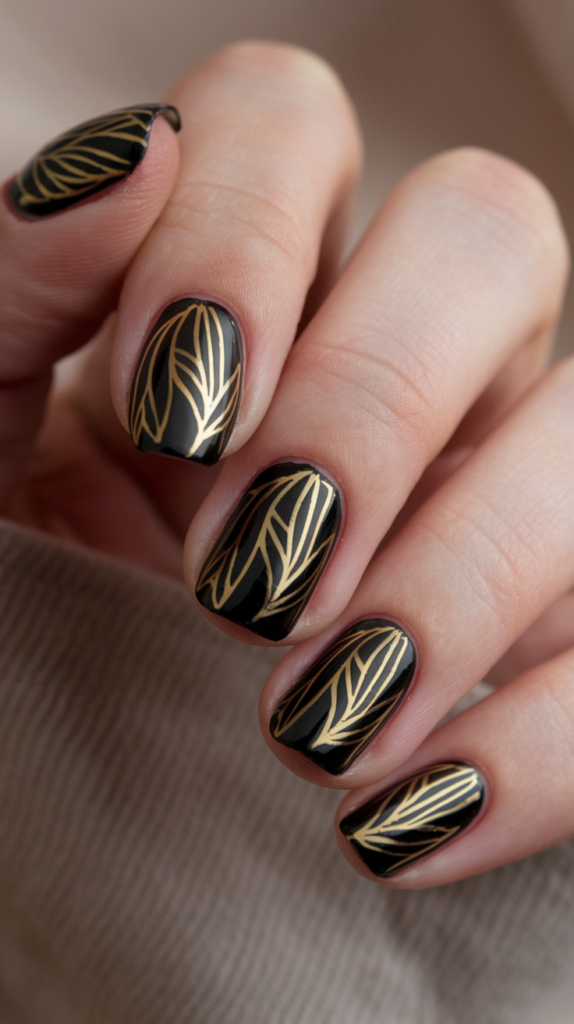
35. Deco Leaf Design: Nature’s Elegance

Black nails with delicate gold leaf patterns, blending nature-inspired designs with structured Art Deco elegance.

Design Inspiration: Art Deco’s Nature-Inspired Designs

While Art Deco is known for its geometric shapes and structured lines, the movement also drew inspiration from nature, incorporating organic motifs like leaves, flowers, and animals into its designs.

The “Deco Leaf Design” nail art combines this natural inspiration with the clean lines of Art Deco, using black as a base and applying gold leaf patterns for a touch of elegance.

This design captures the beauty of nature while maintaining the structured aesthetic of Art Deco, making it perfect for those who appreciate both simplicity and refinement.

Gold Leaf Patterns: Tips For Achieving Clean, Symmetrical Designs

To recreate the Deco Leaf Design, start with a glossy black base coat on all nails.

Once the base has dried, use a fine nail art brush to paint delicate gold leaf patterns on each nail.

The leaves can be simple or intricate, depending on your preference, but be sure to keep the design symmetrical and evenly spaced for a clean, polished look.

For a more natural feel, vary the size and placement of the leaves on each nail, and consider adding small gold dots or accents to enhance the overall design.

Finish with a glossy top coat to seal the design and protect the gold leaf patterns.

Styling Tips: How To Pair Nature-Inspired Designs With Art Deco Fashion

The Deco Leaf Design is a versatile manicure that can be worn for both casual and formal occasions.

The natural leaf patterns add a touch of whimsy, while the black and gold color scheme keeps the design elegant and sophisticated.

This manicure pairs well with neutral or earth-toned clothing, as well as gold jewelry that complements the metallic leaf patterns.

For a more formal look, consider wearing this design with a black or dark green dress, allowing the gold accents to tie the look together.

Conclusion

Art Deco nail designs are more than just a style—they are a celebration of glamour, precision, and creativity.

From bold geometric patterns and metallic accents to intricate florals and soft gradients, these designs allow you to express a timeless elegance that never goes out of fashion.

Whether you’re dressing up for a special occasion or simply want to add a touch of sophistication to your everyday look, the versatility of Art Deco-inspired nails offers endless possibilities.

By incorporating rich colors, sleek textures, and vintage motifs, you can elevate your manicure to new levels of artistic beauty.

With these 35 Art Deco nail designs, you’re sure to find inspiration for your next stunning manicure.

So go ahead, experiment with these ideas, and let your nails become your canvas for Art Deco artistry!

Related posts