Introduction
Animal print nail art is a timeless and versatile trend that continues to captivate nail enthusiasts with its bold, playful, and exotic patterns.
Whether you’re a fan of classic leopard spots, wild tiger stripes, or intricate peacock feathers, animal prints offer endless possibilities for creating eye-catching and unique designs.
In this blog, we’ll explore 35 animal print nail art ideas that are sure to inspire your next manicure.
From fun and playful prints to elegant and textured designs, there’s something for everyone, whether you’re a fan of traditional styles or looking to try something new and creative.
Let’s dive into the world of animal-inspired nail art and discover how you can elevate your style with these stunning designs.
Classic Animal Print Nail Designs
Leopard Spots: Iconic Brown And Black
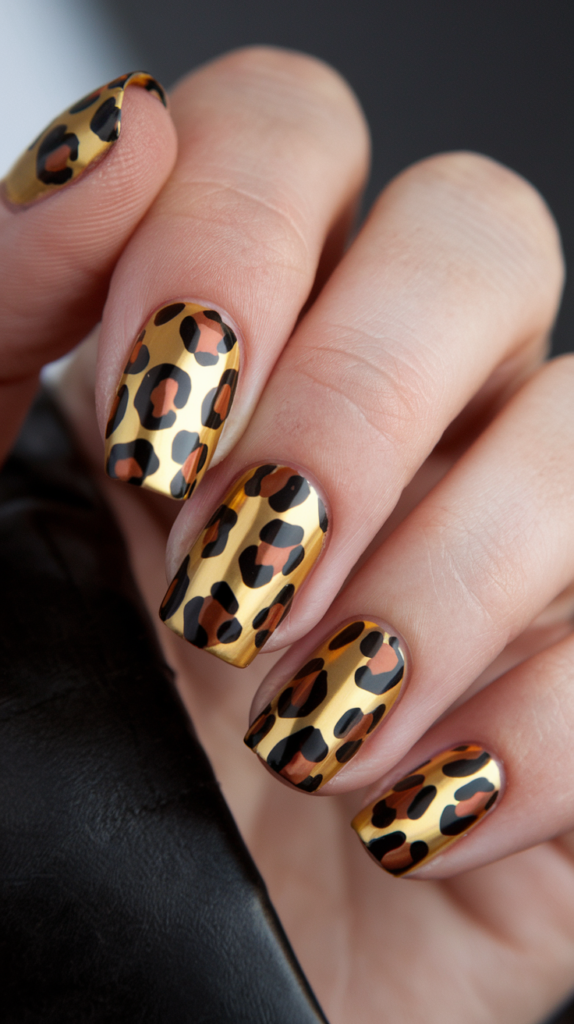
Leopard print is one of the most iconic and beloved animal patterns when it comes to nail art.
Achieving the perfect leopard spot nail design is a fun and relatively easy way to add a fierce and fashionable look to your manicure.
To create this design, you will start with a nude or light pink base that complements the bold spots.
Once the base coat has dried, use a small detail brush to create irregular brown and black spots.
The key to achieving a natural leopard print look is ensuring that the spots are not uniform in size or shape.
For those looking to customize their leopard print, switching up the base color can completely change the vibe of the design.
For instance, using a deep red or burgundy base with the leopard spots can give the design a sultry, high-fashion twist, while a pastel base can make the print feel more playful and fresh.
The key to nailing this design is balance—ensure that the spots are randomly scattered across each nail, creating an organic and natural look that mimics real leopard spots.
Tiger Stripes: Bold And Wild
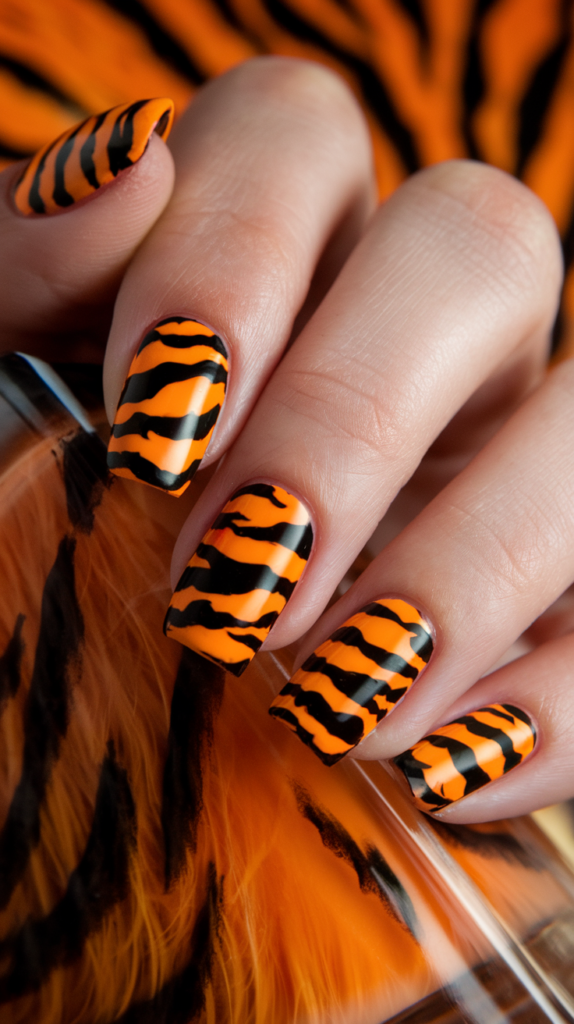
Tiger stripes are all about boldness and drama, making this design perfect for anyone who wants their nails to stand out.
The classic tiger stripe design features bright orange nails with sharp black stripes that run horizontally or diagonally across the nail.
To achieve this design, start with a bright, vibrant orange base coat.
Once it dries, use a thin striping brush or nail art pen to create sharp, jagged black lines across the nail.
The beauty of tiger stripes is that they can be customized to fit your personal style.
For a more daring look, try experimenting with non-traditional color combinations like neon pink and black, or even metallic gold stripes over a deep purple base.
To perfect the tiger stripe design, it’s crucial to achieve sharp, clean lines.
Using a striping brush with a fine tip or nail art pen can help you control the thickness of the stripes, ensuring that they don’t look too thick or messy.
The result should be a set of nails that are fierce, dynamic, and attention-grabbing.
Zebra Print: Timeless Black And White
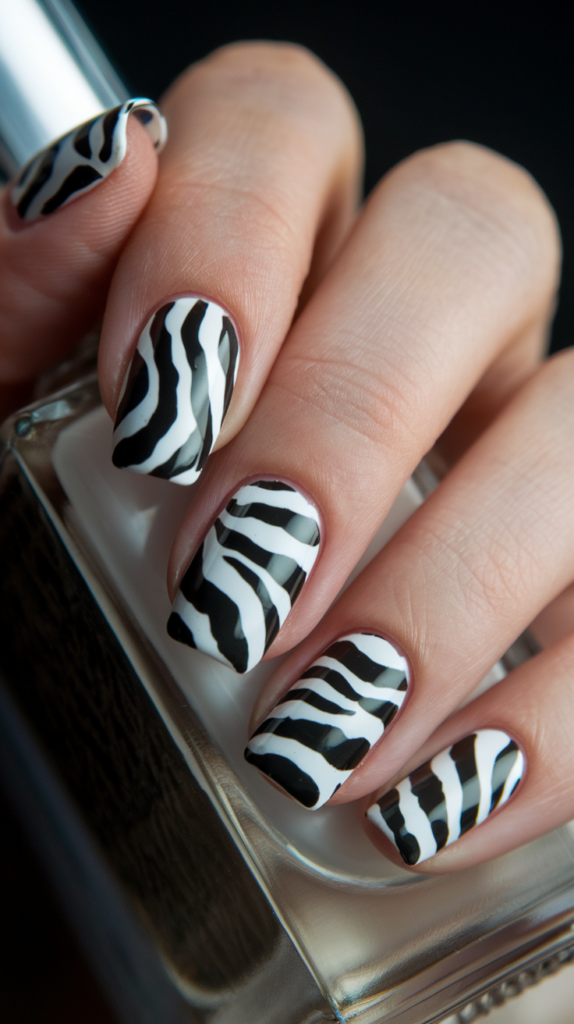
Zebra print is a timeless pattern that exudes elegance while still making a statement.
To create this design, you can opt for either a matte or glossy finish depending on the look you’re going for.
A matte finish will give the design a more understated, chic feel, while a glossy finish will add a bit more shine and flair.
Start with a clean, white base coat and allow it to dry completely.
Then, using a thin nail art brush or striping tool, draw irregular black stripes that mimic the natural pattern of zebra stripes.
The stripes should vary in thickness and curve slightly to avoid a stiff or overly rigid look.
If you want to elevate your zebra print nails, try pairing them with accent nails.
A popular option is to add a glittery black or silver accent nail to complement the monochrome zebra stripes, creating a design that feels balanced and sophisticated.
Cheetah Print: Small, Intricate Patterns
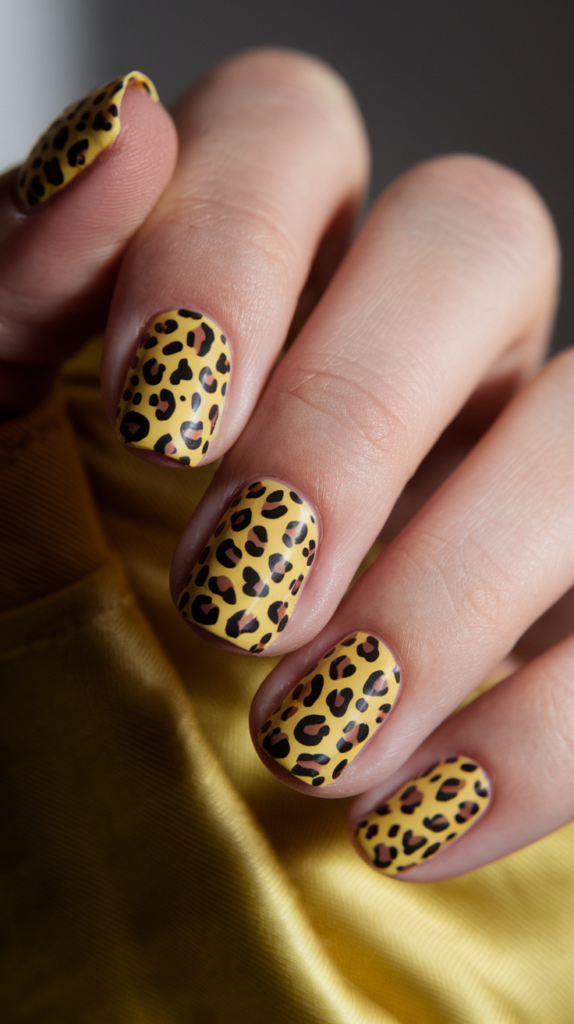
Cheetah print is similar to leopard print, but with smaller, more intricate spots that are tighter and closer together.
To create this look, you’ll want to use a gold or tan base coat that mimics the natural color of a cheetah’s fur.
After the base coat has dried, use a fine nail art brush or dotting tool to create tiny, irregular black and dark brown spots across each nail.
The key to perfecting this design lies in the size and placement of the spots.
Cheetah spots are typically smaller and more closely packed than leopard spots, so be mindful of the spacing as you apply the design.
You can also experiment with metallic accents, using gold or bronze polish to highlight certain spots for a more glamorous take on the traditional cheetah print.
The result is a sleek, fierce design that showcases the beauty of the cheetah’s natural pattern.
Exotic Animal Print Nail Designs
Snake Skin Texture: Intricate And Bold
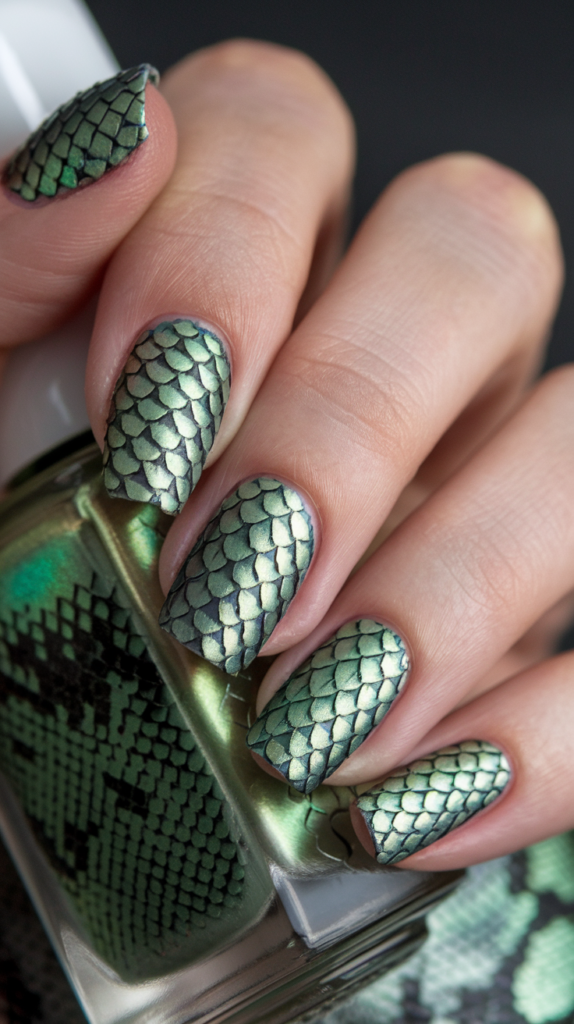
Snake skin texture is one of the most exotic and eye-catching animal print nail designs, known for its intricate patterns and bold textures.
To create this design, you can use a variety of metallic and holographic finishes to mimic the natural shimmer of snake scales.
Start with a metallic base coat in shades like green, silver, or gold.
Once it’s dry, use a nail stamping tool with a snake skin pattern or carefully paint overlapping, diamond-shaped scales with a fine brush.
The key to a realistic snake skin design is in the texture.
For a more three-dimensional effect, you can use a matte topcoat over the scales or add a layer of clear, raised gel polish to give the nails a bumpy, textured finish.
Tools like nail stencils or stamps are helpful for achieving a uniform scale pattern, while freehand designs can create a more organic, natural look.
The final result should be bold, glamorous, and full of intricate detail, perfect for making a statement.
Peacock Feathers: Stunning And Colorful
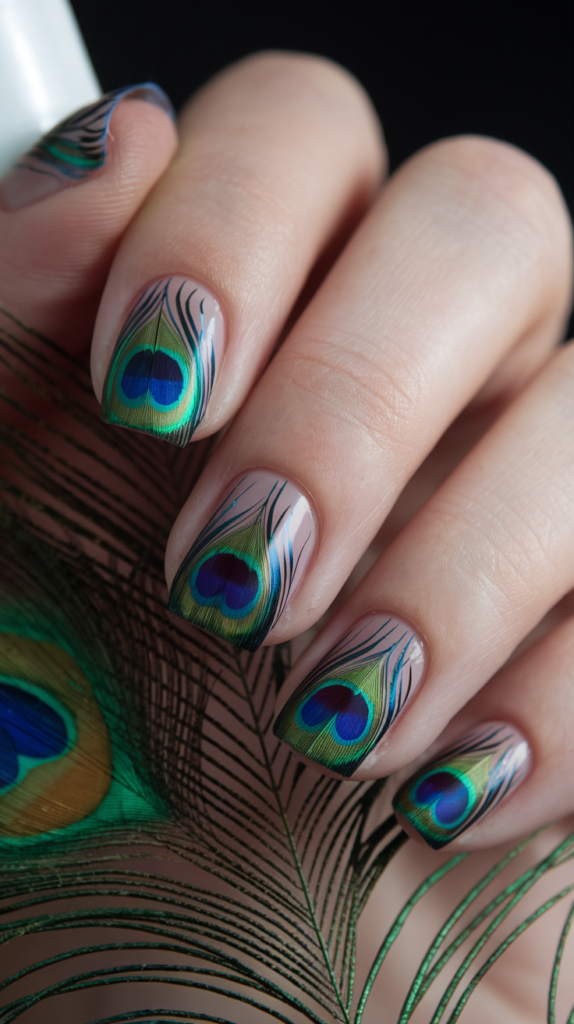
Peacock feathers are known for their stunning array of colors, making them a fantastic choice for anyone looking to add a pop of color and elegance to their nails.
To create a peacock feather design, start with a deep, royal blue or emerald green base.
Once it dries, use a fine nail art brush to paint the peacock feather pattern, focusing on the “eye” of the feather.
The eye of the peacock feather is where the design shines, so be sure to use bright colors like teal, gold, and purple to create the intricate, circular pattern.
Layering the shades adds depth and dimension to the feather, and for added drama, you can incorporate metallic or glitter polish to give the design an extra sparkle.
The final look should be vibrant, luxurious, and intricate, capturing the beauty of real peacock feathers.
Giraffe Spots: Unique And Earthy
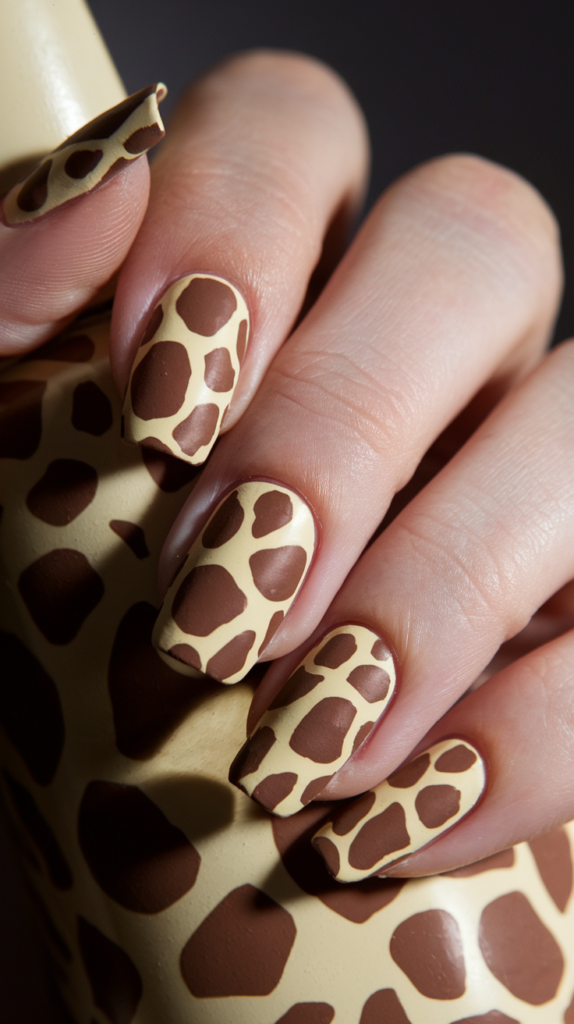
Giraffe spots are another unique and earthy animal print that brings an organic feel to nail art.
To create this design, start with a soft, cream-colored base that resembles the light tones of a giraffe’s fur.
Once the base has dried, use a brown polish to create large, irregularly shaped spots across the nail.
Unlike leopard spots, giraffe spots are much larger and tend to have more angular edges.
The trick to making this design stand out is in the placement of the spots, which should be spread evenly across the nails without being too uniform.
If you want to make the design more playful, you can add a bit of gold shimmer to the brown spots or experiment with different shades of brown for added depth.
The result is a sophisticated yet wild design that’s perfect for any occasion.
Dalmatian Spots: Fun And Playful
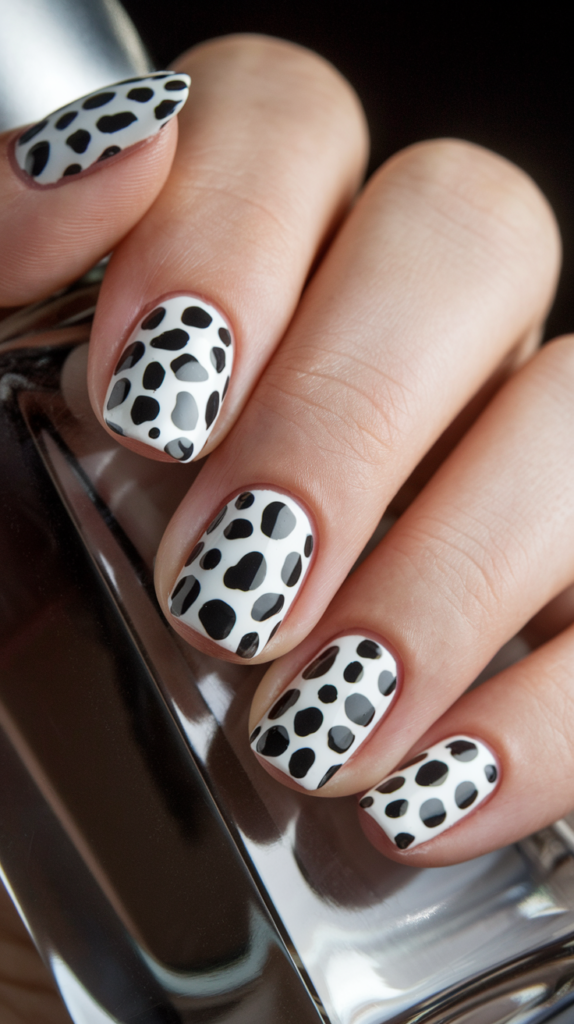
Dalmatian spots are a fun and playful take on the classic animal print design.
The black spots on a white or light pink base create a whimsical, high-contrast look that’s perfect for anyone who loves bold, graphic nail art.
To achieve this design, start with a crisp, white base coat and let it dry completely.
Once the base is set, use a dotting tool or small brush to create irregular black spots across the nails.
The key to getting a true Dalmatian look is in the randomness of the spots—they should vary in size and shape, with some larger than others, but none too perfectly round.
For a playful twist, you can add a single accent nail in a contrasting color or even incorporate tiny hearts or stars among the spots.
The result is a fun, eye-catching design that’s easy to achieve and perfect for a playful, lighthearted look.
Textured And 3D Animal Print Nail Designs
Crocodile Skin: Textured And Fierce
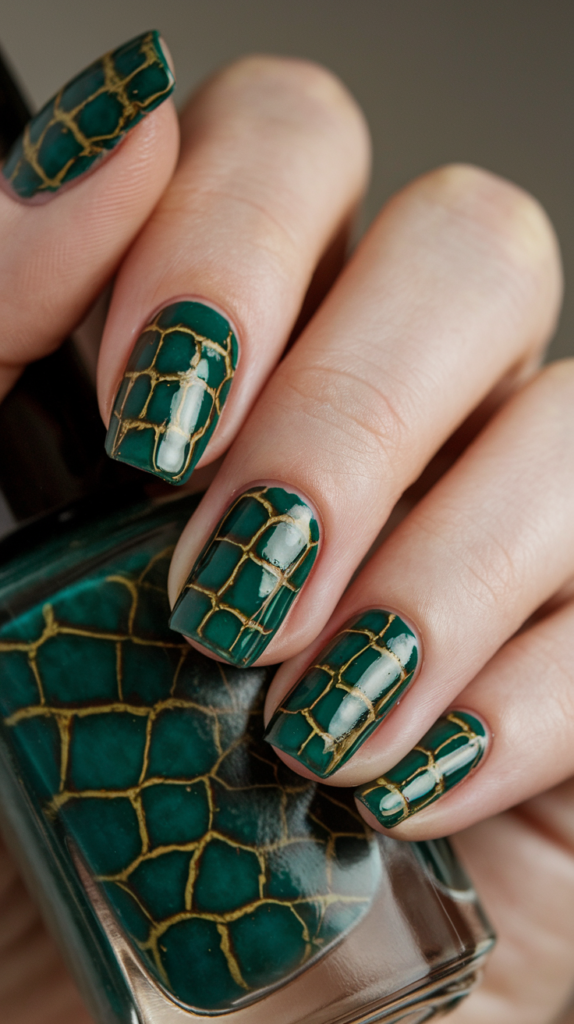
Crocodile skin nails are all about texture and fierceness.
This design is perfect for those who want their nails to stand out with a bold, rugged look.
To create crocodile skin nails, start with a deep, dark green or metallic shade that mimics the natural color of a crocodile’s skin.
Once the base coat dries, use a nail stamp or freehand technique to create raised, rectangular shapes that resemble the scales of a crocodile.
The key to this design is texture—using raised gel polish or textured topcoats can help create a 3D effect that makes the scales appear more lifelike.
You can also experiment with metallic shades to give the scales a more polished, glamorous feel.
For those who want to take it a step further, consider adding small rhinestones or gold accents to the design, giving the crocodile skin a more luxurious twist.
Turtle Shell: Earthy And Natural
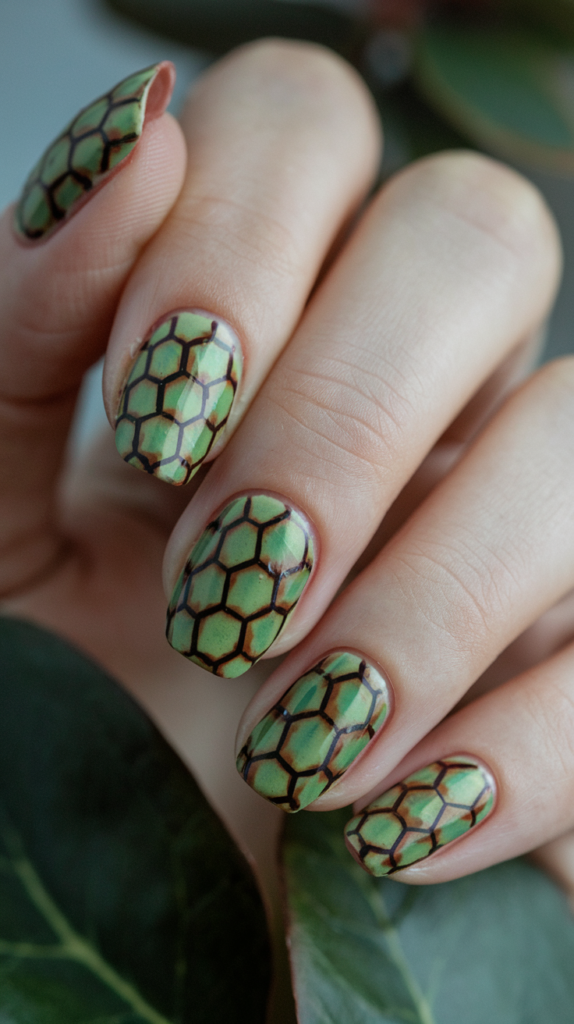
Turtle shell patterns are earthy and natural, making them a great choice for anyone looking to create a unique, nature-inspired design.
To achieve this look, start with a base coat in shades of green or brown to mimic the natural colors of a turtle’s shell.
Once the base coat dries, use a nail art brush to create hexagonal or pentagonal shapes that resemble the shell’s natural pattern.
The beauty of turtle shell designs lies in the shading—use darker shades to outline the shapes and lighter shades to fill them in, creating a layered, textured effect.
You can also add a bit of shimmer or metallic polish to give the design a subtle sheen, making it look more polished and refined.
The result is a unique, earthy design that’s perfect for anyone looking to make a bold yet natural statement.
Fish Scales: Mermaid-Inspired Shimmer
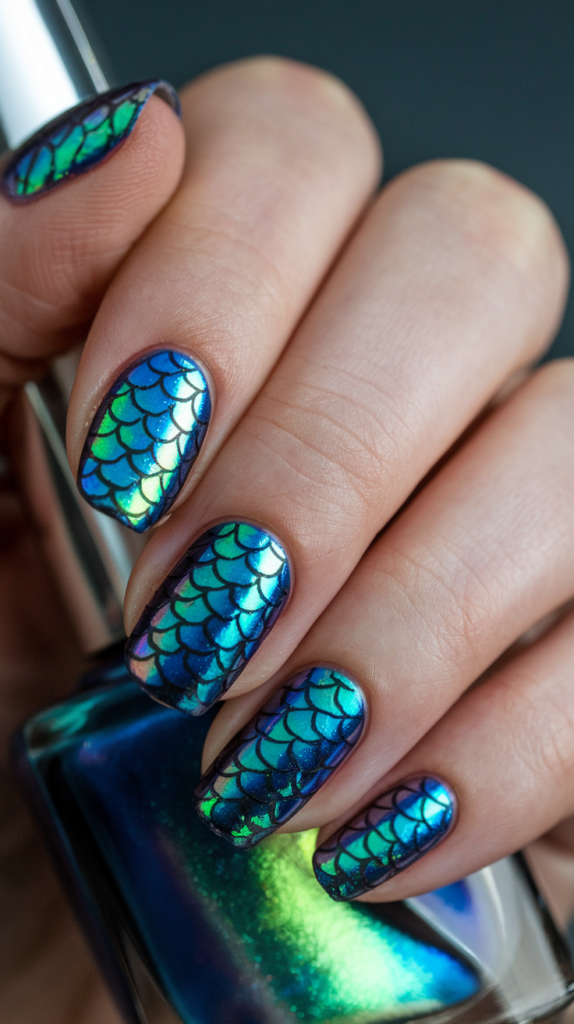
Fish scale nails are a mermaid-inspired design that’s all about shimmer and shine.
To create this look, start with a shimmering blue or green base coat that mimics the iridescent quality of fish scales.
Once the base coat is dry, use a nail stamp or freehand technique to create overlapping, scale-like patterns across the nails.
For a more dramatic effect, you can add glitter or iridescent polish to the scales, making them catch the light and shimmer as you move your hands.
You can also experiment with different colors, using shades of purple, silver, or gold to add depth and dimension to the design.
The result is a stunning, mermaid-inspired look that’s perfect for anyone who loves a bit of sparkle and glamour.
Dragon Scale Accent: Mystical And Fierce
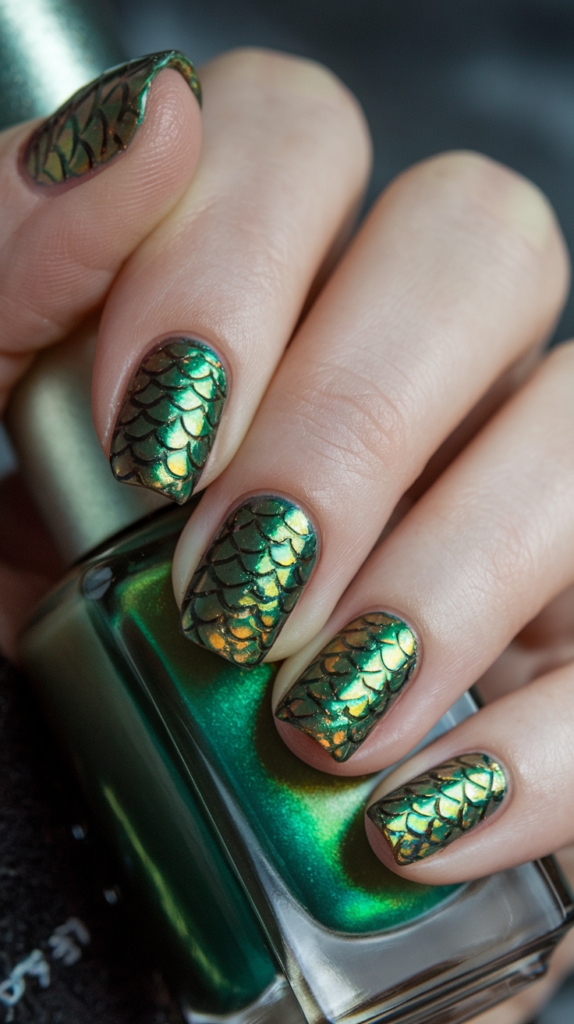
Dragon scale nails are perfect for those who want to add a mystical, otherworldly touch to their manicure.
To create this design, start with a metallic base coat in shades of green, red, or black to mimic the scales of a dragon.
Once the base coat dries, use a fine nail art brush or stamp to create overlapping, scale-like shapes.
The key to making dragon scale nails stand out is in the texture—use a raised gel polish or textured topcoat to create a 3D effect that makes the scales appear more lifelike.
You can also add a bit of shimmer or holographic polish to give the design a magical, glowing effect.
The result is a fierce, mystical look that’s perfect for anyone looking to make a bold statement.
Feathered Animal Print Nail Designs
Flamingo Feathers: Soft And Delicate
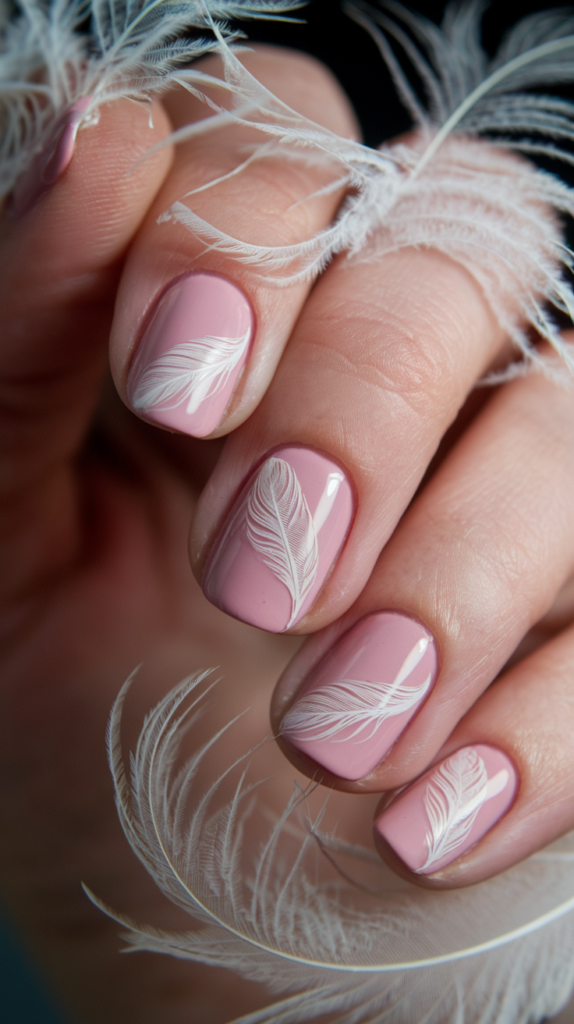
Flamingo feather nails are all about softness and delicacy, making them a great choice for those who want a more subtle, elegant animal print design.
To create this look, start with a soft pink base coat that mimics the color of a flamingo’s feathers.
Once the base coat dries, use a fine nail art brush to paint delicate, feather-like strokes in white or light pink.
The key to achieving a realistic feather design is in the fine details—each stroke should be light and airy, mimicking the softness of real feathers.
For a more polished look, you can add a bit of shimmer or glitter to the design, giving the feathers a soft, glowing effect.
The result is a delicate, elegant design that’s perfect for those who want a more understated, feminine look.
Owl Feathers: Textured And Earthy
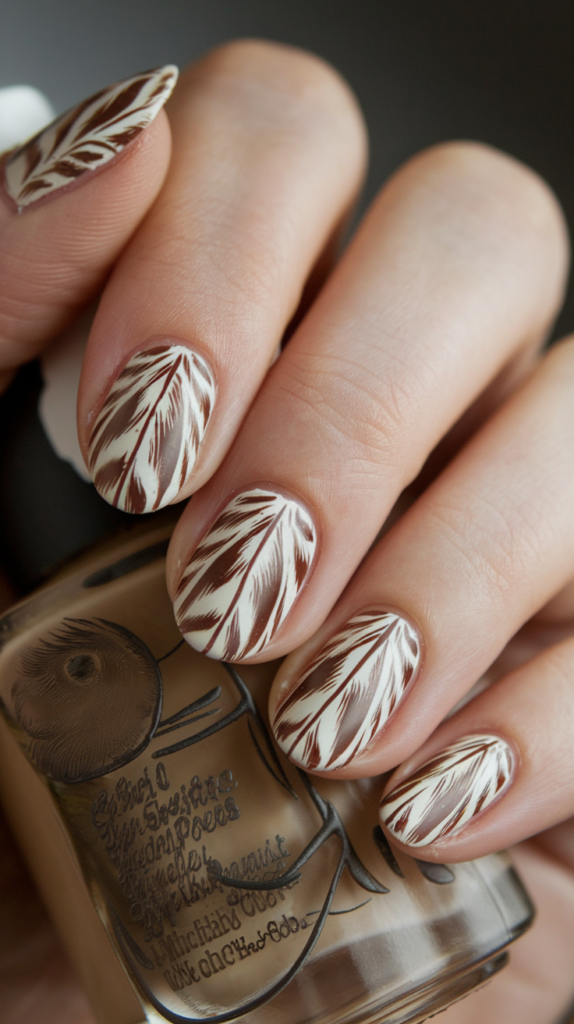
Owl feather nails are perfect for those who want a more textured, earthy design.
To create this look, start with a neutral, earthy base coat in shades like brown, beige, or taupe.
Once the base coat dries, use a fine nail art brush to paint intricate feather designs across the nails, focusing on creating fine, detailed lines that mimic the texture of real owl feathers.
To add depth and texture to the design, use darker shades to outline the feathers and lighter shades to fill them in, creating a layered, textured effect.
You can also add a bit of shimmer or metallic polish to give the design a more polished, refined feel.
The result is a unique, earthy design that’s perfect for anyone looking to add a bit of texture and detail to their nails.
Peacock Tail Accent: Intricate And Glamorous
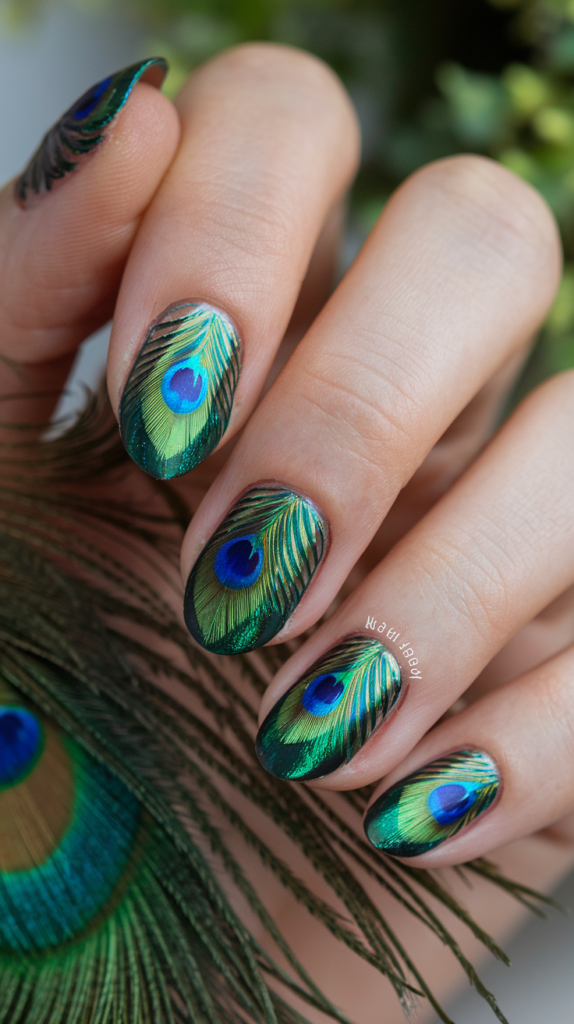
Peacock tail nails are all about glamour and intricacy, making them a great choice for those who want to add a bit of drama and elegance to their manicure.
To create this look, start with a deep blue or green base coat that mimics the colors of a peacock’s feathers.
Once the base coat dries, use a fine nail art brush to paint the intricate details of a peacock’s tail, focusing on the “eye” of the feather.
The key to making this design stand out is in the details—use bright colors like gold, teal, and purple to create the circular patterns of the peacock’s tail, and add rhinestones or glitter to give the design a bit of extra sparkle.
The result is a stunning, glamorous design that’s perfect for anyone looking to make a bold, elegant statement.
Fun And Playful Animal Nail Designs
Bumblebee Stripes: Cute And Bold
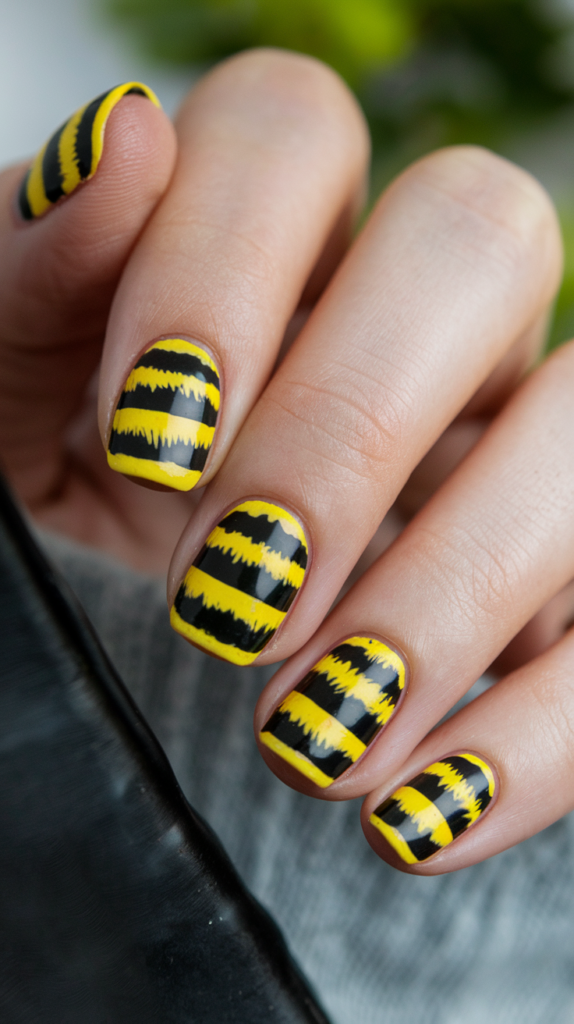
Bumblebee stripe nails are all about fun and boldness, making them a great choice for anyone looking to add a bit of playfulness to their manicure.
To create this look, start with a bright yellow base coat that mimics the color of a bumblebee.
Once the base coat dries, use a fine nail art brush or striping tool to paint sharp, clean black stripes across the nails.
The key to achieving clean, sharp lines is in the tools—using a fine striping brush or nail art pen will help you control the thickness of the stripes and ensure that they don’t look too thick or messy.
For a more playful twist, you can add honeycomb patterns or tiny bee accents to the design, creating a fun, whimsical look that’s perfect for any occasion.
Paw Prints: Simple And Fun
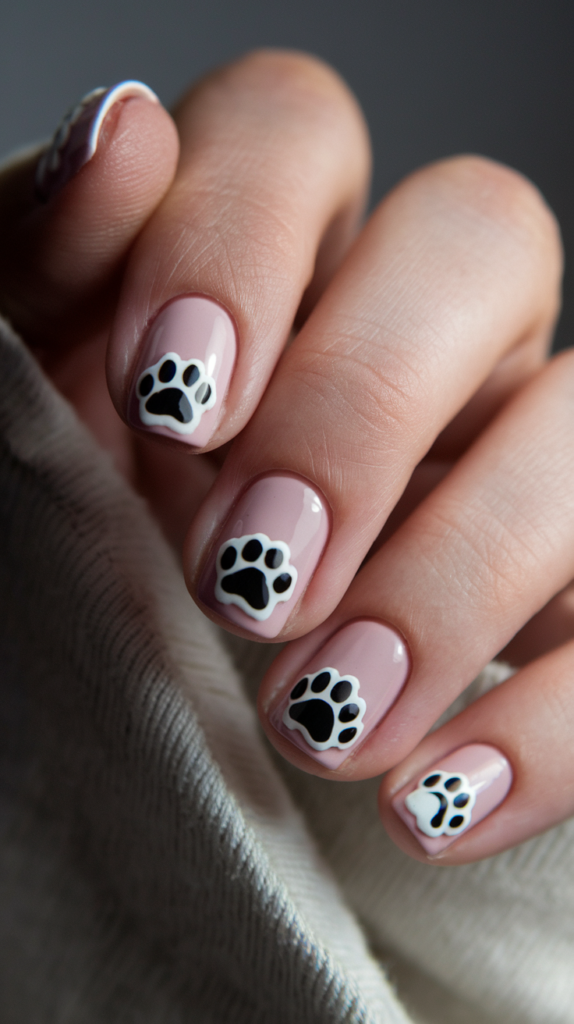
Paw print nails are a fun and simple design that’s perfect for anyone looking to add a playful touch to their manicure.
To create this look, start with a pastel or neutral base coat that complements the black or white paw prints.
Once the base coat dries, use a dotting tool or fine nail art brush to create small, rounded paw prints across the nails.
The key to making paw print nails stand out is in the placement—ensure that the prints are scattered randomly across the nails, creating a natural, playful look.
For a more customized look, you can experiment with different base colors or add tiny animal faces to the design, creating a fun, unique look that’s sure to turn heads.
Ladybug Spots: Red And Black For Playful Designs
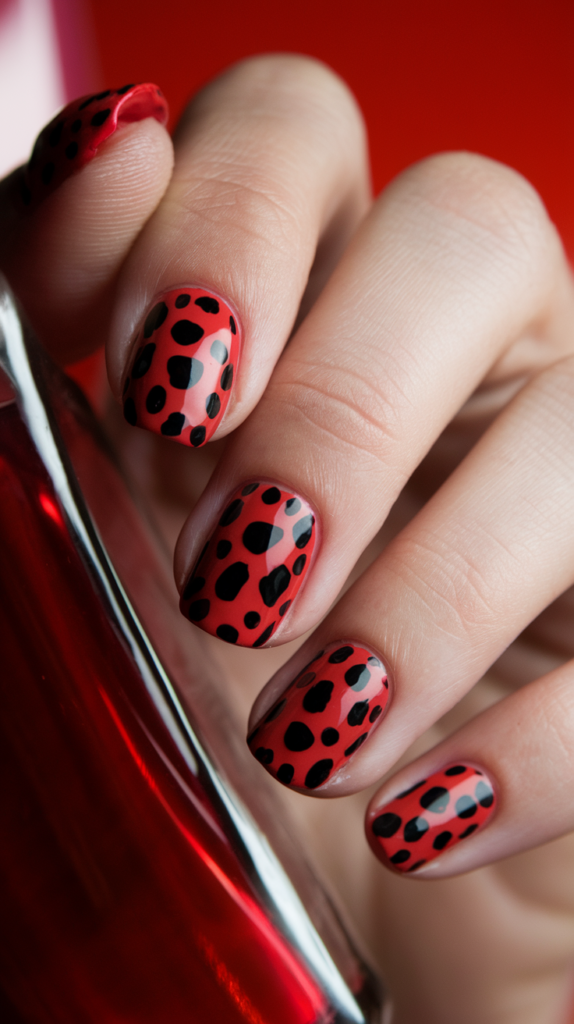
Ladybug spots are a fun, playful design that’s perfect for those who love bold, graphic nail art.
To create this look, start with a bright red base coat that mimics the color of a ladybug.
Once the base coat dries, use a dotting tool or fine nail art brush to create large black spots across the nails.
The key to achieving a true ladybug look is in the size and placement of the spots—they should be large and evenly spaced, with a few smaller spots scattered in between.
For a more playful twist, you can add tiny white dots to the black spots or incorporate green leaf accents to the design, creating a whimsical, nature-inspired look.
Penguin Print: Cute And Cool
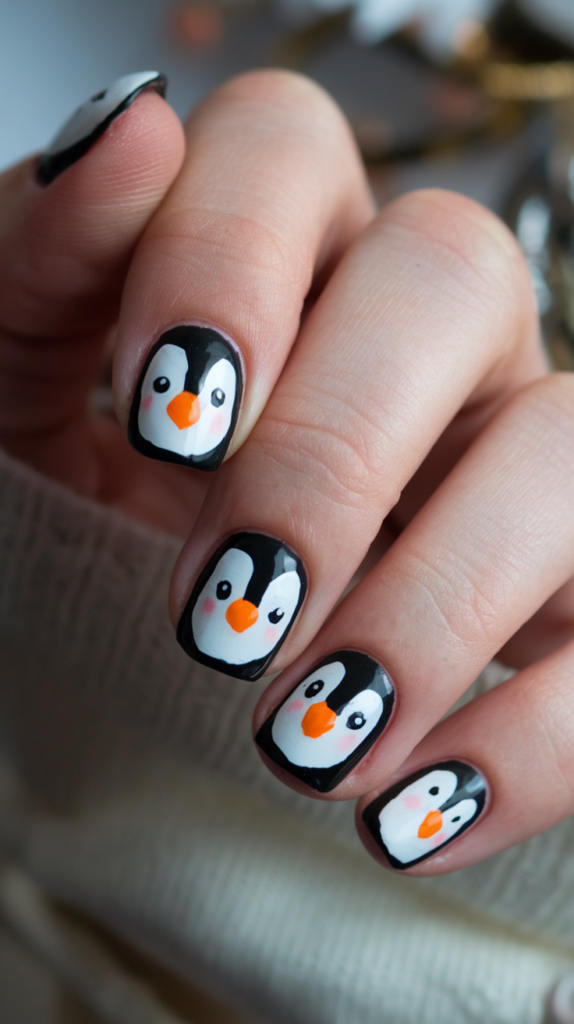
Penguin print nails are a cute and cool design that’s perfect for anyone looking to add a bit of wintery charm to their manicure.
To create this look, start with a white or light blue base coat that mimics a snowy background.
Once the base coat dries, use a fine nail art brush to paint tiny black and white penguin faces with orange beaks on a few accent nails.
For the rest of the nails, you can add snowflakes or icy blue gradients to enhance the wintery feel of the design.
The key to making penguin print nails stand out is in the details—focus on creating clean, crisp lines and adding small, playful accents that bring the design to life.
The result is a fun, wintery look that’s perfect for the colder months.
Gradient And Ombre Animal Print Nail Designs
Fox Fur Texture: Warm And Cozy Gradient
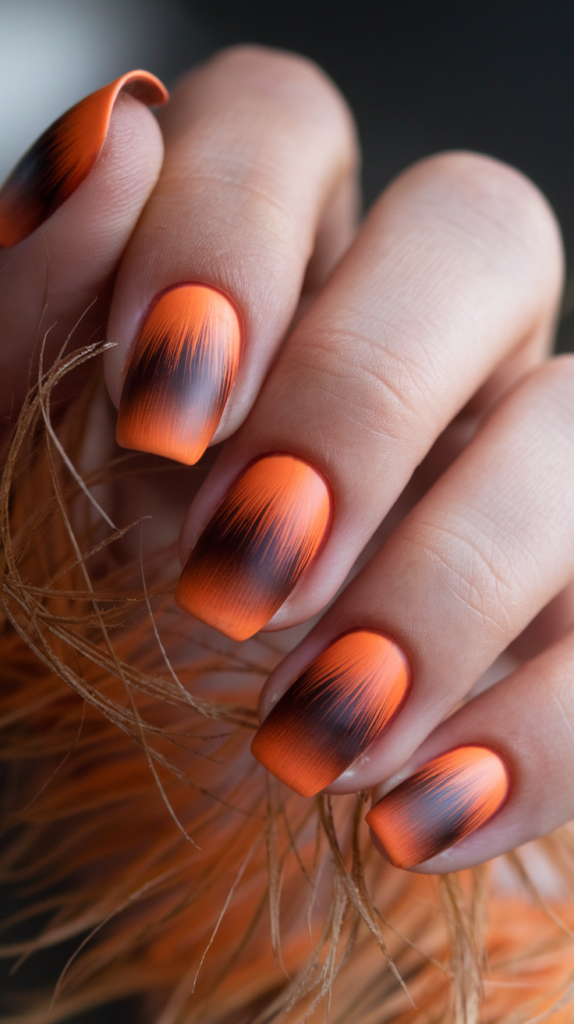
Fox fur nails are a warm and cozy design that’s perfect for anyone looking to add a bit of texture and depth to their manicure.
To create this look, start with a gradient base that fades from deep orange to light brown, mimicking the natural colors of a fox’s fur.
Once the base coat dries, use a fine nail art brush to add feathered strokes that resemble the soft texture of fur.
The key to making fox fur nails stand out is in the shading—use darker shades to create depth and lighter shades to highlight the texture of the fur.
You can also add a bit of shimmer or glitter to give the design a soft, glowing effect.
The result is a warm, cozy design that’s perfect for the fall and winter months.
Wolf Fur: Gray To White Ombre
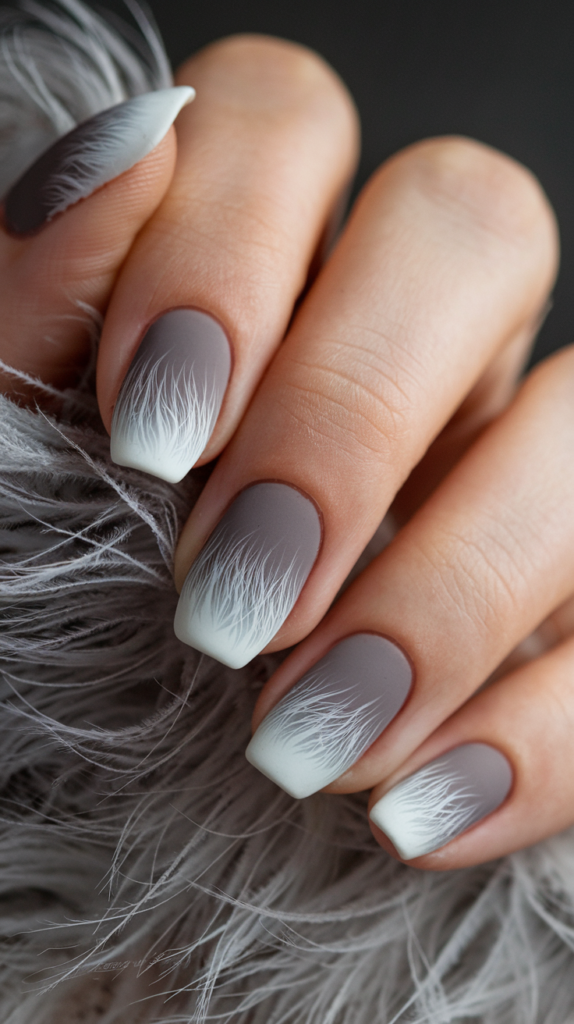
Wolf fur nails are a sleek, minimalist design that’s all about texture and shading.
To create this look, start with a gray-to-white ombre base that mimics the natural colors of a wolf’s fur.
Once the base coat dries, use a fine nail art brush to add thin, feathered strokes that resemble the soft texture of fur.
The key to achieving a seamless ombre effect is in the blending—use a sponge or gradient tool to blend the gray and white shades together smoothly, creating a soft, natural transition.
For added depth, you can use darker shades of gray to outline the fur and lighter shades to highlight certain areas.
The result is a sleek, elegant design that’s perfect for anyone who loves a minimalist, nature-inspired look.
Horse Mane Gradient: Earthy And Natural
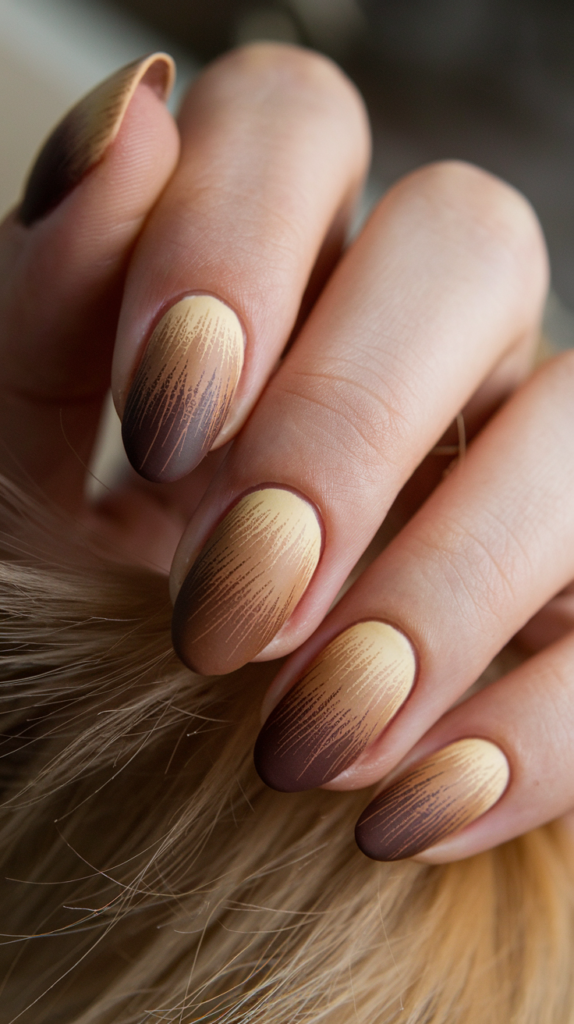
Horse mane nails are an earthy, natural design that’s perfect for anyone looking to add a bit of warmth and texture to their manicure.
To create this look, start with a brown-to-blonde ombre base that mimics the natural colors of a horse’s mane.
Once the base coat dries, use a fine nail art brush to add thin, feathered strokes that resemble the soft texture of hair.
The key to making horse mane nails stand out is in the gradient—use darker shades to add depth and lighter shades to highlight certain areas, creating a layered, textured effect.
You can also add a bit of shimmer or metallic polish to give the design a subtle sheen, making it look more polished and refined.
The result is a unique, earthy design that’s perfect for anyone looking to make a bold, natural statement.
Leopard Gradient: Fading Into Spots
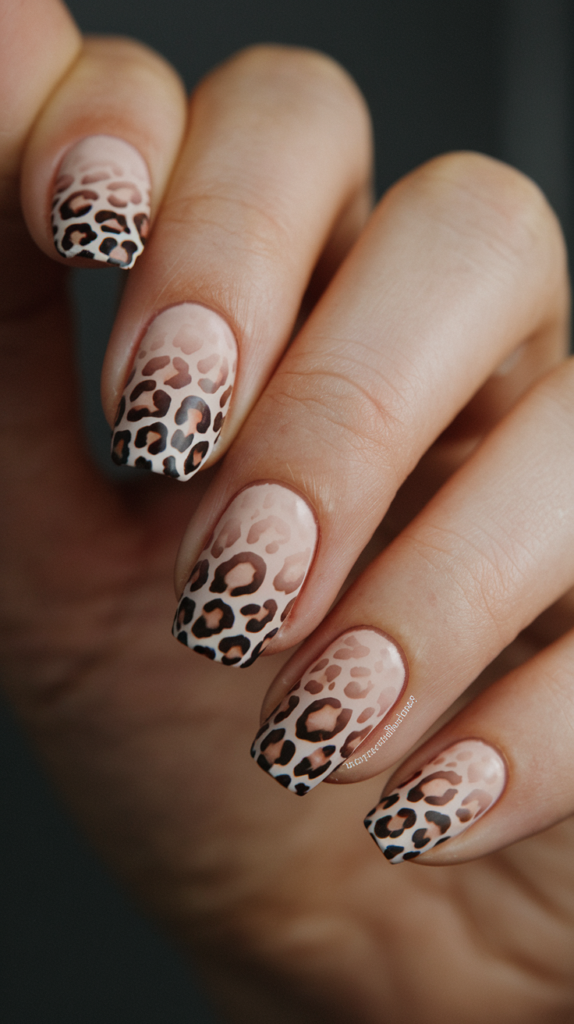
Leopard gradient nails are a fun, dynamic design that combines the boldness of leopard print with the elegance of a gradient.
To create this look, start with a gradient base that fades from a light, nude shade to a darker brown or black.
Once the base coat dries, use a fine nail art brush or dotting tool to add irregular leopard spots that gradually appear toward the tips of the nails.
The key to making this design stand out is in the blending—use a sponge or gradient tool to blend the colors together smoothly, creating a soft, natural transition.
The leopard spots should be scattered randomly across the tips of the nails, gradually fading into the gradient.
For a more polished look, you can add a bit of shimmer or metallic polish to the leopard spots, giving the design a subtle, glamorous touch.
The result is a fun, dynamic design that’s perfect for anyone who loves bold, graphic nail art.
Unique And Creative Animal Print Nail Designs
Bird Claw Marks: Sharp And Fierce
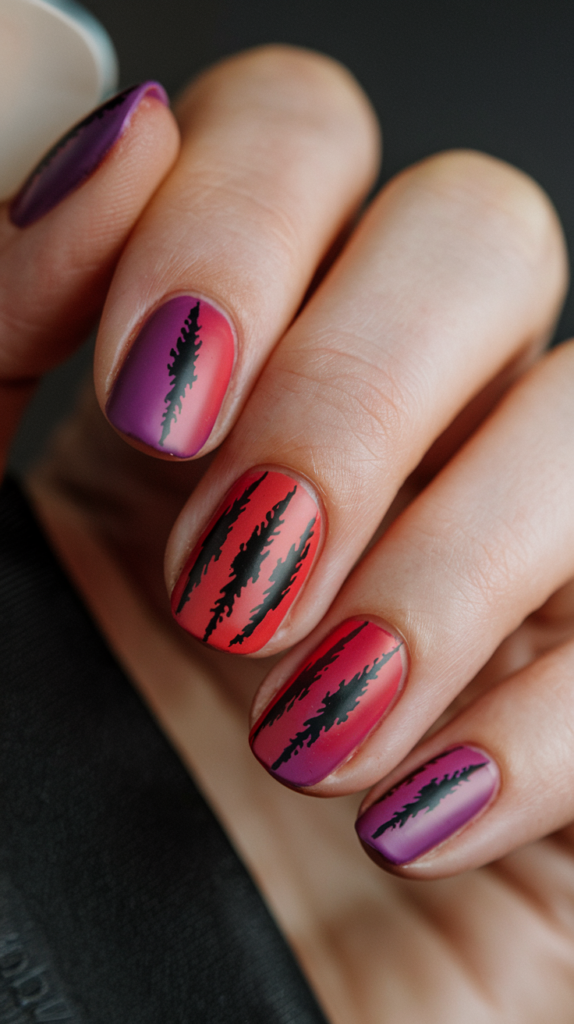
Bird claw mark nails are a fierce, dynamic design that’s perfect for anyone looking to add a bit of edge to their manicure.
To create this look, start with a bold-colored base in shades like red, purple, or black.
Once the base coat dries, use a fine nail art brush to paint sharp, jagged claw marks across the nails, mimicking the look of a bird’s talons.
The key to making this design stand out is in the sharpness of the lines—use a striping tool or nail art pen to ensure that the claw marks are clean and precise.
You can also experiment with different colors to match the design to different bird species, such as using metallic shades for an eagle-inspired look or bright colors for a parrot-inspired design.
The result is a fierce, edgy design that’s perfect for anyone looking to make a bold statement.
Floral & Animal Mix: Leopard Print With Flowers
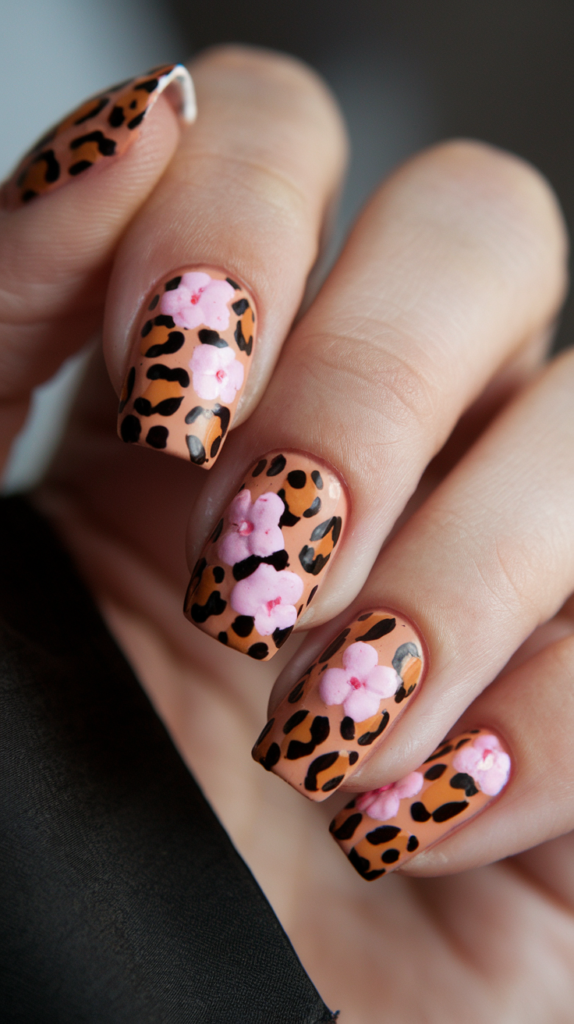
Floral and animal mix nails are a unique, creative design that combines the boldness of animal print with the softness of floral accents.
To create this look, start with a leopard print base using a nude or light pink base coat and irregular black and brown spots.
Once the leopard print is complete, use a fine nail art brush to paint delicate, floral accents around the edges of the spots.
The key to making this design stand out is in the balance—ensure that the floral accents are small and delicate, complementing the boldness of the leopard print without overpowering it.
You can also experiment with different floral patterns, such as using soft pink roses or bright yellow daisies to create a fun, unique look.
The result is a beautiful, balanced design that’s perfect for anyone looking to combine the best of both worlds.
Jaguar Print: Bold And Angular
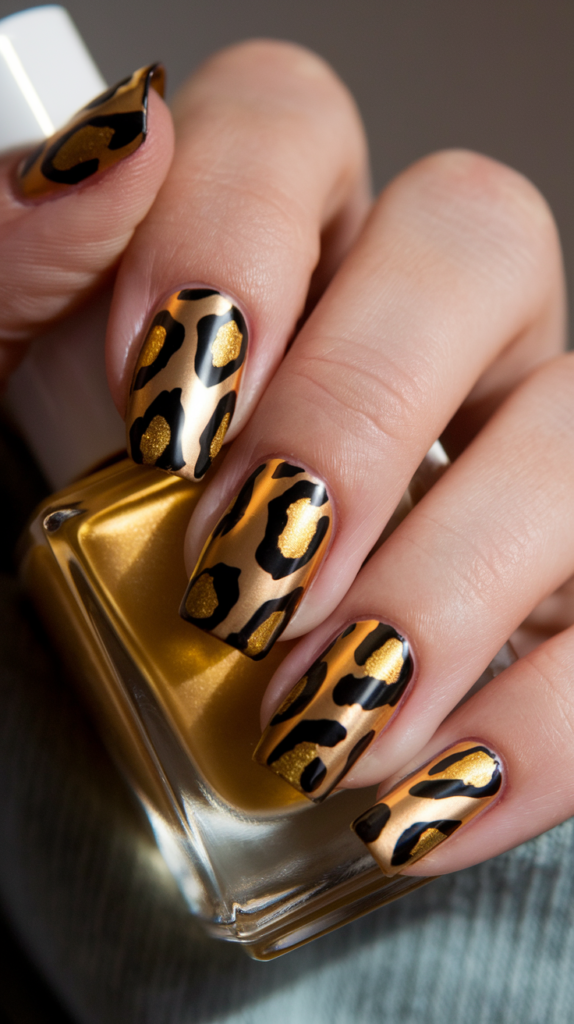
Jaguar print nails are a bold, angular take on the classic leopard print design, perfect for anyone looking to add a bit of edge to their manicure.
To create this look, start with a golden-hued base coat that mimics the natural color of a jaguar’s fur.
Once the base coat dries, use a fine nail art brush or dotting tool to create angular, irregular black spots across the nails.
The key to making this design stand out is in the sharpness of the spots—unlike leopard spots, jaguar spots are typically more angular and defined, creating a bold, graphic look.
You can also experiment with different color combinations, such as using metallic gold or silver polish for a more glamorous take on the traditional jaguar print.
The result is a bold, fierce design that’s perfect for anyone looking to make a statement.
Deer Antlers: Elegant And Subtle
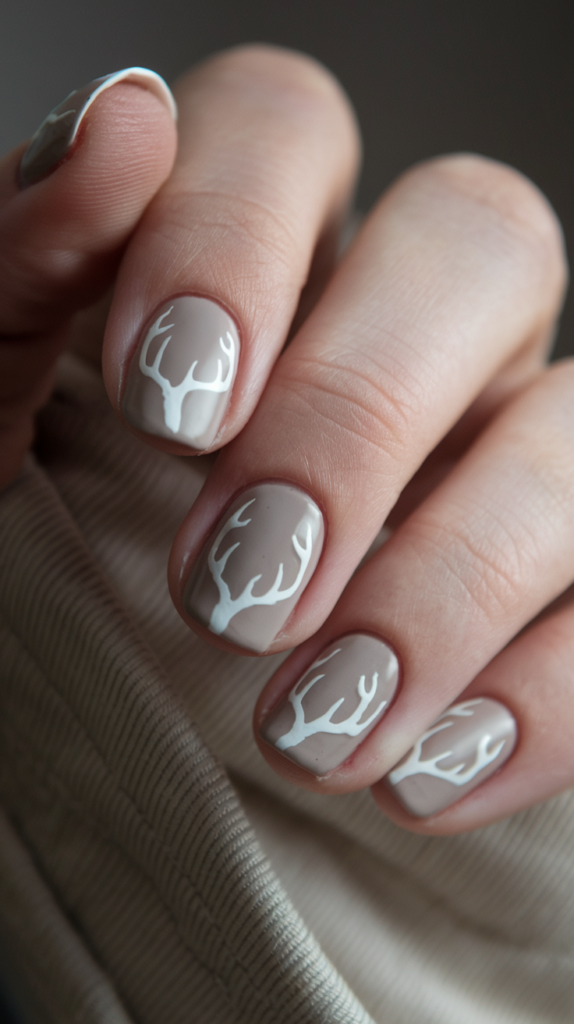
Deer antler nails are an elegant, subtle design that’s perfect for anyone looking to add a bit of nature-inspired detail to their manicure.
To create this look, start with a neutral-toned base coat in shades like beige, taupe, or light brown.
Once the base coat dries, use a fine nail art brush to paint delicate, intricate deer antler silhouettes across the nails.
The key to making this design stand out is in the fine details—each antler should be thin and delicate, creating a subtle, elegant look that’s not too overpowering.
You can also experiment with different base colors or add tiny rhinestones to the design for a more glamorous take on the traditional deer antler look.
The result is a beautiful, nature-inspired design that’s perfect for anyone looking to add a bit of elegance to their nails.
Polar Bear Print: Winter-Inspired Paw Prints
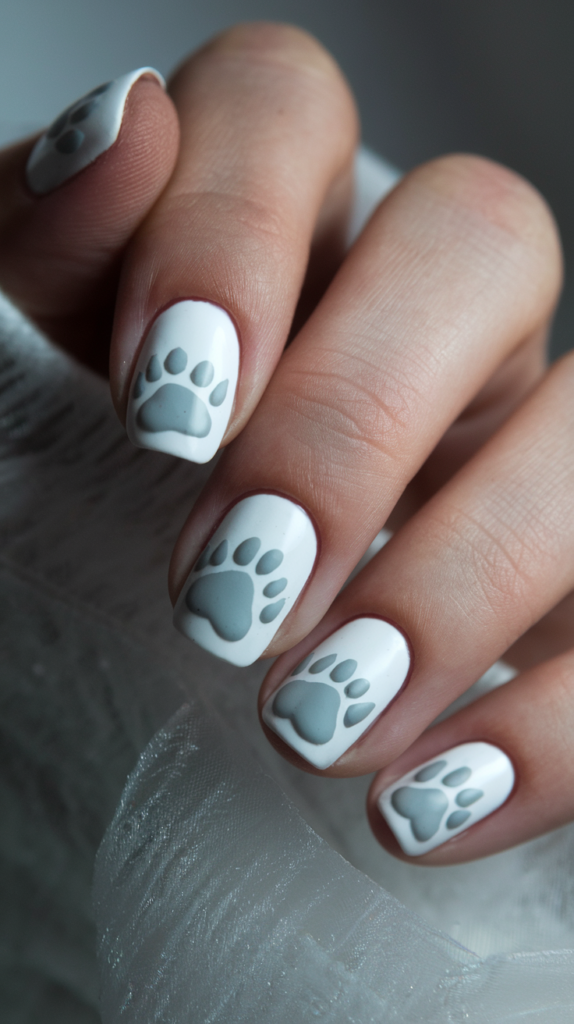
Polar bear print nails are a fun, winter-inspired design that’s perfect for anyone looking to add a bit of seasonal charm to their manicure.
To create this look, start with a white or light blue base coat that mimics a snowy background.
Once the base coat dries, use a fine nail art brush or dotting tool to create tiny, rounded paw prints in light grey or black across the nails.
The key to making this design stand out is in the details—ensure that the paw prints are small and evenly spaced, creating a balanced, playful look.
For a more wintery feel, you can add snowflake accents or a bit of shimmer to the design, giving the nails a soft, glowing effect.
The result is a fun, seasonal design that’s perfect for the colder months.
Animal Face Accents And Details
Tiger Face Accent: Pairing With Stripes
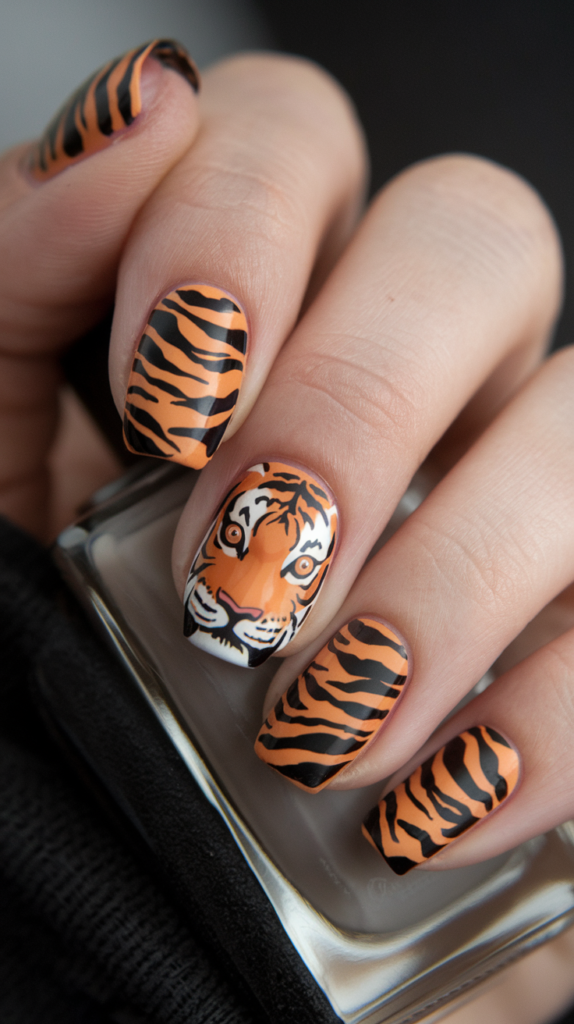
Tiger face accent nails are a bold, fierce design that pairs a detailed tiger face with classic tiger stripes.
To create this look, start by painting the tiger face on a single accent nail, using a fine nail art brush to create intricate details like the tiger’s eyes, nose, and whiskers.
For the rest of the nails, use a bright orange base coat and sharp, black tiger stripes to complement the face.
The key to making this design stand out is in the details—focus on creating a realistic, lifelike tiger face with clean, sharp lines and bold colors.
You can also experiment with different color combinations, such as using metallic gold stripes or a matte black base for a more dramatic look.
The result is a bold, fierce design that’s perfect for anyone looking to make a statement.
Owl Eyes Accent: Big And Expressive
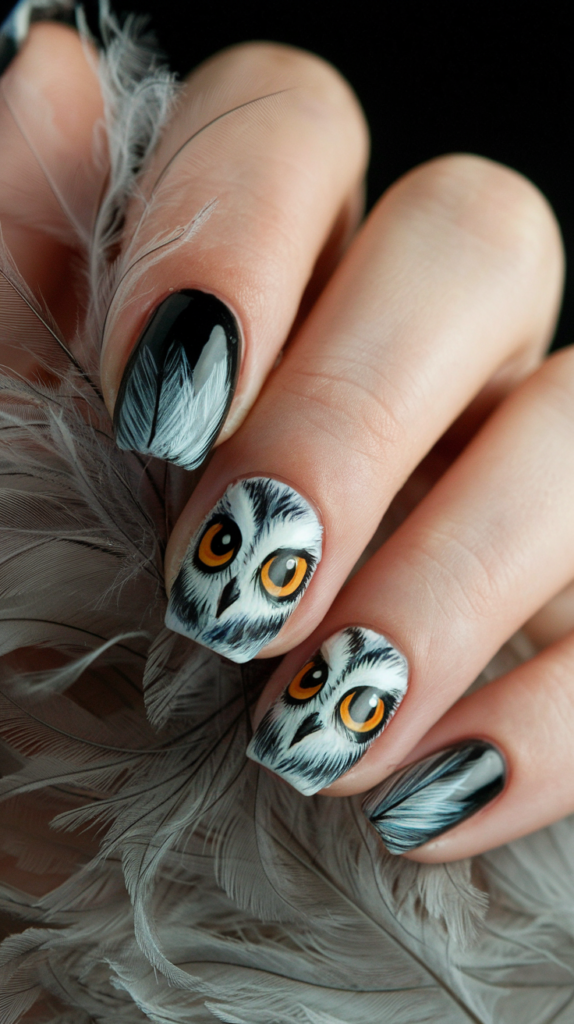
Owl eyes accent nails are a unique, dynamic design that focuses on creating big, expressive owl eyes as an accent nail.
To create this look, start with a neutral-toned base coat in shades like brown or beige.
Once the base coat dries, use a fine nail art brush to paint large, round owl eyes with sharp, yellow-orange irises on a single accent nail.
For the rest of the nails, use soft, feathery strokes in earthy tones to mimic the texture of owl feathers, creating a cohesive, nature-inspired design.
The key to making the owl eyes stand out is in the shading—use darker shades around the edges of the eyes to create depth and lighter shades to highlight certain areas, making the eyes appear more lifelike.
The result is a fun, dynamic design that’s perfect for anyone looking to add a bit of personality to their manicure.
Elephant Skin: Textured And Rugged
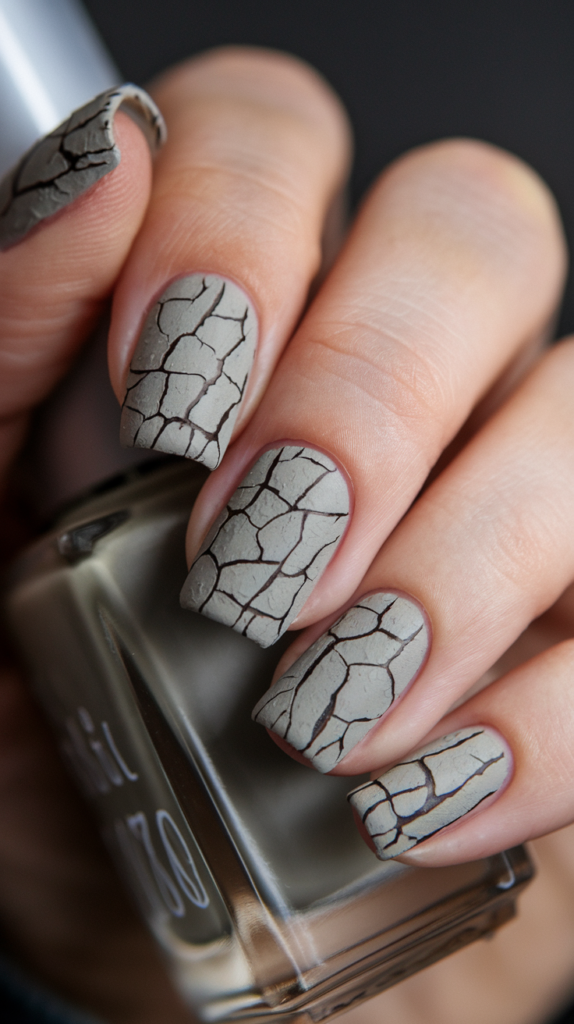
Elephant skin nails are a rugged, textured design that’s perfect for anyone looking to add a bit of edge to their manicure.
To create this look, start with a gray base coat that mimics the natural color of an elephant’s skin.
Once the base coat dries, use a fine nail art brush or textured tool to create cracked, irregular lines across the nails, mimicking the rough texture of elephant skin.
The key to making this design stand out is in the texture—use darker shades of gray to outline the cracks and lighter shades to fill them in, creating a layered, dimensional effect.
For a more polished look, you can add a bit of shimmer or metallic polish to the design, giving the elephant skin a soft, glowing effect.
The result is a bold, rugged design that’s perfect for anyone looking to make a statement.
Butterfly Silhouettes: Simple And Elegant
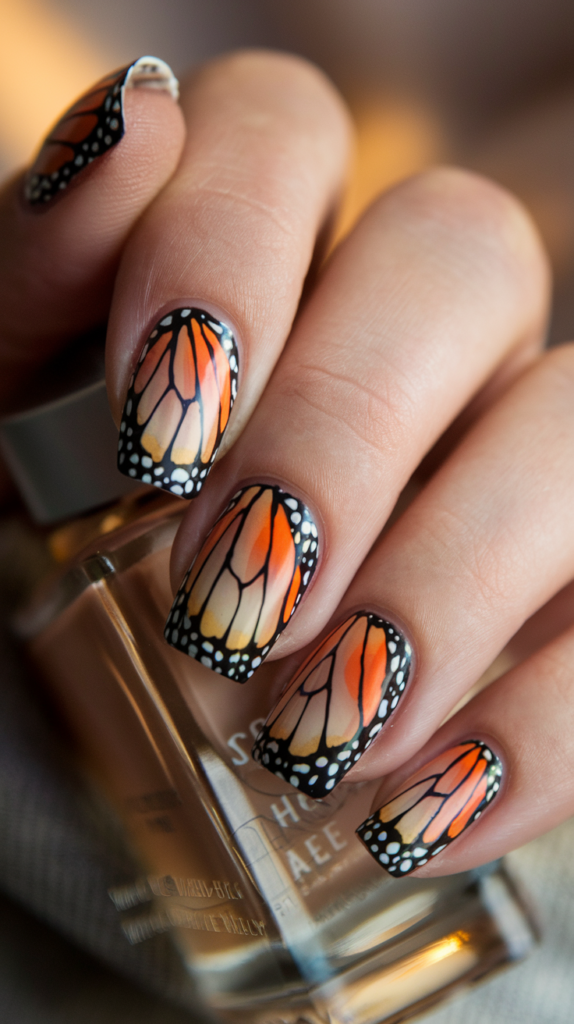
Butterfly silhouette nails are a simple, elegant design that’s perfect for anyone looking to add a bit of whimsy and delicacy to their manicure.
To create this look, start with a pastel or nude base coat that complements the black or white butterfly silhouettes.
Once the base coat dries, use a fine nail art brush to paint delicate butterfly silhouettes across the nails.
The key to making this design stand out is in the simplicity—focus on creating clean, crisp lines and keeping the overall look minimal yet elegant.
For a more polished look, you can add tiny rhinestones or glitter accents to the butterflies, giving the design a subtle, glamorous touch.
The result is a beautiful, delicate design that’s perfect for anyone looking to add a bit of elegance and whimsy to their nails.
Conclusion
Animal print nail art is more than just a fashion statement; it’s a way to express creativity and individuality.
Whether you prefer the timeless appeal of zebra stripes or the bold, exotic textures of crocodile skin, these 35 designs offer a wide range of options to suit every mood and occasion.
From subtle gradients to intricate face accents, the versatility of animal prints ensures that there’s always something new to explore and experiment with.
With a little practice and creativity, you can easily recreate these designs at home or show them to your nail technician for a professional touch.
So go ahead and unleash your wild side—there’s no limit to the possibilities when it comes to animal print nail art!


