Summer is synonymous with sun-kissed skin, sandy beaches, and endless days by the water.
As the temperatures rise, it’s the perfect time to let your nails reflect the vibrant energy of the season.
Whether you’re planning a tropical getaway, a weekend beach escape, or simply want to bring a touch of the ocean into your everyday life, your nails can be the ultimate accessory.
From playful and colorful designs to subtle, sophisticated looks, there’s a beach-inspired nail design for everyone.
In this blog, we’ll explore 35 stunning nail designs that capture the essence of summer, offering you endless inspiration for your next manicure.
Get ready to dive into a world of vibrant colors, intricate patterns, and beachy vibes that will have you dreaming of the shore with every glance at your hands.
1. Ocean Waves Ombre: Capturing The Essence Of The Sea
Gradient Techniques For Oceanic Depth
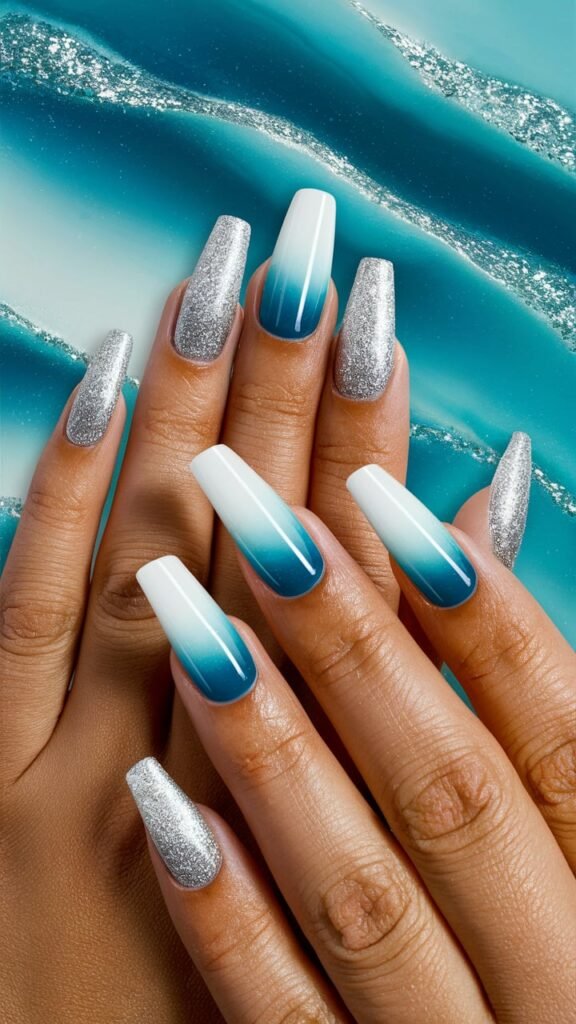
Ocean waves are synonymous with the beach, and recreating them on your nails can be a truly mesmerizing experience.
To capture the depth of the ocean on your nails, start with a gradient technique that transitions from deep ocean blue at the tips to a soft sky blue at the base.
This gradient effect not only mimics the varying shades of the sea but also adds dimension to the overall design.
Creating a seamless gradient requires a bit of practice, but the results are worth the effort.
Begin by applying the lightest shade of blue near the cuticle, gradually blending it with darker shades towards the tips.
Use a sponge or a gradient brush to achieve a smooth transition.
The key is to blend the colors gently, creating an ombre effect that reflects the natural beauty of the ocean.
Adding Realistic Wave Patterns
Once you’ve perfected the gradient base, it’s time to add the wave patterns that will bring your ocean-inspired nails to life.
Using a fine brush, paint delicate white wave patterns cresting over the tips of your nails.
The waves should appear as if they are gently rolling towards the shore, with subtle curves and swirls that mimic the motion of the sea.
For a more realistic effect, consider adding varying shades of blue and white to the waves.
This will create a sense of depth and movement, making the waves appear more dynamic.
Don’t forget to add tiny foam details at the tips of the waves, which will enhance the overall realism of the design.
Enhancing With Subtle Silver Glitter
To complete your Ocean Waves Ombre nails, add a touch of subtle silver glitter to mimic the sunlight reflecting off the water.
Apply the glitter sparingly, focusing on the tips of the waves and the highest points of the nails.
The glitter should catch the light, adding a shimmering effect that brings the entire design to life.
The key is to keep the glitter application subtle, as too much can overpower the design.
A light dusting of glitter is enough to enhance the oceanic theme without detracting from the intricate wave patterns.
Finish with a clear top coat to seal in the design and give your nails a glossy, water-like finish.
2. Sunset Silhouettes: Creating A Tropical Evening Vibe
Perfecting The Sunset Ombre Transition
Sunsets are one of nature’s most beautiful displays, and capturing that on your nails can evoke a sense of calm and tranquility.
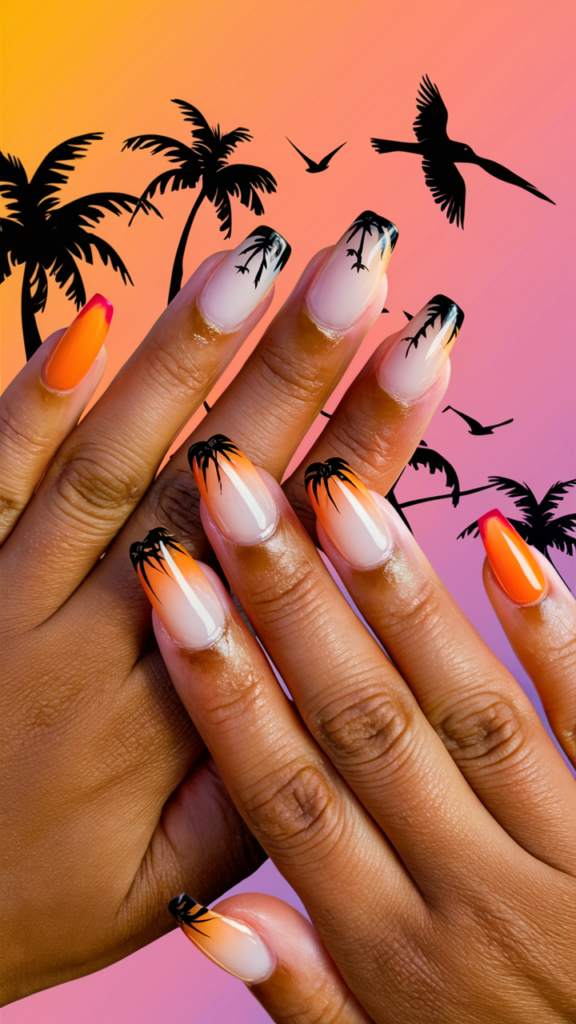
To create a sunset silhouette design, start with an ombre transition that mimics the colors of a tropical evening sky.
The gradient should transition from vibrant orange at the tips to a soft pink at the base, representing the fading light of the sun.
Achieving a flawless ombre effect requires careful blending of colors.
Start with the lightest shade at the base of the nail and gradually blend in darker hues towards the tips.
Use a makeup sponge or a specialized gradient brush to apply the colors, dabbing gently to blend them seamlessly.
The result should be a smooth transition that captures the warmth and beauty of a tropical sunset.
Incorporating Palm Tree And Bird Silhouettes
With the sunset ombre as your base, the next step is to add the silhouettes that will complete the tropical evening vibe.
Using black nail polish and a fine detailing brush, paint the silhouettes of palm trees and birds across one or two accent nails.
The palm trees should be tall and slender, with delicate fronds swaying in the breeze.
Birds can be added as small, simple shapes flying across the sky, adding a sense of movement to the design.
The contrast between the dark silhouettes and the vibrant sunset background creates a striking visual effect.
Make sure the silhouettes are sharp and defined, as this will enhance the overall impact of the design.
Tips For A Serene Tropical Look
To achieve a serene tropical look, keep the rest of the nails simple and let the silhouettes be the focal point.
You can add a subtle shimmer to the sunset gradient to mimic the last rays of sunlight reflecting on the water.
Alternatively, consider adding a small amount of glitter to the palm trees or birds to give them a magical, twilight sparkle.
Finish with a high-gloss top coat to enhance the colors and protect the design.
The key to a successful Sunset Silhouette manicure is balance—allow the gradient and silhouettes to complement each other without one overpowering the other.
The result should be a serene, tropical look that transports you to a peaceful evening by the beach.
3. Tropical Paradise: Bright, Vivid Nail Art
Choosing Neon Shades For Tropical Nails
Tropical nails are all about bright, vivid colors that capture the vibrant energy of a paradise getaway.
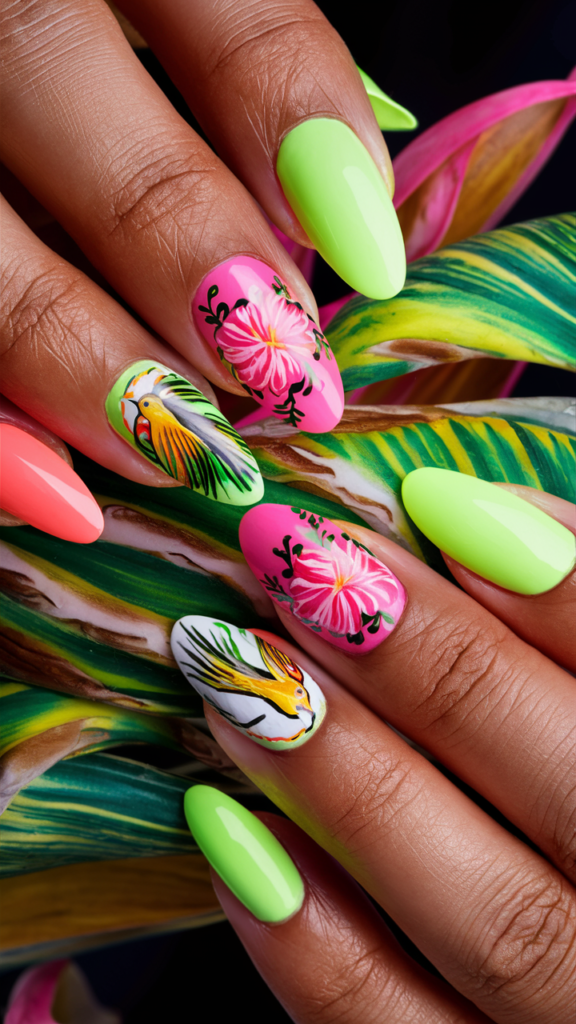
When choosing shades for your Tropical Paradise manicure, opt for neon colors that pop against the natural tones of your skin.
Bright pinks, greens, and yellows are perfect for this theme, as they evoke the lush landscapes and exotic flowers of a tropical island.
Start with a bold base color for each nail, mixing and matching neon shades to create a lively palette.
The key is to embrace the brightness of the colors, allowing them to take center stage in the design.
Neon polishes are known for their intense pigmentation, so apply them carefully to avoid streaks and achieve full coverage.
Hand-Painting Hibiscus Flowers And Palm Leaves
With your neon base in place, it’s time to add the intricate details that will bring your Tropical Paradise nails to life.
Using a fine brush, hand-paint hibiscus flowers and palm leaves on one or two accent nails.
Hibiscus flowers should be large and showy, with bold, overlapping petals in shades of pink, red, or orange.
Palm leaves, on the other hand, should be delicate and detailed, with fine lines representing the individual fronds.
The contrast between the bright base colors and the intricate floral designs creates a stunning effect.
For added depth, consider layering different shades of green for the palm leaves or adding highlights to the petals of the hibiscus flowers.
Achieving Realistic Exotic Bird Designs
To complete the Tropical Paradise look, consider adding exotic birds to your design.
Parrots, toucans, or flamingos are all excellent choices for this theme, as their bright colors and distinctive shapes add a playful touch to the manicure.
Use a fine brush to paint the birds in vibrant colors, paying attention to the details such as feathers, beaks, and eyes.
The birds should be small enough to fit on the nails without overwhelming the design but detailed enough to be recognizable.
A steady hand and patience are required to achieve the level of detail needed for these designs.
Once completed, the birds will add a touch of whimsy to your tropical nails, making them truly stand out.
4. Seashell Art: Luxurious And Beachy
Soft Nude Base: The Perfect Canvas
Seashell art on nails is a timeless design that brings the beauty of the beach to your fingertips.
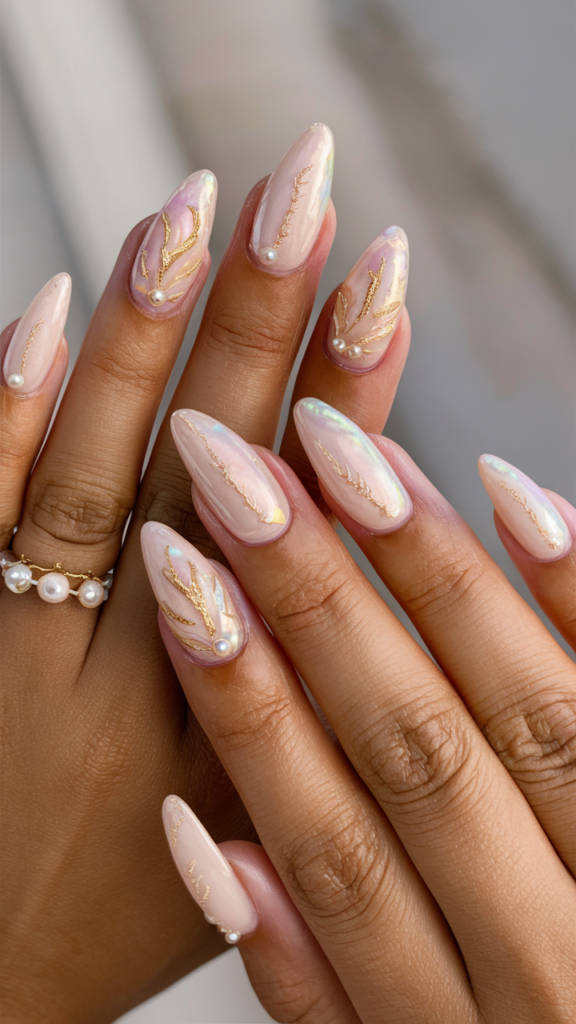
To create a luxurious and beachy look, start with a soft nude base that acts as the perfect canvas for the intricate seashell designs.
A nude base is versatile and elegant, allowing the details of the seashells to shine without overpowering the overall look.
Choose a nude shade that complements your skin tone, whether it’s a warm beige, soft pink, or cool taupe.
Apply two to three coats for a smooth, even finish, ensuring the base is fully opaque before moving on to the next step.
The nude base will provide a subtle backdrop that enhances the natural beauty of the seashell designs.
Painting Intricate Seashells In Pastel Tones
With your nude base in place, it’s time to add the seashell designs that will make your nails stand out.
Using a fine brush and pastel-colored polishes, paint intricate seashells on one or two accent nails.
The shells can be varied in shape and size, ranging from delicate spiral shells to larger, fan-shaped designs.
Pastel tones such as soft pinks, lavenders, and mint greens work beautifully for this design, as they add a touch of color without being too bold.
Pay attention to the details, adding fine lines and shading to give the shells a realistic, three-dimensional appearance.
The result should be delicate and elegant, capturing the natural beauty of seashells.
Accentuating With Pearls And Gold Details
To elevate the luxurious feel of your Seashell Art nails, consider adding pearl and gold accents.
Tiny pearls can be placed at the center of the shells or along the edges to add a touch of sophistication.
Gold details, such as thin lines or dots, can be used to highlight the contours of the shells or add decorative elements to the design.
The combination of pearls and gold with the pastel seashells creates a rich, opulent look that is perfect for a beach-inspired manicure.
Finish with a glossy top coat to enhance the shine and protect the design.
The result is a set of nails that exude luxury and elegance, with a subtle nod to the beauty of the beach.
5. Mermaid Scales: Iridescent Fantasy Nails
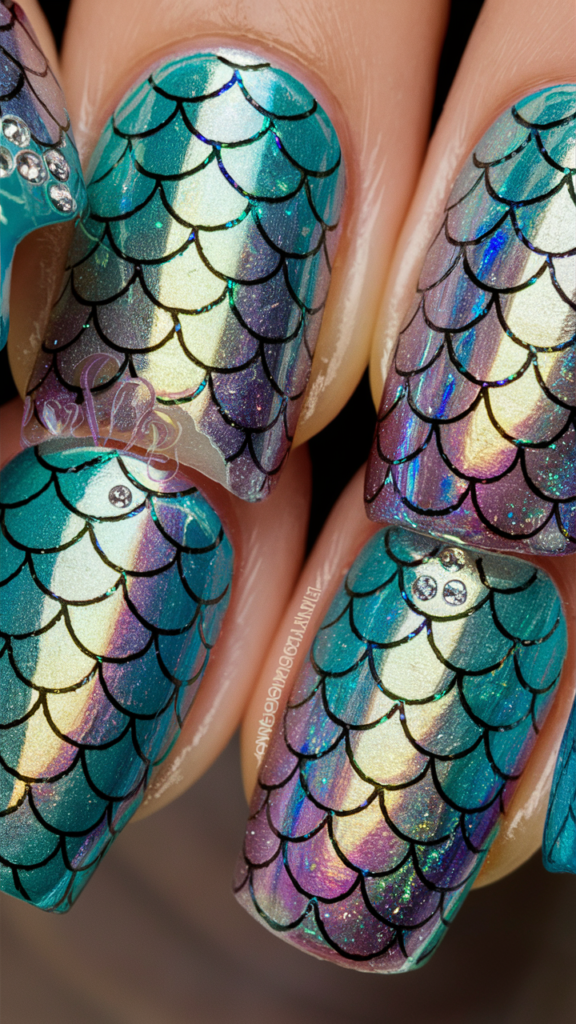
Creating Hyperrealistic Mermaid Scales
Mermaid scales are a popular nail design that brings a touch of fantasy to your fingertips.
To create hyperrealistic mermaid scales, start with an iridescent base that captures the shimmering effect of a mermaid’s tail.
Choose shades of teal, purple, and silver, as these colors work well together to create a mystical, underwater look.
Using a fine brush or a stencil, paint overlapping scale patterns on the nails, ensuring each scale is uniform in size and shape.
The scales should have a slight curve to them, mimicking the natural shape of a mermaid’s tail.
To achieve a realistic effect, layer different shades of polish, adding highlights and shadows to create depth and dimension.
Using Teal, Purple, And Silver For Holographic Effects
The key to creating a stunning Mermaid Scales design is the use of holographic effects.
Choose polishes with a holographic or duochrome finish, as these will catch the light and change color depending on the angle.
Teal, purple, and silver are ideal choices for this look, as they create a beautiful, shimmering effect that is reminiscent of a mermaid’s tail.
Apply the holographic polish over the scale pattern, allowing the colors to blend and shift as the light hits them.
The result should be a mesmerizing, iridescent effect that captures the magical allure of mermaids.
For added depth, consider adding a layer of clear polish with holographic glitter, which will enhance the overall shimmer and sparkle of the design.
Adding Rhinestones For Extra Sparkle
To take your Mermaid Scales nails to the next level, add rhinestones for extra sparkle.
Place small rhinestones at the center of each scale or along the edges to create a dazzling, three-dimensional effect.
The rhinestones should be in shades that complement the iridescent polish, such as clear, blue, or purple.
Use a clear adhesive to secure the rhinestones in place, ensuring they are evenly spaced and firmly attached.
The rhinestones will catch the light, adding a touch of glamour to your Mermaid Scales nails.
Finish with a clear top coat to seal in the design and add a glossy finish.
The result is a set of nails that are both enchanting and eye-catching, perfect for anyone who loves the fantasy world of mermaids.
6. Nautical Stripes: Classic Sailor-Inspired Nails
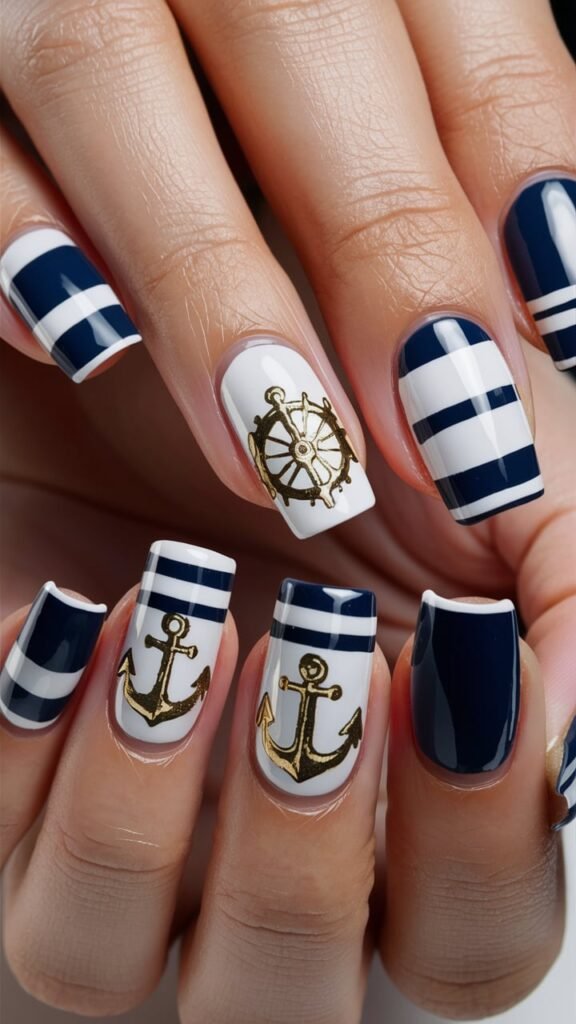
Crafting Crisp Navy And White Stripes
Nautical stripes are a classic nail design that evokes the timeless elegance of a sailor’s uniform.
To create this look, start with a navy blue base, which serves as the perfect backdrop for the crisp white stripes.
The contrast between the navy and white creates a clean, sophisticated look that is both stylish and versatile.
Using a striping brush or nail tape, carefully paint thin white stripes across each nail.
The stripes should be evenly spaced and uniform in thickness, creating a neat, polished appearance.
If you prefer a bolder look, you can opt for thicker stripes, but make sure to maintain the balance between the navy and white colors.
Detailing With Gold Anchors And Ship Wheels
To add a touch of nautical charm to your stripes, consider detailing one or two accent nails with gold anchors or ship wheels.
These small, intricate designs add a playful element to the classic stripes, making your nails stand out.
Use a fine brush and gold polish to paint the anchors or ship wheels, ensuring the details are sharp and precise.
You can also add gold dots or lines to the stripes for a more decorative effect.
The gold accents should be subtle yet eye-catching, adding a touch of luxury to the overall design.
The combination of navy, white, and gold creates a timeless nautical look that is perfect for any occasion.
Achieving A Smooth, Glossy Finish
To complete your Nautical Stripes manicure, apply a clear, glossy top coat to seal in the design and give your nails a smooth, shiny finish.
The top coat not only enhances the colors and details of the design but also protects the polish from chipping and fading.
For an extra high-gloss finish, consider applying a second layer of top coat once the first has dried.
The result should be a set of nails that are sleek, polished, and ready to set sail.
The classic combination of navy, white, and gold, combined with the crisp stripes and nautical details, creates a sophisticated look that never goes out of style.
7. Beach Sand Texture: Bringing The Shore To Your Nails
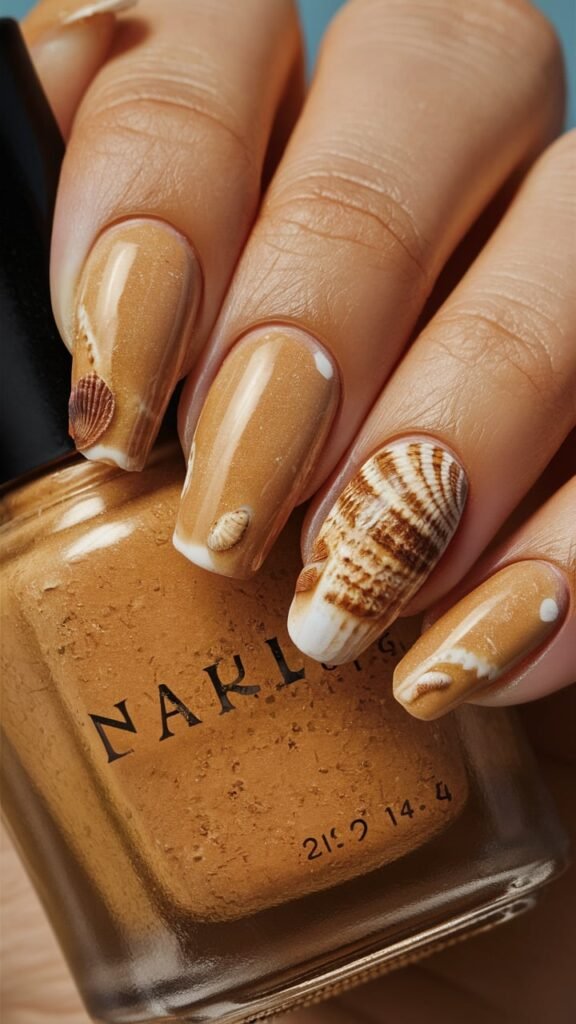
Mimicking The Look And Feel Of Beach Sand
If you want to bring the beach to your nails, a sand texture manicure is the perfect choice.
This design mimics the look and feel of actual beach sand, creating a tactile experience that is both unique and stylish.
To achieve this look, start with a sandy beige polish that serves as the base for the textured design.
Once the base coat is dry, apply a textured top coat that contains fine particles to mimic the gritty feel of sand.
The texture should be subtle enough to be wearable but still noticeable to the touch.
The result is a realistic sand texture that captures the essence of the beach and adds a fun, tactile element to your nails.
Embedding Tiny Seashells And Pebbles
To enhance the beachy feel of your sand texture nails, consider embedding tiny seashells and pebbles into the design.
You can use small, flat-backed seashells or pebble-shaped nail decorations, which can be placed on one or two accent nails.
Arrange the seashells and pebbles in a random pattern, as if they were naturally scattered across the sand.
Use a clear adhesive to secure the decorations in place, ensuring they are firmly attached to the textured base.
The combination of the sand texture with the embedded seashells and pebbles creates a realistic beach scene on your nails.
The result is a set of nails that look and feel like a day at the beach.
Tips For A Realistic But Smooth Texture
While the sand texture is meant to be tactile, it’s important to strike a balance between realism and wearability.
To achieve a realistic texture without making your nails too rough, apply a thin layer of the textured top coat, followed by a clear top coat to smooth out the surface.
The clear top coat will help to seal in the texture while still allowing the sandy effect to show through.
This will create a more wearable version of the sand texture, making it comfortable for everyday wear.
The key is to keep the texture subtle, allowing the design to be both visually appealing and practical.
The result is a set of nails that capture the essence of the beach without sacrificing comfort or style.
8. Starfish Charm: Adding 3D Beach Elements
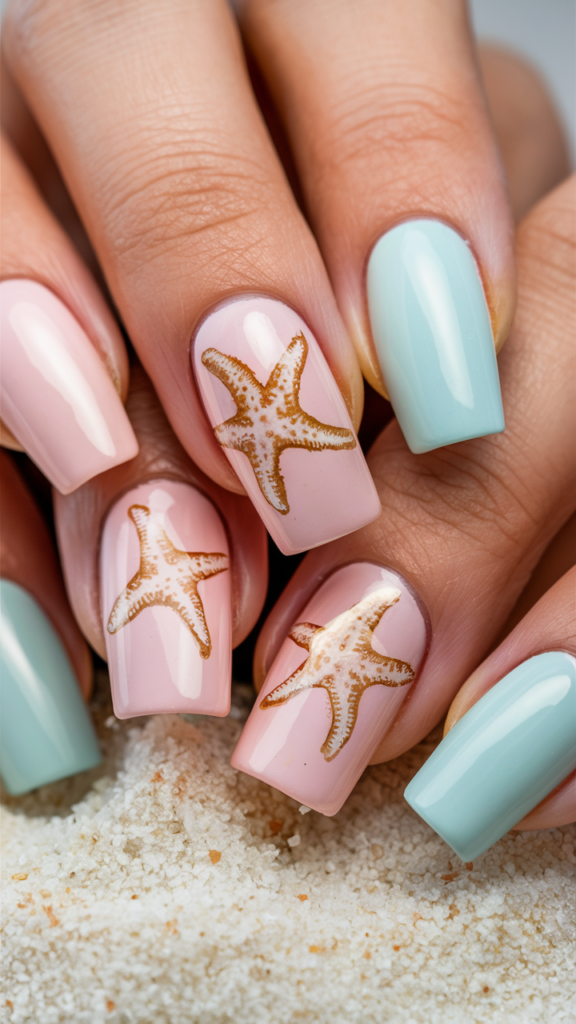
Creating Pastel-Colored Nails With 3D Charms
Starfish are a symbol of the ocean, and incorporating them into your nail design adds a touch of whimsy and charm.
To create a Starfish Charm manicure, start with a pastel-colored base that complements the soft, beachy theme.
Choose colors like soft pinks, blues, and greens, which evoke the serene beauty of the sea.
Once the base color is dry, it’s time to add the 3D starfish charms.
These charms should be small and delicate, with lifelike details that make them look like they’ve just washed up on shore.
Place the charms on one or two accent nails, using a clear adhesive to secure them in place.
The result is a set of nails that are both playful and elegant, perfect for a day at the beach.
Detailing Hyperrealistic Starfish
To enhance the realism of the starfish charms, consider adding tiny details to the design.
Use a fine brush to paint small dots or lines on the starfish, mimicking the texture and appearance of real starfish.
You can also add a touch of glitter or shimmer to the starfish, giving them a sparkling effect that catches the light.
The key is to keep the details subtle, allowing the starfish to remain the focal point of the design.
The result should be a set of nails that look like a miniature beach scene, with hyperrealistic starfish that seem to come to life.
Incorporating Soft White Sand For A Beachy Effect
To complete the Starfish Charm manicure, consider adding a soft white sand effect to the base of the nails.
This can be achieved by applying a light layer of white glitter or textured polish to the tips of the nails, creating a sandy, beach-like appearance.
The white sand effect should be subtle, adding just enough texture to enhance the overall beachy feel of the design.
Finish with a clear top coat to seal in the design and give your nails a smooth, glossy finish.
The result is a set of nails that are both stylish and whimsical, with a touch of beachy charm that makes them perfect for summer.
9. Coral Reef Delight: Vibrant Underwater Designs
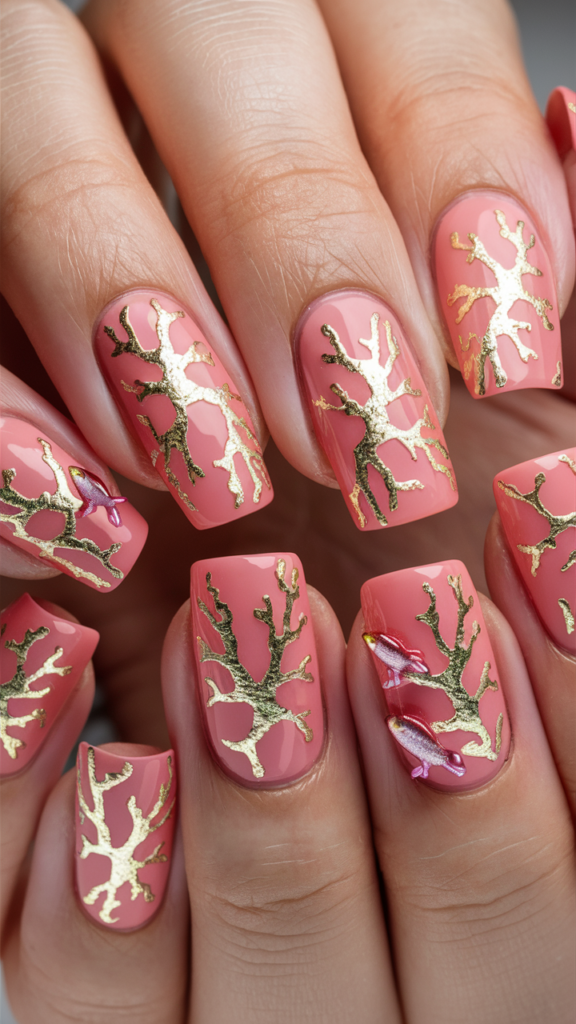
Using Coral Pink As A Base
Coral reefs are some of the most vibrant and diverse ecosystems on the planet, and capturing their beauty on your nails can result in a stunning design.
To create a Coral Reef Delight manicure, start with a coral pink base that reflects the warm, vibrant colors of the reef.
Coral pink is a versatile shade that complements a wide range of skin tones, making it the perfect choice for this design.
Apply two to three coats of coral pink polish, ensuring full coverage and a smooth finish.
The coral pink base will serve as the backdrop for the intricate designs that will bring the reef to life on your nails.
Painting Gold And White Coral Branch Patterns
With your coral pink base in place, it’s time to add the coral branch patterns that will make your nails stand out.
Using a fine brush and gold or white polish, paint delicate coral branch patterns on one or two accent nails.
The branches should be thin and intricate, with multiple offshoots that mimic the natural growth patterns of coral.
The gold and white colors create a beautiful contrast against the coral pink base, adding depth and dimension to the design.
For added realism, consider layering different shades of gold or white to create highlights and shadows within the branches.
The result should be a set of nails that capture the intricate beauty of a coral reef.
Adding Tiny Fish For A Realistic Reef Scene
To complete the Coral Reef Delight manicure, add tiny fish to the design to create a realistic underwater scene.
Use a fine brush to paint small, colorful fish swimming among the coral branches.
The fish should be detailed with tiny fins, scales, and eyes, creating a lifelike appearance that adds to the overall vibrancy of the design.
Choose bright, contrasting colors for the fish, such as blues, yellows, and greens, to make them stand out against the coral branches.
The combination of the coral pink base, gold and white coral patterns, and tiny fish creates a dynamic, vibrant reef scene on your nails.
Finish with a clear top coat to seal in the design and add a glossy finish.
10. Underwater Wonderland: Dive Into A Marine Scene
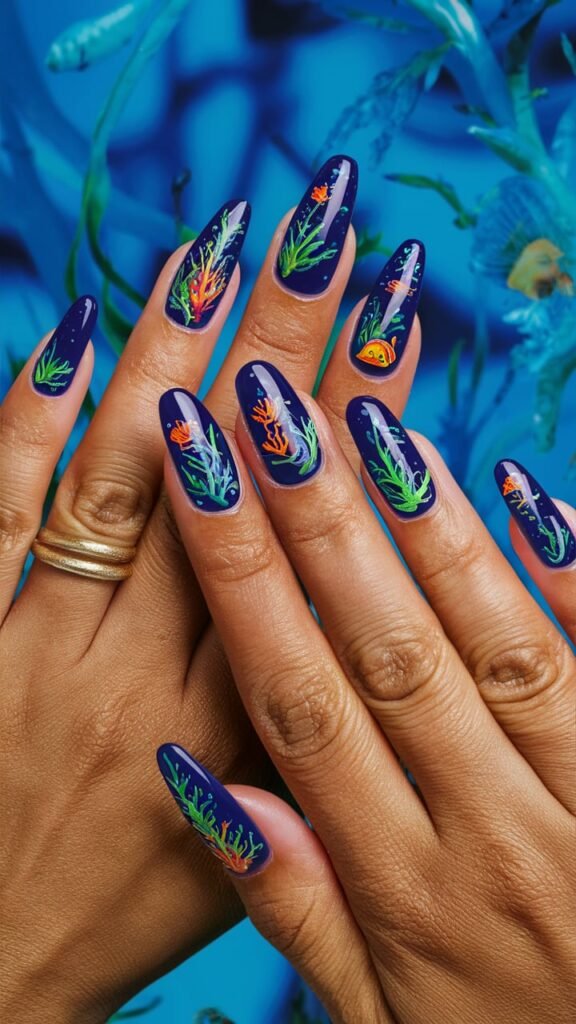
Deep Blue Base: The Perfect Ocean Background
An Underwater Wonderland manicure brings the mysteries of the deep sea to your fingertips.
To create this design, start with a deep blue base that serves as the perfect ocean background.
The deep blue color should be rich and saturated, evoking the depths of the ocean where light barely penetrates.
Apply two to three coats of deep blue polish, ensuring an even, opaque finish.
The deep blue base will create a dramatic backdrop for the intricate marine life designs that will follow.
The key is to choose a blue shade that is dark enough to represent the deep sea but still vibrant enough to catch the eye.
Hand-Painting Coral Reefs And Marine Life
With your deep blue base in place, it’s time to bring the underwater scene to life by hand-painting coral reefs and marine life on your nails.
Use a fine brush to paint colorful coral reefs on one or two accent nails, using shades of pink, orange, and red for the coral.
The reefs should be detailed with multiple branches and layers, creating a sense of depth and complexity.
Next, add marine life such as fish, sea turtles, and seahorses to the design.
The marine creatures should be painted in bright, contrasting colors that stand out against the deep blue background.
Pay attention to the details, adding fine lines and shading to create realistic, three-dimensional creatures that appear to be swimming through the underwater world.
Creating A Wet Look With A Jelly-Like Finish
To enhance the underwater effect of your nails, finish with a jelly-like top coat that gives the design a wet, glossy look.
The jelly-like finish should be slightly thicker than a standard top coat, creating a smooth, glassy surface that mimics the look of water.
This finish not only adds to the realism of the design but also helps to protect the intricate details of the coral reefs and marine life.
The result is a set of nails that look as if they’ve been dipped into the ocean, with a wet, watery finish that brings the Underwater Wonderland to life.
The combination of the deep blue base, detailed marine life, and glossy jelly-like finish creates a mesmerizing, aquatic manicure that is sure to turn heads.
11. Minimalist Beach: Simple Yet Striking Nail Art
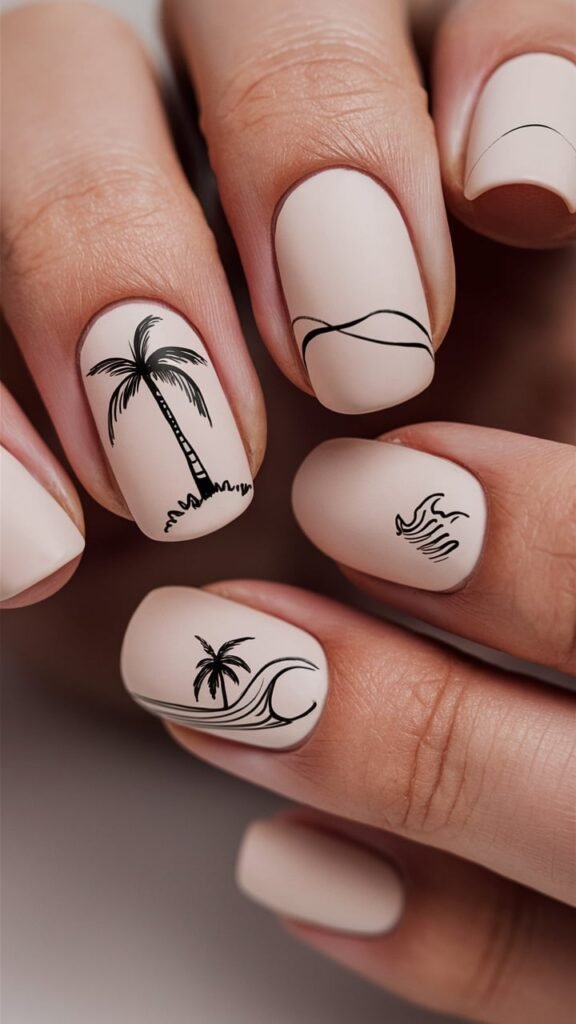
Choosing Soft Neutrals For A Minimalist Look
For those who prefer a more understated approach to beach nail art, a Minimalist Beach manicure offers a simple yet striking alternative.
Start with a soft neutral base that complements your skin tone, such as beige, taupe, or light gray.
The neutral color provides a clean, elegant canvas that allows the minimalist designs to shine.
Apply two to three coats of the neutral polish, ensuring full coverage and a smooth finish.
The key to a successful minimalist manicure is keeping the base simple and uncluttered, allowing the subtle details to take center stage.
Drawing Fine Line Palm Trees And Waves
With your neutral base in place, it’s time to add the minimalist beach designs that will elevate your manicure.
Using a fine brush and black polish, draw delicate palm trees on one or two accent nails.
The palm trees should be simple and understated, with thin trunks and a few fronds swaying in the breeze.
For a cohesive look, add fine line waves to another nail, creating a sense of movement and flow.
The waves should be drawn with soft, curving lines that mimic the gentle ebb and flow of the ocean.
The combination of the palm trees and waves creates a balanced, minimalist design that captures the essence of the beach without being overly detailed.
Matte Finish: Enhancing The Minimalist Aesthetic
To enhance the minimalist aesthetic of your nails, finish with a matte top coat.
The matte finish adds a soft, velvety texture to the nails, giving them a modern, sophisticated look.
The matte effect also helps to highlight the fine line designs, making them stand out against the neutral base.
The result is a set of nails that are simple, elegant, and perfect for those who appreciate minimalist design.
The combination of the soft neutrals, fine line details, and matte finish creates a chic, understated look that is both timeless and stylish.
12. Sun-Kissed Glow: Nails With A Warm, Radiant Finish
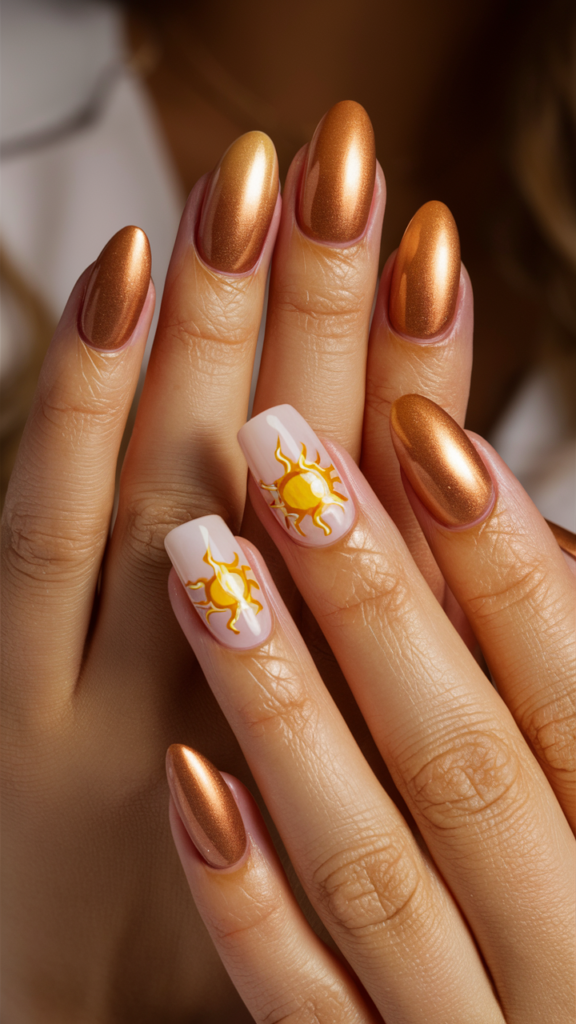
Ombre Techniques For A Golden Glow
Sun-kissed nails capture the warmth and radiance of a sunny day at the beach.
To create this look, start with an ombre effect that transitions from a warm golden bronze at the tips to a soft peach at the base.
The ombre technique should be smooth and seamless, mimicking the gradual fade of sunlight on a hot summer day.
Use a makeup sponge or gradient brush to blend the colors, dabbing gently to create a flawless transition.
The golden bronze at the tips adds a touch of warmth, while the peach at the base softens the overall look.
The result is a set of nails that glow with the warmth of the sun.
Detailing A Sun Accent Nail
To enhance the sun-kissed effect of your nails, add a sun accent to one or two nails.
Using a fine brush and gold polish, paint a small sun near the cuticle or at the center of the nail.
The sun should be simple and stylized, with radiating rays that extend outward.
For added dimension, consider adding a touch of shimmer or glitter to the sun, giving it a radiant, glowing effect.
The sun accent adds a focal point to the design, drawing attention to the warm, golden tones of the ombre base.
Adding A Sun-Kissed Shimmer
To complete the Sun-Kissed Glow manicure, add a touch of shimmer to the nails for a radiant, sun-kissed finish.
Use a sheer shimmer polish or a fine glitter top coat, applying it sparingly to the tips of the nails or over the entire nail for a more dramatic effect.
The shimmer should be subtle, adding just enough sparkle to catch the light and enhance the warmth of the design.
Finish with a clear top coat to seal in the design and give your nails a smooth, glossy finish.
The result is a set of nails that capture the warmth and radiance of the sun, perfect for summer.
13. Seaside Sparkle: Glittery And Beachy
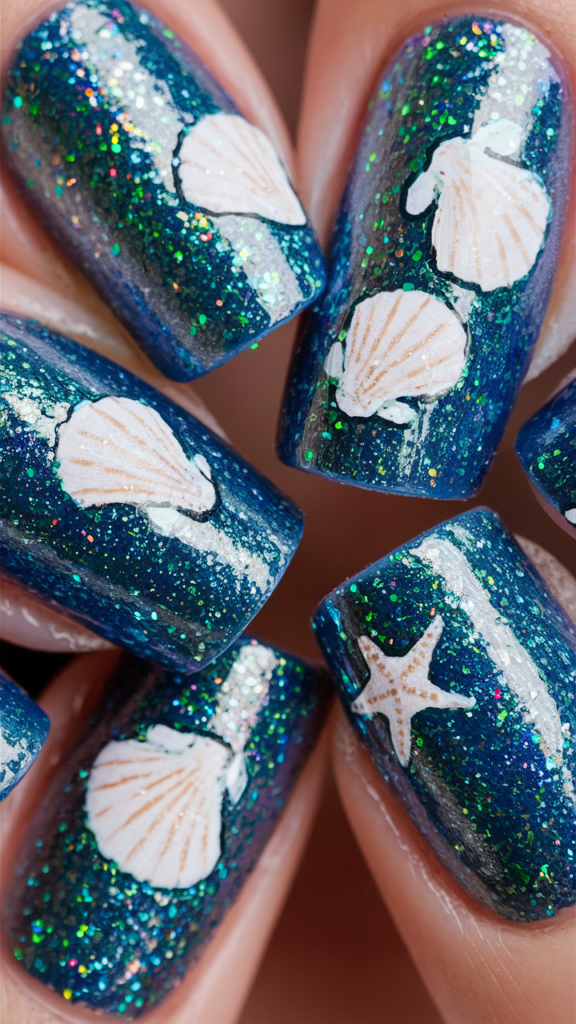
Choosing The Right Shade Of Blue For Oceanic Nails
Seaside Sparkle nails are all about capturing the shimmering beauty of the ocean on your fingertips.
To create this look, start with a blue base that reflects the color of the sea.
Choose a shade of blue that is vibrant and slightly translucent, mimicking the depth and clarity of the ocean water.
Apply two to three coats of blue polish, ensuring an even, opaque finish.
The blue base will serve as the canvas for the glitter and seashell details that will bring the design to life.
The key is to choose a shade that is rich and saturated, allowing the glitter to stand out against the blue background.
Painting Tiny Seashells And Starfish
With your blue base in place, it’s time to add the tiny seashells and starfish that will create the seaside theme.
Using a fine brush and white or pastel polish, paint small seashells and starfish on one or two accent nails.
The seashells should be detailed with fine lines and curves, mimicking the natural shapes of real shells.
The starfish can be painted as simple, five-pointed shapes, with tiny dots or lines added for texture.
The combination of the seashells and starfish with the blue base creates a realistic beach scene on your nails, bringing the seaside to life in a small, delicate design.
Adding Fine Glitter For A Sparkling Finish
To complete the Seaside Sparkle manicure, add a fine glitter top coat to the nails for a shimmering, beachy finish.
The glitter should be subtle and evenly distributed, adding a touch of sparkle without overpowering the design.
Focus the glitter on the tips of the nails or around the seashells and starfish to create a sunlit, sparkling effect.
Finish with a clear top coat to seal in the design and give your nails a smooth, glossy finish.
The result is a set of nails that capture the sparkle and beauty of the seaside, perfect for anyone who loves the ocean and the beach.
14. Beach Ball Fun: Playful, Multicolored Nails
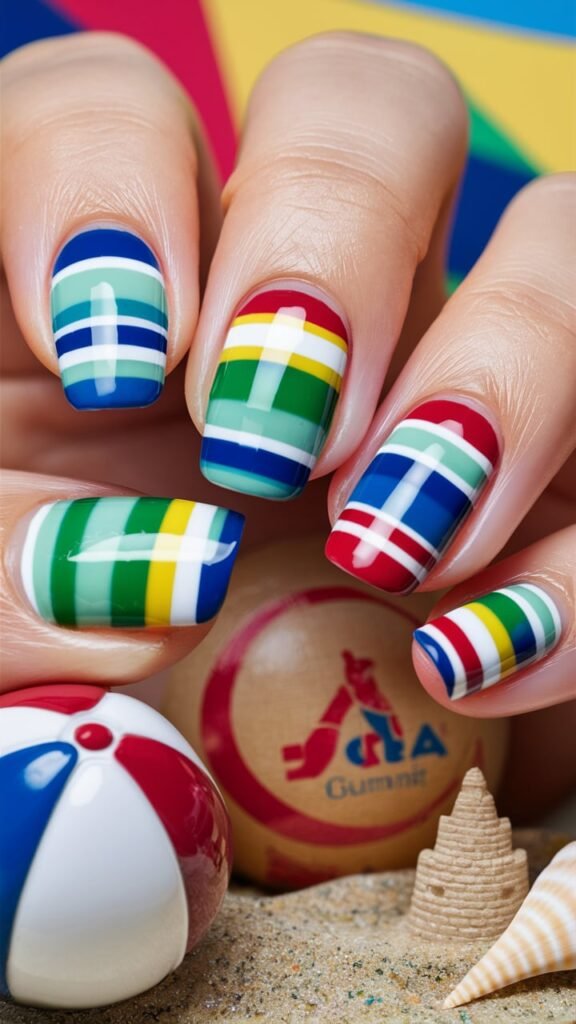
Creating Vibrant, Multicolored Stripes
Beach Ball Fun nails are a playful and colorful design that captures the joy and energy of a day at the beach.
To create this look, start with a white base that serves as the canvas for the multicolored stripes.
The white base provides a clean, bright backdrop that allows the colors to pop.
Using a striping brush or nail tape, paint vibrant, multicolored stripes across each nail, mimicking the look of a classic beach ball.
The stripes should be bold and evenly spaced, with colors like red, yellow, blue, and green.
The key is to use bright, saturated colors that evoke the fun and excitement of summer.
Tips For Mimicking A Beach Ball Look
To achieve a realistic beach ball look, focus on the arrangement and width of the stripes.
The stripes should be evenly spaced and consistent in width, creating a neat, polished appearance.
If you’re feeling creative, consider adding a small white circle at the center of one or two nails, mimicking the top of a beach ball.
This small detail adds an extra layer of realism to the design, making your nails look like miniature beach balls.
The combination of the bright stripes and the white base creates a fun, summery look that is perfect for a day at the beach or a pool party.
Glossy Finish For A Fun, Summery Vibe
To complete the Beach Ball Fun manicure, apply a clear, glossy top coat to seal in the design and give your nails a smooth, shiny finish.
The glossy finish enhances the bright colors and adds a polished, professional look to the design.
For an extra high-gloss effect, consider applying a second layer of top coat once the first has dried.
The result is a set of nails that are playful, vibrant, and full of summer fun.
The combination of the multicolored stripes and glossy finish creates a cheerful, eye-catching design that is sure to put you in a beachy mood.
15. Tropical Fruit: Fresh And Lively Nail Designs
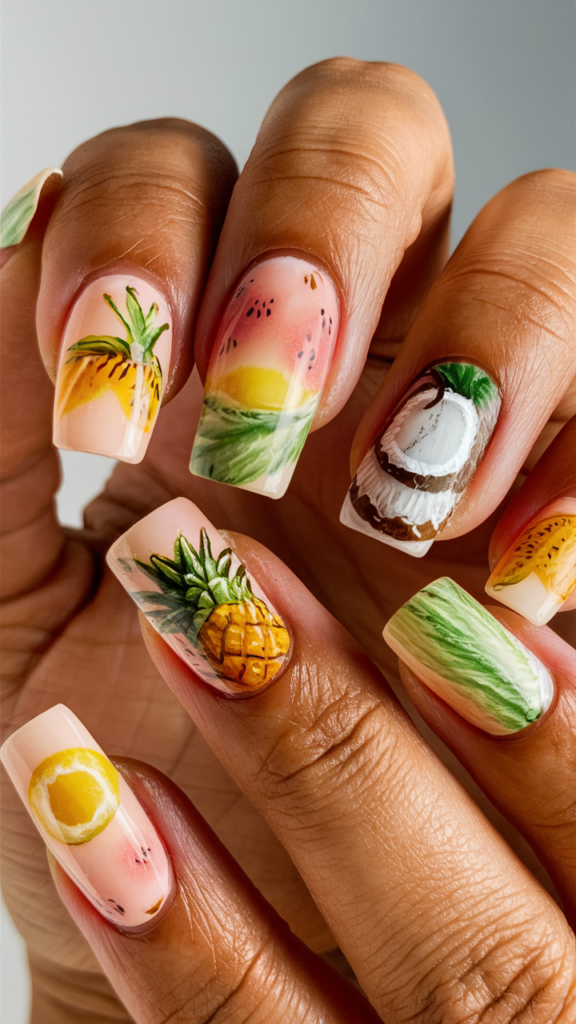
Choosing Bright Colors For Fruit-Inspired Nails
Tropical fruit nails are a fun and fresh way to bring the flavors of the tropics to your fingertips.
To create this look, start by choosing bright, vibrant colors that reflect the juicy, mouthwatering appearance of tropical fruits.
Think bold yellows, oranges, pinks, and greens, which evoke the colors of pineapples, mangoes, and watermelons.
Apply a different color to each nail, creating a lively, colorful palette that sets the stage for the fruit designs.
The key is to embrace the brightness of the colors, allowing them to take center stage in the design.
These bold colors will serve as the backdrop for the intricate fruit designs that will follow.
Hand-Painting Pineapples, Coconuts, And Watermelons
With your bright base in place, it’s time to add the fruit designs that will bring your nails to life.
Using a fine brush and complementary colors, hand-paint small pineapples, coconuts, and watermelons on one or two accent nails.
The pineapples should be detailed with small, overlapping scales in shades of yellow and green, while the coconuts can be painted as brown ovals with a small white interior.
For the watermelons, paint a crescent shape with a green rind and a pink or red interior, adding tiny black seeds for realism.
The combination of the fruit designs with the bright base colors creates a fresh, lively look that is perfect for summer.
Achieving Hyperrealistic Fruit Textures
To enhance the realism of the fruit designs, pay attention to the textures and details.
Use fine lines and shading to create depth and dimension, making the fruits appear more lifelike.
For example, add small dots or lines to the pineapple scales, or use a tiny brush to create the rough texture of a coconut shell.
The goal is to make the fruits look as realistic as possible, so take your time with the details.
The result should be a set of nails that look almost good enough to eat, with hyperrealistic fruit designs that capture the freshness and vibrancy of tropical fruits.
16. Marine Life: A Teal Underwater Adventure
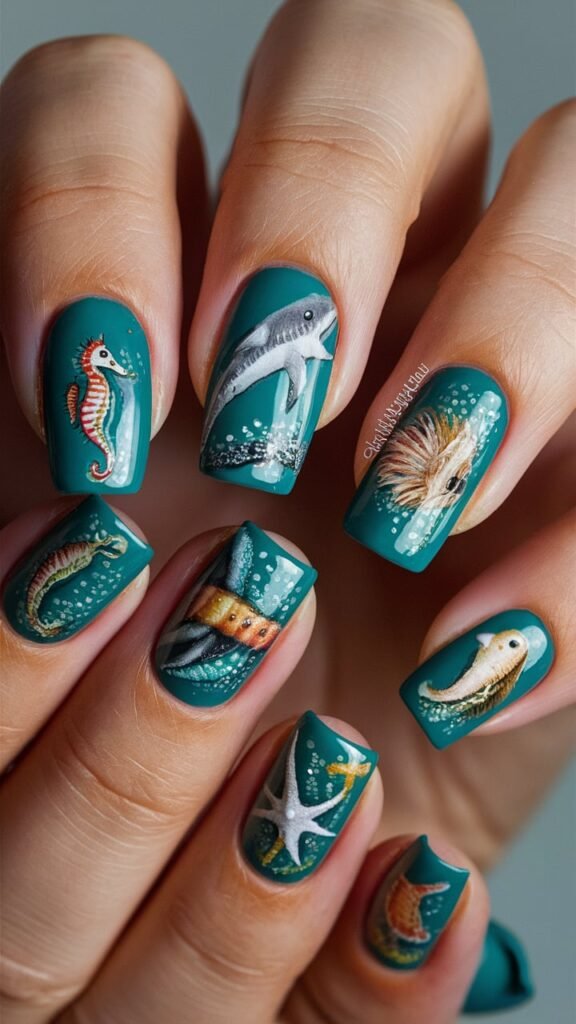
Teal Base: The Perfect Ocean Color
Marine Life nails are a beautiful way to bring the wonders of the ocean to your fingertips.
To create this look, start with a teal base that captures the vibrant, blue-green color of the sea.
Teal is the perfect choice for this design, as it evokes the depth and richness of ocean water while providing a stunning backdrop for the marine life designs.
Apply two to three coats of teal polish, ensuring full coverage and a smooth, even finish.
The teal base will create a serene, aquatic atmosphere that sets the stage for the detailed marine life designs that will follow.
Painting Hyperrealistic Marine Creatures
With your teal base in place, it’s time to add the marine creatures that will bring your nails to life.
Using a fine brush and complementary colors, hand-paint small fish, sea turtles, and seahorses on one or two accent nails.
The marine creatures should be detailed with fine lines and shading, creating a realistic, three-dimensional effect.
For the fish, use bright, contrasting colors like orange, yellow, and blue, and add small scales and fins for added realism.
The sea turtles can be painted with a brown or green shell, and the seahorses should be delicate and intricately detailed.
The goal is to create a vibrant, underwater scene that captures the beauty and diversity of marine life.
Creating A Vibrant Underwater Scene
To complete the Marine Life manicure, consider adding additional elements to create a more dynamic underwater scene.
Use a fine brush to paint small bubbles or coral reefs around the marine creatures, adding depth and movement to the design.
The bubbles can be painted as small, translucent circles, while the coral reefs can be created using bright colors like pink, orange, and red.
The combination of the teal base, detailed marine creatures, and additional underwater elements creates a vibrant, lively scene that brings the ocean to your nails.
Finish with a clear top coat to seal in the design and add a glossy finish.
The result is a set of nails that are both beautiful and unique, capturing the magic of the ocean.
17. Pearl Lagoon: Iridescent And Tranquil
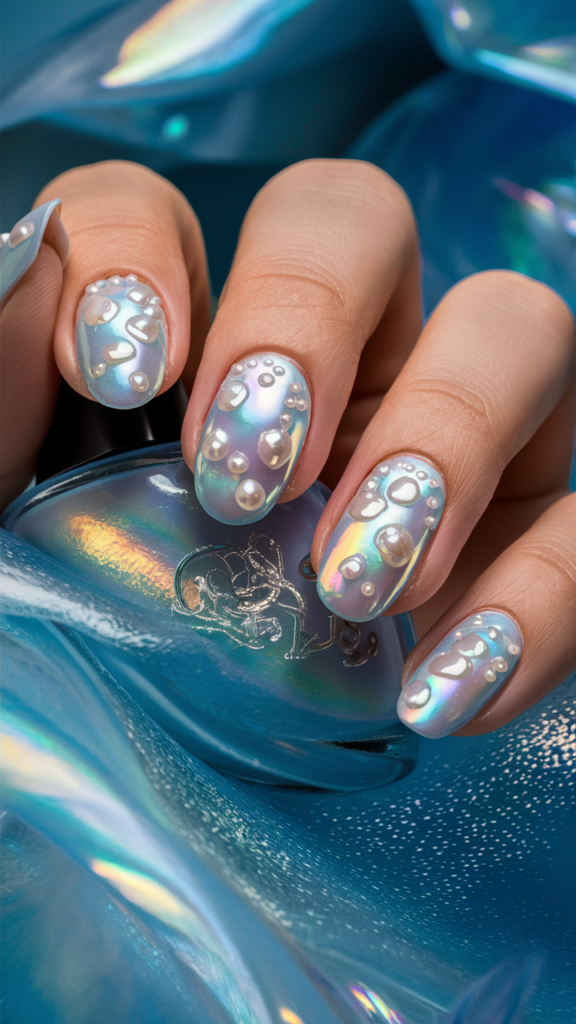
Soft Blue Base For A Calm, Lagoon-Like Feel
Pearl Lagoon nails are a serene and elegant design that captures the tranquil beauty of a hidden lagoon.
To create this look, start with a soft blue base that evokes the calm, soothing waters of a lagoon.
The soft blue color should be light and airy, creating a peaceful backdrop for the pearl accents that will follow.
Apply two to three coats of soft blue polish, ensuring full coverage and a smooth, even finish.
The soft blue base will create a serene, calming effect that sets the stage for the iridescent pearl details that will bring the design to life.
Embedding Tiny Pearls For An Opalescent Shine
With your soft blue base in place, it’s time to add the tiny pearls that will give your nails an opalescent shine.
Use a clear adhesive to secure small, flat-backed pearls to one or two accent nails.
The pearls should be evenly spaced and placed in a random pattern, creating a natural, organic look that mimics the appearance of pearls scattered across a lagoon.
For added depth and dimension, consider using pearls in different sizes, placing smaller pearls near the cuticle and larger pearls towards the tips of the nails.
The combination of the soft blue base and the opalescent pearls creates a serene, tranquil look that is both elegant and sophisticated.
Achieving A Tranquil, Hidden Lagoon Look
To complete the Pearl Lagoon manicure, consider adding additional elements to enhance the tranquil, hidden lagoon effect.
Use a fine brush to paint small, delicate waves or ripples around the pearls, creating a sense of movement and flow.
The waves should be soft and subtle, adding just enough detail to enhance the overall design without overpowering the pearls.
Finish with a clear, glossy top coat to seal in the design and give your nails a smooth, shiny finish.
The result is a set of nails that capture the peaceful beauty of a hidden lagoon, with an iridescent, opalescent shine that adds a touch of luxury and elegance.
18. Message In A Bottle: Unique And Creative Nail Art
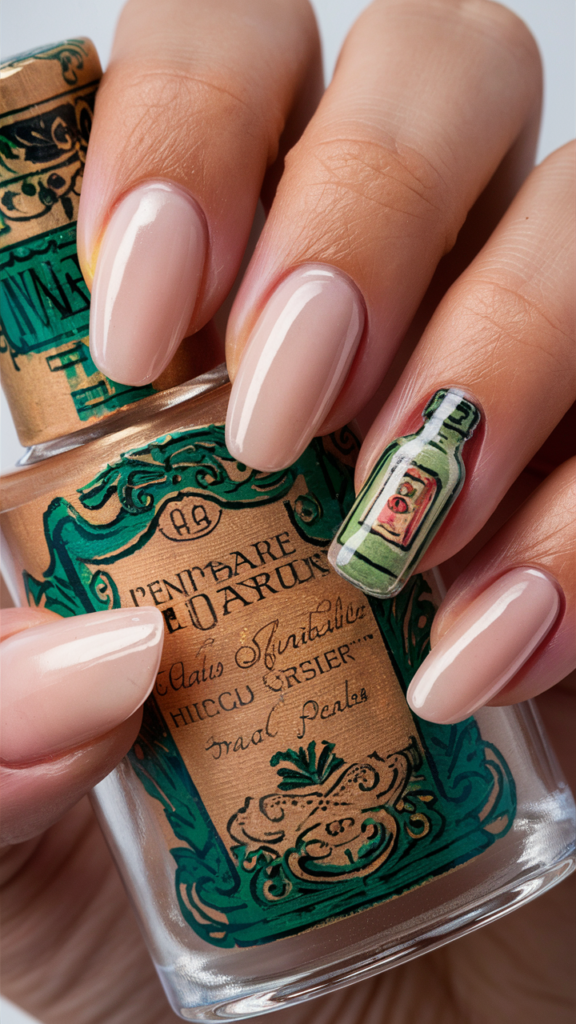
Nude Base: The Foundation For Realistic Designs
Message In A Bottle nails are a unique and creative design that captures the mystery and romance of a message found on the beach.
To create this look, start with a nude base that provides a clean, neutral canvas for the intricate designs that will follow.
The nude base should be soft and subtle, allowing the details of the message and bottle to stand out.
Apply two to three coats of nude polish, ensuring full coverage and a smooth, even finish.
The nude base will create a foundation that enhances the realism of the message and bottle designs, making them appear as if they are floating on the nails.
Creating Hyperrealistic Rolled-Up Paper Designs
With your nude base in place, it’s time to add the hyperrealistic rolled-up paper designs that will bring your nails to life.
Using a fine brush and a light brown or beige polish, paint small rolled-up paper designs on one or two accent nails.
The paper should be detailed with fine lines and shading, creating a realistic, three-dimensional effect.
For added realism, consider adding a small piece of string or ribbon painted around the paper, securing it in place.
The rolled-up paper designs should look as if they are tiny messages, waiting to be discovered.
The combination of the nude base and the detailed paper designs creates a unique, mysterious look that captures the essence of a message in a bottle.
Encasing Designs In Clear Gel For A Floating Effect
To enhance the floating effect of the Message In A Bottle manicure, finish with a clear gel top coat that encases the designs and gives them a three-dimensional, floating appearance.
The gel top coat should be slightly thicker than a standard top coat, creating a smooth, glassy surface that adds to the realism of the design.
The clear gel not only enhances the floating effect but also protects the intricate details of the message and bottle designs.
The result is a set of nails that are both unique and captivating, with a mysterious, romantic theme that tells a story.
19. Beach Umbrella: Stripes And Summer Fun
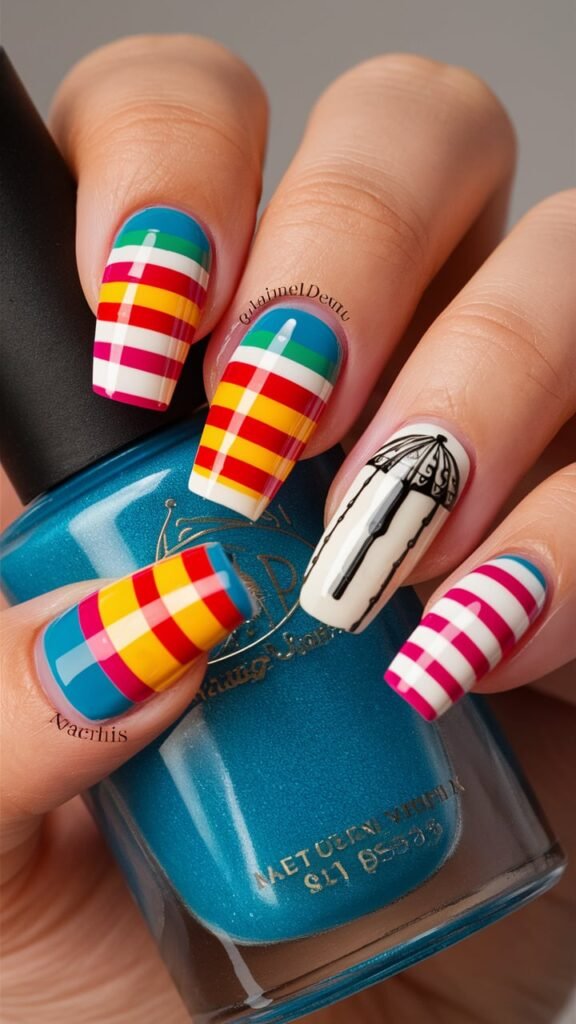
Painting Bright, Colorful Stripes
Beach Umbrella nails are a fun and vibrant design that captures the playful energy of a day at the beach.
To create this look, start with a white base that serves as the canvas for the bright, colorful stripes.
The white base provides a clean, bright backdrop that allows the colors to pop.
Using a striping brush or nail tape, paint bright, colorful stripes across each nail, mimicking the look of a classic beach umbrella.
The stripes should be bold and evenly spaced, with colors like red, yellow, blue, and green.
The key is to use bright, saturated colors that evoke the fun and excitement of summer.
Detailing With Tiny Umbrella Designs
To add a playful touch to your Beach Umbrella manicure, consider detailing one or two accent nails with tiny umbrella designs.
Using a fine brush and complementary colors, paint small umbrellas on the nails, with the stripes forming the canopy and a thin line representing the handle.
The umbrellas should be small and delicate, adding a whimsical element to the design.
The combination of the bright stripes and the tiny umbrella details creates a cheerful, summery look that is perfect for a day at the beach or a pool party.
Glossy Finish For A Summery, Fun Look
To complete the Beach Umbrella manicure, apply a clear, glossy top coat to seal in the design and give your nails a smooth, shiny finish.
The glossy finish enhances the bright colors and adds a polished, professional look to the design.
For an extra high-gloss effect, consider applying a second layer of top coat once the first has dried.
The result is a set of nails that are playful, vibrant, and full of summer fun.
The combination of the bright stripes, tiny umbrella details, and glossy finish creates a cheerful, eye-catching design that is sure to put you in a beachy mood.
20. Flamingo Finesse: Bright And Graceful
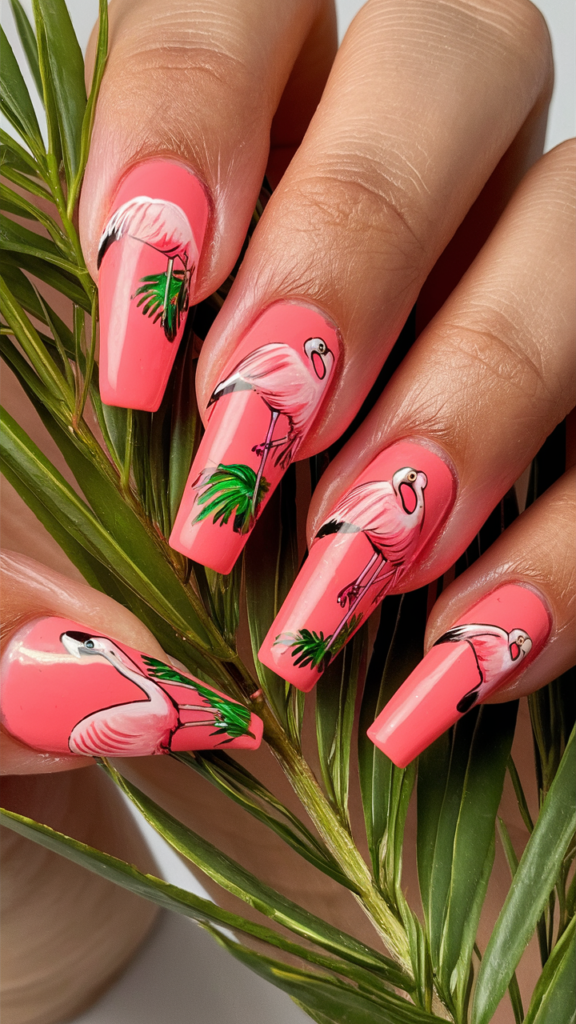
Bright Pink Base: The Perfect Canvas For Flamingos
Flamingo Finesse nails are a bright and elegant design that captures the grace and beauty of these iconic birds.
To create this look, start with a bright pink base that serves as the perfect canvas for the flamingo designs.
The bright pink color should be bold and vibrant, evoking the tropical habitats where flamingos are found.
Apply two to three coats of bright pink polish, ensuring full coverage and a smooth, even finish.
The bright pink base will create a striking backdrop for the detailed flamingo designs that will follow, making them stand out beautifully.
Hand-Painting Hyperrealistic Flamingos
With your bright pink base in place, it’s time to add the hyperrealistic flamingo designs that will bring your nails to life.
Using a fine brush and complementary colors, hand-paint small flamingos on one or two accent nails.
The flamingos should be detailed with fine lines and shading, creating a realistic, three-dimensional effect.
Focus on capturing the elegant curves of the flamingo’s neck and the delicate feathers on its body.
The flamingos should be painted in shades of pink, with accents of white and black for added realism.
The combination of the bright pink base and the detailed flamingo designs creates a graceful, tropical look that is perfect for summer.
Adding Palm Leaves For A Tropical Touch
To enhance the tropical theme of your Flamingo Finesse manicure, consider adding palm leaves to the design.
Use a fine brush and a complementary shade of green to paint small, delicate palm leaves on one or two accent nails.
The palm leaves should be detailed with fine lines, creating a realistic, three-dimensional effect.
The combination of the bright pink base, detailed flamingos, and delicate palm leaves creates a vibrant, tropical scene on your nails.
Finish with a clear top coat to seal in the design and add a glossy finish.
The result is a set of nails that are both elegant and playful, with a touch of tropical charm.
21. Beach Towel Stripes: Summery And Bold
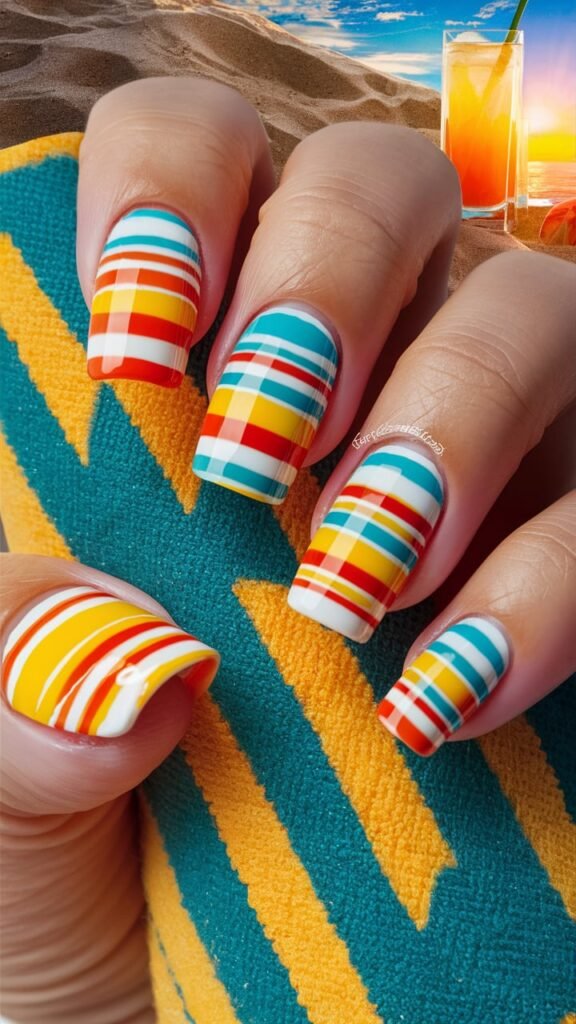
Creating Horizontal Stripes In Vibrant Colors
Beach Towel Stripes nails are a bold and colorful design that captures the fun and energy of a day at the beach.
To create this look, start with a white base that serves as the canvas for the vibrant stripes.
The white base provides a clean, bright backdrop that allows the colors to pop.
Using a striping brush or nail tape, paint horizontal stripes across each nail, mimicking the look of a classic beach towel.
The stripes should be bold and evenly spaced, with colors like red, yellow, blue, and green.
The key is to use bright, saturated colors that evoke the fun and excitement of summer.
Mimicking The Look Of Beach Towels
To achieve a realistic beach towel look, focus on the arrangement and width of the stripes.
The stripes should be evenly spaced and consistent in width, creating a neat, polished appearance.
If you’re feeling creative, consider adding a small white border around the edges of the nails, mimicking the hem of a beach towel.
This small detail adds an extra layer of realism to the design, making your nails look like miniature beach towels.
The combination of the bright stripes and the white base creates a fun, summery look that is perfect for a day at the beach or a pool party.
Achieving A Glossy, Smooth Finish
To complete the Beach Towel Stripes manicure, apply a clear, glossy top coat to seal in the design and give your nails a smooth, shiny finish.
The glossy finish enhances the bright colors and adds a polished, professional look to the design.
For an extra high-gloss effect, consider applying a second layer of top coat once the first has dried.
The result is a set of nails that are bold, vibrant, and full of summer fun.
The combination of the horizontal stripes and glossy finish creates a cheerful, eye-catching design that is sure to put you in a beachy mood.
22. Seashell French Tips: A Classic With A Twist
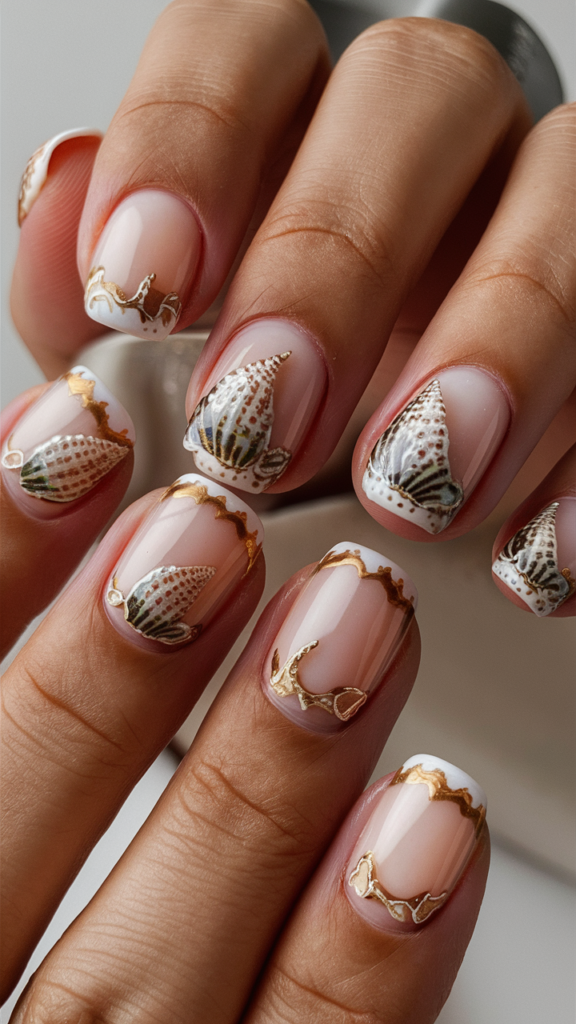
Classic French Tips With Detailed Seashells
Seashell French Tips are a classic nail design with a beachy twist, perfect for those who love the elegance of a French manicure but want to add a touch of seaside charm.
To create this look, start with a soft nude or pale pink base that serves as the canvas for the French tips.
The base should be clean and subtle, allowing the seashell details to stand out.
Using a fine brush and white polish, paint classic French tips on each nail, keeping the tips crisp and even.
Once the French tips are in place, add small, detailed seashells to one or two accent nails.
The seashells should be painted in soft, pastel tones, with fine lines and shading to create a realistic, three-dimensional effect.
Painting Pearly Sheen For Added Elegance
To enhance the elegance of your Seashell French Tips manicure, consider adding a pearly sheen to the seashells.
Use a sheer, pearlescent polish to paint over the seashells, giving them a soft, iridescent glow.
The pearly sheen adds a touch of luxury to the design, making the seashells appear as if they are glistening in the sunlight.
For added dimension, consider layering different shades of pearlescent polish, creating highlights and shadows within the seashells.
The combination of the classic French tips and the detailed, pearly seashells creates a chic, sophisticated look that is perfect for any occasion.
Creating A Subtle, Beachy French Tip Look
To complete the Seashell French Tips manicure, apply a clear top coat to seal in the design and give your nails a smooth, glossy finish.
The top coat enhances the pearly sheen of the seashells and adds a polished, professional look to the design.
For an extra high-gloss effect, consider applying a second layer of top coat once the first has dried.
The result is a set of nails that are both classic and beachy, with a touch of seaside charm that makes them perfect for summer.
The combination of the French tips, detailed seashells, and pearly sheen creates a subtle, elegant look that is sure to turn heads.
23. Surf’s Up: Surfboard-Inspired Nail Art
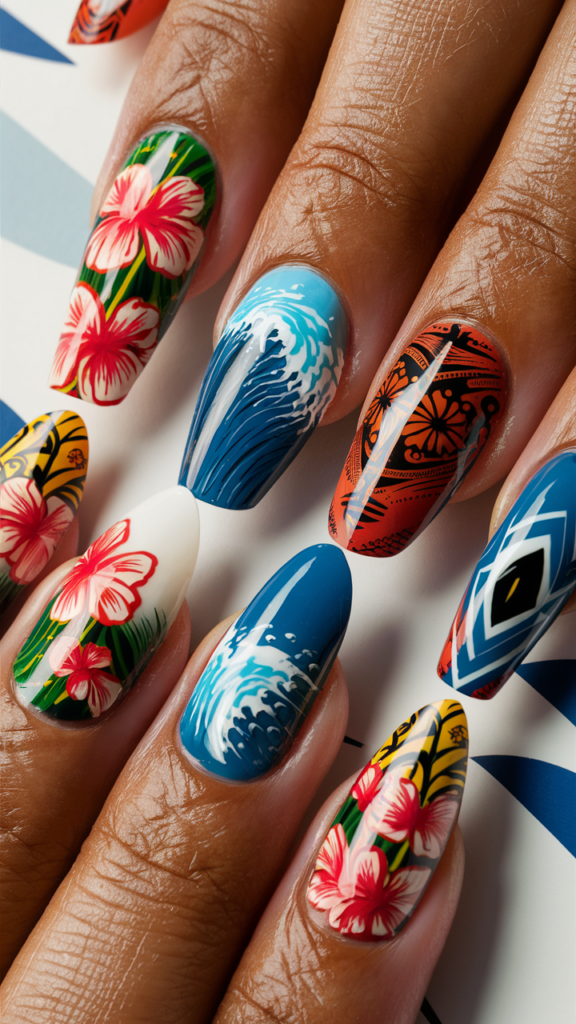
Bright Tropical Colors For A Surfboard Look
Surf’s Up nails are a fun and vibrant design that captures the energy and excitement of catching waves at the beach.
To create this look, start with a white base that serves as the canvas for the surfboard designs.
The white base provides a clean, bright backdrop that allows the colors to pop.
Using a fine brush and bright, tropical colors, paint small surfboards on one or two accent nails.
The surfboards should be detailed with bold, colorful patterns, such as hibiscus flowers, waves, and stripes.
The key is to use bright, saturated colors that evoke the fun and excitement of surfing.
Painting Intricate Hibiscus And Wave Patterns
To enhance the realism of your Surf’s Up manicure, consider adding intricate hibiscus and wave patterns to the surfboards.
Use a fine brush and complementary colors to paint small hibiscus flowers and curling waves on the surfboards.
The hibiscus flowers should be detailed with overlapping petals and a central stamen, while the waves should be painted with soft, curving lines that mimic the motion of the ocean.
The combination of the bright surfboards and the detailed hibiscus and wave patterns creates a dynamic, tropical look that is perfect for summer.
The result should be a set of nails that capture the fun and excitement of a day at the beach, with a touch of surf culture.
Glossy Finish For A Polished Surfboard Effect
To complete the Surf’s Up manicure, apply a clear, glossy top coat to seal in the design and give your nails a smooth, shiny finish.
The glossy finish enhances the bright colors and adds a polished, professional look to the design.
For an extra high-gloss effect, consider applying a second layer of top coat once the first has dried.
The result is a set of nails that are fun, vibrant, and full of summer energy.
The combination of the bright surfboards, intricate patterns, and glossy finish creates a cheerful, eye-catching design that is perfect for anyone who loves the beach and surfing.
24. Driftwood Details: Rustic Beachcomber Nails
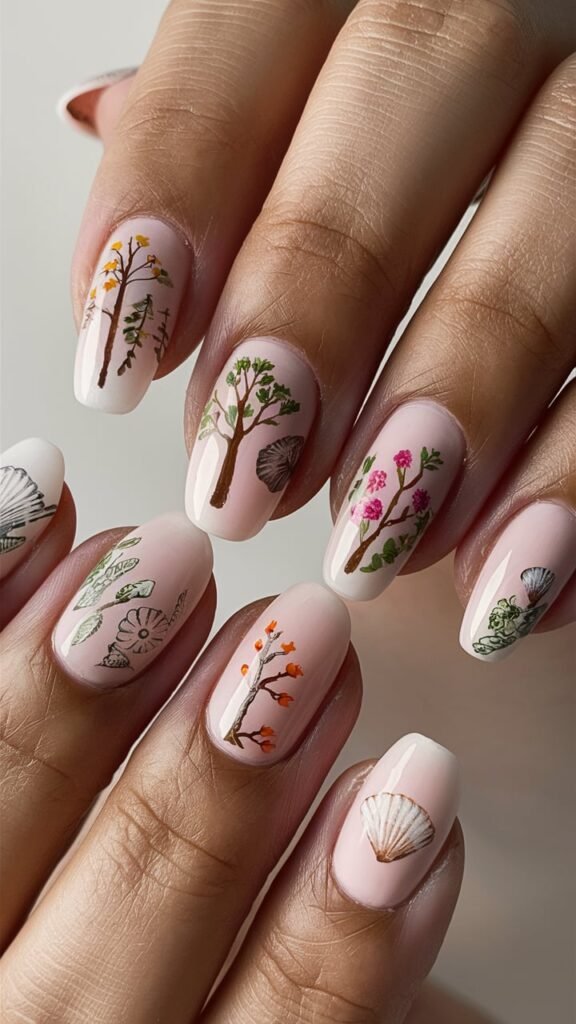
Neutral Base For A Driftwood-Inspired Look
Driftwood Details nails are a rustic and earthy design that captures the natural beauty of driftwood found on the beach.
To create this look, start with a neutral base that evokes the weathered, sun-bleached tones of driftwood.
Choose shades like beige, taupe, or light brown, which complement the natural, rustic theme of the design.
Apply two to three coats of neutral polish, ensuring full coverage and a smooth, even finish.
The neutral base will create a serene, understated backdrop that sets the stage for the detailed driftwood designs that will follow.
Hand-Painting Realistic Driftwood And Seashells
With your neutral base in place, it’s time to add the driftwood designs that will bring your nails to life.
Using a fine brush and complementary colors, hand-paint small pieces of driftwood on one or two accent nails.
The driftwood should be detailed with fine lines and shading, creating a realistic, three-dimensional effect.
For added realism, consider adding small seashells or pebbles to the design, placing them around the driftwood to create a natural, beachcomber scene.
The combination of the neutral base and the detailed driftwood and seashell designs creates a rustic, earthy look that is perfect for those who love the natural beauty of the beach.
Creating A Rustic, Weathered Texture
To enhance the rustic theme of your Driftwood Details manicure, consider adding a textured top coat that mimics the rough, weathered surface of driftwood.
The texture should be subtle, adding just enough roughness to create a tactile, realistic effect.
Apply the textured top coat sparingly, focusing on the driftwood designs to create a natural, weathered look.
Finish with a clear top coat to seal in the design and give your nails a smooth, glossy finish.
The result is a set of nails that are both rustic and elegant, with a touch of beachcomber charm that makes them perfect for summer.
25. Ocean Breeze: Soft And Breezy Nail Designs
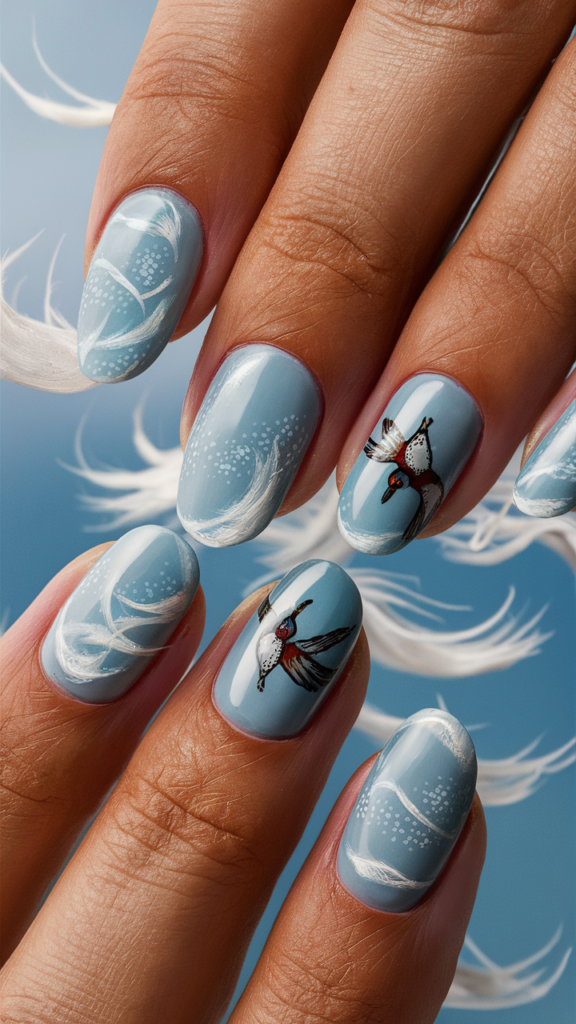
Soft Blue Base For A Light, Airy Look
Ocean Breeze nails are a soft and delicate design that captures the light, airy feel of a gentle sea breeze.
To create this look, start with a soft blue base that evokes the calm, serene colors of the sky and sea.
The soft blue color should be light and airy, creating a peaceful backdrop for the delicate designs that will follow.
Apply two to three coats of soft blue polish, ensuring full coverage and a smooth, even finish.
The soft blue base will create a serene, calming effect that sets the stage for the wispy, breezy designs that will bring the design to life.
Painting Wispy White Clouds And Tiny Birds
With your soft blue base in place, it’s time to add the delicate, breezy designs that will bring your nails to life.
Using a fine brush and white polish, paint small, wispy clouds on one or two accent nails.
The clouds should be soft and fluffy, with gentle curves and edges that mimic the natural shape of clouds in the sky.
To enhance the breezy feel of the design, add tiny birds flying across the sky, using a fine brush and black polish to paint small, simple bird shapes.
The combination of the soft blue base, wispy clouds, and tiny birds creates a light, airy look that is perfect for summer.
Achieving A Breezy, Coastal Feel
To complete the Ocean Breeze manicure, consider adding a touch of shimmer or glitter to the clouds or birds, creating a soft, ethereal glow that enhances the breezy, coastal theme.
The shimmer should be subtle, adding just enough sparkle to catch the light and create a dreamy, coastal effect.
Finish with a clear top coat to seal in the design and give your nails a smooth, glossy finish.
The result is a set of nails that capture the light, breezy feel of a gentle sea breeze, with a touch of coastal charm that makes them perfect for summer.
26. Crashing Waves: Dynamic And Powerful
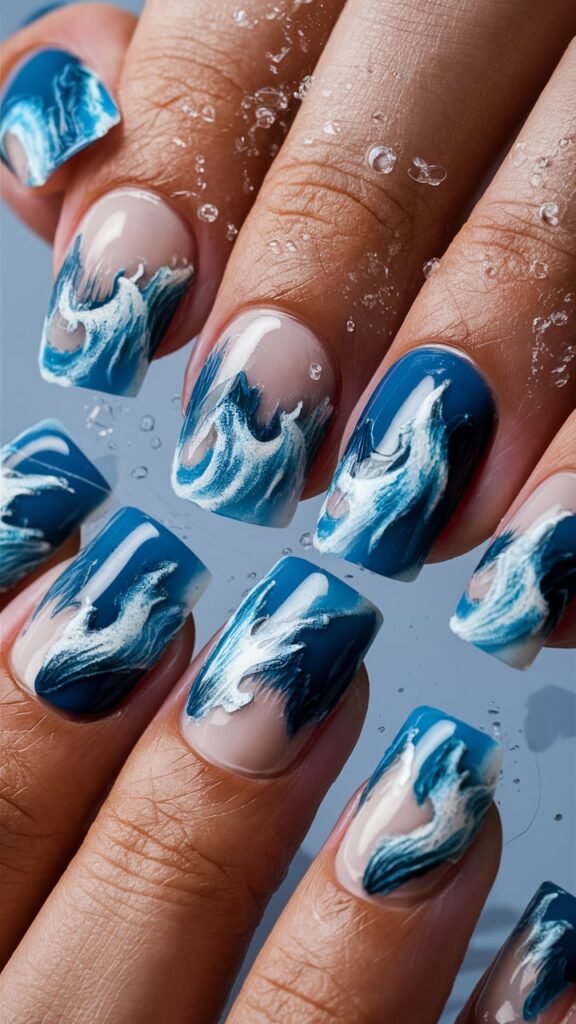
Creating Motion With Detailed Wave Designs
Crashing Waves nails are a dynamic and powerful design that captures the energy and motion of waves crashing against the shore.
To create this look, start with a blue base that serves as the canvas for the wave designs.
The blue base should be rich and vibrant, evoking the deep, swirling waters of the ocean.
Using a fine brush and white polish, paint detailed wave designs on one or two accent nails.
The waves should be dynamic and full of motion, with curling edges and frothy foam that mimics the natural movement of waves.
The key is to create a sense of motion and energy, making the waves appear as if they are crashing right off the nails.
Using Shades Of Blue And White For Realistic Waves
To enhance the realism of the wave designs, use different shades of blue and white to create depth and dimension.
Start with a darker shade of blue at the base of the wave, gradually blending it with lighter shades as you move towards the tips.
Use white polish to create the frothy foam at the edges of the waves, adding fine lines and dots for added texture.
The combination of the different shades of blue and white creates a realistic, three-dimensional effect that makes the waves appear more lifelike.
The result is a set of nails that capture the power and energy of the ocean, with dynamic waves that seem to come to life on your fingertips.
Glossy Top Coat For A Watery, Dynamic Effect
To complete the Crashing Waves manicure, apply a clear, glossy top coat to seal in the design and give your nails a smooth, shiny finish.
The glossy finish enhances the vibrant colors and adds a watery, dynamic effect to the waves, making them appear as if they are moving on the nails.
For an extra high-gloss effect, consider applying a second layer of top coat once the first has dried.
The result is a set of nails that are both powerful and mesmerizing, with a dynamic, watery effect that captures the essence of crashing waves.
27. Seaglass Shimmer: Subtle And Elegant
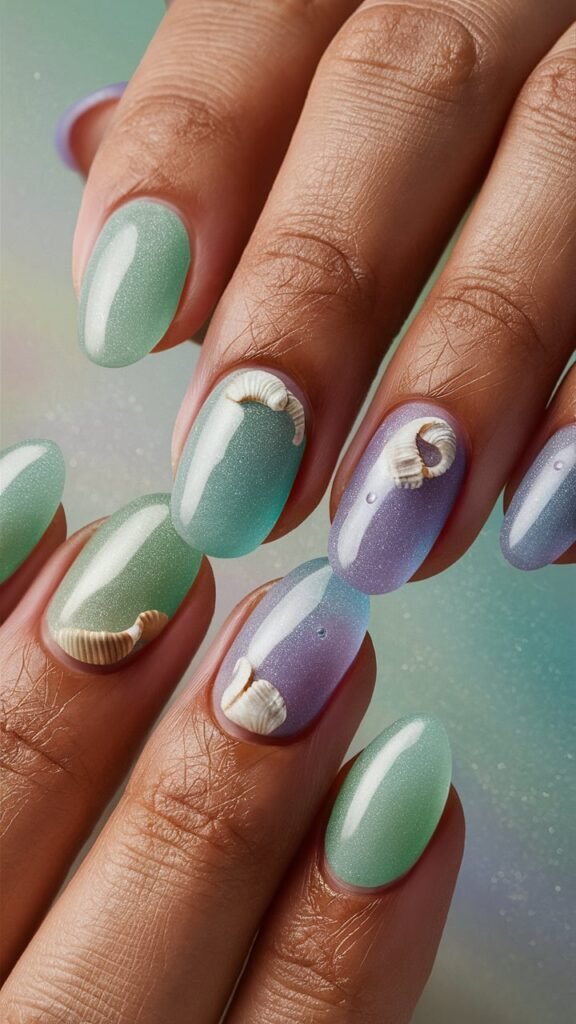
Translucent Nails With Soft Pastel Shades
Seaglass Shimmer nails are a subtle and elegant design that captures the frosted, translucent beauty of seaglass found on the beach.
To create this look, start with a translucent base that mimics the smooth, frosted surface of seaglass.
The base should be soft and sheer, with a hint of color that adds a touch of warmth and depth.
Choose soft pastel shades like pale green, blue, or lavender, applying two to three coats of translucent polish for a smooth, even finish.
The translucent base will create a delicate, frosted effect that sets the stage for the subtle shimmer that will bring the design to life.
Mimicking The Look Of Frosted Sea Glass
To enhance the seaglass effect of your nails, consider adding a frosted top coat that creates a matte, frosted finish.
The frosted top coat should be applied sparingly, creating a smooth, glassy surface that mimics the natural texture of seaglass.
For added realism, consider adding a touch of white or silver polish to the edges of the nails, creating a soft, worn effect that mimics the natural wear and tear of seaglass.
The combination of the translucent base and the frosted top coat creates a subtle, elegant look that captures the beauty of seaglass.
Embedding Tiny Pebbles And Seashells
To complete the Seaglass Shimmer manicure, consider embedding tiny pebbles and seashells into the design for a touch of natural beauty.
Use a clear adhesive to secure the pebbles and seashells to one or two accent nails, arranging them in a random pattern that mimics the look of seaglass washed up on the shore.
The pebbles and seashells should be small and delicate, adding just enough texture and detail to enhance the overall design.
Finish with a clear top coat to seal in the design and give your nails a smooth, glossy finish.
The result is a set of nails that are both subtle and elegant, with a touch of natural beauty that makes them perfect for summer.
28. Beach Bonfire: Warm And Cozy Nail Art
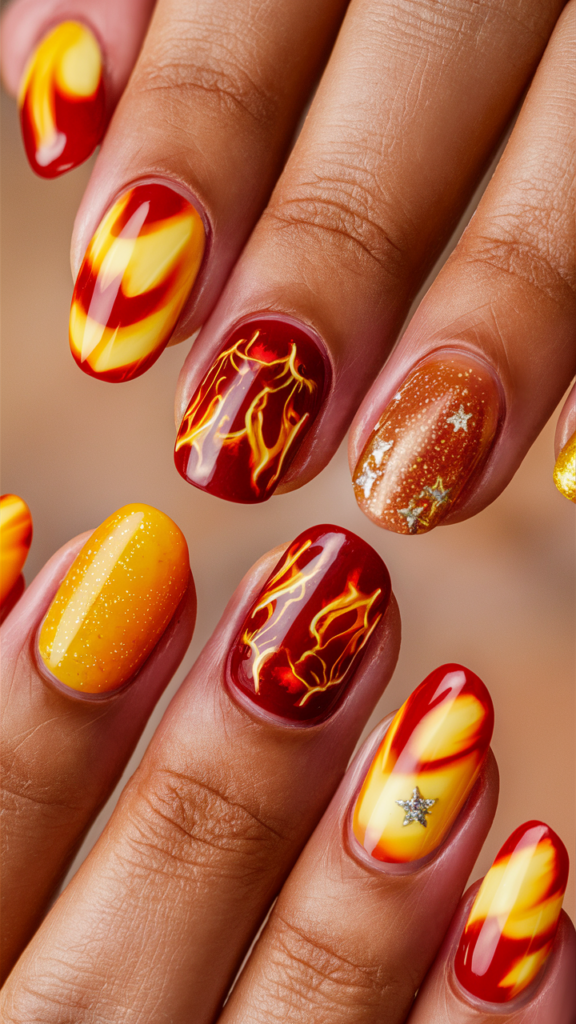
Warm Tones For A Beach Bonfire Look
Beach Bonfire nails are a warm and cozy design that captures the glowing warmth of a bonfire on the beach.
To create this look, start with a warm, earthy base that evokes the colors of a beach bonfire.
Choose shades like burnt orange, deep red, or warm brown, applying two to three coats of polish for a rich, saturated finish.
The warm tones will create a cozy, inviting backdrop that sets the stage for the bonfire designs that will bring the design to life.
The key is to choose warm, rich colors that evoke the warmth and glow of a beach bonfire.
Painting Tiny, Detailed Campfires And Embers
With your warm base in place, it’s time to add the bonfire designs that will bring your nails to life.
Using a fine brush and complementary colors, hand-paint small campfires on one or two accent nails.
The campfires should be detailed with fine lines and shading, creating a realistic, three-dimensional effect.
For added realism, consider adding small embers or sparks around the campfire, using tiny dots or lines of yellow or orange polish.
The combination of the warm base and the detailed campfire designs creates a cozy, inviting look that captures the warmth and energy of a beach bonfire.
Creating A Cozy, Beachy Scene
To complete the Beach Bonfire manicure, consider adding additional elements to enhance the cozy, beachy theme.
Use a fine brush to paint small logs or stones around the campfire, creating a natural, rustic scene that evokes the feel of a beach bonfire.
The logs and stones should be detailed with fine lines and shading, creating a realistic, three-dimensional effect.
Finish with a clear top coat to seal in the design and give your nails a smooth, glossy finish.
The result is a set of nails that are warm, cozy, and perfect for a night by the fire.
29. Sun, Sand, And Sea: The Ultimate Beach Nail Trio
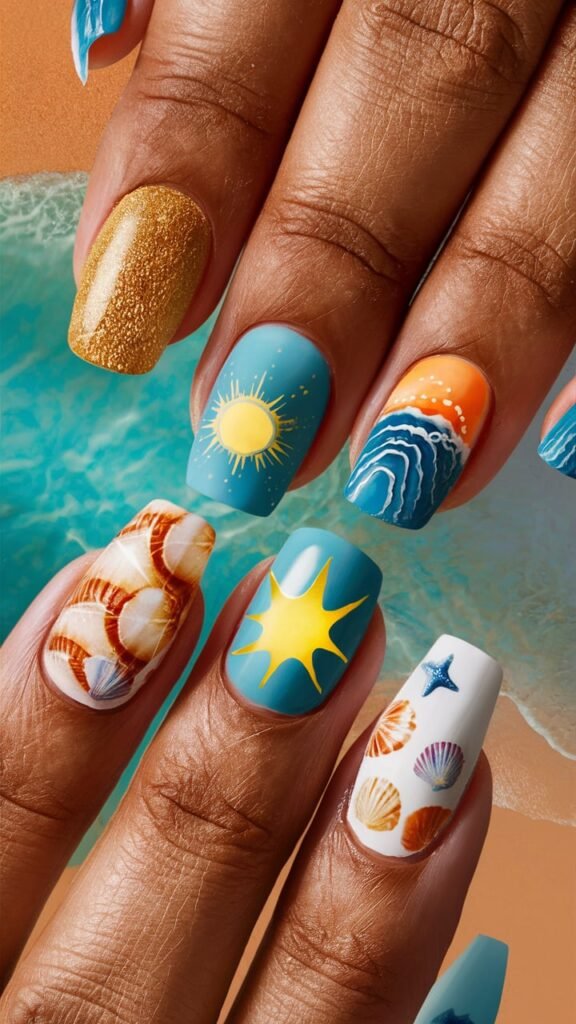
Golden Sand Texture For Realism
Sun, Sand, And Sea nails are the ultimate beach-inspired design, combining the elements of sun, sand, and sea into one cohesive look.
To create this design, start with a golden sand texture that mimics the look and feel of actual beach sand.
The sand texture should be subtle yet tactile, adding a touch of realism to the design.
Apply a sandy beige polish as the base, followed by a textured top coat that contains fine particles to mimic the gritty feel of sand.
The textured top coat should be applied sparingly, creating a smooth yet textured surface that captures the essence of the beach.
Turquoise Water For A Refreshing Look
With your sand texture in place, it’s time to add the turquoise water that will bring your nails to life.
Using a fine brush and a bright turquoise polish, paint small waves or ripples on one or two accent nails.
The waves should be soft and curving, creating a sense of movement and flow that mimics the gentle ebb and flow of the ocean.
For added realism, consider adding small bubbles or foam to the edges of the waves, using white polish to create a frothy, airy effect.
The combination of the golden sand texture and the turquoise water creates a refreshing, beachy look that captures the beauty of the sea.
Sun Motifs For A Bright, Sunny Finish
To complete the Sun, Sand, And Sea manicure, add sun motifs to one or two accent nails for a bright, sunny finish.
Using a fine brush and gold or yellow polish, paint small suns near the cuticle or at the center of the nail.
The suns should be simple and stylized, with radiating rays that extend outward.
For added dimension, consider adding a touch of shimmer or glitter to the sun, giving it a radiant, glowing effect.
The combination of the golden sand texture, turquoise water, and sun motifs creates the ultimate beach-inspired design that captures the warmth and beauty of a day at the beach.
30. Tidal Pools: Clear, Jelly-Like Nails
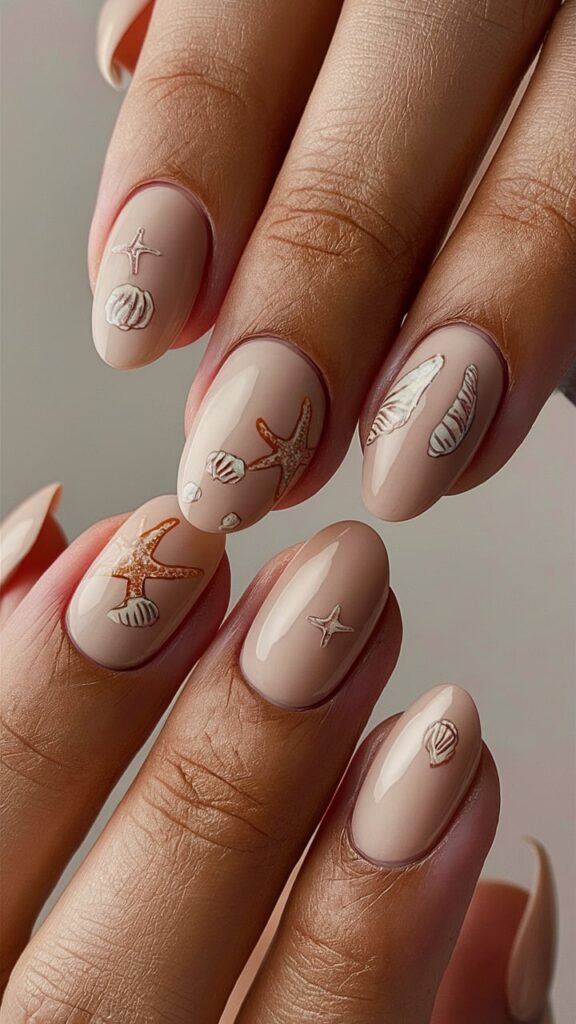
Clear Jelly Base For A Floating Effect
Tidal Pools nails are a unique and creative design that captures the beauty and mystery of tidal pools found on the beach.
To create this look, start with a clear jelly base that mimics the look and feel of water.
The clear jelly base should be slightly translucent, creating a smooth, glassy surface that allows the embedded elements to float within the polish.
Apply two to three coats of clear jelly polish, ensuring full coverage and a smooth, even finish.
The clear jelly base will create a floating effect that sets the stage for the tiny starfish, seashells, and pebbles that will bring the design to life.
Embedding Tiny Starfish, Seashells, And Pebbles
With your clear jelly base in place, it’s time to add the tiny starfish, seashells, and pebbles that will create the tidal pool effect.
Use a clear adhesive to secure the starfish, seashells, and pebbles to one or two accent nails, arranging them in a random pattern that mimics the natural arrangement of tidal pools.
The starfish, seashells, and pebbles should be small and delicate, adding just enough texture and detail to enhance the overall design.
The combination of the clear jelly base and the embedded elements creates a unique, three-dimensional effect that captures the beauty and mystery of tidal pools.
Creating A Realistic Tidal Pool Scene
To complete the Tidal Pools manicure, consider adding additional elements to enhance the realistic tidal pool scene.
Use a fine brush to paint small bubbles or seaweed around the starfish, seashells, and pebbles, creating a dynamic, underwater effect.
The bubbles can be painted as small, translucent circles, while the seaweed should be soft and wavy, adding a sense of movement and flow to the design.
Finish with a clear top coat to seal in the design and give your nails a smooth, glossy finish.
The result is a set of nails that are both unique and mesmerizing, with a floating, three-dimensional effect that captures the beauty and mystery of tidal pools.
31. Nautical Knots: Classic And Elegant
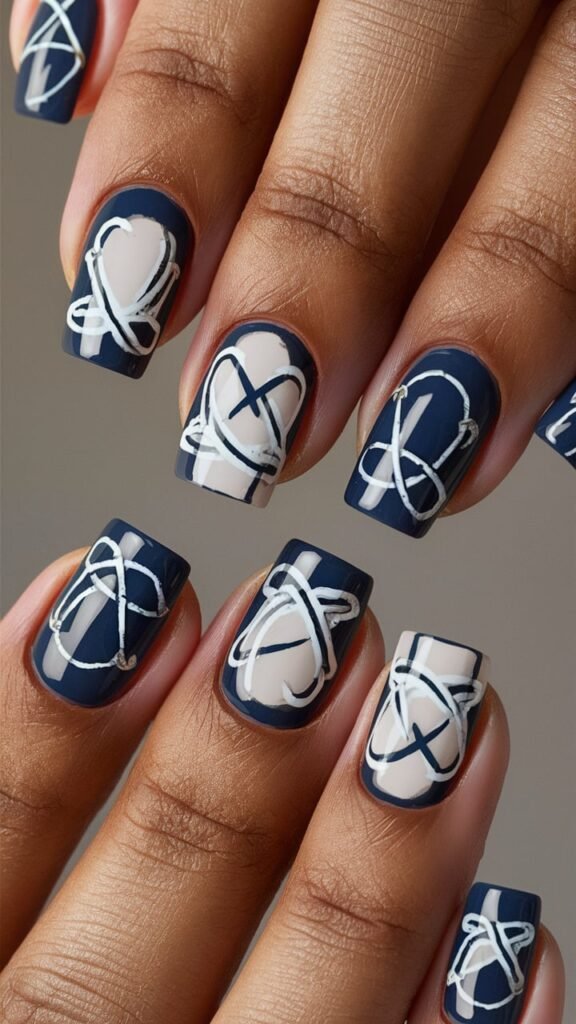
Navy Blue Base For A Nautical Look
Nautical Knots nails are a classic and elegant design that captures the timeless beauty of nautical themes.
To create this look, start with a navy blue base that serves as the canvas for the knot designs.
The navy blue color should be rich and saturated, evoking the deep, swirling waters of the ocean.
Apply two to three coats of navy blue polish, ensuring full coverage and a smooth, even finish.
The navy blue base will create a bold, elegant backdrop that sets the stage for the intricate knot designs that will bring the design to life.
Painting Intricate White Rope Knots
With your navy blue base in place, it’s time to add the intricate rope knot designs that will bring your nails to life.
Using a fine brush and white polish, paint small rope knots on one or two accent nails.
The knots should be detailed with fine lines and shading, creating a realistic, three-dimensional effect.
For added realism, consider adding small, overlapping loops or twists to the knots, creating a sense of depth and dimension.
The combination of the navy blue base and the intricate white rope knots creates a classic, elegant look that captures the timeless beauty of nautical themes.
Creating A Slightly Raised, Realistic Texture
To enhance the realism of the knot designs, consider adding a slightly raised texture to the ropes.
Use a textured top coat or clear gel polish to create a subtle, three-dimensional effect that mimics the look and feel of real rope.
The texture should be applied sparingly, creating a smooth yet tactile surface that adds to the overall realism of the design.
Finish with a clear top coat to seal in the design and give your nails a smooth, glossy finish.
The result is a set of nails that are both classic and elegant, with a touch of nautical charm that makes them perfect for any occasion.
32. Palm Leaves: Tropical And Lush
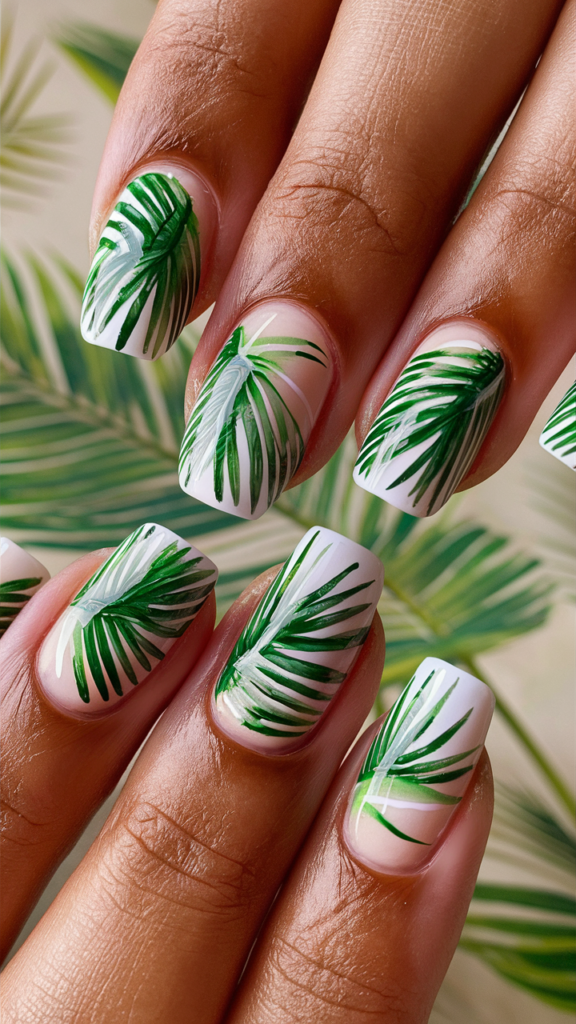
Tropical Green Base For A Lush Look
Palm Leaves nails are a tropical and lush design that captures the beauty and vibrancy of tropical foliage.
To create this look, start with a tropical green base that serves as the canvas for the palm leaf designs.
The tropical green color should be rich and vibrant, evoking the lush, verdant landscapes of a tropical paradise.
Apply two to three coats of tropical green polish, ensuring full coverage and a smooth, even finish.
The tropical green base will create a bold, vibrant backdrop that sets the stage for the detailed palm leaf designs that will bring the design to life.
Hand-Painting Detailed Palm Leaf Patterns
With your tropical green base in place, it’s time to add the detailed palm leaf patterns that will bring your nails to life.
Using a fine brush and complementary shades of green, hand-paint small palm leaves on one or two accent nails.
The palm leaves should be detailed with fine lines and shading, creating a realistic, three-dimensional effect.
For added depth and dimension, consider layering different shades of green, using darker shades for the base of the leaves and lighter shades for the tips.
The combination of the tropical green base and the detailed palm leaf patterns creates a lush, tropical look that is perfect for summer.
Achieving A Three-Dimensional Leaf Effect
To enhance the realism of the palm leaf designs, consider adding a three-dimensional effect to the leaves.
Use a clear gel polish or textured top coat to create a slightly raised surface on the leaves, adding depth and dimension to the design.
The three-dimensional effect should be subtle yet noticeable, creating a tactile, realistic effect that brings the palm leaves to life.
Finish with a clear top coat to seal in the design and give your nails a smooth, glossy finish.
The result is a set of nails that are both lush and vibrant, with a touch of tropical charm that makes them perfect for a day at the beach or a tropical getaway.
33. Shell Accent Nails: Subtle And Sophisticated
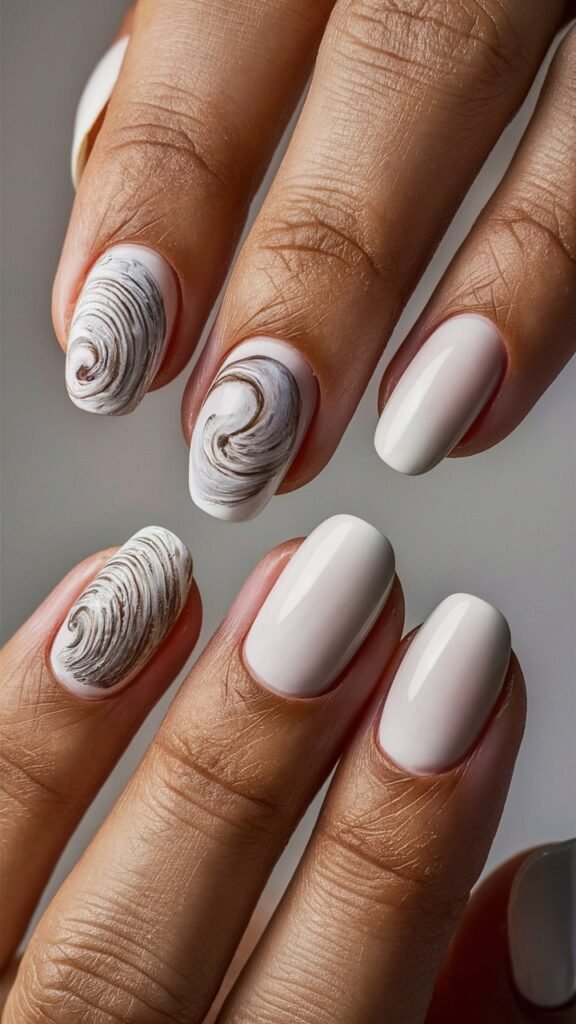
Soft White Base For A Clean, Elegant Look
Shell Accent nails are a subtle and sophisticated design that captures the elegance and beauty of seashells found on the beach.
To create this look, start with a soft white base that serves as the canvas for the shell accents.
The soft white color should be clean and elegant, creating a serene backdrop that allows the shell accents to stand out.
Apply two to three coats of soft white polish, ensuring full coverage and a smooth, even finish.
The soft white base will create a subtle, elegant backdrop that sets the stage for the large, detailed shell accents that will bring the design to life.
Large, Hyperrealistic Shells As Accents
With your soft white base in place, it’s time to add the large, hyperrealistic shell accents that will bring your nails to life.
Using a fine brush and complementary colors, paint large, detailed shells on one or two accent nails.
The shells should be detailed with fine lines and shading, creating a realistic, three-dimensional effect.
For added realism, consider adding small, overlapping layers or ridges to the shells, creating a sense of depth and dimension.
The combination of the soft white base and the large, hyperrealistic shells creates a subtle, sophisticated look that is perfect for those who appreciate the elegance and beauty of the beach.
Pearlescent Finish For Added Sophistication
To enhance the sophistication of the Shell Accent manicure, consider adding a pearlescent finish to the shells.
Use a sheer, pearlescent polish to paint over the shells, giving them a soft, iridescent glow.
The pearlescent finish adds a touch of luxury to the design, making the shells appear as if they are glistening in the sunlight.
Finish with a clear top coat to seal in the design and give your nails a smooth, glossy finish.
The result is a set of nails that are both subtle and sophisticated, with a touch of seaside charm that makes them perfect for any occasion.
Tropical Breeze: Pastel And Relaxing
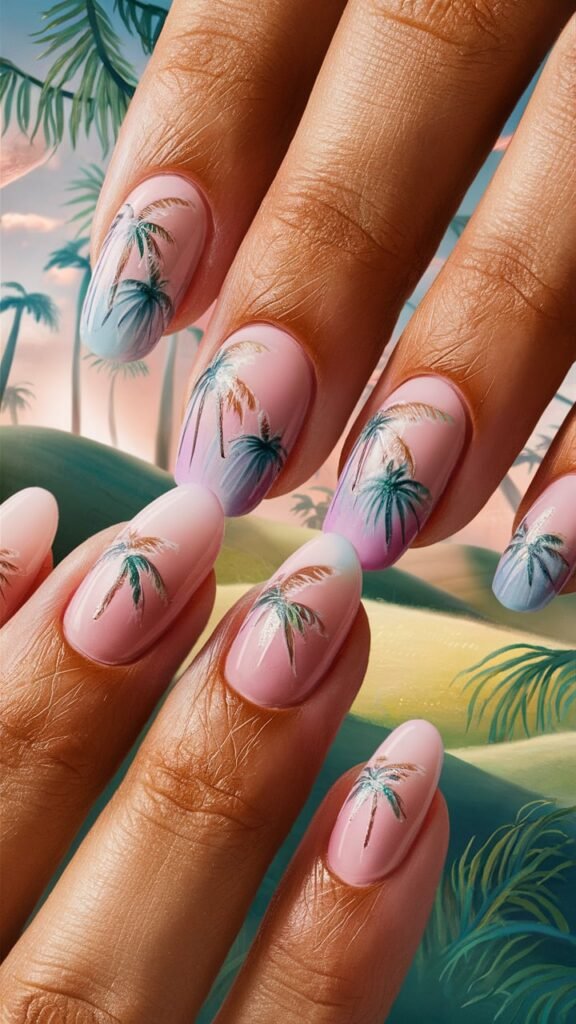
Pastel Base For A Soft, Relaxing Look
Tropical Breeze nails are a soft and relaxing design that captures the gentle, soothing colors of a tropical paradise.
To create this look, start with a pastel base that evokes the calm, serene atmosphere of a tropical getaway.
Choose soft pastel shades like pale pink, blue, or green, applying two to three coats of polish for a smooth, even finish.
The pastel base will create a soft, relaxing backdrop that sets the stage for the delicate palm tree shadows that will bring the design to life.
The key is to choose soft, muted colors that evoke the peaceful, relaxing vibe of a tropical breeze.
Painting Delicate Palm Tree Shadows
With your pastel base in place, it’s time to add the delicate palm tree shadows that will bring your nails to life.
Using a fine brush and a slightly darker shade of the pastel base color, paint small, delicate palm tree shadows on one or two accent nails.
The palm tree shadows should be soft and subtle, creating a gentle, calming effect that mimics the dappled light of a tropical breeze.
The shadows should be detailed with fine lines and soft edges, creating a realistic, three-dimensional effect that adds depth and dimension to the design.
The combination of the pastel base and the delicate palm tree shadows creates a soft, relaxing look that is perfect for summer.
Creating A Soft Ombre For A Tropical Sky Effect
To enhance the tropical theme of your Tropical Breeze manicure, consider adding a soft ombre effect that mimics the colors of a tropical sky.
Use a makeup sponge or gradient brush to blend the pastel base colors, creating a smooth, seamless transition from one shade to another.
The ombre effect should be soft and subtle, adding just enough color to enhance the overall design without overpowering the delicate palm tree shadows.
Finish with a clear top coat to seal in the design and give your nails a smooth, glossy finish.
The result is a set of nails that are soft, relaxing, and perfect for a day at the beach or a tropical getaway.
Beachside Glitter: Sparkling And Subtle
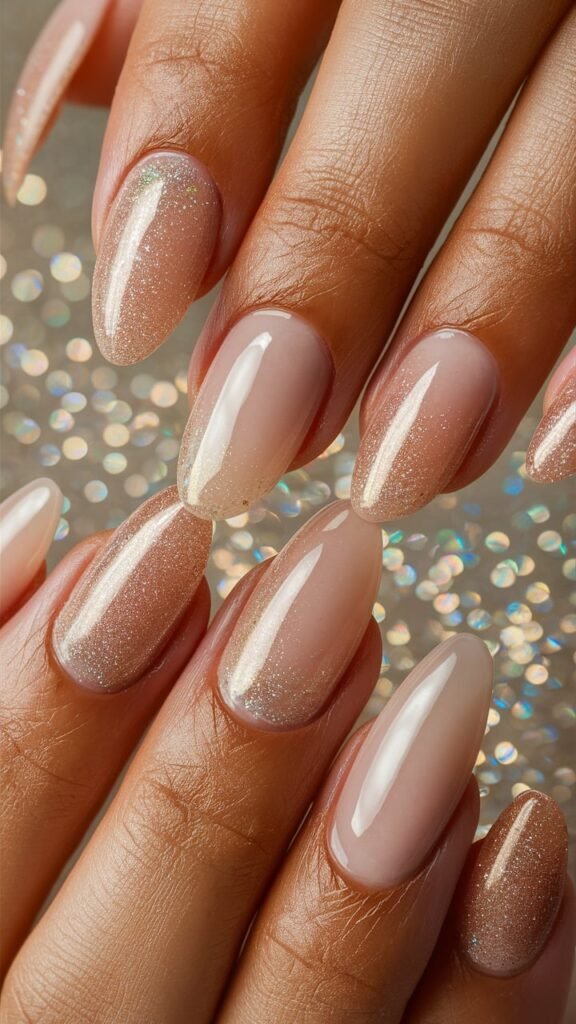
Soft Nude Or Pale Pink Base For A Natural Look
Beachside Glitter nails are a subtle and elegant design that captures the soft, shimmering beauty of sunlight reflecting off the sand.
To create this look, start with a soft nude or pale pink base that serves as the canvas for the glittery tips.
The soft nude or pale pink color should be light and natural, creating a clean, understated backdrop that allows the glitter to shine.
Apply two to three coats of soft nude or pale pink polish, ensuring full coverage and a smooth, even finish.
The soft nude or pale pink base will create a subtle, elegant backdrop that sets the stage for the fine glitter that will bring the design to life.
Glittery Tips Mimicking Sparkling Sand
With your soft nude or pale pink base in place, it’s time to add the glittery tips that will bring your nails to life.
Using a fine brush or a gradient sponge, apply fine glitter to the tips of the nails, creating a soft, subtle gradient effect that mimics the look of sparkling sand.
The glitter should be applied sparingly, focusing on the tips of the nails and gradually fading towards the base.
The fine glitter adds a touch of sparkle and shimmer to the design, capturing the soft, glowing beauty of sunlight reflecting off the sand.
Creating A Subtle Gradient Effect With Fine Glitter
To enhance the subtle, elegant theme of your Beachside Glitter manicure, consider adding a fine glitter top coat to the entire nail for a soft, shimmering effect.
The fine glitter top coat should be applied sparingly, adding just enough sparkle to catch the light and enhance the overall design.
Finish with a clear top coat to seal in the design and give your nails a smooth, glossy finish.
The result is a set of nails that are subtle, elegant, and perfect for a day at the beach or a summer wedding.
Conclusion
Your nails are a canvas, and with these 35 beach-inspired designs, you have a plethora of options to express your love for the ocean, the sun, and everything that makes summer magical.
From the shimmering beauty of mermaid scales to the fiery glow of a beach bonfire, each design brings a unique aspect of the beach to life.
Whether you prefer the bold and bright or the soft and subtle, these designs ensure your nails will be a perfect complement to your summer style.
So, grab your favorite polish and let your creativity flow.
With these ideas in hand, you’re just a brushstroke away from the perfect beach-ready nails that will carry the spirit of summer with you wherever you go.


