Street style has always been a powerful form of self-expression, blending creativity, boldness, and a touch of rebellion.
Whether it’s the chaotic energy of graffiti, the sleek lines of minimalism, or the nostalgic vibes of retro streetwear, street style offers endless inspiration for those who dare to stand out.
This influence extends beyond clothing and accessories—it has made its mark on the world of nail art as well.
In this blog, we explore 35 eye-catching street-style-inspired nail designs that capture the essence of urban fashion.
From graffiti splatter to holographic skater motifs, these designs not only showcase the diversity and vibrancy of street culture but also provide a unique canvas for you to express your personality and style.
Table of Contents
1. Graffiti Splatter Nail Art
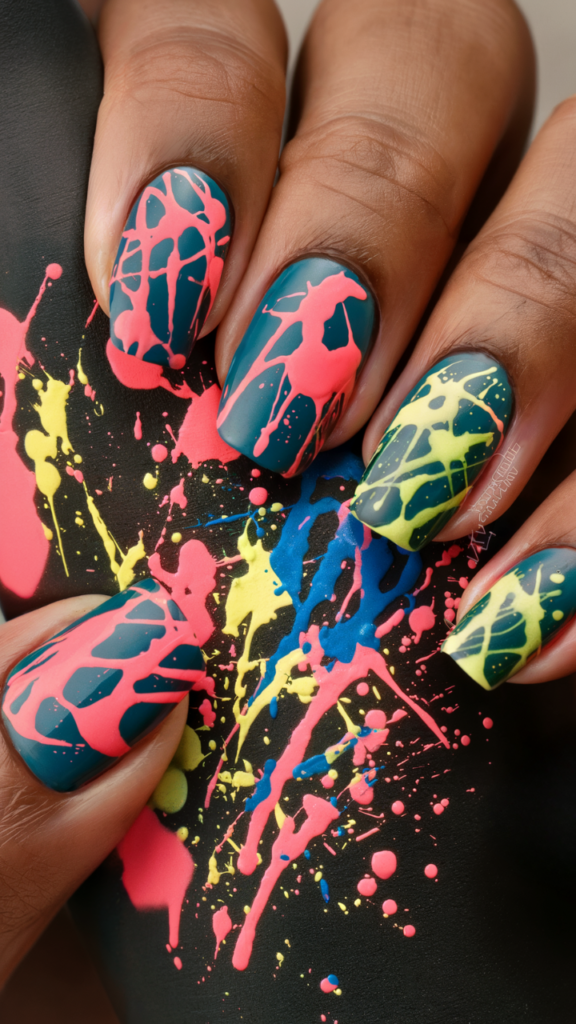
Unleash your creativity with graffiti splatter nail art—a bold design inspired by the energy and chaos of street culture.
Perfect for those who love to make a statement, this vibrant look brings the raw beauty of graffiti to your fingertips.
Step-by-Step Guide to Graffiti Splatter Nails
1. Prep Your Canvas
Start with a solid base color that enhances the graffiti effect. Choose matte black for a dramatic look or bright white for a clean, vibrant background.
2. Select Your Splatter Colors
Pick a mix of neon shades like hot pink, electric blue, lime green, and bright yellow. These colors will mimic the vibrant layers seen in urban graffiti.
3. Apply the Splatter Effect
- Use a thin nail art brush, a toothbrush, or a splatter tool to apply each color.
- Lightly dip your tool into the polish, then flick it onto your nails for an organic, unpolished effect.
- Overlap the splatters to create depth and mimic the layered aesthetic of street art.
Pro Tip: Place tape or peel-off liquid around your cuticles to avoid a messy cleanup.
4. Seal the Design
Finish with a glossy top coat to lock in the design and add a polished finish. This final layer also highlights the contrast between the splatters and the base.
Color Combination Ideas
- Complementary: Pair neon shades like pink and green for a harmonious blend.
- Contrasting: Use clashing colors like orange and purple for an eye-catching effect.
- Monochrome: Stick to variations of a single color for a subtle yet edgy look.
This graffiti splatter nail design is perfect for expressing your individuality while embracing the raw, unrefined beauty of street art.
Whether you’re a nail art enthusiast or trying this style for the first time, the result is bound to turn heads!
2. Checkerboard Nail Art
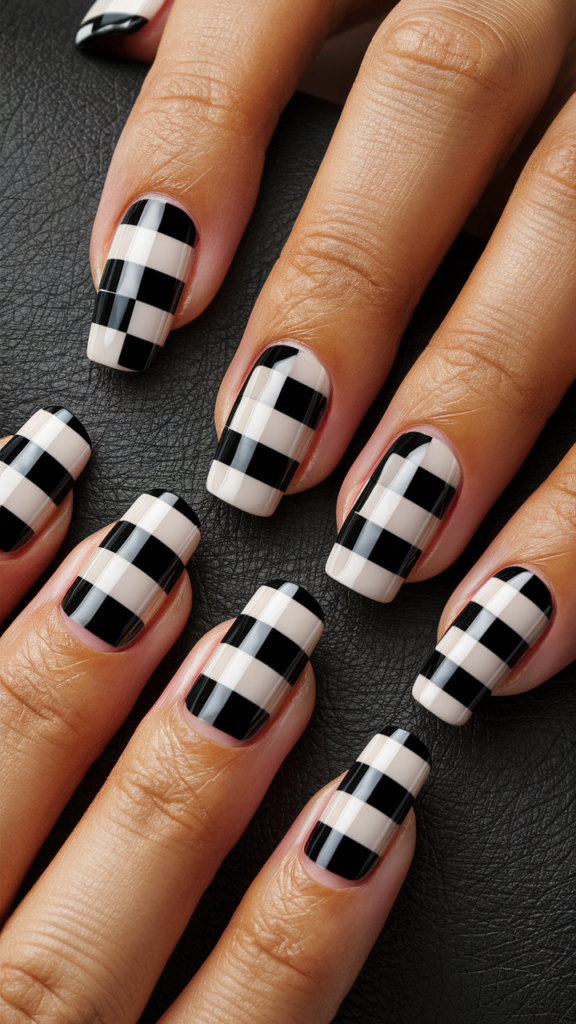
The iconic checkerboard pattern is a timeless symbol of skater culture, originating in the rebellious 1980s.
This bold black-and-white design exudes edgy, laid-back vibes and remains a staple for those who love a retro-inspired aesthetic.
Step-by-Step Guide to Checkerboard Nails
1. Start with a Clean Base
- Apply a white base coat to your nails. This creates a striking contrast for the black squares and ensures the pattern pops.
- Let the base coat dry completely before moving to the next step.
2. Create the Checkerboard Grid
- Use a thin nail art brush or nail striping tape to map out evenly spaced squares on each nail.
- Fill in alternate squares with black polish to achieve the classic checkerboard look.
Pro Tip: If freehanding the pattern feels tricky, use pre-cut nail stickers or stencils for precision.
3. Add Your Unique Twist
Experiment with alternative colors to make the design your own:
- Swap black and white for bold hues like red and yellow or soft pastels like lavender and mint green.
- Create an ombré checkerboard effect by blending shades within the squares.
4. Finish with a Top Coat
Seal the design with a glossy or matte top coat to ensure durability and add a polished finish.
Why Checkerboard Nails Work
This pattern isn’t just visually striking—it’s versatile and complements a variety of styles. Pair it with a casual outfit for a skater-inspired vibe or use it as a statement accessory for a bold fashion look.
This modern take on checkerboard nails channels the free-spirited energy of skater culture while offering endless customization options.
Perfect for beginners and nail art pros alike, it’s a classic design with room for creativity.
3. Neon Drips Nail Art
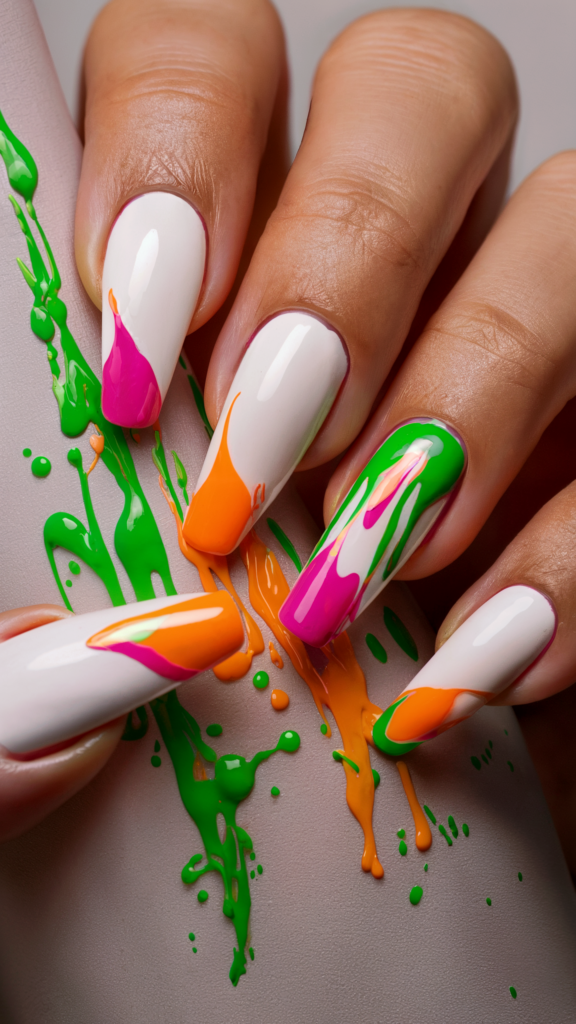
Make a statement with neon drip nail art—a trend that blends bold electric hues with fluid, dynamic designs.
This vibrant style channels the energy of street fashion, making it the perfect choice for those who love to stand out.
Step-by-Step Guide to Neon Drip Nails
1. Prep Your Base
- Start with a black or white base coat. Black creates a dramatic, high-contrast look, while white enhances the vibrancy of neon shades.
- Allow the base coat to dry completely before moving forward.
2. Create the Drip Effect
- Choose a few neon colors, such as bright pink, electric green, and fiery orange.
- Using a thin nail art brush or a dotting tool, apply small dots of color near the tip of your nail.
- Drag the polish downward toward the cuticle in uneven, rounded lines to create the illusion of dripping paint.
Pro Tip: Add smaller dots or teardrops near the end of each drip for a more realistic effect.
3. Add Dimension
- Layer additional neon shades over the drips for a multicolor effect.
- Experiment with blending two neon shades together for a gradient drip.
4. Seal and Shine
Finish with a glossy top coat to lock in the design and amplify the neon’s glow. For an extra pop, consider using a UV-reactive top coat that makes the colors glow under black light.
Color Combination Ideas
- Bold Contrast: Pair neon pink with lime green for a striking, high-energy look.
- Subtle Gradient: Use shades of blue and purple for a softer, cohesive effect.
- Rainbow Drips: Combine multiple neon colors on each nail for a fun and playful vibe.
Neon drip nails are a dynamic way to showcase your bold side while staying on-trend with street fashion. Whether you’re rocking these nails for a night out or simply to brighten your day, this design guarantees to turn heads.
4. Retro Vibes Nail Art
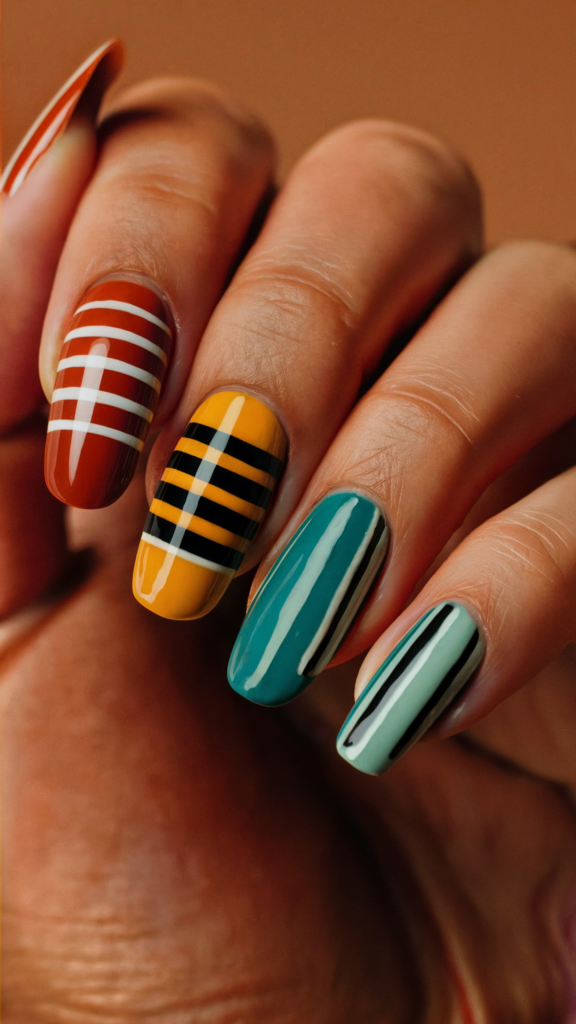
Bring the bold patterns and vibrant colors of the 70s, 80s, and 90s to your nails with retro-inspired designs.
This nostalgic style draws from vintage streetwear trends, including bold stripes, geometric patterns, and eye-catching palettes.
Step-by-Step Guide to Retro Nail Art
1. Choose Your Color Palette
- Select bold, vintage-inspired colors like burnt orange, mustard yellow, teal, and purple.
- For a softer retro feel, opt for pastel versions of these shades.
2. Create the Base Design
- Apply your chosen base color to all nails. Consider using white or a neutral shade to make the vibrant colors pop.
- Once dry, use nail tape or a thin nail art brush to create horizontal or vertical stripes on each nail. Vary the width of the stripes for a dynamic look.
3. Add Geometric Details
- Incorporate retro shapes like triangles, circles, and squares into the design.
- Place these shapes strategically over the stripes to create a layered, multi-dimensional pattern.
Pro Tip: Keep the lines crisp by using nail art tape or stencils.
4. Seal the Design
- Use a glossy top coat to bring out the vibrancy of the colors and give the design a polished finish.
Creative Variations
- Abstract Retro: Blend geometric shapes with freeform patterns for a modern twist.
- Monochrome Retro: Stick to variations of one color, such as shades of blue, for a more understated look.
- Pop of Glitter: Add subtle glitter accents to enhance the retro vibe without overpowering the design.
Retro vibes nail art is perfect for those who love to mix nostalgia with modern creativity.
Whether you’re channeling bold 80s stripes or playful 90s geometry, this design is a stylish nod to vintage streetwear with a contemporary edge.
5. Logo Mania Nail Art
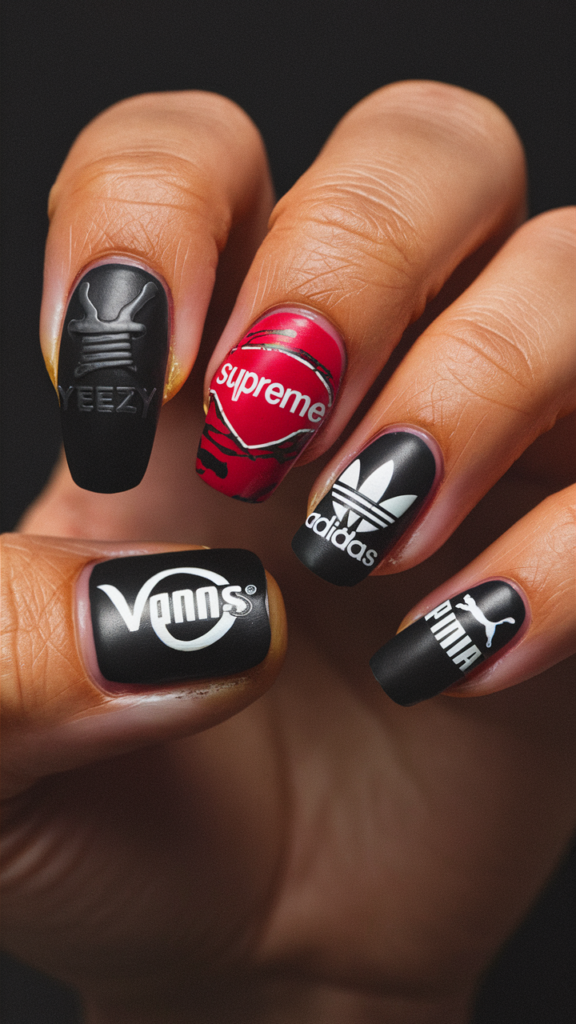
Show off your love for iconic streetwear with logo-inspired nail art.
This trendy design celebrates the bold branding of Supreme, Off-White, Nike, and other streetwear giants, letting you wear your favorites right on your fingertips.
Step-by-Step Guide to Logo Nail Art
1. Prep Your Base
- Start with a matte or glossy base coat in neutral tones like black, white, or beige.
- This clean canvas ensures the logos stand out prominently.
2. Add the Logos
- Use a fine nail art brush to carefully paint the logos onto each nail. Common choices include brand initials, symbols, or text (e.g., the Nike swoosh or Off-White arrows).
- For a more precise finish, opt for pre-made logo decals that can be applied directly to the nail.
Pro Tip: Experiment with placement—centered logos create a clean look, while angled or layered logos offer a dynamic twist.
3. Mix and Match
- Combine logos from different brands across your nails for a playful, eclectic style.
- Keep the design cohesive by sticking to a specific color palette, such as black, white, and red.
4. Seal It In
Apply a glossy or matte top coat to protect the design and enhance its finish.
Creative Variations
- Minimalist Logo: Use small, subtle logos for a sleek and understated look.
- Pop of Color: Add bright accents like neon outlines or glitter to make the logos pop.
- Themed Designs: Dedicate each nail to a different brand for a unique statement.
Why It Works
Logo mania nail art is bold, trendy, and effortlessly chic. Whether you’re a streetwear enthusiast or simply love the clean aesthetic of branded designs, this style is perfect for showcasing your individuality.
6. Metallic Accents Nail Art
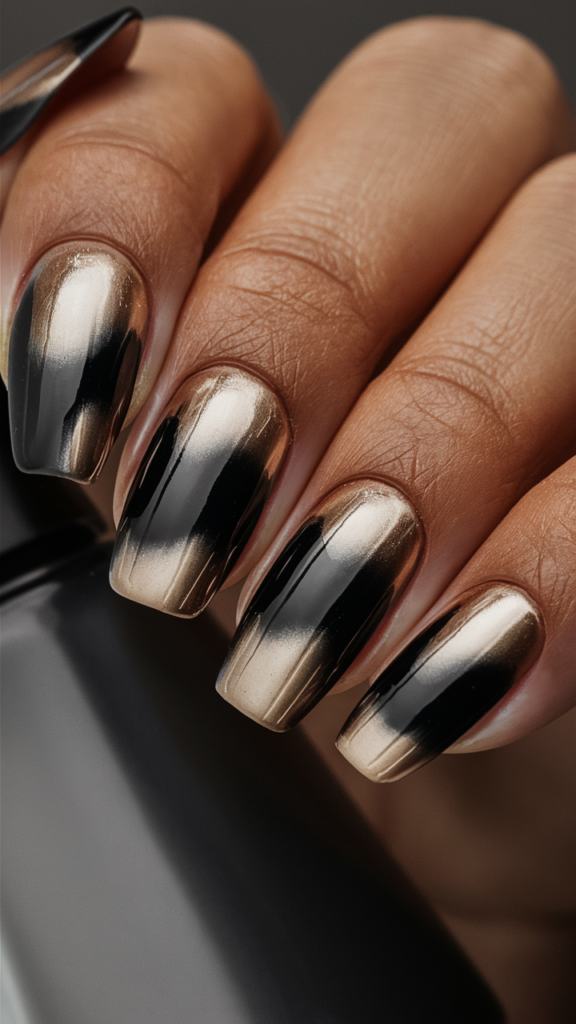
Metallic accents are the ultimate way to add sophistication and edge to your nails.
Whether it’s silver, gold, or rose gold, these shiny elements elevate your design and capture the urban chic vibe of street style.
Step-by-Step Guide to Metallic Accent Nails
1. Start with a Metallic Base
- Apply a chrome base coat in your chosen metallic shade. Silver gives a cool, industrial feel, while gold and rose gold add warmth and luxury.
- For a softer look, opt for a metallic shimmer polish instead of a full chrome finish.
2. Add Embellishments
- Use metallic studs, small chains, or foil accents to enhance the design.
- Apply these elements to a few accent nails for a balanced, sophisticated look.
- Secure the embellishments with nail glue for durability.
Pro Tip: Keep the embellishments minimal to avoid overwhelming the design.
3. Incorporate Geometric Patterns
- Use a striping brush or tape to create sleek metallic lines or shapes over a matte or glossy base.
- Consider layering matte black with metallic gold stripes for a modern, edgy vibe.
4. Finish with a Top Coat
Seal your design with a clear top coat to add shine and ensure the metallic accents stay in place.
Creative Variations
- Matte & Metallic: Pair a matte base with metallic accents for a bold contrast.
- Dual-Toned Metals: Combine silver and gold for a mixed-metal effect.
- Metallic Ombre: Create a gradient effect with metallic polish, blending from the cuticle to the tip.
Why Metallic Nails Are Trending
Metallic accents capture the essence of street style with their sleek, reflective finish and urban edge. Whether you’re adding subtle studs or going full chrome, this versatile look can transition seamlessly from casual to glam.
7. Animal Print Remix Nail Art
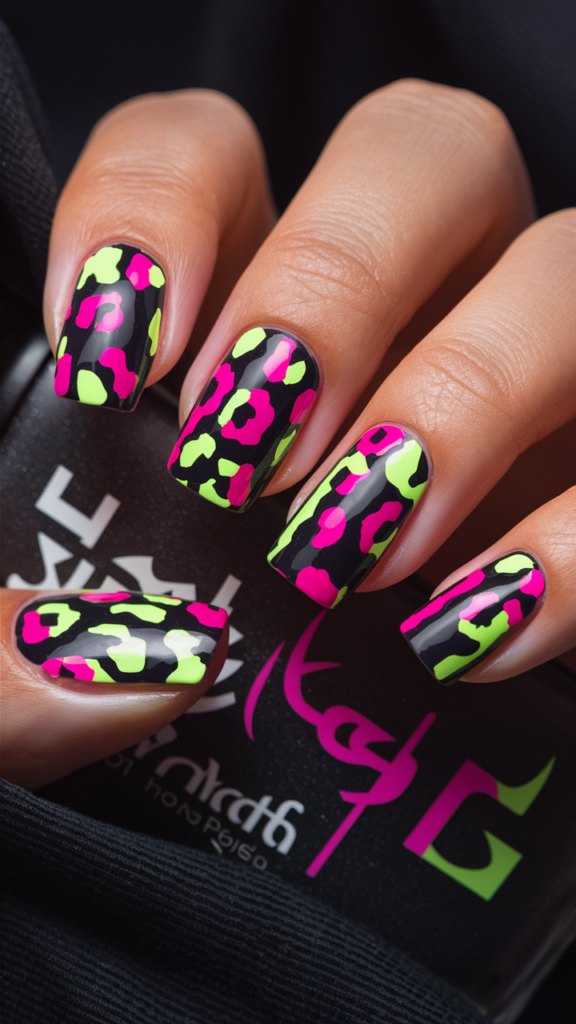
Animal prints have long been a symbol of boldness and confidence, and the classic leopard print is no exception.
By reimagining this iconic pattern with neon colors and creative placements, you can create a modern, eye-catching nail art look that stands out.
Step-by-Step Guide to Neon Leopard Nails
1. Prep Your Base
- Start with a matte black base coat for maximum contrast.
- Alternatively, use a white or pastel base for a softer, more playful aesthetic.
- Let the base coat dry completely.
2. Add Leopard Spots
- Use a fine nail art brush or dotting tool to paint irregular spots in neon shades like hot pink, lime green, and electric blue.
- Focus on creating organic shapes rather than perfect circles to mimic the natural look of leopard spots.
Pro Tip: Vary the size of the spots to add depth and visual interest.
3. Outline the Spots
- Use a thin nail art brush to outline the neon spots with black polish. Avoid fully enclosing the shapes to maintain a more natural, edgy vibe.
- For added flair, fill some spots with glitter or gradient effects.
4. Seal the Look
Apply a glossy top coat to lock in the design and make the neon colors pop even more.
Creative Variations
- Mixed Animal Prints: Combine leopard spots with zebra stripes or snake skin patterns for a wild, eclectic look.
- Gradient Base: Use a gradient background (e.g., pink fading into orange) to elevate the design.
- Metallic Spots: Swap neon colors for metallic shades like gold or silver for a luxe, modern feel.
Why It Works
Neon leopard nails blend the timeless appeal of animal prints with contemporary streetwear trends. Whether you’re going for a bold statement or a playful twist, this design is versatile, stylish, and endlessly customizable.
8. Pop Art Prints Nail Art
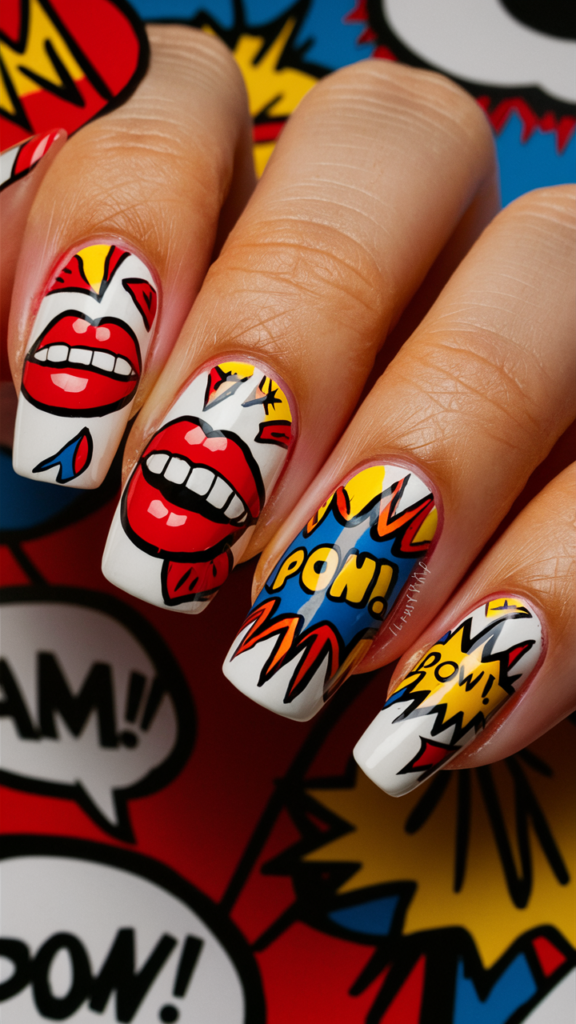
Pop art nail designs channel the bold colors, graphic patterns, and playful imagery that define this iconic art style.
Perfect for adding personality to your look, this design is a fun way to make a statement while embracing the creative energy of street culture.
Step-by-Step Guide to Pop Art Nail Art
1. Choose a Base Color
- Start with a white or pastel base coat to provide a clean, vibrant canvas for the bold designs.
- For a more dynamic look, use a different base color for each nail.
2. Add Pop Art Elements
- Use a fine nail art brush to paint iconic motifs like lips, speech bubbles, comic-style explosions, or polka dots.
- Bright, contrasting colors like red, yellow, blue, and pink will make these designs pop.
Pro Tip: Outline each element with bold black lines to mimic the signature style of pop art.
3. Add Details for Dimension
- Use small white dots or highlights to create a three-dimensional effect.
- Incorporate text elements like “POW!” or “WOW!” for an authentic comic-inspired look.
4. Seal the Design
Finish with a glossy top coat to enhance the colors and protect the intricate details.
Creative Variations
- Collage Style: Mix different pop art elements across your nails for a playful, eclectic design.
- Monochrome Pop Art: Stick to shades of one color (e.g., red and pink) for a modern twist.
- Metallic Pop: Add metallic accents to elevate the design and give it a futuristic edge.
Why It Works
Pop art nails are perfect for those who love bold, playful, and artistic designs. This style is an ode to creativity, making it an ideal choice for anyone looking to embrace the fun, expressive side of street culture.
9. Camouflage Chic Nail Art
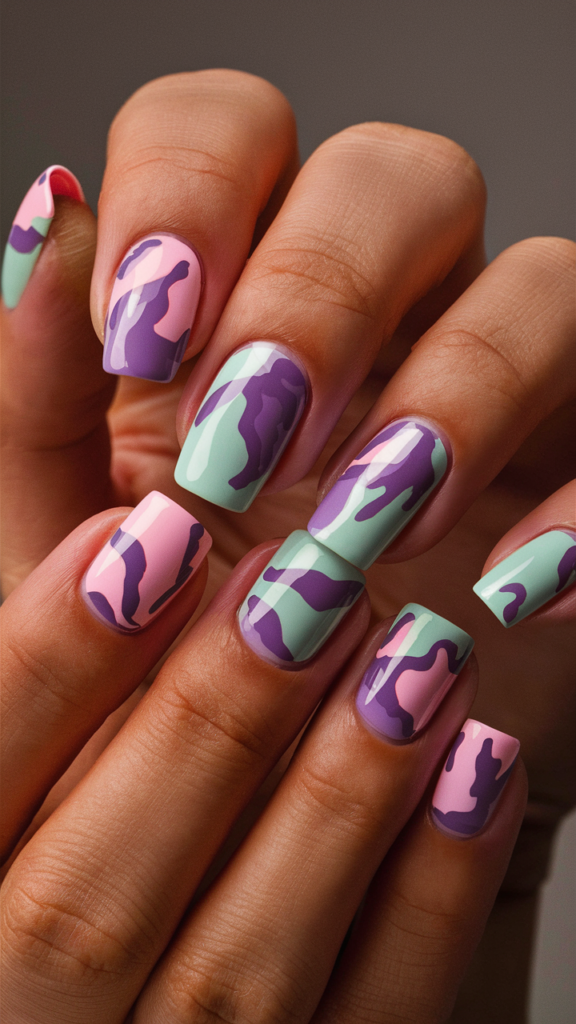
Camouflage patterns have evolved from their military origins to become a staple in streetwear.
Urban camo nail art takes this trend to new heights by experimenting with unconventional colors and abstract shapes, creating a fresh, edgy design.
Step-by-Step Guide to Urban Camo Nails
1. Choose Your Color Palette
- Move away from traditional earth tones and opt for unexpected shades like pastel pinks, lavender, mint green, or neon hues for a modern twist.
- Select three to four complementary colors to create depth and contrast.
2. Create the Base
- Apply a neutral or one of your chosen camo colors as the base coat.
- Let it dry completely to ensure a smooth foundation.
3. Paint Abstract Camo Shapes
- Using a fine nail art brush, paint irregular, rounded shapes in your selected colors.
- Layer the shapes to mimic the overlapping look of traditional camouflage.
- Leave small gaps between shapes to let the base color peek through for added dimension.
Pro Tip: Vary the size and placement of shapes for a more dynamic design.
4. Seal the Look
Finish with a glossy or matte top coat depending on your preference. A matte finish enhances the modern, urban vibe, while gloss gives a polished touch.
Creative Variations
- Gradient Camo: Blend the camo colors together for a soft ombré effect.
- Metallic Touch: Add metallic gold or silver accents to elevate the design.
- Mixed Camo: Combine camo patterns with other street-inspired elements like stripes or graffiti for a bold, layered look.
Why It Works
Urban camo nails are a versatile design that merges rugged style with modern creativity. Whether you go pastel and soft or neon and bold, this look perfectly captures the streetwear aesthetic with a unique twist.
10. Bandana Print Nail Art
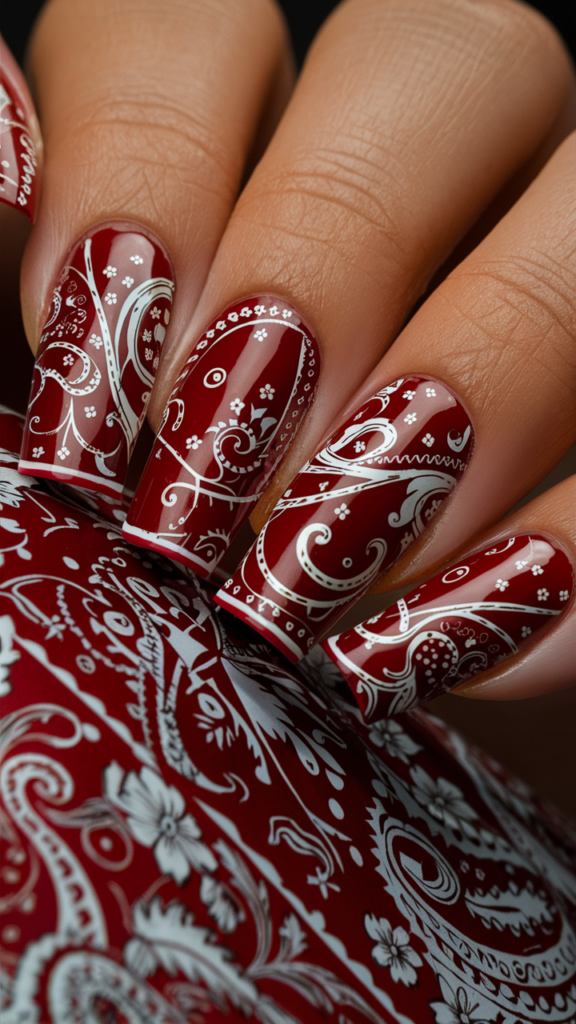
Bandana patterns are a timeless symbol of streetwear, with their intricate paisley designs and bold colors representing a rebellious, edgy spirit.
Translating these patterns onto your nails is a creative way to bring a touch of street culture to your look.
Step-by-Step Guide to Bandana Print Nails
1. Select Your Base Color
- Choose traditional bandana colors like deep red, navy blue, or black for a classic look.
- For a modern take, opt for vibrant shades like hot pink, teal, or neon green.
- Apply the base color and let it dry completely.
2. Create the Paisley Pattern
- Use a fine nail art brush or a dotting tool to carefully paint intricate paisley elements in white polish. Focus on shapes like swirls, teardrops, and small floral accents.
- Arrange the elements in a balanced, symmetrical layout for a cohesive design.
Pro Tip: If freehand designs are tricky, try using stencils or nail art stickers for precision.
3. Add Details for Dimension
- Incorporate tiny dots or lines to fill in the spaces between the larger paisley motifs.
- You can also outline some of the shapes with a contrasting color for added depth.
4. Seal the Design
Apply a glossy top coat to enhance the intricate details and protect the design.
Creative Variations
- Monochrome Bandana: Stick to black and white for a sleek, minimalist style.
- Mixed Bandana Colors: Use a different base color for each nail to create a bold, eclectic look.
- Metallic Paisley: Swap white polish for gold or silver to give the pattern a luxe, modern feel.
Why It Works
Bandana nails combine the rich cultural history of streetwear with intricate artistry, making them a bold and stylish statement. Whether you keep it classic or add a contemporary twist, this design is perfect for showcasing your personality and creativity.
11. Distressed Denim Nail Art
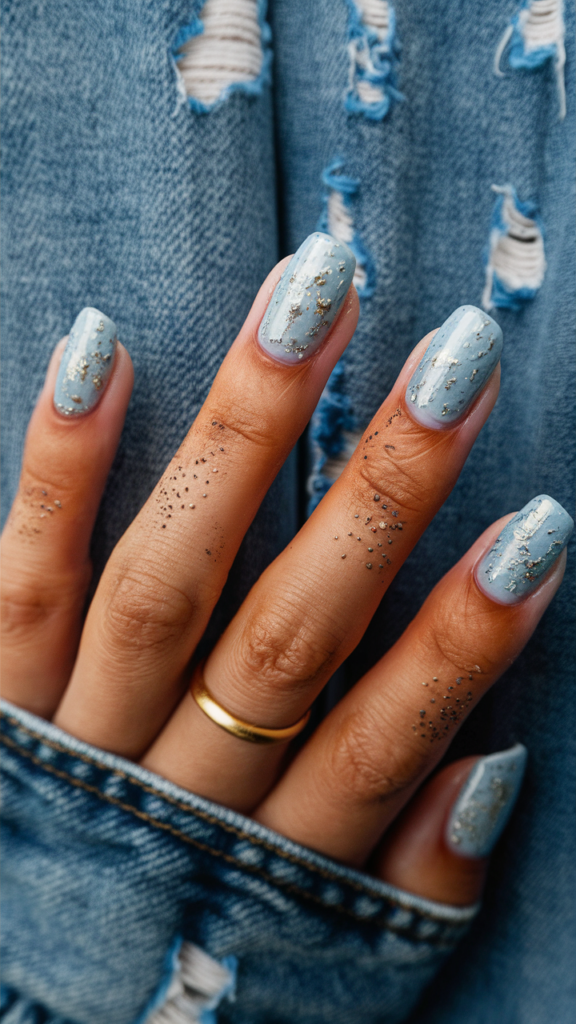
Distressed denim is a streetwear staple, loved for its cool, laid-back aesthetic. By recreating the worn, textured look of ripped jeans on your nails, you can capture this effortlessly edgy vibe with a creative twist.
Step-by-Step Guide to Distressed Denim Nails
1. Choose Your Denim Base
- Start with a faded blue or medium indigo base coat to mimic the look of classic denim.
- For a more rugged style, opt for a matte finish to reflect the fabric’s texture.
2. Add the Worn Effect
- Use a sponge or makeup applicator to dab on lighter blue polish in irregular patches. This creates the appearance of naturally faded areas on denim.
- Let each layer dry before adding more to ensure depth and dimension.
Pro Tip: Blend small amounts of white polish with the lighter blue for a more realistic fade.
3. Paint the Distressed Details
- Use a thin brush or a toothpick to paint tiny “tears” or “rips” across the nails in white or gray polish. Focus on creating jagged, uneven edges for authenticity.
- You can also use a dry brush technique to add subtle lines, mimicking denim’s woven texture.
4. Optional Embellishments
- Add small metallic studs, chains, or silver dots to represent the rivets and hardware found on jeans.
- Apply these to a few accent nails for extra flair.
5. Seal the Look
Finish with a glossy or matte top coat depending on your desired finish. Matte enhances the rugged look, while gloss adds a polished edge.
Creative Variations
- Black Denim: Swap blue polish for shades of black and gray to mimic distressed black jeans.
- Denim Ombré: Blend shades of blue from light to dark across the nails for a gradient effect.
- Patchwork Denim: Use different shades of blue to create a patchwork-inspired design for a playful twist.
Why It Works
Distressed denim nails are a creative way to channel the effortless, rugged vibes of streetwear. Whether you’re pairing them with your favorite jeans or using them to add a casual touch to your outfit, this design is versatile, trendy, and undeniably cool.
12. Street Typography Nails

Typography is a cornerstone of street art and fashion, often used to make bold, impactful statements.
By incorporating graffiti-style letters and numbers into your nail art, you can create a design that’s expressive, edgy, and full of personality.
Step-by-Step Guide to Typography Nails
1. Choose Your Base
- Opt for a matte or glossy base coat in neutral tones like black, white, or gray to let the typography stand out.
- For a bold twist, consider using a neon or metallic base color.
2. Add Your Typography
- Use a thin nail art brush to paint letters, numbers, or symbols across your nails. Common ideas include initials, meaningful dates, or graffiti-inspired tags.
- Experiment with bold fonts, block letters, or freehand styles to mimic the raw energy of street typography.
Pro Tip: If freehand is too challenging, use nail stencils or pre-made decals for a cleaner look.
3. Mix and Match Styles
- Combine different fonts and sizes across your nails to create a layered, dynamic effect.
- Incorporate graffiti-style lettering or playful bubble letters for an extra touch of creativity.
4. Add Details
- Outline the letters with contrasting colors to make them pop.
- Consider adding small elements like arrows, stars, or lines to enhance the urban vibe.
5. Seal the Design
Finish with a glossy top coat to protect the design and bring out the vibrancy of the colors.
Creative Variations
- Neon Glow: Use fluorescent colors to create a typography design that mimics neon street signs.
- Metallic Accents: Add gold or silver outlines for a luxe, urban feel.
- Themed Messages: Spell out a motivational word or phrase across your nails, like “DREAM” or “CREATE.”
Why It Works
Typography nails are perfect for making a statement while embracing the bold, expressive energy of street culture. Whether you choose clean block letters or graffiti-inspired designs, this style is a creative way to showcase your individuality.
13. Typography Nail Art
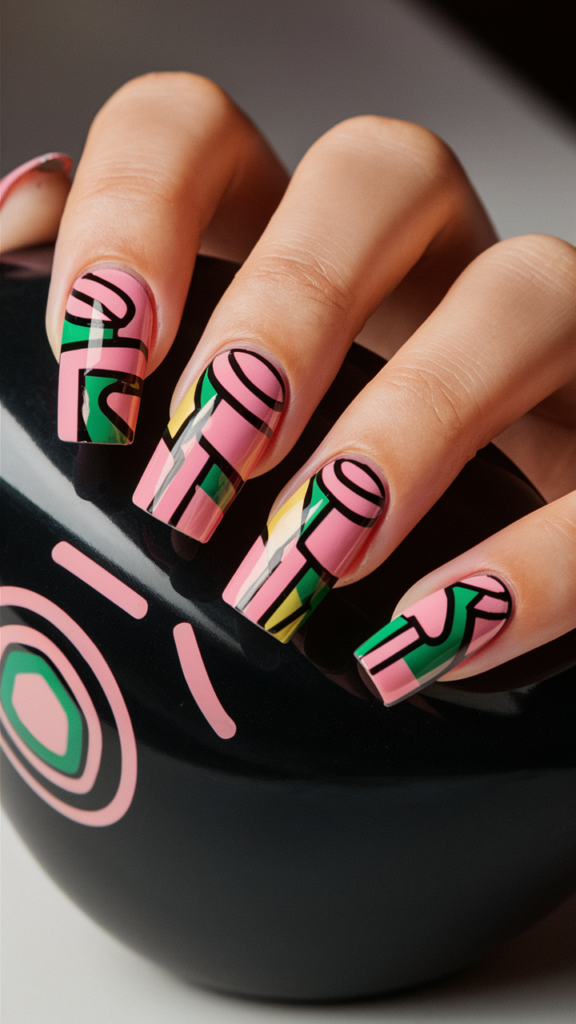
Typography is a cornerstone of street art and fashion, often used to make bold, impactful statements.
By incorporating graffiti-style letters and numbers into your nail art, you can create a design that’s expressive, edgy, and full of personality.
Step-by-Step Guide to Typography Nails
1. Choose Your Base
- Opt for a matte or glossy base coat in neutral tones like black, white, or gray to let the typography stand out.
- For a bold twist, consider using a neon or metallic base color.
2. Add Your Typography
- Use a thin nail art brush to paint letters, numbers, or symbols across your nails. Common ideas include initials, meaningful dates, or graffiti-inspired tags.
- Experiment with bold fonts, block letters, or freehand styles to mimic the raw energy of street typography.
Pro Tip: If freehand is too challenging, use nail stencils or pre-made decals for a cleaner look.
3. Mix and Match Styles
- Combine different fonts and sizes across your nails to create a layered, dynamic effect.
- Incorporate graffiti-style lettering or playful bubble letters for an extra touch of creativity.
4. Add Details
- Outline the letters with contrasting colors to make them pop.
- Consider adding small elements like arrows, stars, or lines to enhance the urban vibe.
5. Seal the Design
Finish with a glossy top coat to protect the design and bring out the vibrancy of the colors.
Creative Variations
- Neon Glow: Use fluorescent colors to create a typography design that mimics neon street signs.
- Metallic Accents: Add gold or silver outlines for a luxe, urban feel.
- Themed Messages: Spell out a motivational word or phrase across your nails, like “DREAM” or “CREATE.”
Why It Works
Typography nails are perfect for making a statement while embracing the bold, expressive energy of street culture. Whether you choose clean block letters or graffiti-inspired designs, this style is a creative way to showcase your individuality.
14. Geometric Graffiti Nail Art
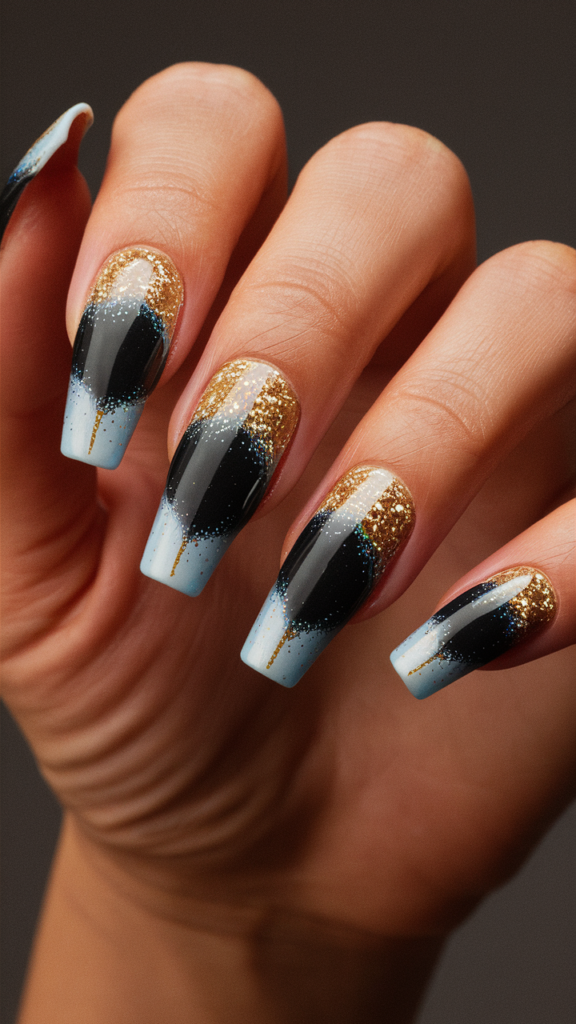
Geometric graffiti blends the clean, bold shapes of abstract art with the vibrant, spontaneous energy of street style. This nail art design is perfect for those who love sharp lines, bright colors, and a modern aesthetic inspired by urban creativity.
Step-by-Step Guide to Geometric Graffiti Nails
1. Choose Your Base Color
- Start with a deep navy, purple, or black base coat for a dramatic look.
- For a lighter aesthetic, use a neutral or pastel base.
2. Create Geometric Shapes
- Use a thin nail art brush or striping tape to outline and fill in shapes like triangles, squares, or stripes in vibrant colors such as neon pink, lime green, or bright yellow.
- Allow the shapes to overlap and intersect for a layered, dynamic effect.
Pro Tip: Keep the edges crisp by letting each shape dry before adding another.
3. Add Graffiti-Inspired Details
- Incorporate small graffiti-style accents like dots, splatters, or abstract lines around the geometric shapes.
- Use contrasting colors to enhance the design’s depth and energy.
4. Seal the Design
Apply a glossy top coat to protect the design and amplify the vibrant colors. A matte top coat can also work for a more urban, edgy finish.
Creative Variations
- Gradient Geometry: Use an ombré effect within the shapes for a softer, blended look.
- Metallic Pop: Add metallic accents to one or more geometric shapes for a luxe touch.
- Monochrome Graffiti: Stick to shades of one color, like blue or purple, for a more subtle, cohesive design.
Why It Works
Geometric graffiti nails are a perfect mix of boldness and structure, capturing the essence of street art in a modern, wearable way. This design is versatile, allowing endless customization to suit your style while keeping the edgy, urban vibe alive.
15. Street Art Collage Nail Art
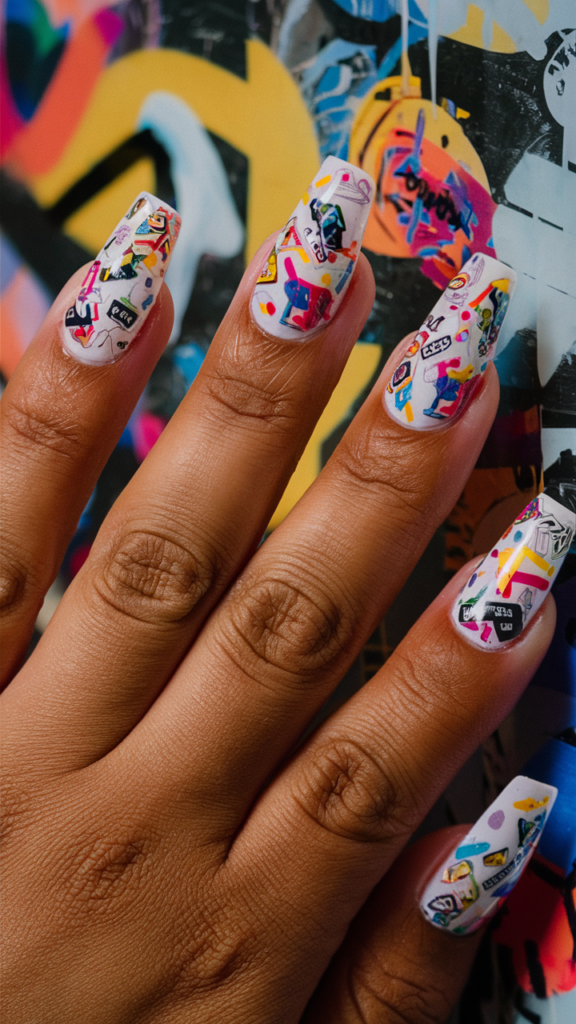
Inspired by the chaotic beauty of layered street posters and graffiti, street art collage nails bring a playful mix of colors and textures to your fingertips.
This design is all about individuality and creativity.
Step-by-Step Guide to Street Art Collage Nails
1. Start with a Neutral Base
- Apply a white or light-colored base coat to create a neutral canvas for the collage.
- Let it dry completely before moving on.
2. Apply Stickers and Decals
- Use a mix of nail stickers or decals with street-inspired motifs like graffiti tags, lips, logos, or eyes.
- Layer the stickers randomly across your nails, overlapping some to mimic the look of layered posters.
Pro Tip: Use tweezers for precise placement of smaller stickers.
3. Add Painted Accents
- Enhance the design by painting small details like splatters, lines, or abstract shapes using a fine brush.
- Use contrasting colors to make the collage more vibrant and dynamic.
4. Seal It In
Finish with a glossy top coat to bring all the elements together and ensure the design lasts.
Creative Variations
- Monochrome Collage: Use stickers and accents in black and white for a sleek, minimalistic look.
- Pop of Glitter: Add a hint of glitter polish to highlight specific areas of the design.
- Theme-Based Collage: Stick to a theme, such as floral graffiti or urban typography, for a cohesive yet creative design.
Why It Works
Street art collage nails are a celebration of urban creativity, blending bold visuals and playful layers to make a unique statement.
Perfect for those who love eclectic styles, this design offers endless customization options to reflect your individuality.
16. Neon Flame Nail Art
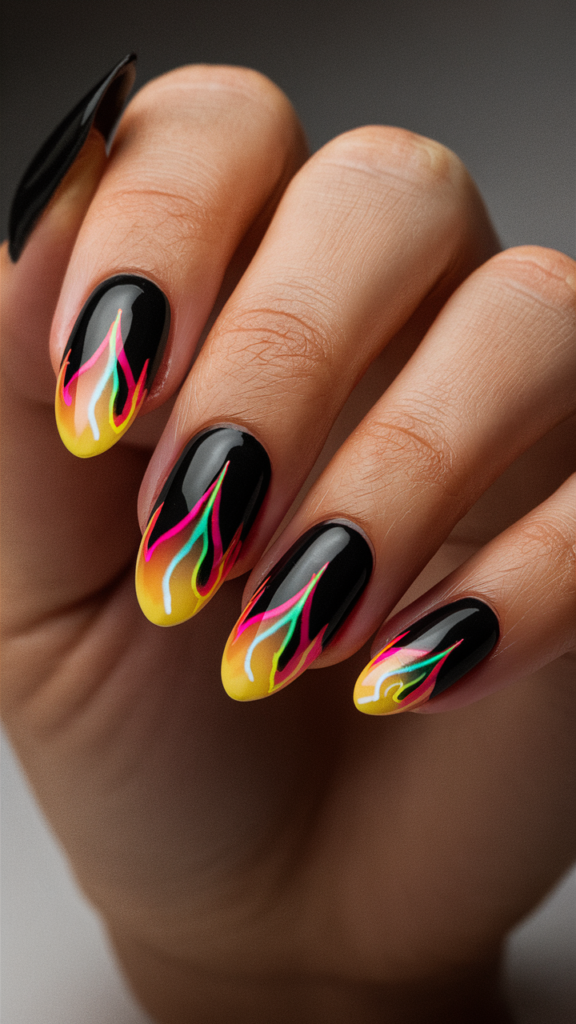
Flames are a classic symbol of power and intensity, and when paired with neon colors, they create a striking, electrifying nail design. Neon flame nails are perfect for anyone looking to add a bold and energetic edge to their street-inspired style.
Step-by-Step Guide to Neon Flame Nails
1. Choose Your Base Color
- Opt for a matte black or dark gray base coat to make the neon flames pop.
- Alternatively, try a white base for a brighter, cleaner aesthetic.
2. Create the Flame Shapes
- Use a fine nail art brush to paint flame patterns starting from the tips of your nails and flowing upward toward the cuticle.
- Choose neon colors like electric yellow, orange, pink, or green for a bold look.
- Layer the colors within the flames to create a gradient effect, blending shades from darker at the base to lighter at the tips.
Pro Tip: Keep the flames slightly irregular for a more dynamic and natural look.
3. Outline the Flames
- Use a contrasting color, such as black or white, to outline the flames and give them a sharp, defined edge.
- This step adds depth and enhances the neon effect.
4. Seal the Design
Apply a glossy top coat to protect the design and make the neon colors shine. For a more subtle look, a matte top coat can soften the flames while keeping them bold.
Creative Variations
- Glow-in-the-Dark Flames: Use glow-in-the-dark polish for a design that lights up at night.
- Multi-Color Flames: Blend multiple neon shades within each flame for a rainbow effect.
- Metallic Accents: Add a touch of silver or gold at the flame tips for a luxe twist.
Why It Works
Neon flame nails are a powerful combination of bold design and vibrant colors, capturing the edgy energy of street culture. Whether you’re hitting the nightlife scene or adding flair to your everyday look, this design is guaranteed to turn heads.
17. Monochrome Minimalist Nail Art
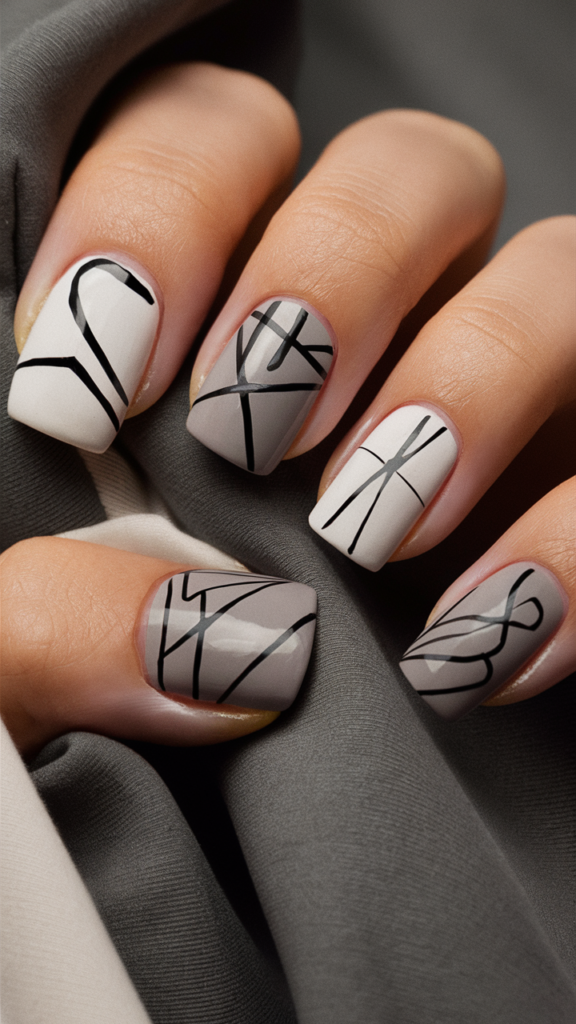
Minimalism meets street style in this monochrome nail art design.
Using a limited palette of black, white, and gray, this look is clean, sophisticated, and effortlessly edgy—perfect for those who love understated yet impactful nails.
Step-by-Step Guide to Monochrome Minimalist Nails
1. Start with a Neutral Base
- Apply a matte or glossy base coat in your chosen neutral tone: black, white, or gray.
- Let the base dry completely to create a smooth foundation for the design.
2. Add Geometric Patterns
- Use a fine nail art brush or striping tape to create clean, bold lines, abstract shapes, or grids in a contrasting color.
- Experiment with negative space by leaving parts of the nail unpainted for a modern, airy look.
Pro Tip: Keep the design simple to maintain the minimalist aesthetic.
3. Incorporate Subtle Textures
- Pair a matte base with glossy accents, such as thin stripes or dots, for an elegant contrast.
- For an elevated look, use metallic silver or gold as an accent within the monochrome palette.
4. Seal the Design
Apply a top coat to protect the design. Choose matte for a muted, edgy finish or gloss for a sleek, polished vibe.
Creative Variations
- Asymmetrical Lines: Break symmetry by painting abstract, freeform lines for a contemporary look.
- Monochrome Gradient: Blend shades of gray to black for an ombré effect within the minimalist framework.
- Tiny Accents: Add small dots or fine lines to create intricate, subtle details.
Why It Works
Monochrome minimalism nails are a stylish way to make a statement without overwhelming your look. This design is versatile, timeless, and perfect for pairing with any outfit, whether casual or formal.
18. Tie-Dye Nail Art
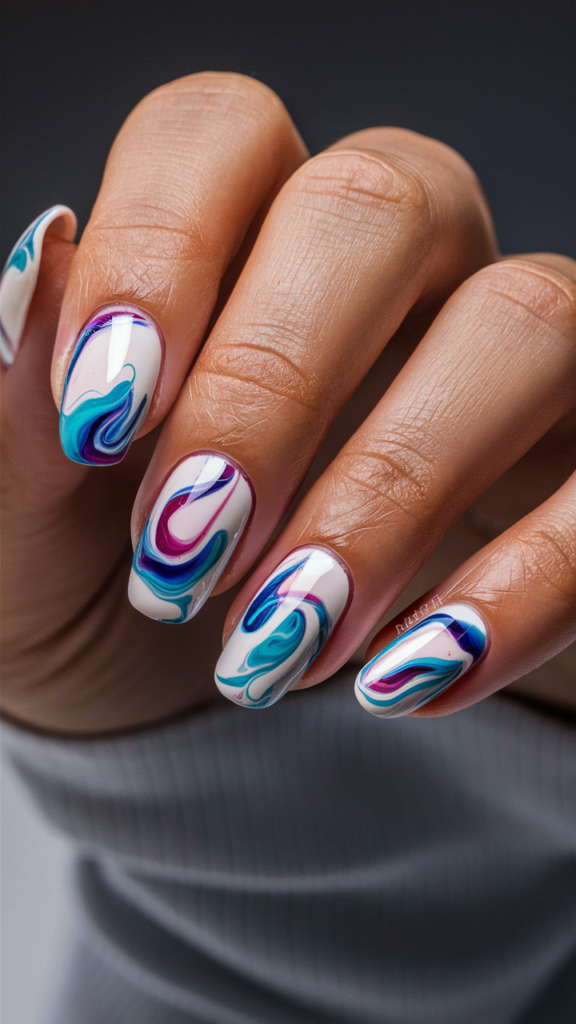
Tie-dye nails bring the vibrant, swirling patterns of this iconic trend straight to your fingertips.
A symbol of creativity and individuality, tie-dye is perfect for adding a playful, streetwear-inspired touch to your nail art.
Step-by-Step Guide to Tie-Dye Nails
1. Choose a Base Color
- Start with a white or pastel base coat to enhance the vibrancy of the tie-dye effect.
- Let the base dry completely for a smooth, even canvas.
2. Select Your Colors
- Pick three to four bright shades, such as blue, pink, yellow, and purple, for a classic tie-dye look.
- For a softer vibe, use pastel versions of these colors.
3. Create the Tie-Dye Swirl
- Add small dots of each color to the nail, spaced randomly across the surface.
- Use a fine brush, toothpick, or needle to gently swirl the colors together, creating the signature tie-dye effect. Work quickly to prevent the polish from drying during the process.
Pro Tip: Avoid over-mixing to preserve the distinctiveness of each color.
4. Add Fun Details (Optional)
- Incorporate small elements like stars, hearts, or peace signs to emphasize the playful tie-dye theme.
- Use glitter polish for a subtle sparkle.
5. Seal the Design
Apply a glossy top coat to smooth out the design and enhance the swirl effect. For a more muted finish, opt for a matte top coat.
Creative Variations
- Neon Tie-Dye: Use neon colors for a bold, modern twist on the classic look.
- Monochrome Tie-Dye: Stick to varying shades of one color, like blues or purples, for a more cohesive, elegant design.
- Reverse Tie-Dye: Start with a dark base and swirl in lighter colors for a striking contrast.
Why It Works
Tie-dye nails are vibrant, fun, and endlessly customizable. Perfect for channeling carefree, creative energy, this design is a great choice for anyone looking to add a pop of personality to their streetwear-inspired style.
19. Chain Link Nail Art
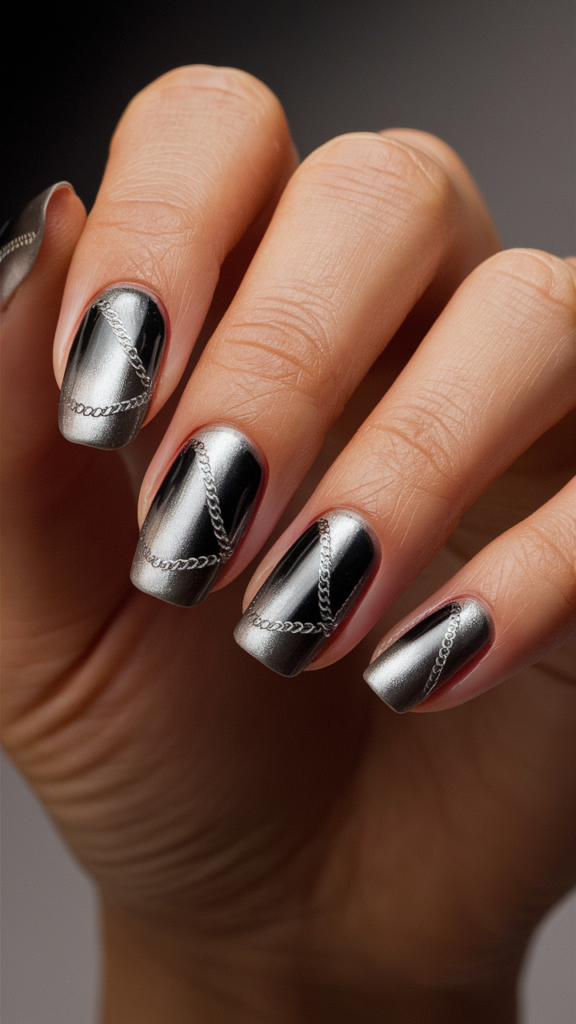
Chain links are a bold symbol of streetwear, blending the gritty aesthetics of industrial design with edgy sophistication.
Incorporating chain-inspired elements into your nail art is a great way to make a strong, street-style statement.
Step-by-Step Guide to Chain Link Nails
1. Start with a Metallic Base
- Apply a metallic silver, gold, or gunmetal base coat for an industrial vibe.
- Allow the base to dry completely before adding details.
2. Paint the Chain Links
- Use a fine nail art brush to paint small interlocking chain shapes across each nail. Begin with simple oval shapes, then connect them to mimic real links.
- For added dimension, use darker shades to create shadows or lighter shades for highlights.
Pro Tip: Start with a single accent nail if you’re new to freehand designs, or use stencils for precision.
3. Add Embellishments
- Incorporate small metallic studs, rhinestones, or even miniature chain pieces to enhance the design.
- Apply these elements sparingly to a few nails for a balanced, bold look.
4. Seal the Look
Use a glossy top coat to protect the design and bring out the metallic shine. For a more muted, industrial aesthetic, a matte top coat works well too.
Creative Variations
- Double Chains: Paint two parallel rows of chain links for a more intricate design.
- Colorful Chains: Use neon or pastel shades instead of metallics for a playful, modern twist.
- Mixed Textures: Combine matte and glossy finishes to add depth and dimension to the design.
Why It Works
Chain link nails are a perfect mix of toughness and style, making them an ideal choice for anyone who loves edgy, urban-inspired designs. Whether paired with bold outfits or casual streetwear, this look is guaranteed to stand out.
20. Brick Wall Nail Art
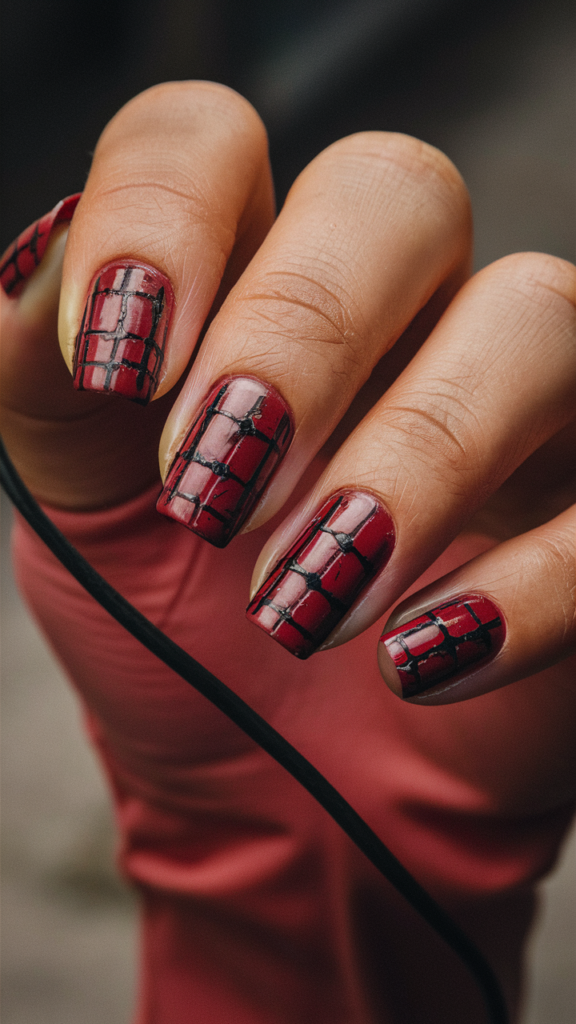
The iconic brick wall, a symbol of urban life and resilience, makes for a striking nail art design.
Mimicking the rugged texture of bricks on your nails adds a touch of street-inspired character and creativity to your look.
Step-by-Step Guide to Brick Wall Nails
1. Choose Your Brick Base Color
- Start with a deep red or brown base coat to represent traditional brick.
- For a modern twist, experiment with shades like gray, white, or pastel pink for painted or chalky brick effects.
2. Paint the Brick Pattern
- Use a fine nail art brush or striping tool to create small, rectangular shapes across each nail, leaving thin gaps between them to mimic mortar lines.
- Use a lighter shade, such as gray or white, for the mortar to create contrast.
Pro Tip: Vary the size and alignment of the bricks slightly for a more realistic, textured look.
3. Add Depth and Texture
- Use a sponge or dry brush technique to dab a darker shade onto the bricks, creating a weathered, distressed appearance.
- Incorporate subtle cracks or chips with a fine brush to mimic aged, worn bricks.
4. Optional Urban Elements
- Add small graffiti details, like tags, splatters, or stencils, for a true street-art vibe.
- Use neon or metallic accents to contrast the rugged texture of the bricks.
5. Seal the Design
Finish with a matte top coat to emphasize the brick-like texture. For a more polished appearance, opt for a glossy finish.
Creative Variations
- Painted Brick Wall: Use pastel or white shades for a softer, chalky look.
- Graffiti Accent Nails: Add graffiti designs to a single nail for a bold, urban statement.
- Gradient Brick: Blend shades of red, orange, and brown for a fiery ombré effect.
Why It Works
Brick wall nails are a unique way to channel the gritty, urban aesthetic of street culture. Whether you prefer a clean, structured look or a distressed, artistic vibe, this design offers plenty of room for creativity and personalization.
21. Pixel Art Nail Art
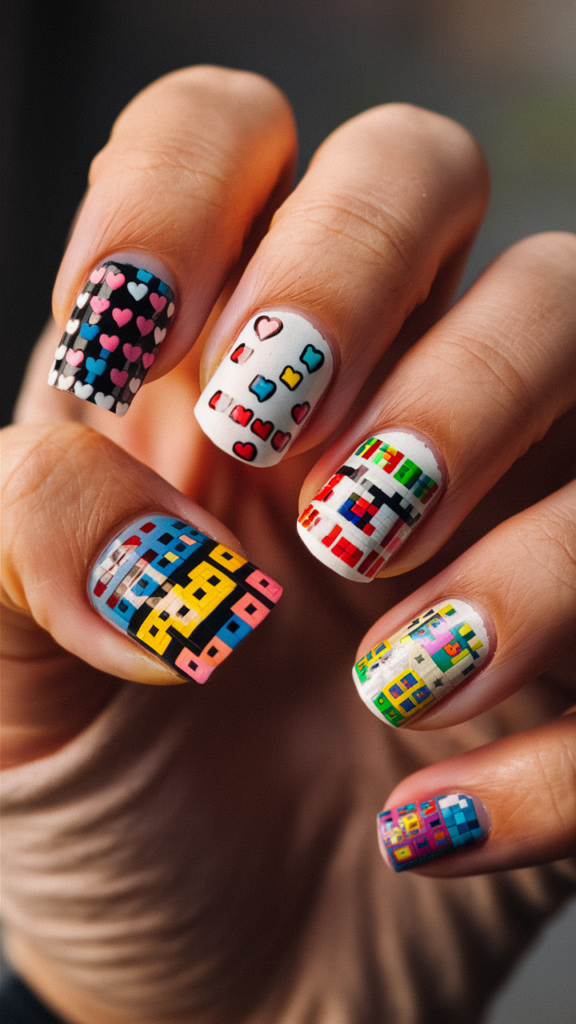
Pixel art, with its blocky shapes and bold colors, brings nostalgic vibes from retro gaming straight to your nails.
This fun, playful design merges the energy of street culture with the charm of classic video games for a unique and vibrant look.
Step-by-Step Guide to Pixel Art Nails
1. Prep with a Neutral Base
- Start with a white or pastel base coat to make the pixel designs pop.
- Alternatively, use a light gray or pale pink for a softer, modern twist.
2. Choose Your Pixel Designs
- Plan simple shapes like hearts, stars, or gaming icons such as a joystick or coin.
- Use a fine nail art brush or dotting tool to create small, square-shaped blocks to form the designs.
Pro Tip: Stick to bold, bright colors like red, yellow, blue, and green to keep the retro aesthetic authentic.
3. Add Details and Dimension
- Outline the shapes with a thin black line for a crisp, classic pixel art effect.
- For added depth, incorporate lighter or darker shades of the same color to mimic shading within the design.
4. Seal the Design
Finish with a glossy top coat to enhance the vibrant colors and smooth out the pixelated texture.
Creative Variations
- Gaming Collage: Feature a different gaming-inspired design on each nail, such as a mushroom, controller, or pixelated character.
- Monochrome Pixel Art: Stick to one color family, like shades of blue, for a cohesive look.
- Glow-in-the-Dark Pixels: Use glow-in-the-dark polish for a fun twist that stands out at night.
Why It Works
Pixel art nails are a nostalgic throwback with a modern edge, blending retro gaming culture with contemporary street style. Perfect for gamers, art lovers, or anyone looking to make a bold, playful statement.
22. Graffiti Tag Nail Art
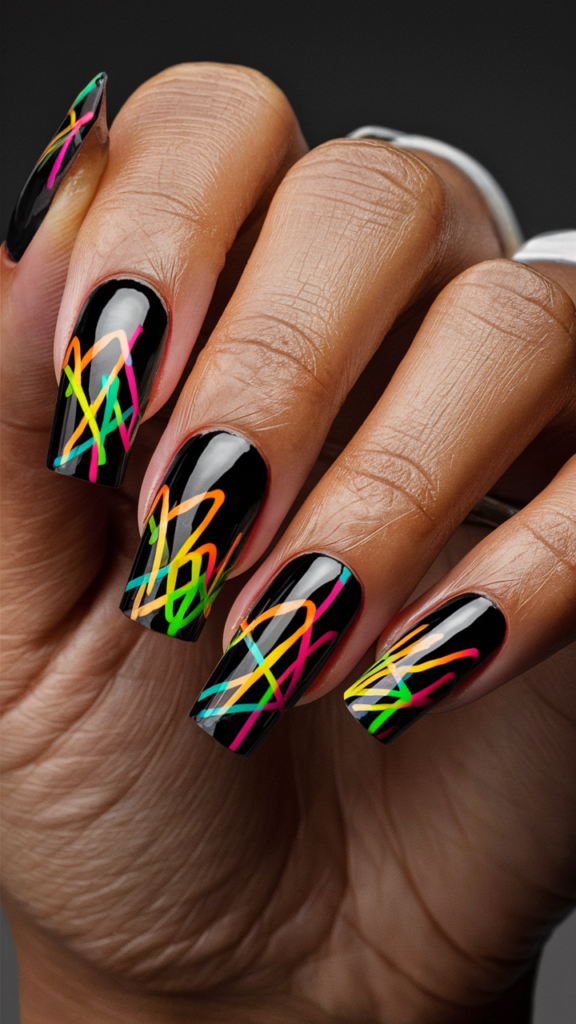
Graffiti tags are a cornerstone of street art, characterized by bold, expressive lettering and vibrant designs.
Translating this raw, energetic art form onto your nails allows you to channel the rebellious spirit of street culture in a creative and eye-catching way.
Step-by-Step Guide to Graffiti Tag Nails
1. Choose a Bold Base Color
- Start with a matte black or dark gray base coat to mimic the look of a city wall.
- For a brighter aesthetic, use a white base to make the graffiti tags pop.
2. Plan Your Tag Designs
- Sketch out simple tag-style letters, symbols, or words on paper first to decide on your layout. Popular ideas include your initials, fun words like “LOVE” or “BOOM,” or abstract shapes.
3. Paint the Tags
- Use a fine nail art brush to paint your tags onto each nail with vibrant colors like neon pink, yellow, or blue.
- Mimic spray paint effects by adding soft, faded edges or small splatters around the letters.
Pro Tip: Use stencils or decals if freehand graffiti feels too challenging.
4. Add Details and Highlights
- Outline the tags with a contrasting color to make them stand out.
- Incorporate small accents like arrows, dots, or drips for an authentic graffiti vibe.
5. Seal the Design
Apply a glossy or matte top coat to protect the design. Gloss enhances the colors’ vibrancy, while matte gives it a raw, urban feel.
Creative Variations
- Gradient Graffiti: Blend multiple colors within the tag for a dynamic, layered effect.
- Metallic Tags: Use metallic polish for an elevated, modern twist on classic graffiti.
- Tag Collage: Mix different tag styles and colors across your nails for a chaotic, artistic vibe.
Why It Works
Graffiti tag nails let you showcase your individuality and creativity, capturing the bold, unpolished energy of urban art. This design is perfect for anyone looking to make a strong, stylish statement that’s full of personality.
23. Cracked Concrete Nail Art
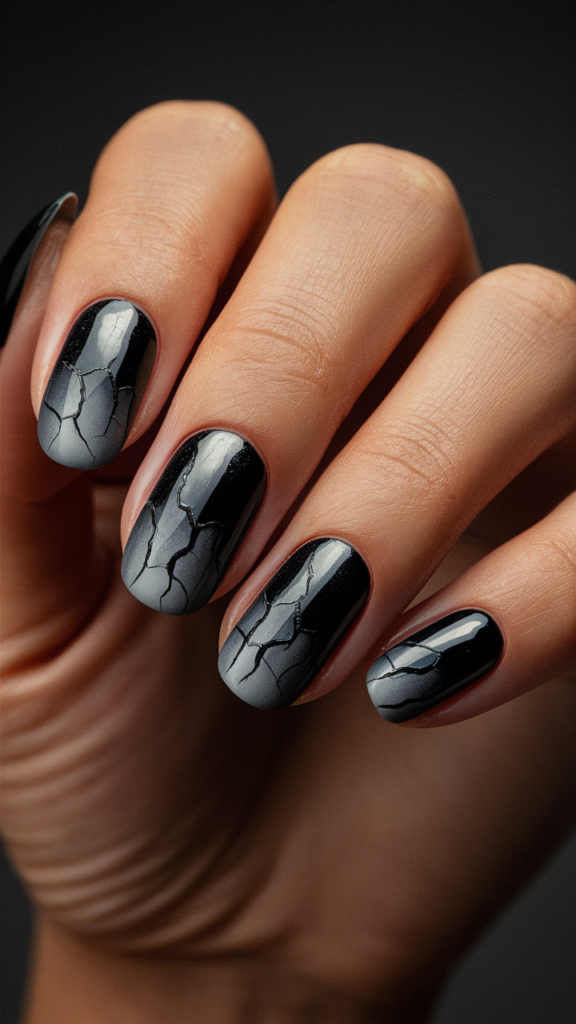
The cracked, weathered look of concrete is a signature element of urban landscapes, symbolizing the resilience and grit of city life.
Bringing this raw texture to your nails creates a bold, street-inspired design full of character.
Step-by-Step Guide to Cracked Concrete Nails
1. Start with a Gray Base
- Apply a medium gray or taupe base coat to mimic the color of concrete.
- Let the base dry completely for a smooth surface.
2. Create the Cracked Effect
- Use a fine nail art brush or sponge to paint irregular lines and cracks across the nails with a darker gray or black polish.
- Focus on creating random, uneven patterns for a realistic, organic look.
Pro Tip: Vary the thickness of the lines to add depth and dimension.
3. Add Subtle Texture
- Use a dry sponge to dab on lighter gray or white polish in patches, simulating worn, weathered areas on the concrete.
- For extra detail, incorporate small chips or specks with a fine brush or toothpick.
4. Optional Urban Elements
- Add graffiti-inspired accents like small tags, splatters, or neon highlights to contrast the gritty base.
- Use metallic silver or gold to represent embedded elements like rebar for a unique twist.
5. Seal the Design
Finish with a matte top coat to enhance the concrete-like texture. A glossy top coat can be used for a polished, modern interpretation.
Creative Variations
- Colored Concrete: Experiment with pastel or neon bases for a playful, abstract take on the design.
- Graffiti-Concrete Fusion: Combine cracks with colorful graffiti motifs for a layered, urban art look.
- Cracked Metallics: Use metallic silver or bronze for the cracks to elevate the rugged aesthetic.
Why It Works
Cracked concrete nails are a unique way to embrace urban textures and aesthetics. Rugged yet stylish, this design captures the essence of city life while offering endless opportunities for creative personalization.
24. Barcode Nail Art
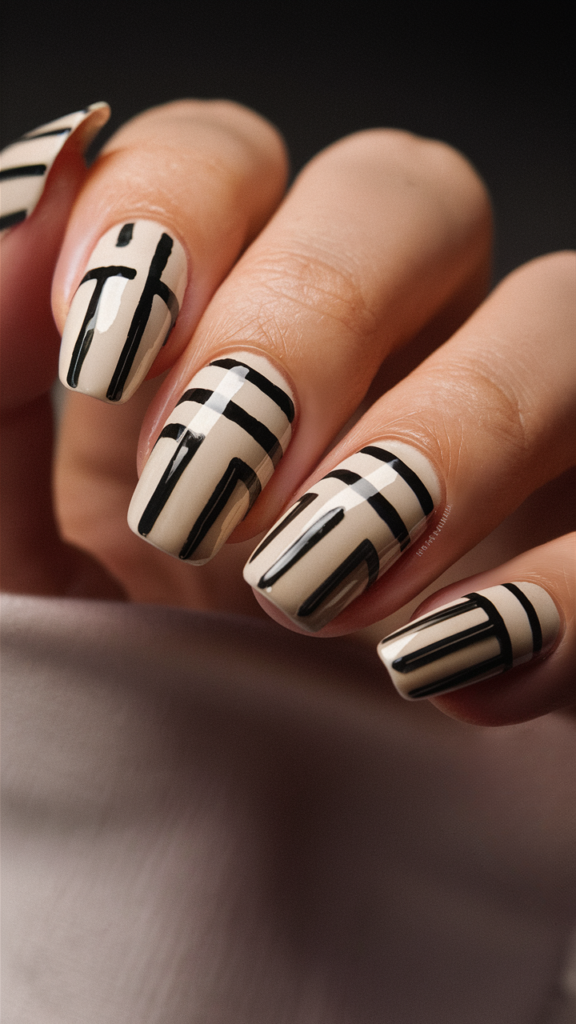
Barcodes are a symbol of modern consumerism, with their sleek, linear design offering a clean, minimalist aesthetic.
Translating this motif onto your nails creates a bold, futuristic look perfect for fans of contemporary street style.
Step-by-Step Guide to Barcode Nail Art
1. Prep Your Base
- Start with a white or light gray base coat to replicate the neutral canvas of traditional barcodes.
- Let the base dry completely to avoid smudging the design.
2. Create the Barcode Lines
- Use a thin nail art brush or striping tool to paint vertical black lines of varying widths across the nails.
- Space the lines unevenly to mimic the irregularity of real barcodes.
Pro Tip: Practice the line pattern on paper first to perfect the layout before applying it to your nails.
3. Add Numbers or Symbols
- Use a fine brush or nail art pen to add small numbers or characters below the lines for an authentic barcode look.
- Consider incorporating a meaningful sequence, like a special date or initials, for a personalized touch.
4. Seal the Design
Finish with a glossy top coat to highlight the crispness of the lines and give the nails a polished appearance. For a more industrial feel, opt for a matte top coat.
Creative Variations
- Colored Barcodes: Use neon or pastel shades for the lines to create a playful twist on the traditional black-and-white design.
- Gradient Background: Apply a gradient base from light to dark to add depth to the minimalist design.
- Metallic Barcodes: Swap black lines for metallic silver or gold for a luxe, modern look.
Why It Works
Barcode nails combine clean, minimalist design with edgy, contemporary vibes. Whether you prefer the classic black-and-white style or want to experiment with color and texture, this design is versatile and effortlessly cool.
25. Street Sign Nail Art
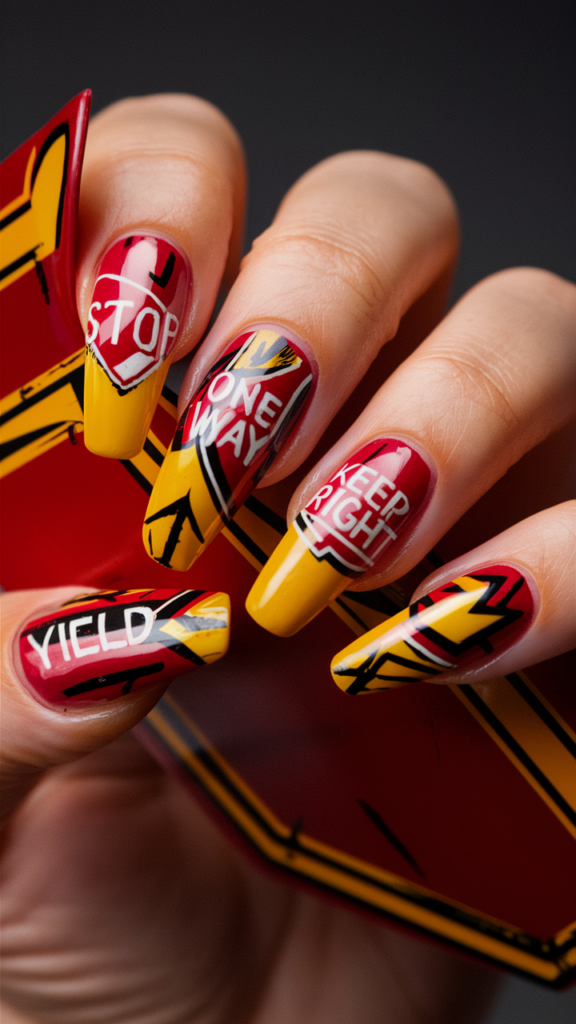
Street signs are instantly recognizable symbols of city life, blending bold shapes and bright colors with practical design.
Incorporating these motifs into your nail art lets you channel the dynamic energy of urban streets while making a fun and creative statement.
Step-by-Step Guide to Street Sign Nail Art
1. Choose Your Base Color
- Opt for a matte black or dark gray base coat to mimic the asphalt of city streets.
- Alternatively, use white or another neutral shade to let the vibrant street sign designs stand out.
2. Add Street Sign Motifs
- Use a fine nail art brush or stencils to paint small street signs such as stop signs, arrows, or traffic signals. Bright red, yellow, green, and blue work well to replicate authentic signage.
- Focus on one sign per nail for a clean, bold look or layer multiple signs for a collage effect.
Pro Tip: Incorporate recognizable symbols like “STOP,” pedestrian crossing icons, or directional arrows for authenticity.
3. Enhance the Details
- Outline the signs with white or black polish for crisp edges.
- Add small text or symbols to mimic the design of real street signs.
4. Seal the Design
Apply a glossy top coat to protect the intricate designs and give the nails a polished finish. For a grittier, urban feel, consider a matte top coat.
Creative Variations
- Neon Street Signs: Use neon shades for a playful, modern twist.
- Metallic Accents: Add metallic details like gold or silver for a luxe interpretation.
- Street Collage: Combine various signs across your nails to create a layered, dynamic look.
Why It Works
Street sign nails capture the vibrancy and functionality of urban design, turning everyday city symbols into wearable art.
Whether you stick to classic signage or mix in your own creative spin, this bold and dynamic design is sure to stand out.
26. Bubble Letter Nail Art
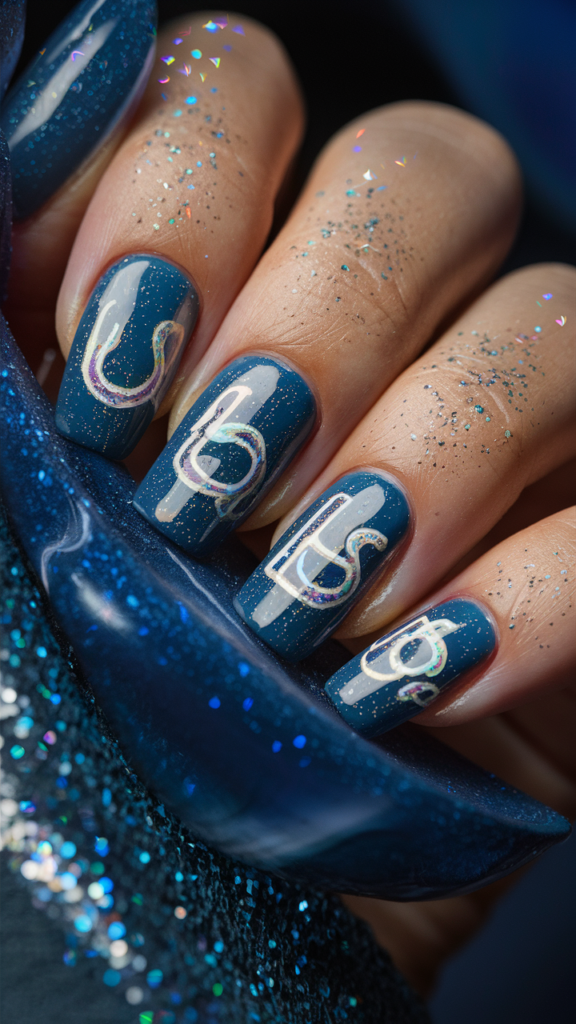
Bubble letters are a hallmark of graffiti culture, with their rounded shapes and bold outlines exuding creativity and fun.
Bringing this lively style to your nails allows you to embrace the playful side of street art while making a unique and bold statement.
Step-by-Step Guide to Bubble Letter Nails
1. Prep with a Bright Base Color
- Choose a vibrant base coat like bright blue, pink, or yellow to complement the colorful bubble letters.
- Let the base dry completely for a smooth, clean canvas.
2. Plan Your Bubble Letter Designs
- Sketch out simple words or phrases on paper first, such as “WOW,” “POP,” or your initials.
- Keep the letters rounded and exaggerated to capture the classic bubble letter style.
3. Paint the Letters
- Use a fine nail art brush to paint each letter in bold, contrasting colors. Start with one letter per nail or fit shorter words across multiple nails.
- Outline each letter with black polish for definition and authenticity.
Pro Tip: Add small highlights in white or light-colored polish to give the letters a three-dimensional effect.
4. Add Decorative Details
- Incorporate graffiti-inspired elements like stars, hearts, or dots around the letters for extra flair.
- Use neon or metallic polish to make the design pop.
5. Seal the Design
Finish with a glossy top coat to enhance the colors and protect the intricate details. For a raw, street-inspired finish, opt for a matte top coat.
Creative Variations
- Gradient Letters: Blend colors within the letters for a gradient effect.
- Layered Graffiti: Add a graffiti-style background to each nail with splatters or abstract patterns.
- Minimalist Bubble Letters: Use subtle outlines and muted colors for a softer, more refined take.
Why It Works
Bubble letter nails are the perfect fusion of fun and artistic expression, channeling the bold energy of graffiti in a wearable format.
This playful design is great for showcasing individuality and adding a splash of personality to any outfit.
27. Tattoo-Inspired Nail Art
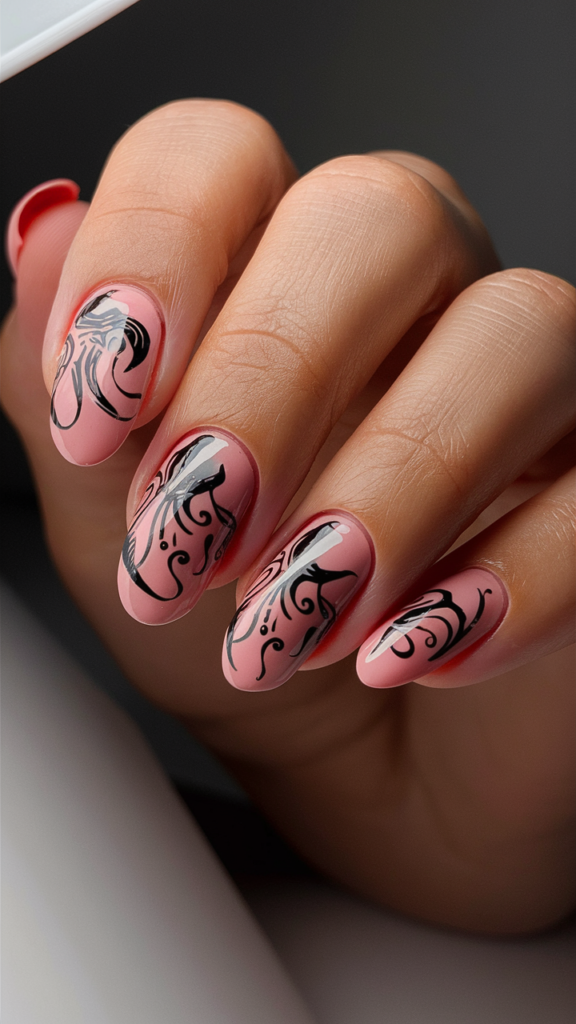
Tattoo-inspired nail art brings the timeless appeal of inked designs to your fingertips.
With motifs like roses, swallows, and skulls, this bold and expressive style captures the edgy spirit of tattoo culture while allowing for endless customization.
Step-by-Step Guide to Tattoo-Inspired Nails
1. Choose a Neutral Base
- Start with a pale pink, nude, or clear base coat to mimic the look of tattooed skin.
- For a more dramatic effect, opt for a black or white base.
2. Plan Your Tattoo Motifs
- Decide on classic tattoo elements, such as roses, anchors, swallows, hearts, or script lettering.
- Sketch the designs on paper first to visualize how they’ll fit on your nails.
3. Paint the Tattoo Designs
- Use a fine nail art brush to paint the motifs in black polish. Add bold outlines and fine details to replicate the intricate style of tattoos.
- For shading, dilute black polish with a clear top coat or use gray to create softer, gradient effects.
Pro Tip: Keep the designs simple and clean for smaller nails, focusing on iconic imagery.
4. Add Highlights and Accents
- Use white polish to add highlights for depth and dimension.
- Incorporate pops of red, blue, or green for traditional tattoo colors, or stick to black and gray for a minimalist look.
5. Seal the Design
Finish with a glossy top coat to enhance the details and protect the design. A matte top coat works well for a vintage tattoo feel.
Creative Variations
- Old School Style: Focus on bold, colorful designs with thick outlines for a traditional tattoo look.
- Minimalist Ink: Use simple black line art on a nude base for a modern, understated aesthetic.
- Tattoo Collage: Mix multiple motifs across your nails for a layered, dynamic effect.
Why It Works
Tattoo-style nails channel the bold and timeless appeal of classic ink, making them a perfect choice for those who love artistic, statement-making designs.
Whether you go minimalist or intricate, this style is as unique as you are.
28. Neon Light Nail Art
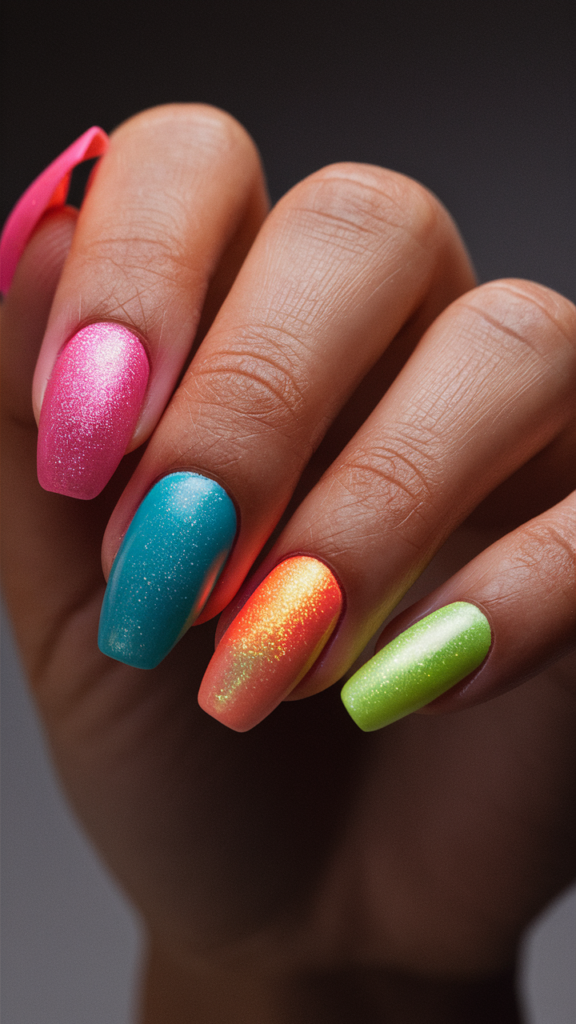
Neon lights are synonymous with city nightlife, buzzing with bright colors and electric energy.
Bringing this vibrant motif to your nails creates a dynamic and eye-catching design that mimics the glow of neon signage.
Step-by-Step Guide to Neon Light Nails
1. Choose a Dark Base
- Start with a matte black or deep navy base coat to replicate the look of a nighttime cityscape.
- Let the base dry completely to create a smooth, clean canvas.
2. Plan Your Neon Designs
- Decide on simple shapes or symbols that resemble neon signs, such as hearts, arrows, stars, or text like “OPEN” or “LOVE.”
- Sketch the designs on paper first to plan spacing and layout.
3. Paint the Neon Lines
- Use a fine nail art brush to paint thin lines in vibrant neon shades such as pink, blue, yellow, or green.
- For a glowing effect, apply a lighter shade of the same color around the edges of the design, blending gently outward.
Pro Tip: Add a soft white or pastel base layer beneath the neon colors to enhance their brightness.
4. Create the Glow Effect
- Use a small sponge or brush to blend neon polish outward from the design’s edges, creating a subtle gradient that mimics the glow of real neon lights.
5. Seal the Design
Apply a glossy top coat to intensify the colors and give the nails a polished, reflective finish. For an authentic glow-in-the-dark effect, use a UV-reactive or glow polish as a top coat.
Creative Variations
- Street Signs: Combine multiple neon symbols across your nails to create the look of a busy cityscape.
- Gradient Glow: Blend two or more neon shades in the same design for a multicolor glow effect.
- Glow-in-the-Dark: Use glow-in-the-dark top coats to make the designs visible even in the dark.
Why It Works
Neon light nails are a bold and electrifying design that captures the vibrant energy of urban nightlife.
Perfect for parties or simply adding a pop of brightness to your day, this style ensures your nails are always in the spotlight.
29. Streetwear Fabric-Inspired Nail Art
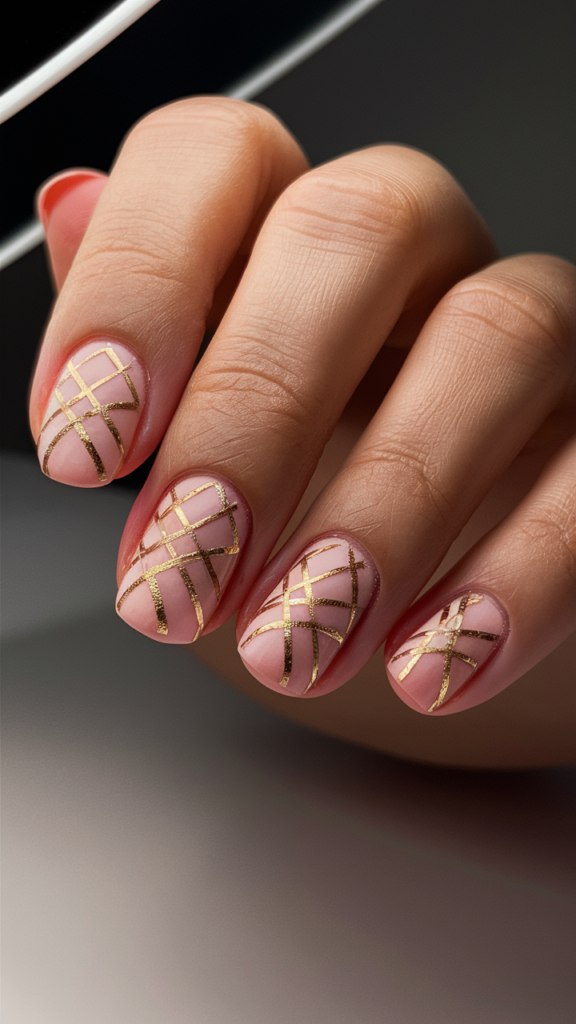
Streetwear is known for its innovative use of fabrics like mesh, leather, and nylon, which add unique textures and depth to any look.
Incorporating these textures into nail art allows you to capture the essence of streetwear in a modern, creative way.
Step-by-Step Guide to Streetwear Fabric-Inspired Nails
1. Choose Your Fabric-Inspired Base
- Decide on a fabric theme, such as leather, mesh, or nylon.
- For leather, use a matte black or deep brown polish as the base.
- For mesh, opt for a neutral or clear base to let the texture stand out.
2. Create the Texture
- Leather: Use a matte top coat over a black base for a soft, leather-like finish. Add subtle cracks or seams with a thin brush for extra realism.
- Mesh: Use a striping brush or stencil to paint a grid-like pattern with black or metallic polish.
- Nylon: Apply a satin-finish polish to mimic the smooth, slightly shiny texture of nylon.
Pro Tip: Use a sponge to dab on lighter or darker shades to add depth and mimic fabric wear.
3. Add Embellishments
- Incorporate studs, chains, or small rhinestones to mimic zippers or hardware often found in streetwear.
- Use metallic foil for a futuristic, urban touch.
4. Seal the Design
Apply a matte or glossy top coat, depending on your chosen fabric. Matte works well for leather or mesh, while gloss enhances the look of satin or nylon.
Creative Variations
- Patchwork Look: Combine different fabric textures across your nails for a layered, streetwear-inspired style.
- Metallic Highlights: Add metallic stripes or accents to elevate the design.
- Graffiti Fabric Fusion: Incorporate graffiti-like patterns over the textured nails for a bold statement.
Why It Works
Streetwear fabric nails blend texture and creativity, offering a bold and modern interpretation of urban fashion.
Perfect for those who love edgy, tactile designs, this look adds depth and character to any outfit.
30. Ripped Paper Nail Art
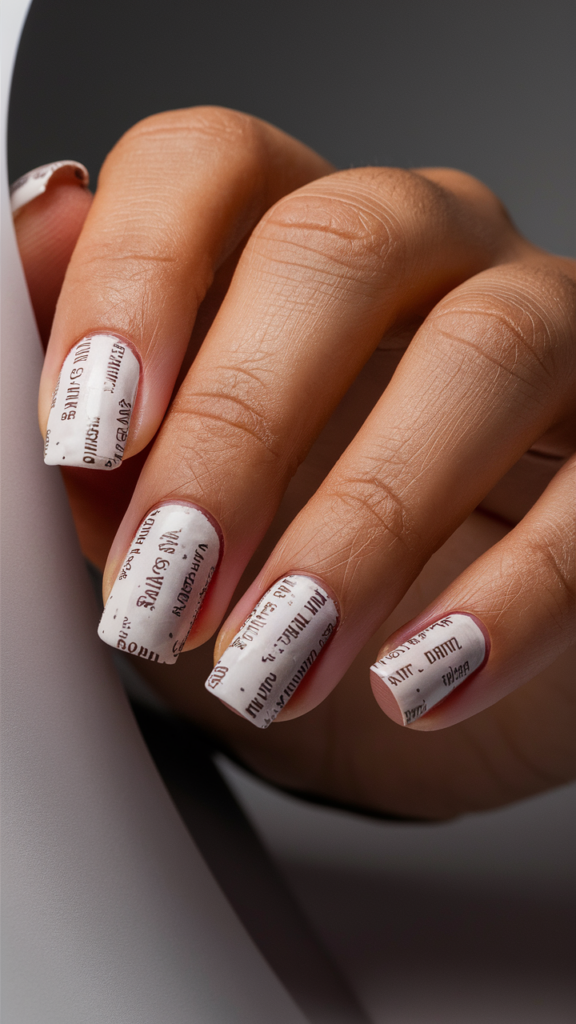
Ripped paper is a common motif in street art, symbolizing layers of creativity and history on city walls.
By recreating this textured, unpolished aesthetic on your nails, you can channel the raw energy of urban life with a stylish twist.
Step-by-Step Guide to Ripped Paper Nails
1. Start with a Neutral Base
- Use a white, gray, or light beige base coat to mimic the canvas of a postered or painted wall.
- Allow the base to dry completely before adding layers.
2. Create the Ripped Paper Effect
- Use a fine nail art brush or sponge to paint jagged, irregular edges across the nails with darker shades like black or gray. These shapes will mimic the torn edges of paper.
- Layer additional “ripped” pieces in contrasting colors like pastel pink, blue, or neon yellow to create depth and visual interest.
Pro Tip: Add texture by using a dry brush technique to create streaks and worn effects.
3. Add Urban Details
- Incorporate small elements like graffiti tags, stickers, or abstract shapes to mimic the look of layered street posters or advertisements.
- Use metallic or glitter accents for a modern, artistic touch.
4. Seal the Design
Apply a matte top coat to emphasize the layered, rough texture of the design. A glossy finish can be used for a more polished take on the style.
Creative Variations
- Colorful Layers: Use bright, clashing colors for the torn edges to create a playful, eye-catching look.
- Minimalist Rips: Stick to a monochrome palette for a subtle, sophisticated design.
- Graffiti Collage: Add tiny graffiti-style details over the layers for a dynamic urban art effect.
Why It Works
Ripped paper nails are a creative way to embrace the layered, chaotic energy of street art.
This design offers endless opportunities for customization, making it perfect for expressing your individuality and love for urban culture.
31. Sticker Bomb Nail Art
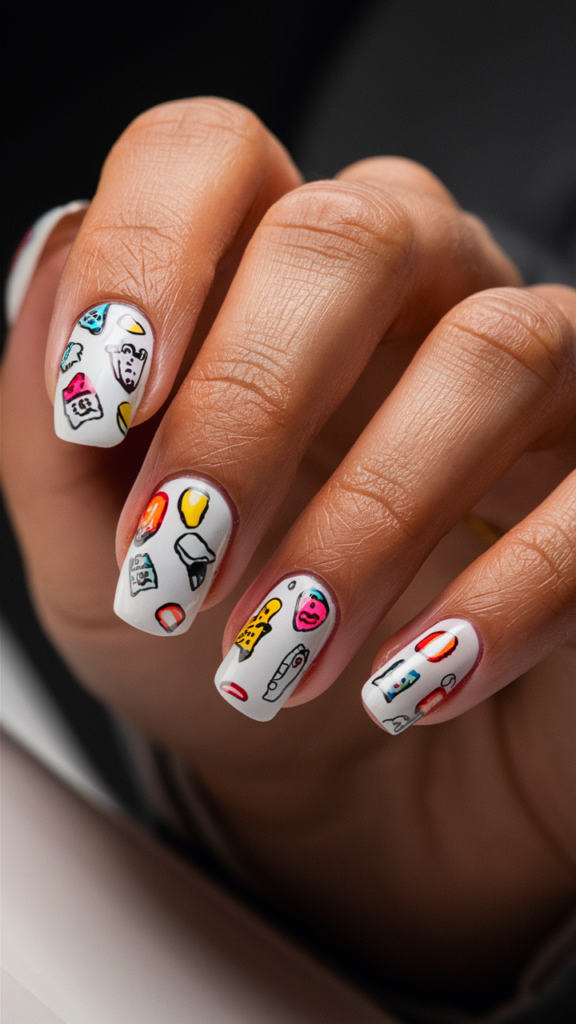
Sticker bombing, a popular street art technique, layers colorful stickers to create an eclectic and chaotic design.
Bringing this concept to your nails allows you to showcase a dynamic, playful style packed with personality and creativity.
Step-by-Step Guide to Sticker Bomb Nails
1. Start with a Neutral Base
- Use a white, pastel, or light-colored base coat to serve as a clean canvas for your stickers.
- Allow the base to dry completely before adding layers.
2. Select Your Stickers
- Choose small nail art stickers or decals featuring street-inspired motifs such as logos, graffiti tags, hearts, eyes, or abstract patterns.
- Opt for a variety of colors, shapes, and sizes for a lively, layered effect.
3. Apply the Stickers
- Carefully place each sticker on your nails, layering them randomly to mimic the overlapping style of sticker bombing.
- Use tweezers for precise placement and trim any excess sticker material for a clean finish.
Pro Tip: Leave a mix of empty space and layered areas for a balanced look.
4. Add Painted Details
- Enhance the design by adding hand-painted accents like dots, splatters, or lines around the stickers.
- Use neon or metallic polishes to tie the elements together.
5. Seal the Design
Apply a thick, glossy top coat to secure the stickers and create a smooth, cohesive finish. For an edgy, urban vibe, consider a matte top coat.
Creative Variations
- Themed Bomb: Choose a single theme, like graffiti tags or pop culture icons, for a more cohesive look.
- Monochrome Bomb: Use stickers and details in shades of one color for a minimalist style.
- Textured Stickers: Mix flat stickers with raised elements like rhinestones or studs for added depth.
Why It Works
Sticker bomb nails are bold, playful, and endlessly customizable, letting you express your creativity and love for street culture.
This layered design ensures that every nail tells a unique story, making it perfect for those who love eclectic, eye-catching art.
32. Glow-In-The-Dark Graffiti Nail Art
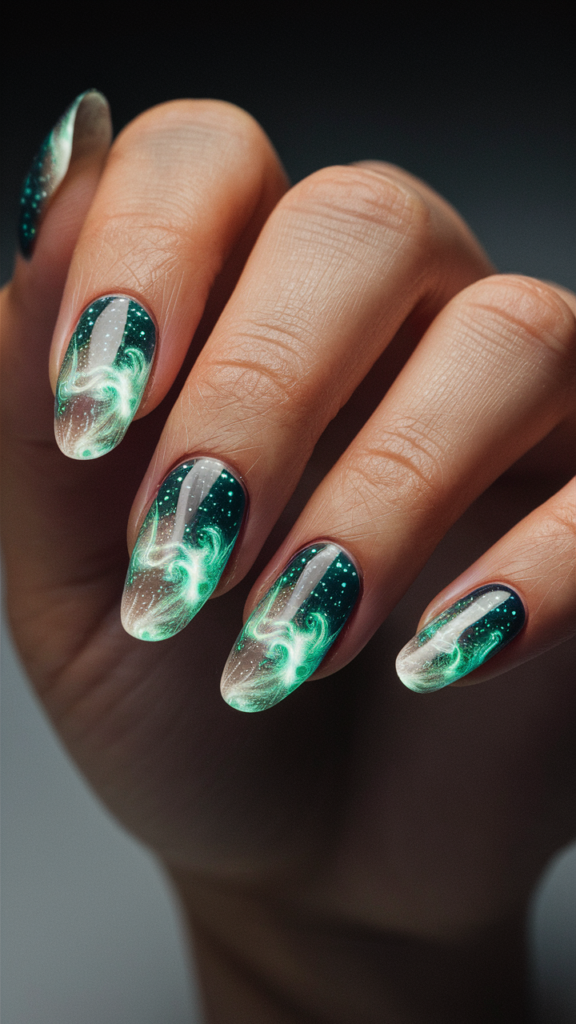
Glow-in-the-dark graffiti combines the vibrant energy of street art with a touch of nighttime magic.
This bold and electrifying nail design captures the essence of urban creativity while offering a fun, luminous twist that stands out in the dark.
Step-by-Step Guide to Glow-In-The-Dark Graffiti Nails
1. Start with a Bold Base
- Apply a matte black or deep gray base coat to create the look of a city wall at night.
- Let the base dry completely for a smooth surface.
2. Plan Your Graffiti Elements
- Sketch out simple graffiti motifs like tags, arrows, or abstract shapes. Consider bold designs that will pop against the dark base.
3. Paint the Graffiti
- Use neon or glow-in-the-dark polishes to paint your graffiti designs. Thin brushes work well for intricate tags and outlines.
- Incorporate a mix of bright colors like pink, green, yellow, and blue for a layered, dynamic effect.
Pro Tip: Apply a white base layer beneath the glow-in-the-dark polish for a brighter, more vibrant glow.
4. Create a Glow Effect
- Use a sponge or fine brush to blend the edges of the neon polish outward, mimicking the soft, glowing effect of real neon lights.
- Add subtle splatters or dots around the designs to enhance the glowing, urban vibe.
5. Seal the Design
Finish with a glow-enhancing top coat to lock in the design and amplify the glowing effect under UV or black light.
Creative Variations
- Full Neon Collage: Cover each nail with multiple graffiti designs for a chaotic, vibrant look.
- Monochrome Glow: Use shades of a single color for a cohesive yet striking design.
- Mixed Media Graffiti: Combine glow-in-the-dark designs with metallic accents for added depth and texture.
Why It Works
Glow-in-the-dark graffiti nails bring the dynamic energy of street art to life, even after the lights go out.
This bold and creative style is perfect for those who love making a statement, day or night.
33. Holographic Skater Nail Art
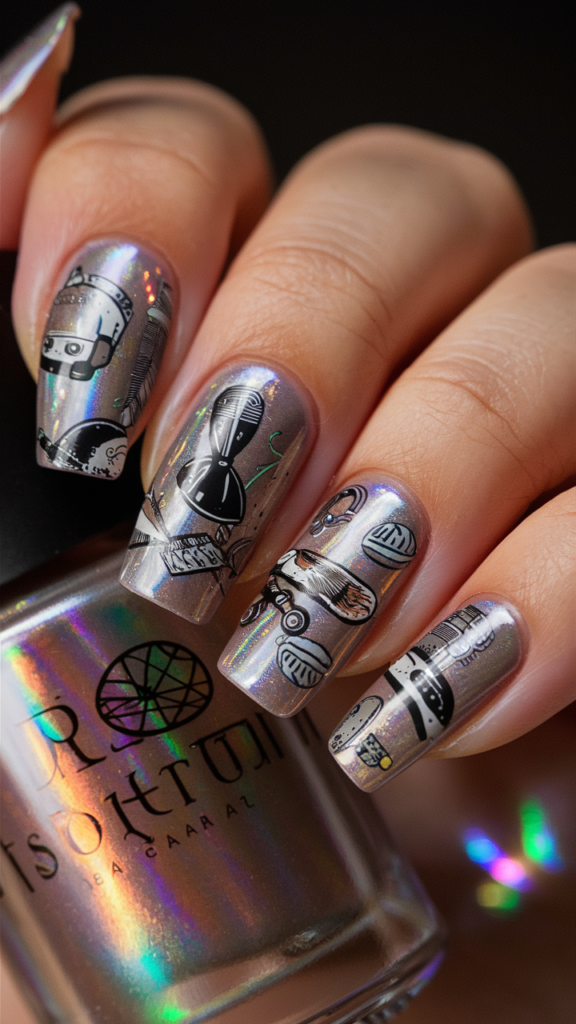
Holographic designs are the perfect way to capture the edgy, high-energy aesthetic of skate culture.
Combining reflective, shiny surfaces with skate-inspired motifs, this nail art design brings bold, modern street style to your fingertips.
Step-by-Step Guide to Holographic Skater Nails
1. Start with a Holographic Base
- Apply a holographic or metallic silver polish as the base coat to create a reflective, futuristic effect.
- Let the base dry completely for a smooth, shiny surface.
2. Add Skater-Inspired Motifs
- Use a fine nail art brush to paint skate-related elements like wheels, boards, or graffiti-inspired logos.
- Opt for bold colors such as neon pink, green, or yellow to contrast against the holographic background.
Pro Tip: Keep designs simple and clean to avoid overwhelming the holographic effect.
3. Create Textural Layers
- Add small geometric patterns like stripes, grids, or arrows around the skater motifs for extra detail.
- Incorporate matte black or white polish to balance the shine of the holographic base.
4. Seal the Design
Finish with a glossy top coat to protect the design and enhance the reflective quality of the holographic polish.
Creative Variations
- Gradient Holographic: Use multiple holographic colors to create an ombré effect across your nails.
- Accent Nails: Feature holographic designs on a few nails, leaving the others with matte or neutral finishes for contrast.
- Mixed Media: Add small 3D embellishments like studs or rhinestones for an industrial, skater-inspired vibe.
Why It Works
Holographic skater nails combine the rebellious energy of skate culture with the futuristic appeal of holographic finishes.
This design is perfect for those who love bold, eye-catching looks that reflect their individuality and love for urban street style.
34. Mismatched Pattern Nail Art
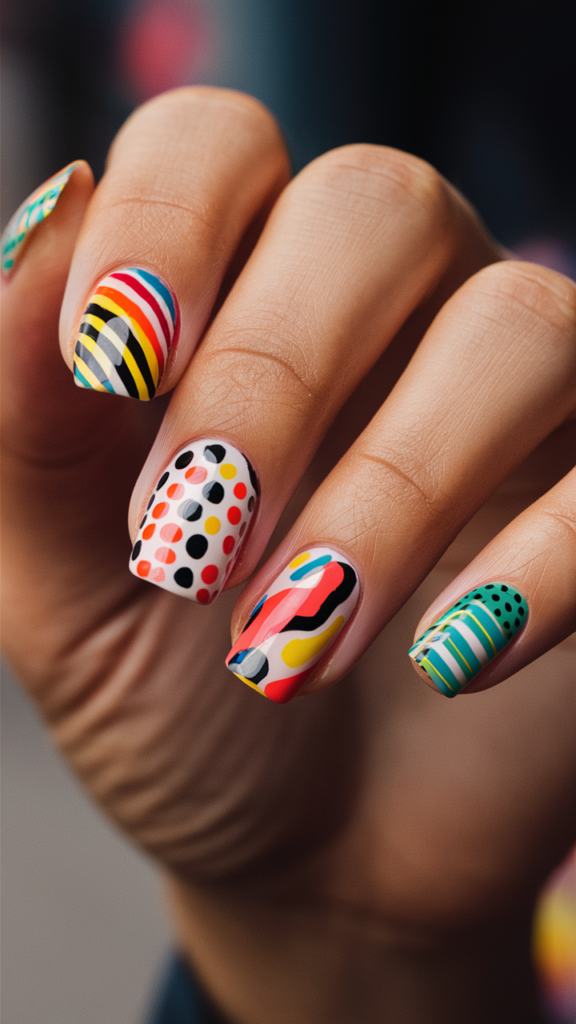
Mismatched patterns are all about breaking the rules, combining bold designs and vibrant colors to create an eclectic, playful look.
Inspired by the carefree energy of streetwear, this nail art style lets you experiment and showcase your individuality.
Step-by-Step Guide to Mismatched Pattern Nails
1. Start with a Base Coat
- Use a neutral base like white, nude, or light gray for a clean canvas.
- Alternatively, start with different base colors on each nail for a lively, colorful foundation.
2. Choose Your Patterns
- Pick a mix of bold patterns like checkerboards, polka dots, stripes, and abstract shapes.
- Decide on a unique design for each nail, ensuring the overall look is cohesive through similar colors or styles.
3. Paint the Patterns
- Use a fine nail art brush or striping tool to create clean, precise lines and shapes.
- Mix and match contrasting patterns on adjacent nails for maximum impact.
Pro Tip: Incorporate negative space designs to add balance and prevent the look from feeling overcrowded.
4. Add Embellishments
- Enhance the patterns with metallic accents, glitter, or small rhinestones for added depth and texture.
- Use neon shades for a bold streetwear-inspired twist.
5. Seal the Design
Finish with a glossy or matte top coat to unify the patterns and protect the design.
Creative Variations
- Theme It: Stick to a single theme, like geometric shapes or animal prints, for a more cohesive look.
- Muted Mismatch: Use pastel or monochromatic shades for a softer, understated take on the mismatched trend.
- Layered Chaos: Overlap patterns on the same nail to create a collage-like effect.
Why It Works
Mismatched patterns are a fun, creative way to channel the bold, rule-breaking spirit of street style.
Whether you prefer vibrant contrasts or a more subtle mix, this design is a versatile and eye-catching way to express your personality.
35. Urban Jungle Nail Art
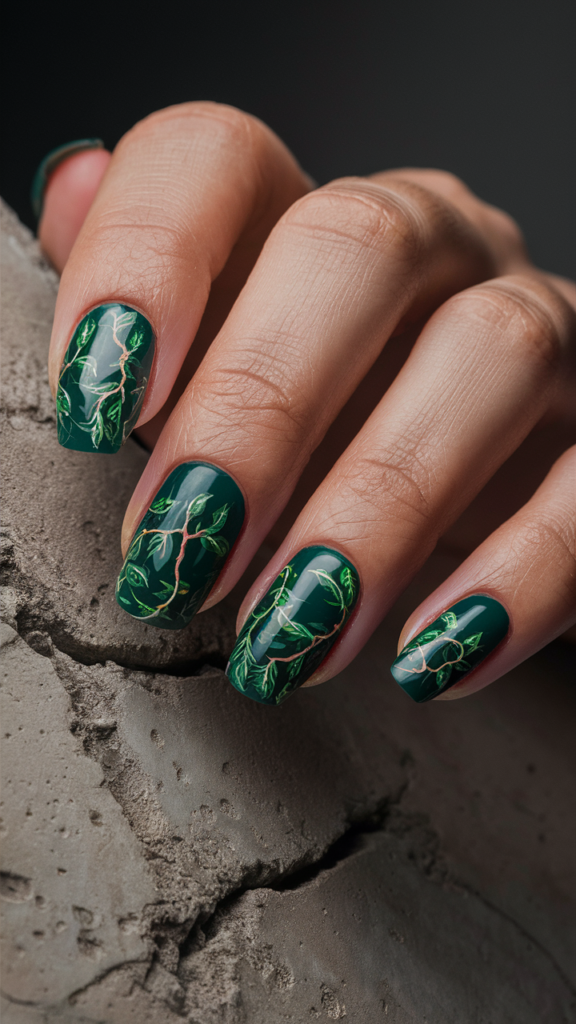
The urban jungle aesthetic combines the raw, gritty textures of city life with lush greenery, creating a striking juxtaposition of nature and the built environment.
Translating this concept into nail art allows you to craft a bold, dynamic design that’s full of life and character.
Step-by-Step Guide to Urban Jungle Nails
1. Start with a Base Coat
- Choose a dark green, gray, or black base to represent the gritty urban environment.
- For a softer vibe, use a neutral base like beige or light gray.
2. Paint Leafy Details
- Use a fine nail art brush to paint vines, leaves, or palm fronds across the nails. Opt for shades of green like emerald, olive, or neon to make the foliage pop.
- Layer the greenery for a lush, dimensional effect.
Pro Tip: Combine multiple leaf styles (e.g., ferns, monstera leaves) for a rich, botanical look.
3. Add Urban Textures
- Incorporate elements like cracks, bricks, or graffiti-inspired patterns alongside the greenery to mimic the urban setting.
- Use metallic accents like gold or silver to represent industrial elements.
4. Seal the Design
Apply a glossy top coat to highlight the details and give the design a polished finish. For a rugged feel, opt for a matte top coat.
Creative Variations
- Graffiti Jungle: Combine bright, graffiti-inspired elements with the greenery for a bold, artistic twist.
- Gradient Background: Create a gradient base transitioning from gray to green to represent the blend of city and nature.
- Metallic Leaves: Paint the foliage in metallic shades for a luxe, urban touch.
Why It Works
Urban jungle nails blend contrasting elements to create a design that’s vibrant and unique.
This style is perfect for those who love bold, dynamic art that captures the essence of the city while embracing the beauty of nature.
Conclusion
Nail art is more than just a beauty trend—it’s a way to wear your individuality on your fingertips.
The designs we’ve explored in this blog are not just about following the latest trends; they are about making a statement, embracing the chaos, and celebrating the creativity that street style embodies.
Whether you’re drawn to the boldness of neon flames, the elegance of city skylines, or the nostalgia of retro patterns, there’s a design here that resonates with your unique style.
So, the next time you’re looking to refresh your nail game, consider channeling the vibrant energy of the streets.
After all, street style isn’t just about what you wear—it’s about how you express yourself in every aspect of your life, including your nails.
