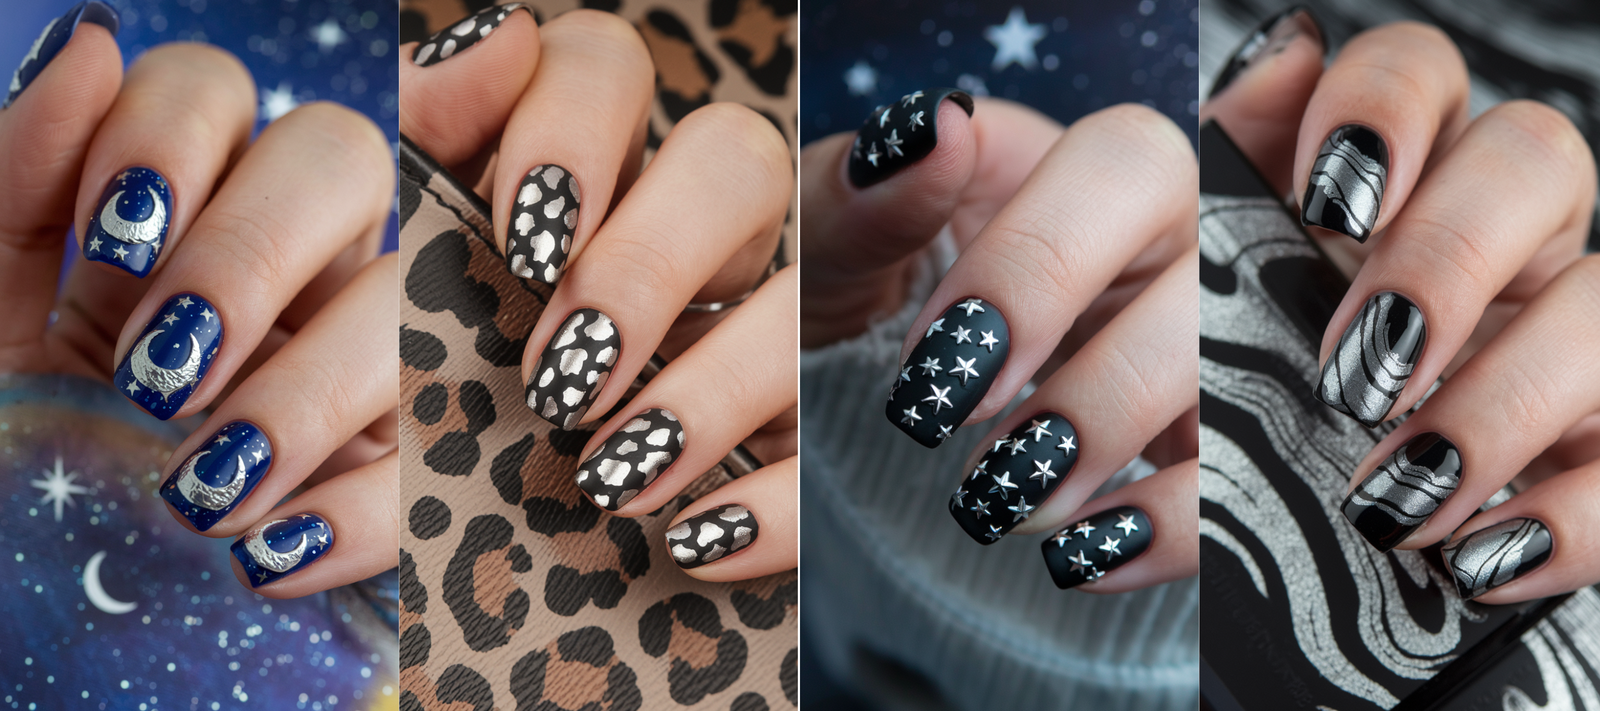
Silver nail art has become a cornerstone of modern beauty trends, offering a wide range of designs that blend elegance, versatility, and creativity.
Whether you’re looking to make a bold statement or add a subtle shimmer to your look, silver nail art provides endless opportunities to express your unique style.
From high-shine chrome finishes to intricate patterns and glittering embellishments, silver nails can be adapted to suit any occasion, outfit, or mood.
In this blog, we will explore 35 stunning silver nail art designs that are guaranteed to inspire.
Whether you’re a fan of minimalist styles, bold patterns, or luxurious accents, there’s something here for everyone.
With detailed descriptions and tips, this guide will help you create salon-quality designs at home or guide you in choosing the perfect look for your next manicure.
Let’s dive into the world of silver nail art and discover the magic it brings to your fingertips.
Classic Silver Chrome Nails
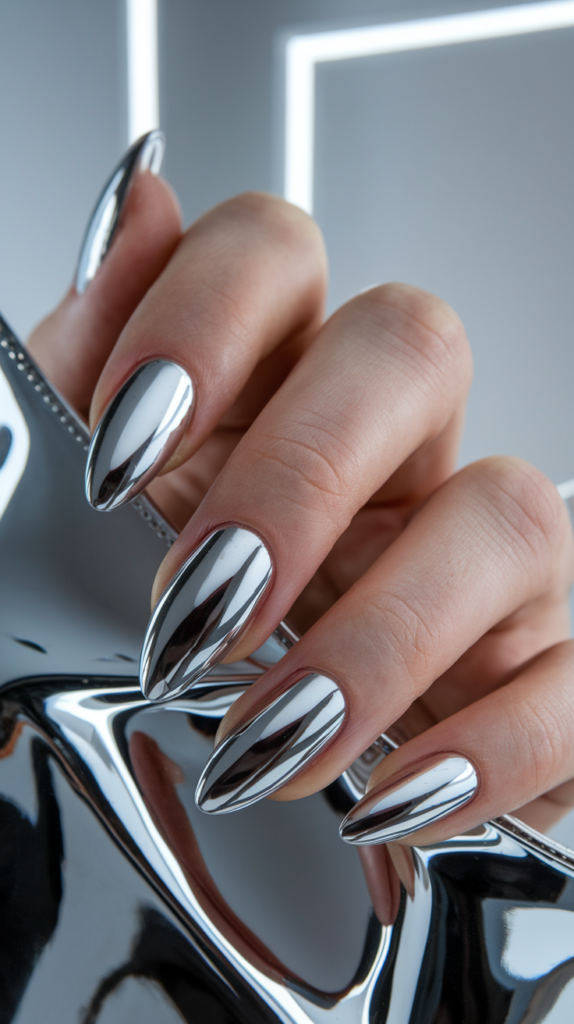
Description Of The Mirror-Like Finish And Futuristic Appeal
Classic silver chrome nails have become a staple in modern nail art, celebrated for their mirror-like finish and sleek, futuristic aesthetic.
This design delivers a high-shine effect that reflects light beautifully, creating a clean and contemporary look.
The mirror-like finish makes the nails appear polished and metallic, giving them an edgy yet elegant vibe.
Perfect for anyone seeking a bold statement, silver chrome nails exude confidence and sophistication, making them ideal for special occasions or fashion-forward everyday wear.
Tips For Achieving The High-Shine Effect At Home
To achieve the iconic silver chrome finish at home, begin by preparing the nails with a smooth base.
A clean and buffed nail surface is essential to ensure the polish or chrome powder adheres properly.
Apply a black or neutral gel base coat, as this enhances the chrome effect.
Once cured, gently rub a fine chrome powder onto the nails using an applicator sponge.
Ensure the powder covers the entire nail for an even, reflective finish.
Seal the look with a clear gel top coat, cure under a UV lamp, and wipe away any residue for a flawless result.
Ideal Occasions For Wearing Chrome Nails
Silver chrome nails are perfect for occasions that call for a touch of glamour.
From upscale parties to fashion shows, they command attention and elevate any outfit.
They are equally suitable for weddings and holiday celebrations, where their reflective shine complements festive attire.
For those who love a bold, everyday look, silver chrome nails also pair effortlessly with casual outfits, adding a polished edge to streetwear or office wear.
Silver Glitter Ombre
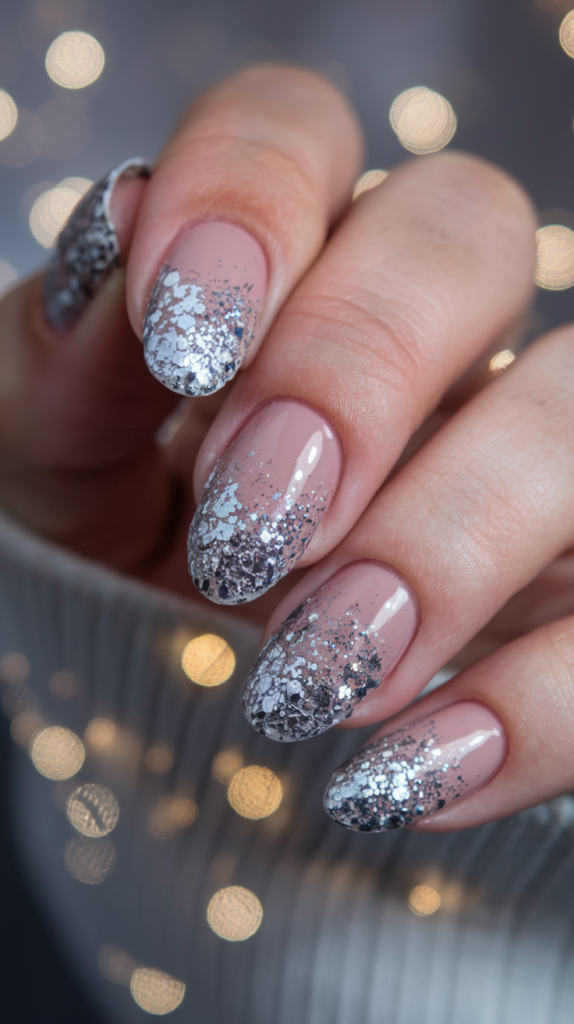
Explanation Of The Gradient Effect And Its Versatility
Silver glitter ombre nails are a popular choice for their versatility and effortless glamour.
This design blends a natural or nude base with a gradient of sparkling silver glitter, creating a seamless transition that is both eye-catching and sophisticated.
The gradient effect allows for customization, making it suitable for understated looks or bold, glitter-heavy finishes.
Silver glitter ombre nails work for any occasion, from casual outings to formal events, and can be paired with various styles to suit individual preferences.
Step-By-Step Guide To Creating This Look
To create silver glitter ombre nails, begin by prepping the nails with a clear or nude base coat.
Once the base is dry, apply silver glitter polish starting at the tips of the nails.
Use a sponge to gently dab the glitter downward toward the center of the nail, creating a gradient effect.
Repeat this process until the desired intensity is achieved.
Finish with a glossy top coat to seal the design and enhance the sparkle.
For a more dramatic look, use loose glitter instead of polish and apply it with a fine brush.
Popular Combinations With Other Colors Or Styles
Silver glitter ombre nails pair beautifully with various color bases, including pastel pinks, soft blues, or deep blacks.
Adding small rhinestones or metallic studs can enhance the design further, creating a multidimensional look.
For a festive twist, combine silver glitter ombre with holiday-themed nail art, such as snowflakes or stars, to create a design perfect for the season.
Silver Foil Accent Nails
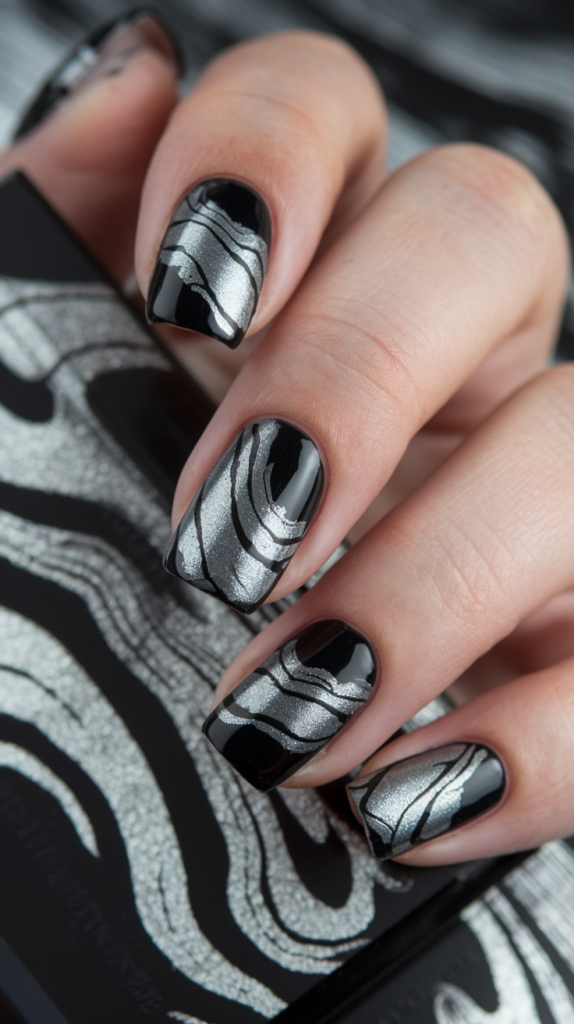
Details About The Chic, Shattered Glass Effect Of Silver Foil
Silver foil accent nails are a striking design that mimics the appearance of shattered glass.
The irregular pieces of silver foil catch and reflect light at different angles, creating a multidimensional effect that adds depth and sophistication to the nails.
The foil pieces can be placed randomly or arranged in patterns, making each design unique.
This chic look is perfect for those seeking a modern, artistic touch to their manicure.
Tips For Placing Foil Pieces Strategically
To achieve the perfect placement of silver foil accents, start with a clear or light-colored base coat.
Use a pair of tweezers or a fine brush to place small pieces of silver foil onto the nails.
For a shattered glass effect, arrange the foil pieces irregularly, ensuring they do not overlap.
Press the foil gently into the tacky surface of the base coat to secure it.
Apply a layer of clear top coat to seal the design and prevent the foil from lifting.
How To Pair Foil Accents With Other Nail Styles
Silver foil accents can be paired with various nail art styles to create stunning combinations.
For a minimalist look, add foil pieces to one or two accent nails while keeping the others simple.
For a bold statement, combine silver foil with geometric patterns or glitter gradients.
Silver foil accents also work beautifully with nude or pastel bases, providing a subtle yet eye-catching detail.
Silver And Black Marble Nails
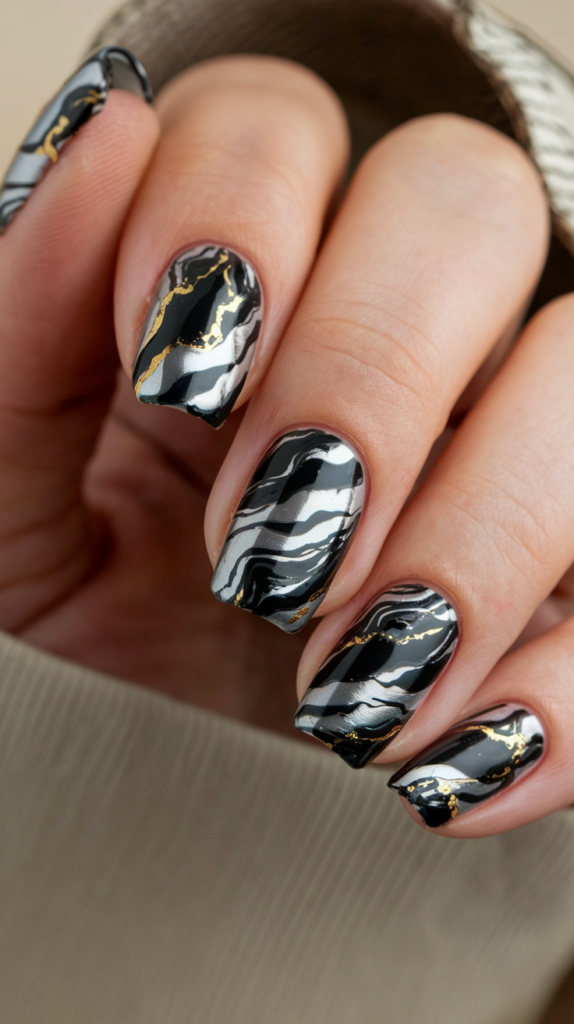
Why Black And Silver Make A Sophisticated Combination
Black and silver marble nails are the epitome of sophistication, blending the elegance of silver with the boldness of black.
The contrast between the two colors creates a dramatic effect, while the marbled patterns add an artistic touch.
This combination exudes luxury and refinement, making it a perfect choice for evening events or formal occasions.
The interplay of silver and black also makes the nails appear dynamic, catching the light in captivating ways.
Techniques To Create Realistic Marble Patterns
To create realistic marble patterns, start with a black base coat.
Use a fine detailing brush or a thin striping tool to paint silver swirls and veins onto the nails.
To achieve a natural marble effect, vary the thickness and intensity of the lines, blending them lightly with a sponge or a brush dipped in acetone.
For added dimension, layer the silver veins with subtle white or grey highlights.
Seal the design with a glossy top coat to enhance the marble effect.
Inspiration For Mixing With Other Colors Or Textures
While black and silver make a classic combination, incorporating additional colors or textures can elevate the design further.
Pairing silver marble with gold accents or glitter creates a luxurious look, while adding matte black sections provides a modern twist.
For a unique take, combine silver marble with clear or negative space designs, creating a contemporary and artistic effect.
Silver Stars On Matte Black

The Allure Of Celestial-Themed Nails
Celestial-themed nails have a timeless appeal, and silver stars on a matte black base perfectly capture the magic of the night sky.
This design evokes a sense of wonder and mystery, with the shimmering silver stars standing out beautifully against the velvety matte background.
The celestial theme is versatile, making it suitable for both casual and formal settings.
How The Matte Black Base Enhances Silver Star Designs
The matte black base enhances the silver star designs by providing a contrasting backdrop that makes the metallic details pop.
The matte texture absorbs light, creating a soft, smooth finish that complements the reflective quality of the silver stars.
This contrast highlights the intricacy of the star patterns, making the design appear more vivid and dynamic.
Tools And Stencils To Use For Precision
Achieving precise silver star designs requires the right tools.
Nail stencils or stamping plates with star patterns are ideal for creating clean and consistent shapes.
A fine detailing brush or dotting tool can be used for hand-painting smaller stars.
For added sparkle, use silver glitter polish or rhinestones to accentuate the star designs.
A matte top coat can be applied after creating the stars to maintain the velvety finish.
Silver French Tips
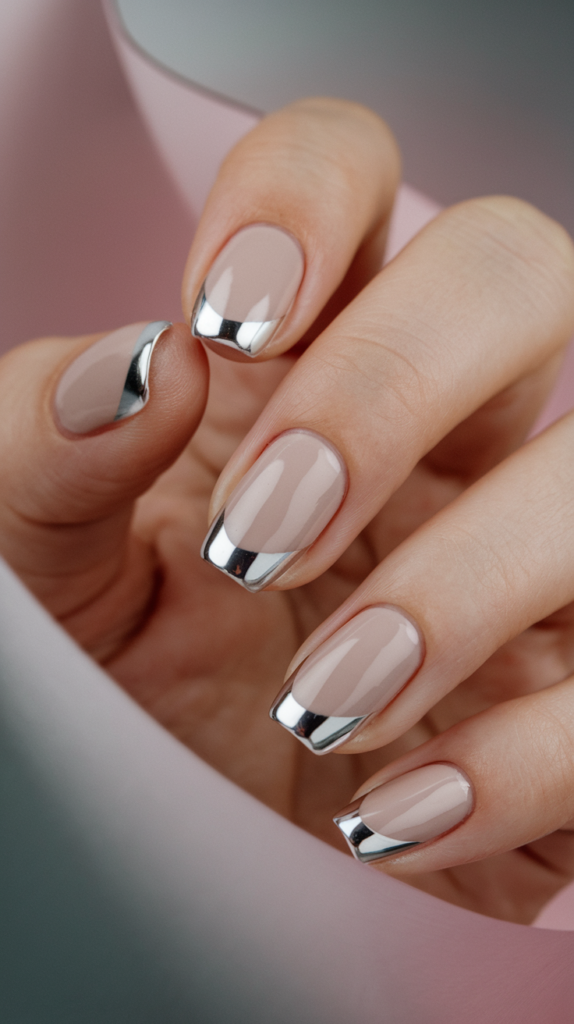
Modern Twist On The Classic French Manicure
Silver French tips are a contemporary take on the traditional French manicure, replacing the classic white tips with sleek, metallic silver.
This modern twist exudes sophistication and elegance while adding a touch of glamour.
The metallic finish elevates the design, making it a versatile choice that pairs well with both casual and formal outfits.
Unlike the traditional look, silver French tips allow for creative experimentation with shapes, angles, and even textures.
Suggestions For Nail Shapes That Complement Silver Tips
To achieve the most flattering look, pair silver French tips with nail shapes that enhance the metallic shine.
Almond-shaped nails are ideal for creating a soft, feminine look, while square or coffin-shaped nails give the design a bold and edgy feel.
Stiletto nails provide a dramatic touch, perfect for evening events.
For a minimalistic aesthetic, round or oval-shaped nails with delicate silver tips maintain a classic charm.
Variations, Such As Angled Or Double-Lined Tips
Silver French tips can be adapted to create unique and artistic designs.
Angled tips, where the metallic line is slanted instead of straight, add a geometric edge to the nails.
Double-lined tips, featuring two thin silver lines at the tip of the nail, create a layered, multidimensional effect.
For a bold statement, incorporate glitter or combine the silver tips with other colors like gold or pastel shades to add depth and variety.
Silver Geometric Patterns
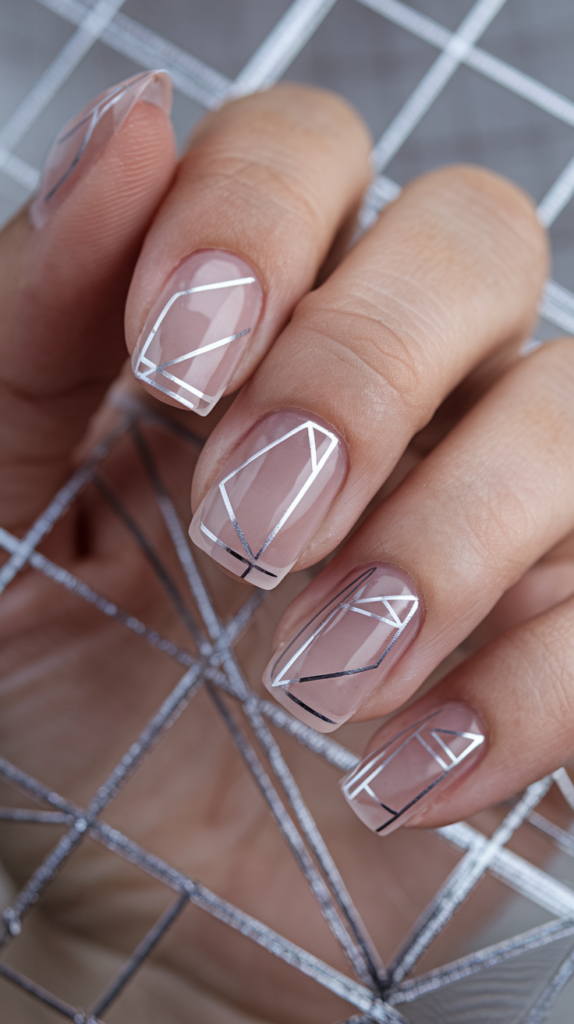
Minimalist Appeal Of Geometric Designs
Silver geometric patterns are a perfect choice for those who love clean, modern designs.
These minimalist patterns, including triangles, grids, and lines, create a structured yet artistic look.
The metallic silver adds a touch of luxury to the simplicity of the geometric shapes, making this style suitable for both everyday wear and upscale occasions.
Tools Like Striping Tape For Precise Lines
Creating precise geometric patterns is made easier with the use of striping tape.
This tape allows for straight, clean lines and sharp edges, ensuring professional-quality results.
Apply the tape over a neutral or clear base, paint the exposed areas with metallic silver, and then carefully remove the tape before the polish dries.
A fine detailing brush can also be used for freehand designs, allowing for more intricate patterns like intersecting lines or layered shapes.
Creative Patterns To Try, Such As Grids And Triangles
Geometric patterns offer endless possibilities for creativity.
A grid design, where the nails are divided into even sections with silver lines, creates a striking and symmetrical look.
Triangular patterns, formed by combining metallic silver with contrasting colors, add a dynamic and bold effect.
Combining multiple shapes, such as squares and circles, can create an abstract yet cohesive design that stands out.
Holographic Silver Nails
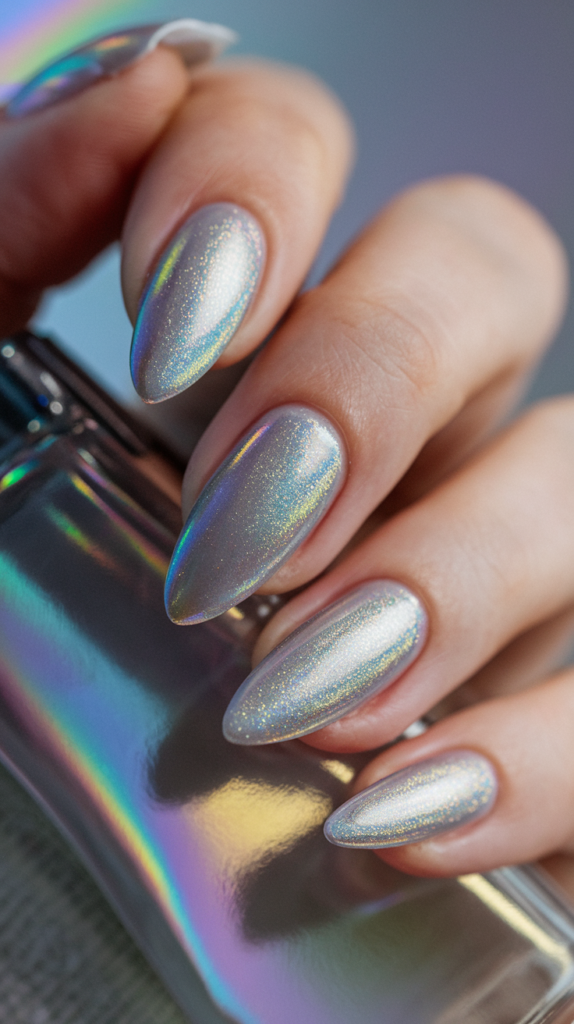
Explanation Of Holographic Polish And Its Reflective Properties
Holographic silver nails are a dazzling design that captures light and transforms it into a spectrum of colors.
The reflective properties of holographic polish create a mesmerizing effect, with the nails appearing to change colors depending on the angle and lighting.
This futuristic and vibrant look is perfect for those who love bold, eye-catching designs.
How To Apply Holographic Top Coats Or Wraps
To achieve a holographic silver finish, start with a black or neutral base coat, as this enhances the reflective effect.
Apply a holographic top coat evenly over the nails, ensuring full coverage.
For a more intense look, holographic wraps or powders can be used.
Rub the powder onto a cured gel base with an applicator sponge, then seal it with a glossy top coat.
Ensure the nails are smooth and even for a flawless application.
Best Lighting Conditions To Highlight The Effect
Holographic silver nails look their best under bright, direct lighting, such as sunlight or artificial spotlights.
The reflective nature of the holographic polish creates a rainbow-like effect in these conditions, making the nails appear dynamic and vibrant.
For indoor settings, LED lighting can also enhance the holographic effect, ensuring the design stands out regardless of the environment.
Silver Sequins Nails
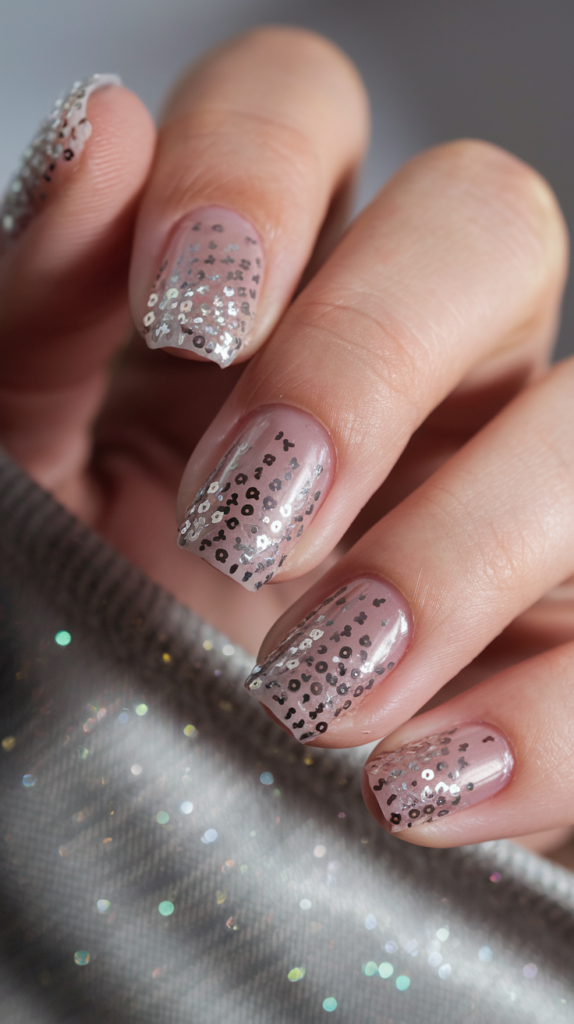
Glittery Elegance Of Silver Sequin Overlays
Silver sequins bring a touch of sparkle and glamour to nail art.
These tiny, reflective particles catch the light beautifully, creating a multidimensional effect that adds depth and texture to the nails.
Whether applied densely or sparingly, silver sequins offer a versatile design that suits both festive and everyday looks.
Application Tips To Ensure Even Distribution
For an even and polished look, apply silver sequins using a clear polish or top coat as an adhesive.
Use a fine brush or applicator to place the sequins on the nails, starting at the tips or cuticles and working outward.
For a gradient effect, concentrate the sequins in one area and fade them gradually across the nail.
Seal the design with a clear top coat to ensure longevity and prevent the sequins from lifting.
Styling Ideas For Accent Nails With Sequins
Silver sequins work beautifully as accent nails, adding a focal point to the overall design.
Pair sequin-covered nails with solid metallic silver or nude bases for a cohesive look.
For a more dramatic effect, combine silver sequins with other embellishments like rhinestones or glitter.
Mixing sequins with negative space designs also creates a modern and artistic aesthetic.
Silver Snowflakes
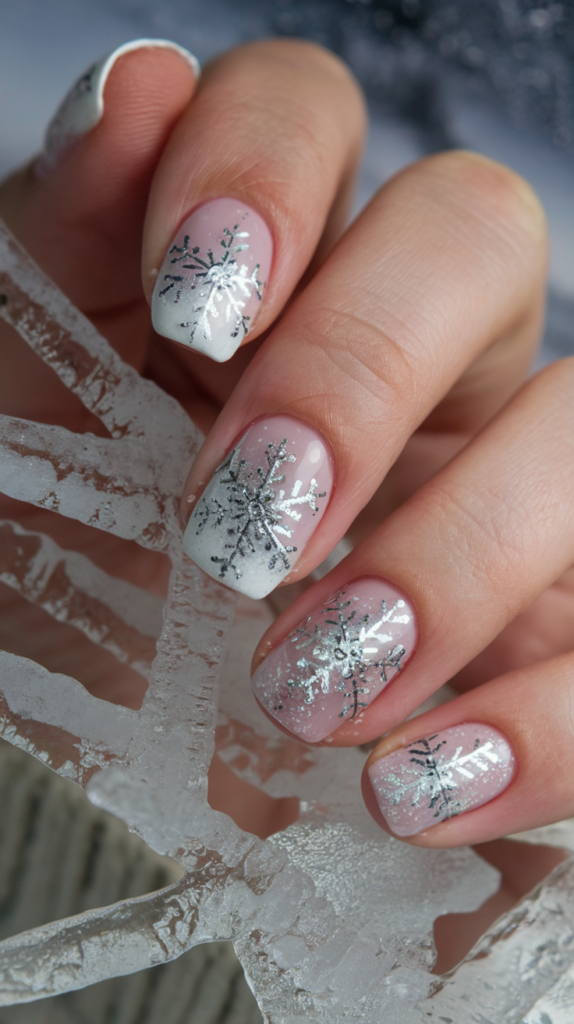
The Seasonal Charm Of Snowflake Nail Art
Silver snowflake nails are a festive design that captures the beauty of winter.
The intricate details of snowflake patterns, combined with the shimmering effect of metallic silver, evoke a sense of magic and elegance.
This seasonal look is perfect for holiday celebrations, winter weddings, or simply embracing the spirit of the colder months.
Tools For Creating Intricate Snowflake Patterns
To create detailed silver snowflakes, use fine detailing brushes or nail art stamping plates with snowflake designs.
For freehand designs, a thin striping brush or dotting tool can be used to draw the delicate lines and shapes of snowflakes.
Silver glitter or metallic polish adds a shimmering effect that enhances the intricacy of the patterns.
Background Colors That Pair Beautifully With Silver Snowflakes
Silver snowflakes stand out best against cool-toned backgrounds like frosty white, icy blue, or deep navy.
For a more dramatic effect, pair the silver snowflakes with a matte black or dark grey base.
Adding subtle gradients or ombre effects to the background can also create a dreamy, wintery atmosphere that complements the snowflake designs.
Silver Galaxy Nails
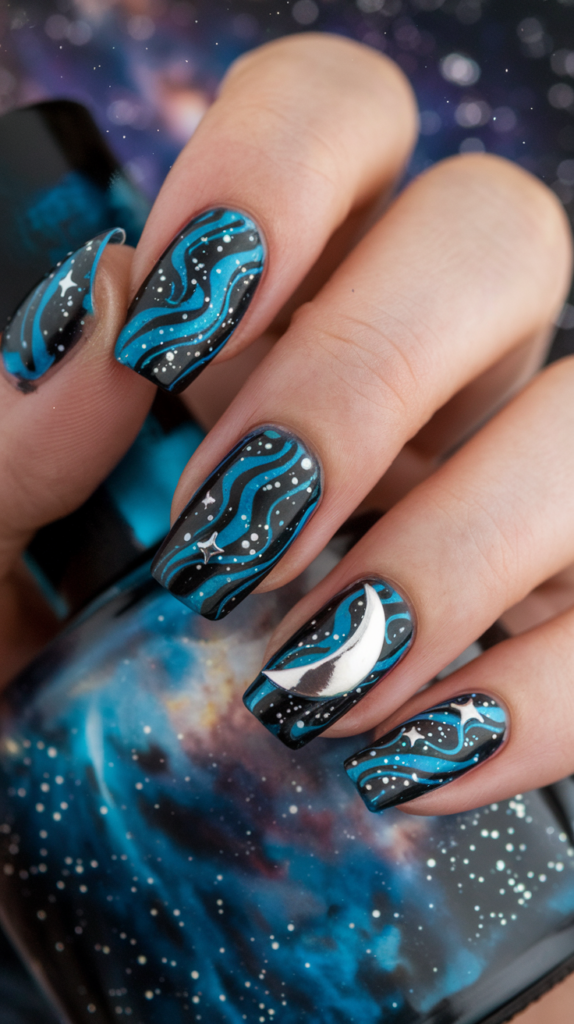
How To Achieve A Galaxy-Inspired Look With Silver Glitter
Silver galaxy nails are an enchanting design that mimics the vastness of outer space.
The design incorporates dark polish as a base, typically deep blue or black, layered with silver glitter to represent stars and cosmic dust.
To achieve this look, begin with a dark base coat and use a sponge to dab silver glitter polish randomly across the nails.
Blend the edges for a seamless effect, creating the illusion of swirling galaxies.
Adding tiny dots of silver or white polish with a fine brush enhances the starry effect, completing the celestial look.
Using Sponges And Brushes For Blending Cosmic Patterns
Blending is key to achieving a realistic galaxy effect.
Sponges are excellent for creating a soft, diffused look with glitter or metallic polish.
Dip the sponge into silver polish, then dab it lightly on the nails, concentrating on areas where the “galaxy” swirls are desired.
Use a thin detailing brush to add fine lines or swirls for dimension, ensuring the layers blend smoothly.
Experiment with layering different shades of silver, white, and even holographic polish to add depth and variation.
Adding Stars And Planets For A Complete Design
To elevate the galaxy design, incorporate tiny silver stars, crescent moons, or planets.
Use a stamping plate or hand-paint these details with a fine brush for precision.
Rhinestones or holographic decals can also be used to represent shining stars or planets.
Finish the design with a clear top coat to seal the details and enhance the glossy, multidimensional effect of the galaxy-inspired nails.
Silver Flame Art

Edgy Appeal Of Metallic Flame Designs
Silver flame art is a bold and striking nail design that exudes confidence and edge.
The metallic silver flames add a dynamic element to the nails, catching the light and creating movement.
Whether paired with a black, white, or holographic base, the flames create a dramatic contrast, making them a statement piece perfect for parties, festivals, or nights out.
Techniques For Painting Flames With Precision
To create sharp and precise flames, use a fine nail art brush or a flame-shaped stencil.
Start by outlining the flame design in silver polish, beginning at the tips of the nails and tapering the flames toward the cuticles.
Fill in the outlined flames with metallic polish, ensuring even coverage.
For a more dramatic effect, add subtle gradients to the flames, blending from silver at the tips to a lighter shade toward the center.
Seal the design with a clear top coat to add shine and durability.
Best Color Bases For Silver Flame Art
Silver flames stand out beautifully against bold base colors such as black, deep red, or royal blue.
For a softer look, pair the flames with pastel shades or nude tones.
Holographic or glitter bases add an extra layer of depth and sparkle, making the flames appear more vibrant and dynamic.
Experimenting with matte versus glossy finishes can also change the overall mood of the design, from edgy to elegant.
Silver Stripes
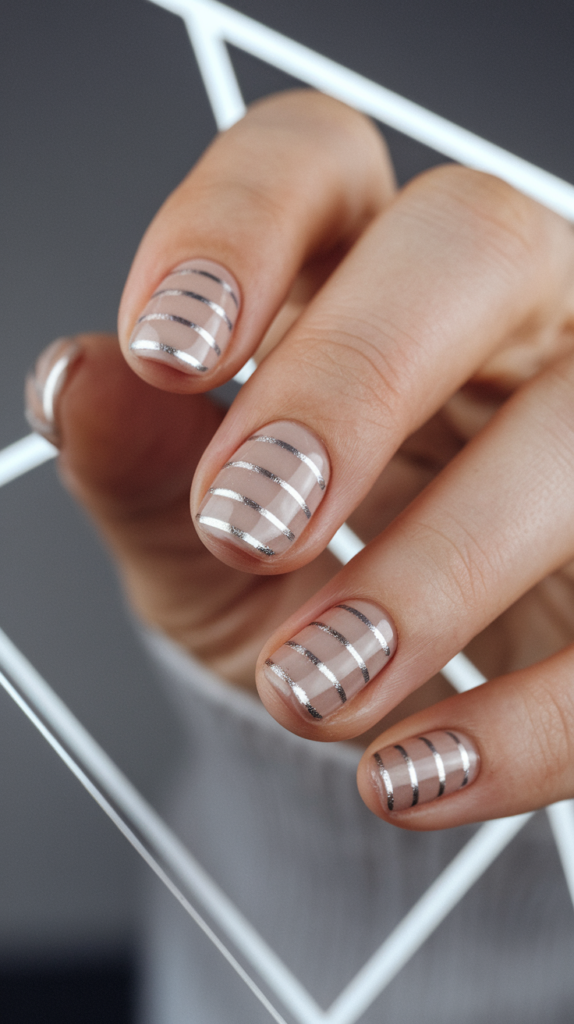
Versatility Of Horizontal And Vertical Stripe Designs
Silver stripes are a versatile and minimalist nail art choice that can be adapted to suit any occasion.
Horizontal stripes create a clean and modern look, while vertical stripes elongate the nails, making them appear longer and more elegant.
The metallic finish of silver stripes adds a touch of sophistication to this simple yet impactful design.
Tools For Clean And Precise Striping
Achieving precise silver stripes requires the use of striping tape or a fine striping brush.
For perfect lines, apply the tape to create a stencil, ensuring it is securely adhered to the nail.
Paint over the exposed area with silver polish, then carefully remove the tape before the polish dries.
If freehanding, use a steady hand and a striping brush for clean, even lines.
A glossy top coat will seal the design and give it a polished finish.
Ideas For Combining Silver Stripes With Other Patterns
Silver stripes can be combined with other patterns for a unique and artistic look.
For example, pairing stripes with polka dots, chevrons, or geometric shapes creates a multidimensional design.
Adding glitter or rhinestones along the stripes can elevate the look further, making it ideal for formal events or parties.
Negative space designs, where parts of the nail are left bare, also pair beautifully with silver stripes for a modern and minimalist aesthetic.
Silver And Nude Gradient
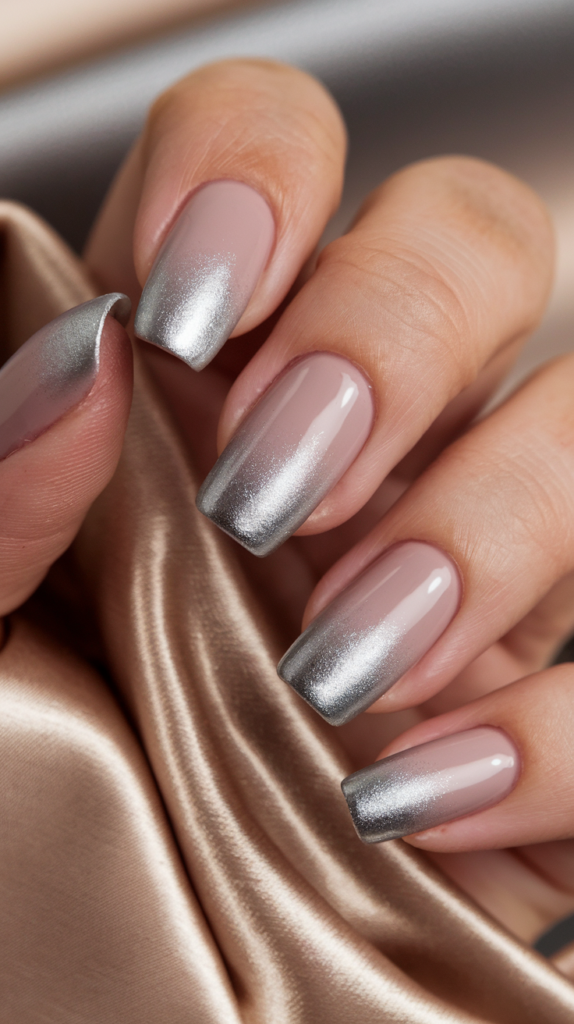
The Subtle Elegance Of Blending Silver Into Nude Tones
Silver and nude gradient nails offer a soft and sophisticated look that is perfect for any occasion.
This design seamlessly blends metallic silver into neutral, natural tones, creating a delicate transition that exudes understated elegance.
The gradient effect enhances the nails’ length and adds a touch of sparkle without being overpowering.
Tips For Achieving A Seamless Gradient
To achieve a flawless silver and nude gradient, use a makeup sponge to blend the colors.
Apply the nude polish at the base of the nails and silver polish at the tips.
Dab the sponge lightly over the nails, blending the two shades in the middle for a smooth transition.
Repeat this process until the desired intensity is reached.
Finish with a clear top coat to smooth the surface and enhance the gradient effect.
Best Occasions To Wear This Understated Style
The subtlety of silver and nude gradient nails makes them suitable for a variety of occasions.
They are perfect for weddings, office settings, or casual outings, where a touch of elegance is desired.
Their neutral palette allows them to complement any outfit, making them a versatile choice for both everyday wear and special events.
Silver Metallic Flowers
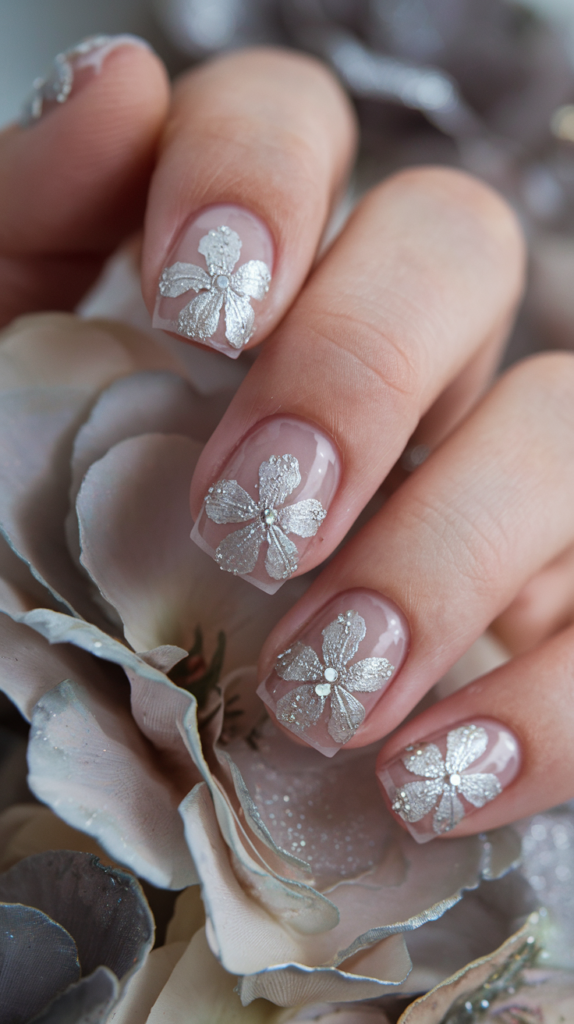
Delicate Beauty Of Floral Patterns In Metallic Finishes
Silver metallic flowers add a feminine and romantic touch to nail art.
The delicate floral patterns, combined with the reflective quality of metallic silver, create a captivating design that is both subtle and eye-catching.
This style is perfect for those who appreciate intricate details and elegant aesthetics.
Tools For Painting Intricate Flower Designs
To create detailed silver flowers, use a fine detailing brush or dotting tool.
Start by painting the petals with a metallic silver polish, adding subtle shading for depth.
For more intricate designs, consider using nail stamping plates with floral patterns.
Add small silver rhinestones or glitter to the center of the flowers to enhance their beauty.
A clear top coat will seal the design and ensure its longevity.
Seasonal Inspirations For Silver Floral Art
Silver floral designs can be adapted for any season.
In spring and summer, pair the metallic flowers with pastel or vibrant bases for a fresh and lively look.
For fall and winter, deep colors like burgundy, navy, or forest green create a rich and dramatic contrast.
Incorporating seasonal elements, such as snowflakes in winter or leaves in autumn, can further personalize the design.
Silver Studs And Gems
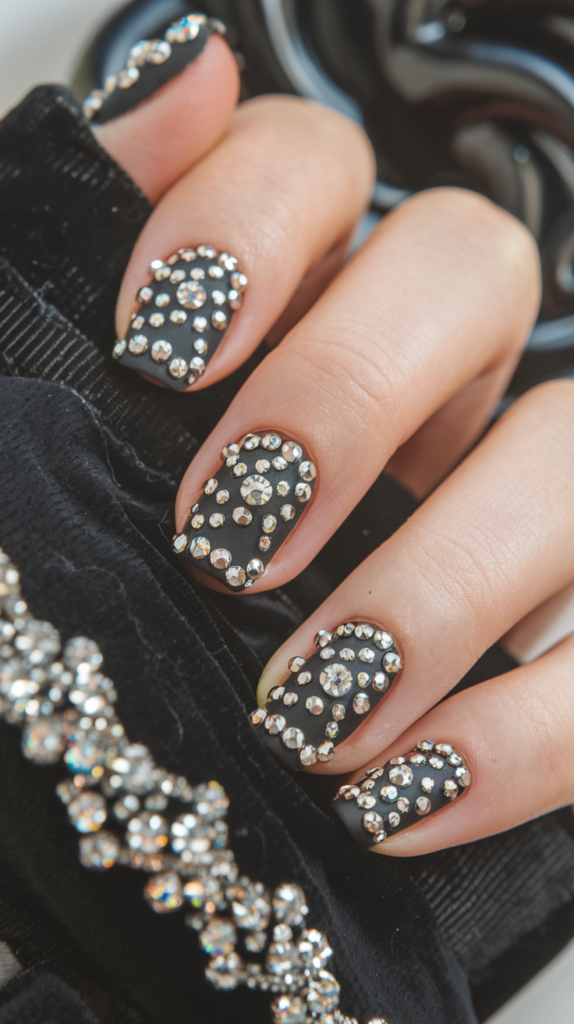
Glamorous Vibe Of Adding 3D Embellishments
Silver studs and gems are the epitome of glam when it comes to nail art.
The 3D embellishments catch light from every angle, creating a luxurious look that instantly elevates any design.
Whether arranged in simple patterns or intricate layouts, these metallic and crystal accents bring a touch of elegance and boldness to your nails.
Ideal for parties, weddings, or any special occasion, silver studs and gems make a dazzling statement.
Tips For Securing Studs And Gems On Nails
To ensure your studs and gems stay secure, start by applying a thick layer of top coat or nail glue to the areas where the embellishments will be placed.
Use tweezers or a dotting tool for precise placement.
Gently press the studs and gems into the adhesive and allow them to set for a few minutes.
Once all the embellishments are in place, apply another layer of top coat around the edges to seal the design without dulling the shine of the studs or gems.
Ideas For Mixing Silver Embellishments With Other Styles
Silver studs and gems pair beautifully with various nail designs.
For a minimalist approach, add a single stud to the center or base of each nail.
For a more extravagant look, combine studs with glitter gradients, metallic stripes, or floral patterns.
Mixing silver embellishments with rhinestones or pearls creates a multidimensional design that is both elegant and unique.
Accent nails adorned with clusters of studs or gems can also serve as the focal point of the manicure.
Silver Metallic Animal Print
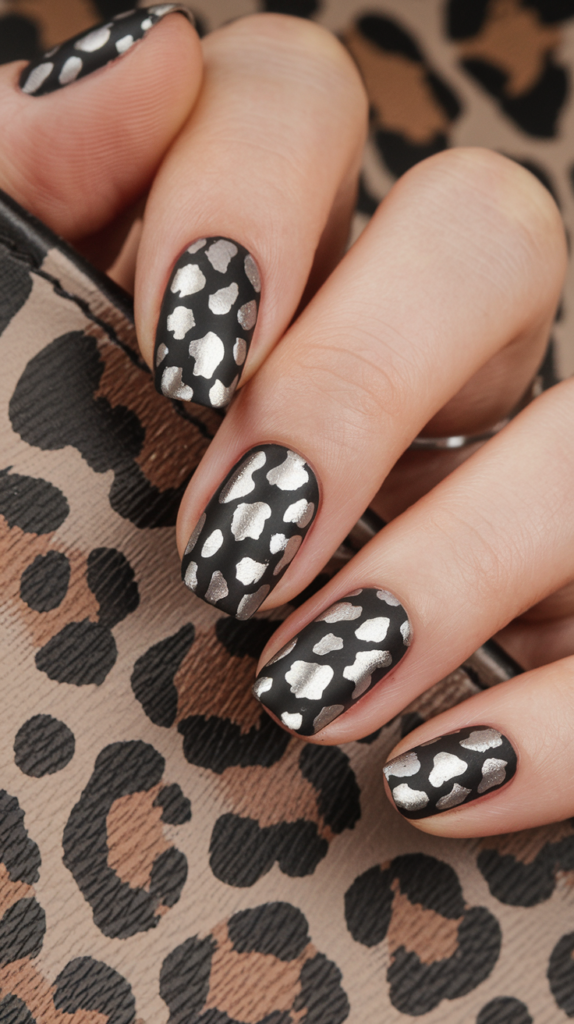
Boldness Of Leopard Or Zebra Patterns In Metallic Finishes
Silver metallic animal print nails bring a wild, bold flair to your manicure.
Designs like leopard spots or zebra stripes, rendered in reflective silver, add a modern twist to traditional animal prints.
The metallic finish makes the patterns pop against any base color, creating a high-impact look perfect for those who want to stand out.
Tools For Precise Animal Print Designs
To create precise animal print patterns, use a fine detailing brush or nail stamping plates.
For leopard spots, start with a base color and use a dotting tool to create irregular shapes with metallic silver polish.
Outline some of the spots with black polish for added definition.
For zebra stripes, paint thin, wavy lines across the nails using a striping brush.
Seal the design with a glossy top coat to enhance the metallic effect.
Popular Color Bases For Silver Animal Prints
Silver animal prints work beautifully with a variety of base colors.
Black and nude are classic choices that allow the silver patterns to shine.
For a more vibrant look, opt for jewel tones like emerald green or royal blue.
Pastel shades like blush pink or lavender provide a softer contrast, while holographic or glittery bases add an extra layer of dimension and sparkle.
Silver Glitter Cuticles
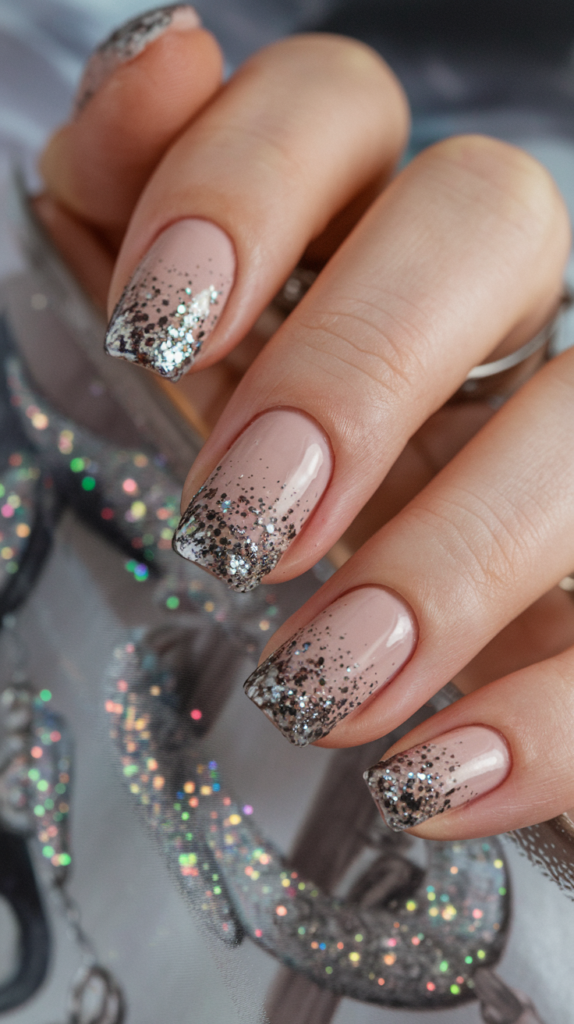
Unique Elegance Of Reverse French Manicures With Glitter
Silver glitter cuticles offer a modern take on the classic French manicure.
Instead of highlighting the nail tips, this design focuses on the cuticles, creating a reverse gradient effect.
The glitter adds a touch of sparkle and sophistication, making the nails look chic and trendy.
This unique style is perfect for those who want to experiment with unconventional designs.
Application Tips To Prevent Smudging
To achieve a clean and precise look, use a fine brush or a dotting tool to apply silver glitter polish around the cuticle area.
Start with a clear or nude base coat and let it dry completely before adding the glitter.
To prevent smudging, work in thin layers and allow each layer to dry before applying the next.
Seal the design with a clear top coat to smooth out the texture and protect the glitter.
Pairing With Different Base Colors For Variety
Silver glitter cuticles pair well with a range of base colors.
For a minimalist look, use a clear or nude base.
For a bolder style, opt for dark colors like black, navy, or deep burgundy.
Pastel shades like mint green or baby pink add a playful touch, while metallic or holographic bases create a cohesive and dazzling effect.
Experimenting with matte finishes can also provide a unique contrast to the glitter’s shine.
Silver Shattered Glass
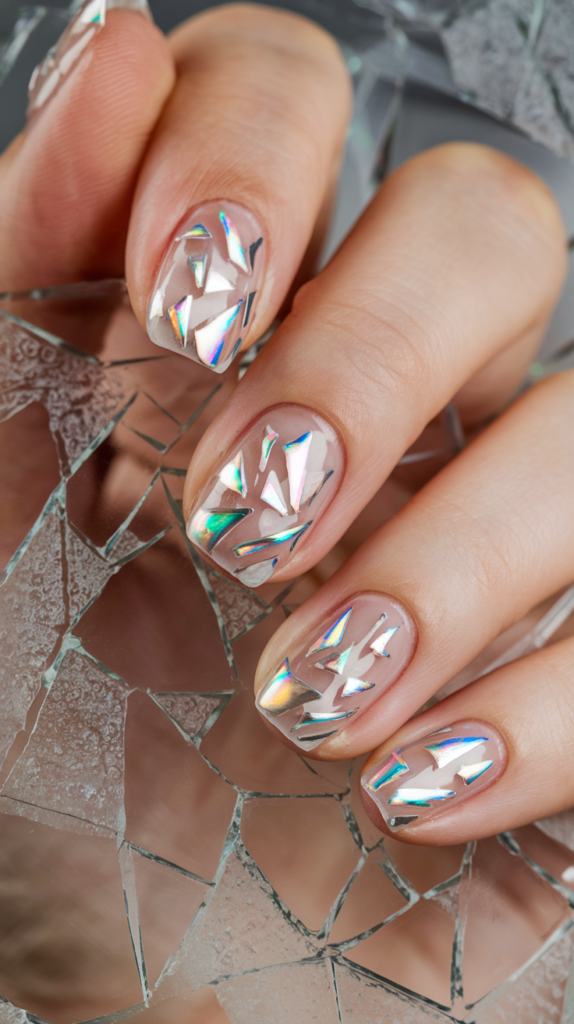
Trendy Look Of Holographic Shattered Glass Effects
Silver shattered glass nails are a trendy design that mimics the appearance of broken shards of glass.
This design uses holographic silver nail wraps or decals to create a fragmented, reflective effect that catches light beautifully.
The multidimensional nature of the design makes it stand out, adding a futuristic and edgy vibe to your nails.
Using Nail Wraps Or Decals For This Style
To achieve the shattered glass effect, start with a base color, such as black, white, or clear.
Cut holographic silver nail wraps into small, irregular pieces.
Apply a layer of top coat or adhesive to the nails, then use tweezers to place the pieces randomly across the nail surface.
Press the pieces down gently to ensure they adhere properly.
Finish with a clear top coat to seal the design and give it a smooth finish.
Inspiration For Combining Shattered Glass With Other Designs
Shattered glass nails can be combined with other designs for a unique look.
Pair them with glitter gradients, geometric patterns, or metallic stripes for added depth.
Using a negative space design, where parts of the nail are left bare, enhances the fragmented effect.
For a cohesive theme, incorporate shattered glass accents on one or two nails while keeping the rest simple with a metallic or nude base.
Silver Matte Finish
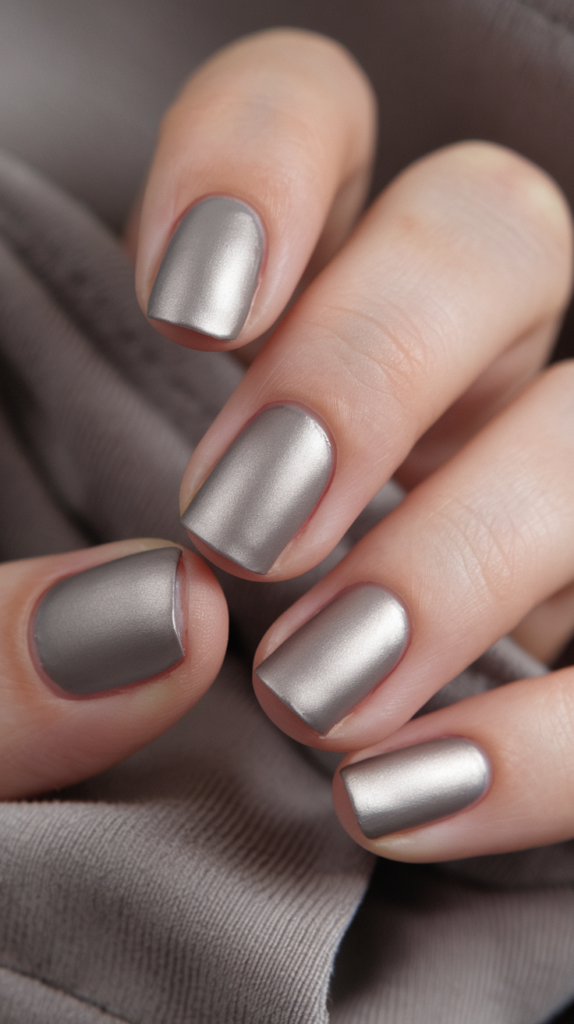
Sophistication Of A Muted Silver Matte Look
A silver matte finish offers a sophisticated and understated alternative to glossy metallic nails.
The muted effect of matte silver polish creates a velvety texture that feels modern and chic.
This versatile design works well for both casual and formal settings, providing a subtle yet stylish look.
How To Achieve A Smooth, Velvety Texture
To create a flawless matte silver finish, start with a silver metallic polish as your base.
Once it dries, apply a matte top coat to transform the glossy finish into a soft, velvety texture.
For an even application, ensure the nails are clean and smooth before applying polish.
Buffing the nails beforehand can help achieve a professional-looking result.
Pairing Matte Finishes With Glossy Accents
Matte silver nails can be elevated by adding glossy accents for contrast.
For example, incorporate glossy silver stripes, geometric patterns, or small dots on top of the matte base.
Combining matte and glossy finishes creates a dynamic look that adds depth and interest to the nails.
This combination works particularly well for minimalist or abstract designs, offering a modern twist on classic styles.
Silver Glitter Gradient Tips
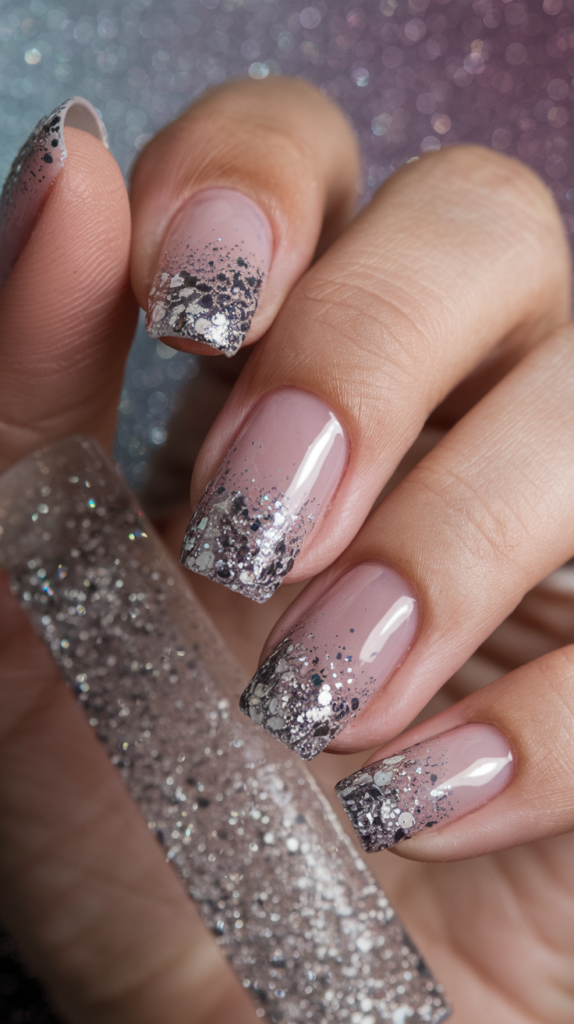
Sparkling Simplicity Of Glitter Gradients
Silver glitter gradient tips bring a subtle sparkle to your nails, creating a design that is both elegant and eye-catching.
The gradient effect, which transitions from a bare or lightly polished base to glitter-packed tips, is timeless and versatile.
This design adds just the right amount of shine for casual outings, formal events, or even bridal nail art, ensuring your nails remain chic and stylish.
Techniques For Gradual Glitter Application
To achieve a smooth gradient, start by applying a base coat in a nude, clear, or pastel shade.
Use a makeup sponge to dab silver glitter polish onto the tips of the nails.
Gradually work your way down toward the middle, fading out the glitter for a seamless transition.
Layer the glitter as needed, ensuring the densest application is at the tips.
For a refined look, finish with a clear top coat to smooth the texture and enhance the sparkle.
Best Combinations With Other Gradient Colors
While silver glitter alone is stunning, combining it with other gradient colors can add depth and creativity to the design.
Pair silver with soft pinks or blues for a dreamy aesthetic, or blend it with bold shades like black or navy for a dramatic contrast.
For a festive twist, incorporate gold glitter for a two-tone gradient that exudes luxury and warmth.
These combinations can be tailored to suit any occasion, from casual to celebratory.
Silver Chains
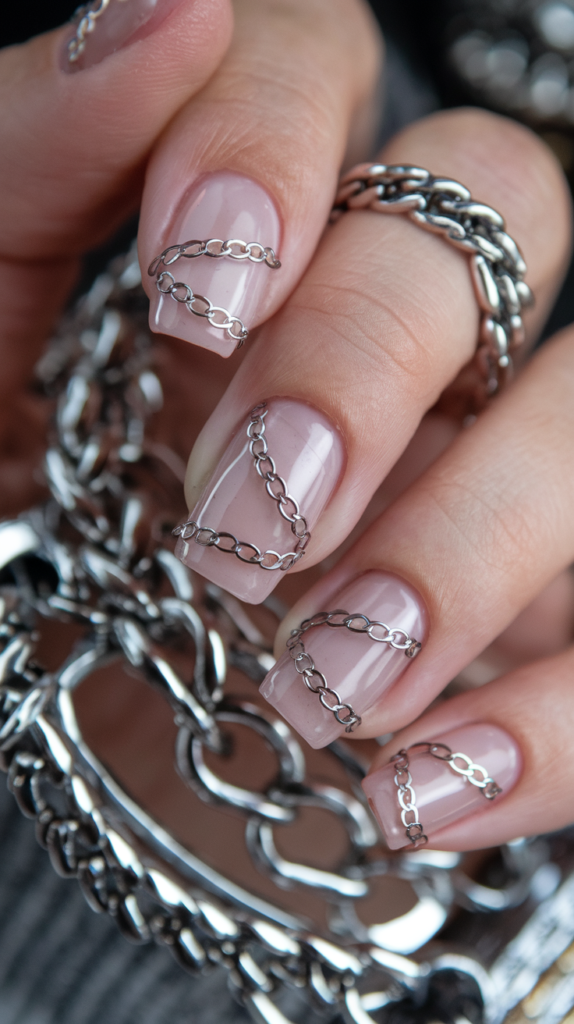
High-Fashion Statement Of Using Chain Decals
Silver chains are a bold and fashionable addition to nail art, adding a unique texture and edge to your manicure.
These three-dimensional decals create a striking, high-fashion look that commands attention.
Whether used sparingly as accents or applied to every nail for a cohesive design, silver chains exude sophistication and modernity, making them perfect for trendsetters.
Tips For Securing Chains Without Compromising Durability
To keep chain decals securely in place, apply them with nail glue or a thick gel polish.
Place the chain gently onto the nail using tweezers, ensuring it adheres firmly to the adhesive layer.
Press down on the chain to eliminate any gaps, and seal the edges with a clear top coat to prevent lifting.
For longer-lasting wear, consider embedding the chain into a layer of clear builder gel and curing it under a UV lamp.
Mixing Chains With Minimalist Or Bold Designs
Silver chains can be incorporated into various nail art styles for added flair.
For a minimalist approach, use a single chain as an accent on one or two nails, paired with a nude or matte base.
For a bolder statement, layer the chains over metallic or glittery backgrounds.
Combining chains with geometric patterns or rhinestone embellishments creates a multidimensional design that is both edgy and glamorous.
Silver Lace Patterns
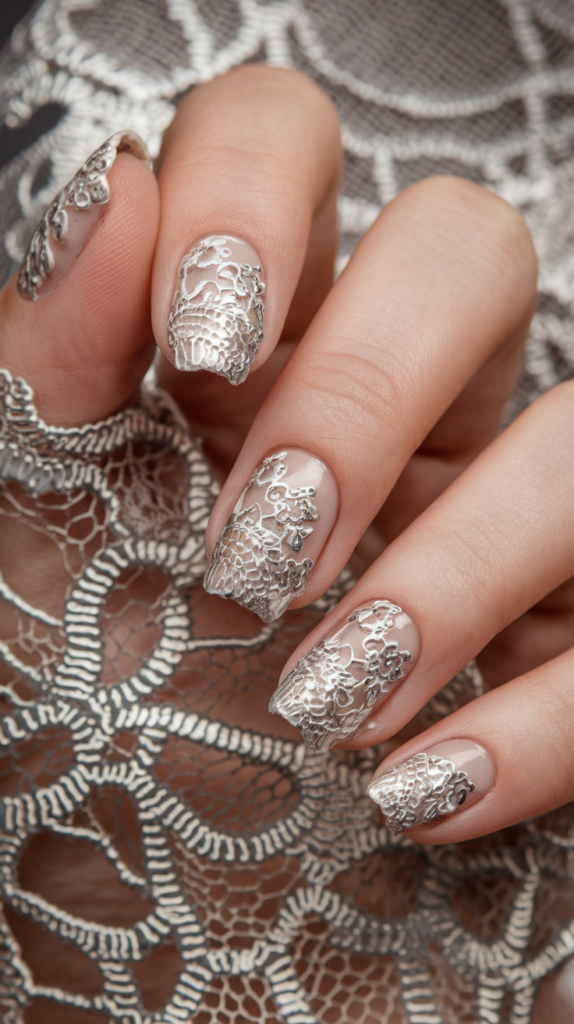
Feminine Elegance Of Lace-Inspired Designs
Silver lace patterns bring a delicate and romantic touch to nail art.
The intricate details of lace designs, paired with the reflective quality of metallic silver, create a sophisticated look that is perfect for special occasions like weddings or anniversaries.
These patterns mimic the texture of real lace, adding a soft, feminine charm to the nails.
Tools For Creating Detailed Lace Patterns
To achieve detailed lace patterns, use stamping plates or nail stencils with lace motifs.
Apply metallic silver polish to the design, then use a scraper to remove excess polish and transfer the pattern onto the nails using a stamping tool.
For freehand designs, a fine detailing brush can be used to draw intricate patterns, such as flowers, swirls, or netted details.
Adding a layer of glitter or rhinestones can further enhance the lace’s elegance.
Background Colors That Enhance Silver Lace
Silver lace patterns look stunning against light, neutral backgrounds such as nude, white, or soft pink.
For a dramatic effect, pair the lace with a deep base color like navy or black, which allows the metallic details to stand out.
Pastel backgrounds add a whimsical touch, while ombre or gradient bases can create a more modern and dynamic look.
Silver Half-Moon Nails
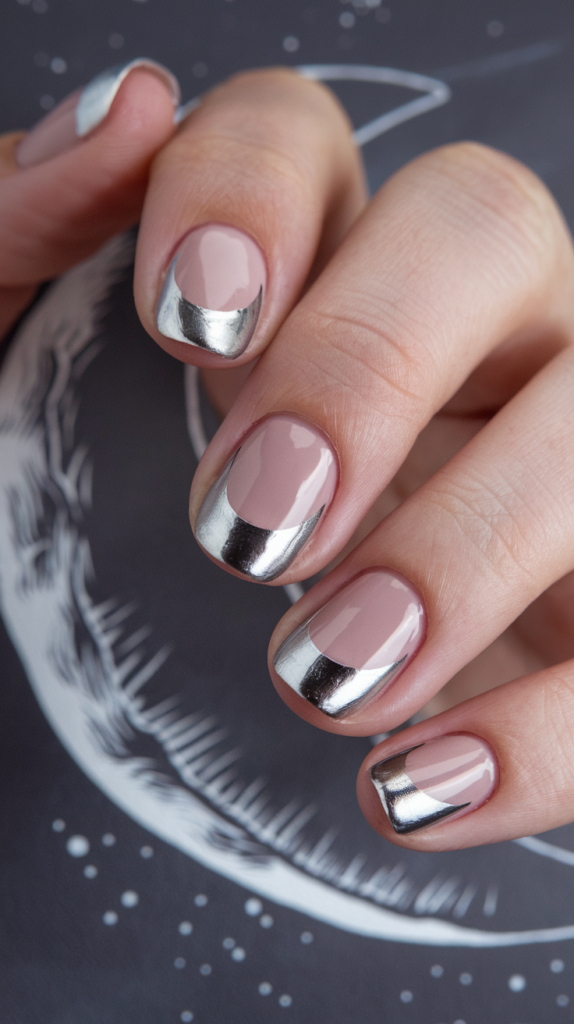
Chic Appeal Of Reverse French Designs
Silver half-moon nails, also known as reverse French designs, offer a chic and contemporary twist on classic manicures.
This style features a crescent-shaped accent at the base of the nails, creating a unique focal point.
The metallic silver adds a modern and glamorous touch, making this design suitable for any occasion, from casual outings to formal events.
Techniques For Painting Precise Crescents
To create a clean and precise half-moon design, start with a base color of your choice.
Once dry, use a curved nail stencil or a steady hand with a fine brush to apply silver polish to the base of the nails, following the natural curve of the cuticle.
For added precision, clean up the edges with a small brush dipped in acetone.
Finish with a clear top coat to smooth the design and add shine.
Styling Ideas For Mixing Half-Moon Nails With Glitter Or Patterns
Silver half-moon nails can be paired with glitter or patterns for a more intricate look.
Adding silver glitter along the crescent’s edges enhances the design’s sparkle.
Combining the half-moon with geometric lines or floral motifs creates a multidimensional style.
For a playful twist, alternate between half-moon and French tip designs on different nails, using complementary colors and textures to tie the look together.
Abstract Silver Swirls
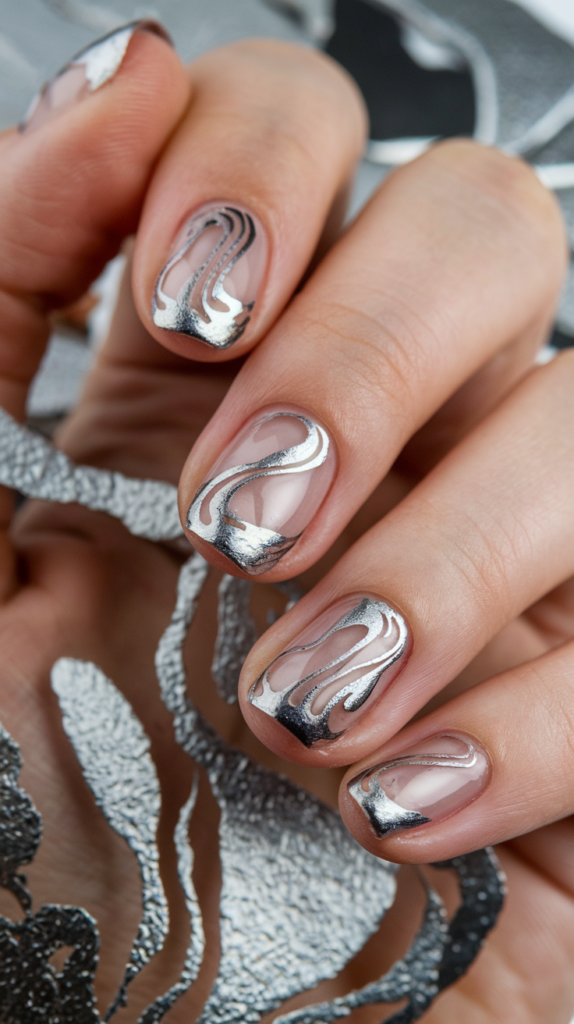
Artistic Freedom With Flowing Silver Swirls
Abstract silver swirl designs allow for creative expression and artistic freedom in nail art.
These free-flowing patterns, painted in reflective silver, create a dynamic and modern look.
The swirling lines add movement and elegance to the nails, making them perfect for those who enjoy unique and unconventional designs.
Tools For Creating Abstract, Freehand Designs
To achieve flowing silver swirls, use a fine detailing brush or a striping brush for precise lines.
Dip the brush into metallic silver polish and paint curved, overlapping lines across the nail, varying the thickness for a natural, artistic effect.
For added dimension, layer the swirls with subtle highlights or use a sponge to create a gradient effect within the swirls.
Seal the design with a glossy top coat to enhance the metallic finish.
Combining Swirls With Other Minimalist Art Styles
Abstract silver swirls can be paired with minimalist elements, such as negative space or solid-colored backgrounds, for a modern aesthetic.
Adding small accents like dots, rhinestones, or glitter enhances the design without overpowering it.
For a cohesive look, combine the swirls with geometric patterns or soft gradients in neutral tones, creating a balance between simplicity and creativity.
Silver Drip Nails

Boldness Of Dripping Metallic Designs
Silver drip nails are an edgy and striking design that mimics the appearance of molten metal dripping across the nails.
The reflective silver polish creates a dramatic, liquid-like effect, making this style a bold choice for fashion-forward individuals.
This design pairs well with both dark and light bases, offering versatility and impact.
Techniques For Creating Realistic, Liquid-Drip Effects
To achieve realistic drips, start with a base color and let it dry completely.
Use a dotting tool or a fine brush to apply metallic silver polish at the tips of the nails, then drag the polish downward in irregular lines to create the dripping effect.
Vary the lengths and widths of the drips for a natural look.
Allow the polish to settle for a few seconds before sealing the design with a glossy top coat to enhance the liquid-metal effect.
Pairing Drip Art With Contrasting Base Colors
Silver drip designs pop beautifully against dark base colors like black, navy, or deep red.
For a more subtle look, use lighter bases such as nude, pastel pink, or soft grey.
Holographic or glittery bases add a futuristic touch, while matte finishes create a striking contrast with the glossy silver drips.
Combining drip art with other elements, like studs or gradients, can further elevate the design.
Silver And White Gradient
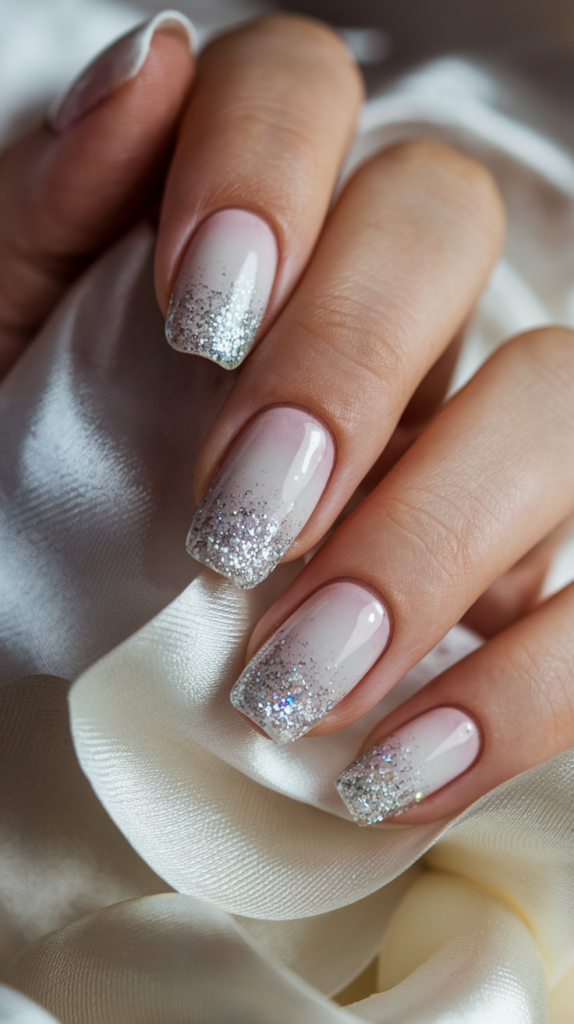
Dreamy Elegance Of Blending White And Silver
Silver and white gradient nails bring a dreamy and ethereal quality to your manicure.
This design merges the purity of white with the shimmer of metallic silver, creating a soft and seamless blend that is both elegant and timeless.
Perfect for weddings, parties, or winter-themed occasions, this gradient offers a sophisticated yet versatile look.
The subtle shimmer from the silver adds depth, while the white keeps the design fresh and clean.
Tools For Seamless Gradient Transitions
Creating a smooth gradient requires the right tools and techniques.
A makeup sponge is ideal for blending the silver and white polishes.
Begin by applying the white polish at the base of the sponge and silver polish at the tip, ensuring the colors overlap slightly in the middle.
Dab the sponge gently onto the nails, starting at the tips and moving toward the base to create a seamless blend.
Repeat this process until the gradient effect is well-defined.
Seal the design with a clear top coat to smooth the texture and enhance the shine.
Occasions Where This Design Works Best
Silver and white gradient nails are versatile enough to suit various occasions.
They are an excellent choice for bridal nail art, complementing white dresses and floral bouquets beautifully.
The frosty tones make them ideal for winter holidays or New Year’s celebrations.
For a more casual setting, the subtle elegance of this design pairs well with pastel or monochromatic outfits, adding a touch of sophistication to your everyday style.
Silver Stars And Moon
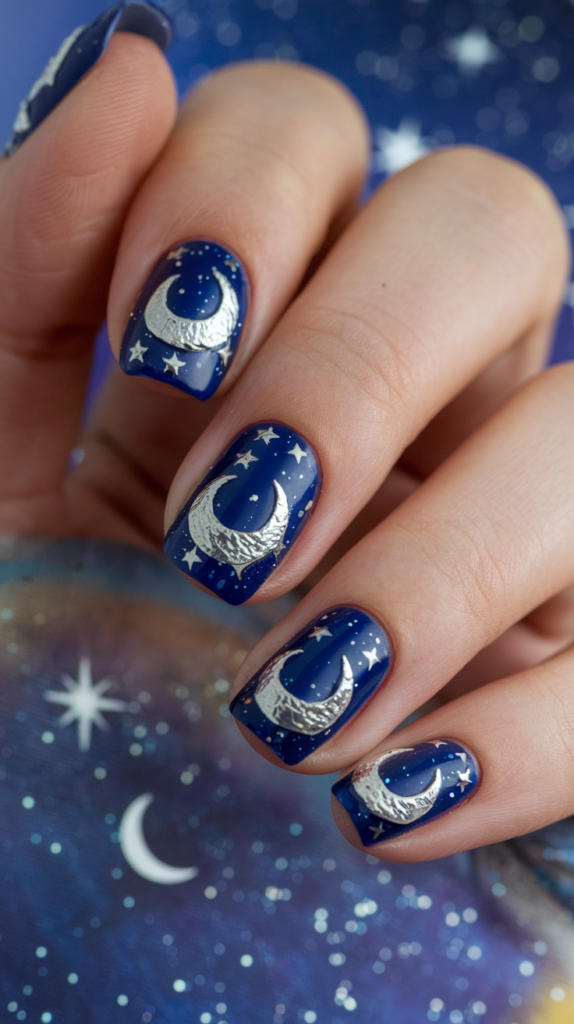
Ethereal Beauty Of Celestial Nail Art
Celestial nail art, featuring silver stars and moons, captures the magic of the night sky.
This design combines delicate metallic stars and crescent moons with shimmering glitter, creating a look that is whimsical and enchanting.
The celestial theme is perfect for dreamers and romantics who want their nails to tell a story.
Whether used as accents or spread across all nails, silver stars and moons add a mystical charm that never goes out of style.
How To Create Detailed Stars And Crescent Moons
To achieve precise and intricate celestial designs, use nail stencils or stamping plates with star and moon motifs.
Apply metallic silver polish to the stencil or plate, then transfer the design onto your nails using a stamping tool.
For hand-painted designs, use a fine detailing brush to draw stars and moons, adding tiny dots for a starry effect.
Enhance the design with glitter polish or small rhinestones to mimic the sparkle of the night sky.
Combining Silver Celestial Designs With Glitter Accents
Silver stars and moons pair beautifully with glitter accents to create a multidimensional look.
Apply a base of clear or dark polish, then add silver glitter across the nails to represent cosmic dust.
Layer the stars and moons over the glitter for added depth.
For a cohesive theme, alternate between full celestial designs and simpler glitter nails, creating a balanced yet striking aesthetic.
Matte Silver And Glossy Accents
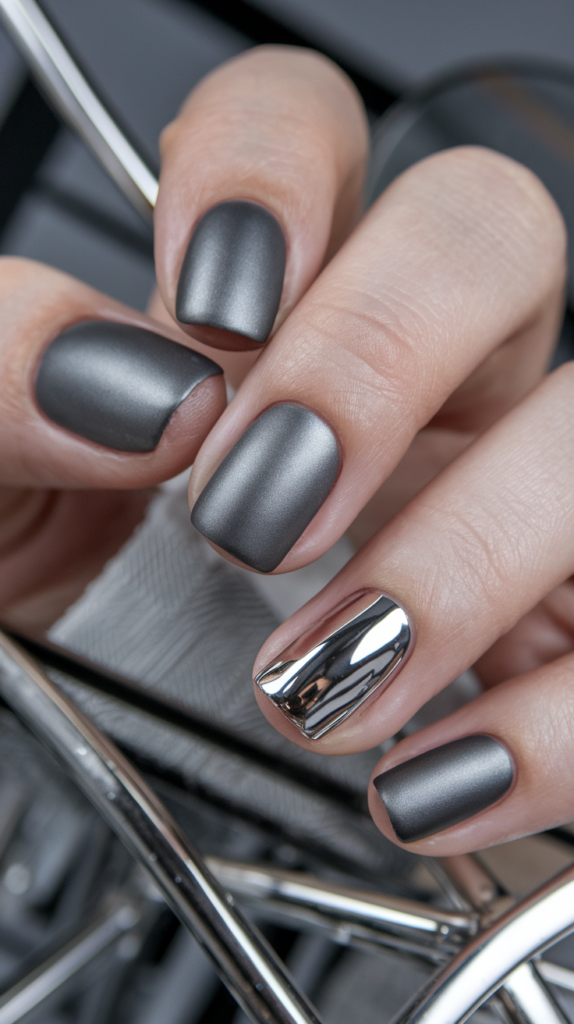
Texture Contrast Between Matte And Glossy Finishes
The combination of matte silver and glossy accents creates a visually striking contrast that is modern and chic.
The matte finish provides a soft, velvety texture, while the glossy accents add dimension and shine.
This juxtaposition elevates the overall design, making it ideal for those who appreciate understated elegance with a contemporary twist.
Tips For Alternating Finishes On Nails
To achieve this look, start by painting the nails with matte silver polish.
Once dry, use a striping brush or nail tape to outline the areas where you want glossy accents.
Apply a clear top coat or glossy silver polish to these sections, ensuring clean and precise edges.
Common accent patterns include geometric lines, dots, or crescents.
For added contrast, leave some nails fully matte and others fully glossy, creating a dynamic and cohesive design.
Styling Inspiration For Modern, Edgy Looks
Matte silver nails with glossy accents lend themselves to various styling options.
For a minimalist look, use thin glossy lines or small dots as accents.
For a bolder design, create glossy flame patterns, stripes, or abstract shapes.
Pairing this design with black or pastel backgrounds adds an extra layer of sophistication.
The combination of matte and glossy textures works well for both casual and formal occasions, making it a versatile and stylish choice.
Silver Tribal Patterns
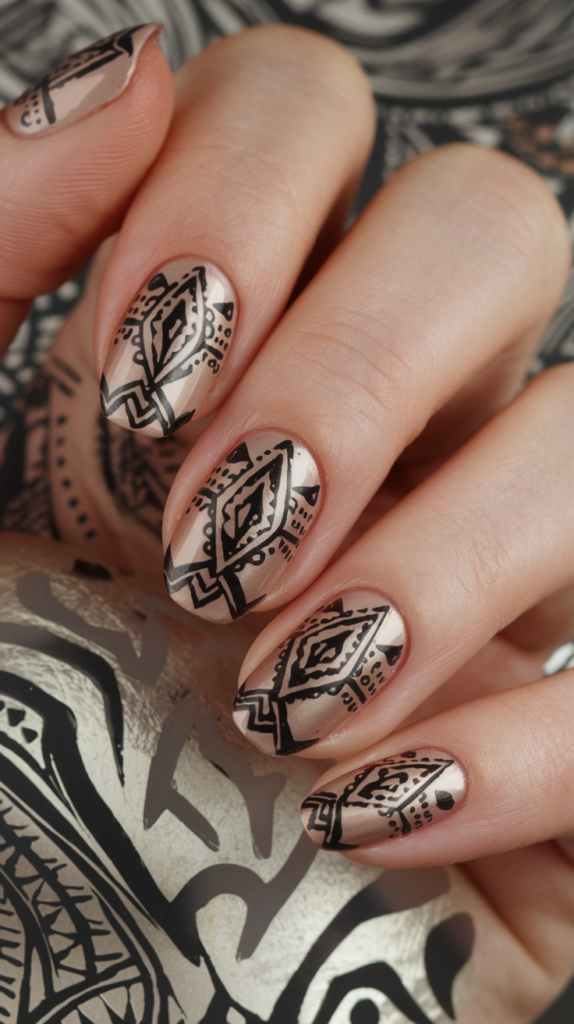
Bold And Intricate Tribal-Inspired Designs
Silver tribal patterns bring an edgy yet artistic flair to nail art.
These bold designs feature geometric shapes, lines, and symmetrical patterns that draw inspiration from traditional tribal motifs.
The metallic silver polish adds a modern twist, making the patterns stand out against any base color.
This design is perfect for those who want to make a statement with their nails while embracing cultural or artistic influences.
Tools For Precise Tribal Patterns
To achieve precise tribal designs, use striping brushes, dotting tools, or nail art pens.
Begin by painting the nails with a solid base color, such as black, nude, or white.
Use a striping brush to create clean lines and shapes, such as triangles, chevrons, or diamonds, in metallic silver polish.
Stamping plates with tribal patterns can also be used for intricate details.
Seal the design with a clear top coat to enhance the metallic finish and protect the patterns.
Combining Silver Tribal Art With Other Metallic Colors
Silver tribal patterns pair beautifully with other metallic colors, such as gold, bronze, or rose gold.
Use these complementary shades to add dimension and variety to the design, creating a layered and intricate look.
Combining tribal patterns with glitter accents or matte finishes adds depth and texture.
For a cohesive aesthetic, alternate between full tribal designs and simpler metallic nails, ensuring a balanced yet dynamic manicure.
Silver Chrome With Negative Space
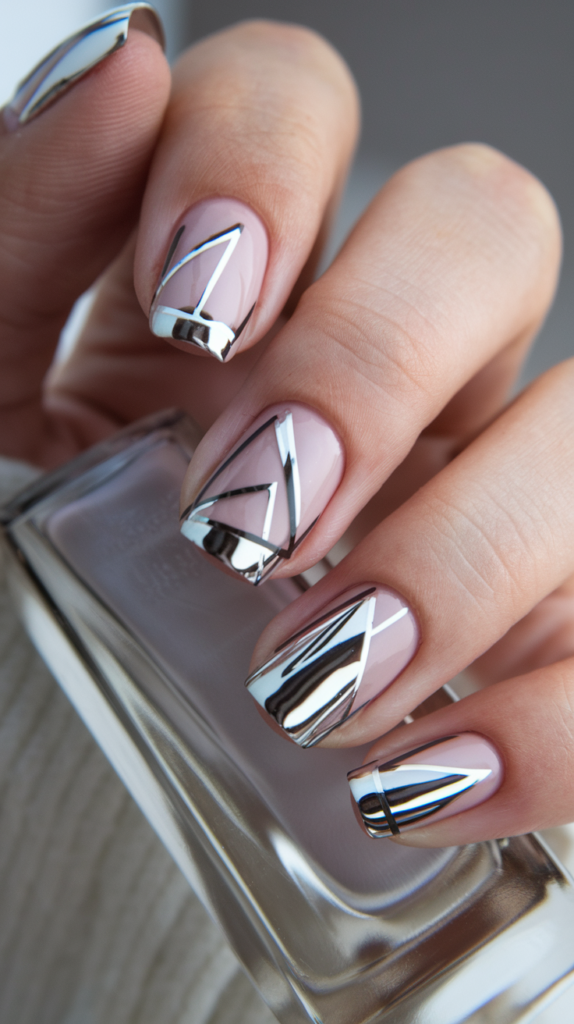
Clean And Modern Look Of Silver Chrome With Bare Areas
Silver chrome nails with negative space offer a minimalist yet futuristic design.
The reflective chrome polish contrasts beautifully with the bare sections of the nail, creating a clean and modern look.
This style is perfect for those who appreciate simplicity with a touch of sophistication, making it suitable for both everyday wear and special occasions.
Techniques For Creating Precise Negative Space Patterns
To achieve precise negative space designs, use nail tape or stencils to block off sections of the nails before applying silver chrome polish.
Paint the exposed areas with the chrome polish, then carefully remove the tape while the polish is still wet to reveal clean lines.
For freehand designs, use a striping brush to paint thin lines or shapes, leaving parts of the nail bare.
Seal the design with a clear top coat to enhance the chrome’s shine and protect the negative space.
Inspiration For Combining With Geometric Or Minimalist Designs
Negative space designs can be combined with geometric or minimalist elements for a contemporary look.
Incorporate silver chrome stripes, triangles, or grids into the design, leaving alternating sections bare.
For a more playful approach, create abstract patterns with irregular shapes or curved lines.
Pairing negative space with glitter or matte finishes adds contrast and depth, elevating the overall design.
Silver Polka Dots
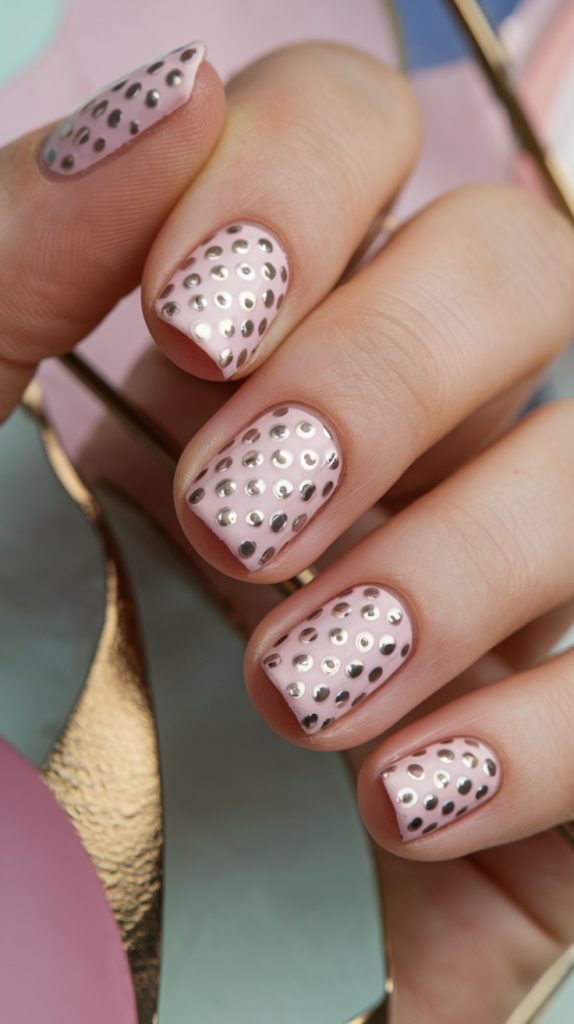
Playful Vibe Of Metallic Polka Dots
Silver polka dots bring a fun and whimsical touch to nail art.
The metallic finish adds a modern twist to this classic pattern, making it suitable for both casual and formal occasions.
Polka dots can be applied uniformly across all nails for a cohesive look or used as accents for a subtler style.
Tips For Evenly Spaced And Uniform Dots
To create evenly spaced polka dots, use a dotting tool dipped in metallic silver polish.
Start by applying a base color, such as nude, pastel, or black.
Use the dotting tool to place dots systematically across the nails, ensuring consistent spacing and size.
For variation, use dotting tools of different sizes to create a layered or gradient effect.
Seal the design with a clear top coat for added shine and durability.
Pairing With Pastel Or Nude Bases For A Chic Style
Silver polka dots pair beautifully with pastel or nude bases for a soft and chic look.
Light pink, lavender, or mint green provide a playful contrast to the metallic dots, while nude or beige tones create a more understated and elegant style.
For a bold statement, use a dark base color like navy or black to make the silver dots pop.
Mixing polka dots with other patterns, such as stripes or gradients, adds depth and creativity to the design.
Silver And Gold Combo
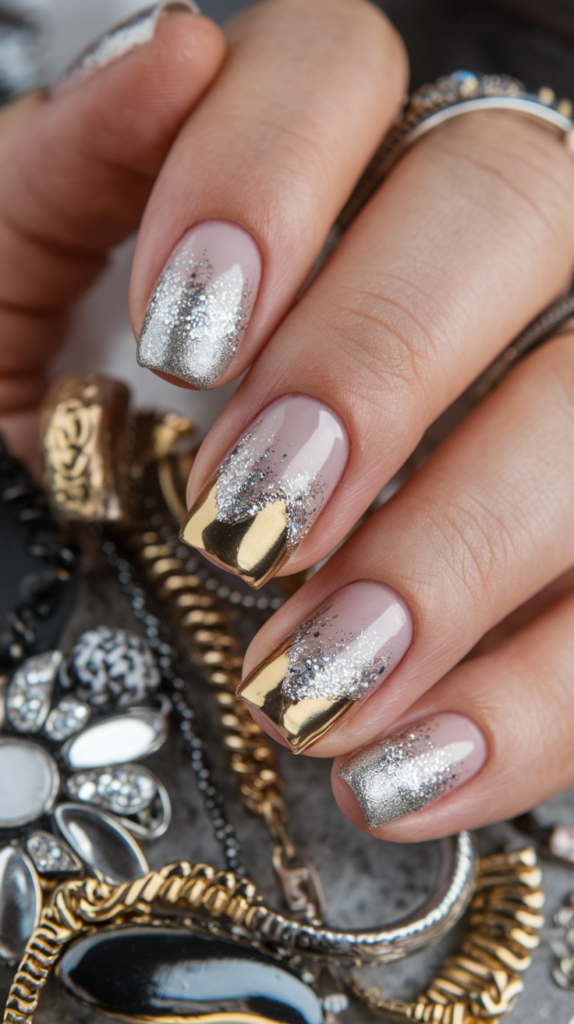
Luxurious Appeal Of Blending Silver And Gold
The combination of silver and gold in nail art creates a look of opulence and sophistication.
These two metallic shades balance each other beautifully, with silver providing a cool, modern edge and gold adding warmth and richness.
Together, they create a multidimensional effect that is perfect for high-fashion events, holiday parties, or any occasion where you want to make a bold statement.
The blend of these two metals exudes luxury and makes your nails a focal point of your overall look.
Ideas For Combining Metallic Stripes, Ombre, Or Accents
To achieve a cohesive silver and gold design, consider incorporating metallic stripes or patterns.
Use striping tape to create clean lines alternating between silver and gold for a sharp, modern look.
Ombre designs are another elegant option; blend silver at the base into gold at the tips or vice versa using a sponge for a seamless gradient effect.
For a subtler style, use silver and gold accents on individual nails, such as dots, stars, or geometric shapes, to enhance a simple manicure with a touch of glamour.
Styling Tips For Formal Occasions
Silver and gold nails are ideal for formal events and can be styled to complement your outfit and accessories.
Pair the design with jewelry in matching metallic tones to create a polished and cohesive look.
For a dramatic evening style, combine silver and gold nails with a little black dress or an all-white ensemble for maximum contrast.
To keep the design elegant, opt for subtle patterns like fine lines or minimalist accents, ensuring the metallic finish takes center stage.
Silver Flames On Holographic Base
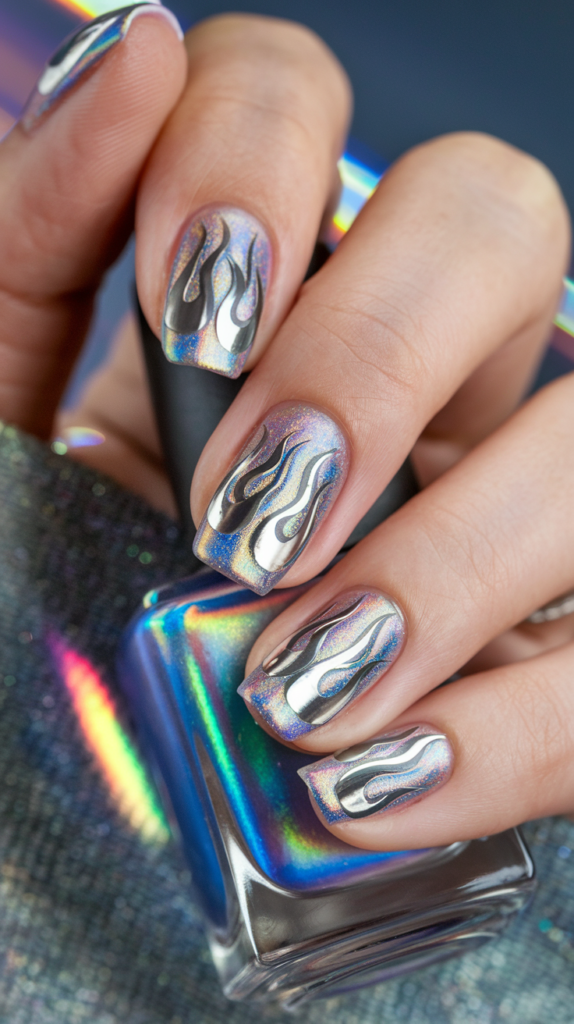
Dramatic And Futuristic Look Of Silver Flames Over Holographic Polish
Silver flames on a holographic base are a bold and futuristic nail design that captures attention with their dynamic and reflective qualities.
The holographic polish shifts colors under different lighting, creating a mesmerizing backdrop for the silver flames.
This high-energy design is perfect for festivals, concerts, or any occasion where you want to stand out.
The combination of metallic flames and prismatic polish exudes confidence and style.
Techniques For Creating Sharp, Detailed Flame Designs
To achieve precise flame designs, use a fine detailing brush or flame-shaped nail stencils.
Begin by applying the holographic base polish and allowing it to dry completely.
Using metallic silver polish, outline the flame shapes at the tips of the nails, then fill them in with smooth, even strokes.
For a more dramatic effect, add subtle gradients to the flames by blending a slightly darker silver polish at the edges.
Seal the design with a clear top coat to enhance the shine and protect the artwork.
Inspiration For Combining With Bold Nail Shapes
Silver flames on a holographic base pair exceptionally well with bold nail shapes such as stiletto, coffin, or almond.
The elongated shape of these nails accentuates the flame design, making it appear more dynamic and striking.
For a cohesive theme, alternate between flame designs and holographic accent nails, creating a balanced yet eye-catching look.
Experimenting with matte or glossy top coats can also add variety and depth to the design.
Silver Glitter Nails With Jewel Accents
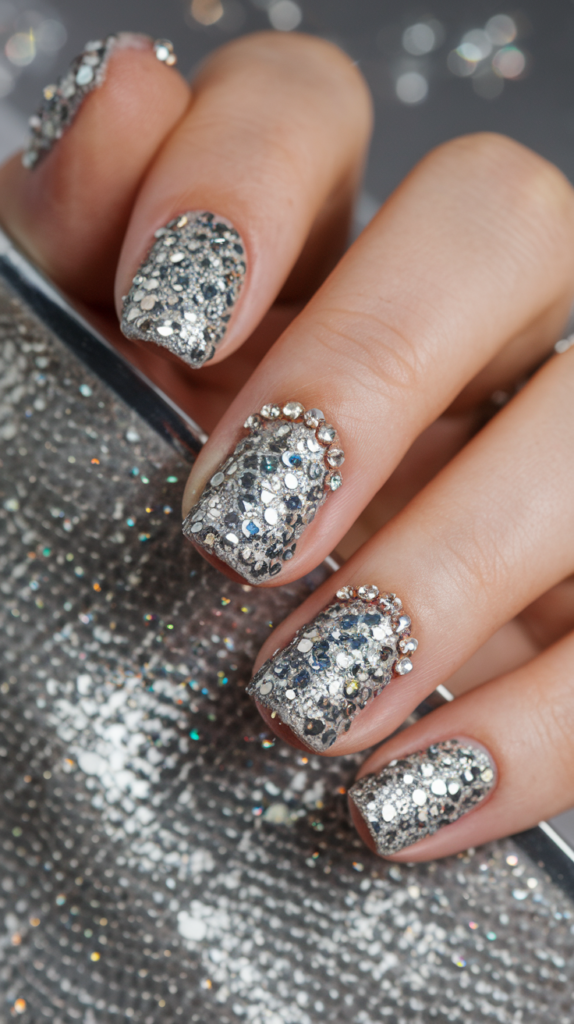
Ultimate Glamour With Glitter And Gemstones
Silver glitter nails with jewel accents are the epitome of luxury and glamour.
The combination of sparkling glitter and dazzling gemstones creates a multidimensional effect that radiates sophistication.
This design is perfect for special occasions such as weddings, galas, or holiday parties, where a touch of elegance and extravagance is desired.
The jewels add an element of opulence, turning your nails into statement pieces that shine as brightly as your outfit.
Placement Tips For Jewels To Enhance Designs
For a balanced and polished look, place jewels strategically on one or two accent nails.
Start by applying silver glitter polish to all nails and letting it dry completely.
Use nail glue or a thick gel to secure the jewels, positioning them in patterns such as clusters, lines, or a single focal point at the base of the nail.
Ensure the jewels are pressed firmly into place and finish with a clear gel top coat to seal the design and provide extra durability.
Best Combinations For Accent Nails Or Full Sets
When incorporating jewel accents, consider combining them with other nail art elements for a cohesive design.
For example, pair jewel-studded accent nails with simple silver glitter on the remaining nails for a balanced look.
Alternatively, use smaller gemstones to outline geometric patterns or enhance floral designs.
For a more dramatic style, cover an entire nail in jewels and glitter, creating a statement piece that stands out.
Mixing textures, such as matte nails with glossy accents, can further elevate the design.
Bringing It All Together
Silver nail art designs offer endless possibilities for creativity, elegance, and bold statements.
From minimalist geometric patterns to extravagant glitter and jewel-studded designs, these styles cater to every preference and occasion.
Whether you’re seeking a subtle touch of sophistication or a dazzling, high-energy look, silver nail art provides the perfect canvas for self-expression.
With this comprehensive guide, you have all the inspiration and techniques you need to create stunning silver nail designs that will captivate and inspire.
Let your creativity shine, and enjoy experimenting with these versatile and timeless styles!
Conclusion
Silver nail art is a timeless trend that never goes out of style, offering a perfect balance of elegance and versatility.
From understated minimalist designs to bold and extravagant creations, silver nails can elevate any look and make a lasting impression.
Whether you’re attending a formal event, celebrating a festive occasion, or simply looking to add a touch of glamour to your everyday style, silver nail art has something to offer.
We hope these 35 silver nail art designs have inspired you to experiment and find the perfect style to suit your personality and preferences.
With the right tools and techniques, you can achieve stunning results that reflect your creativity and confidence.
Embrace the shimmer, shine, and sophistication of silver nail art, and let your nails make a statement wherever you go!
