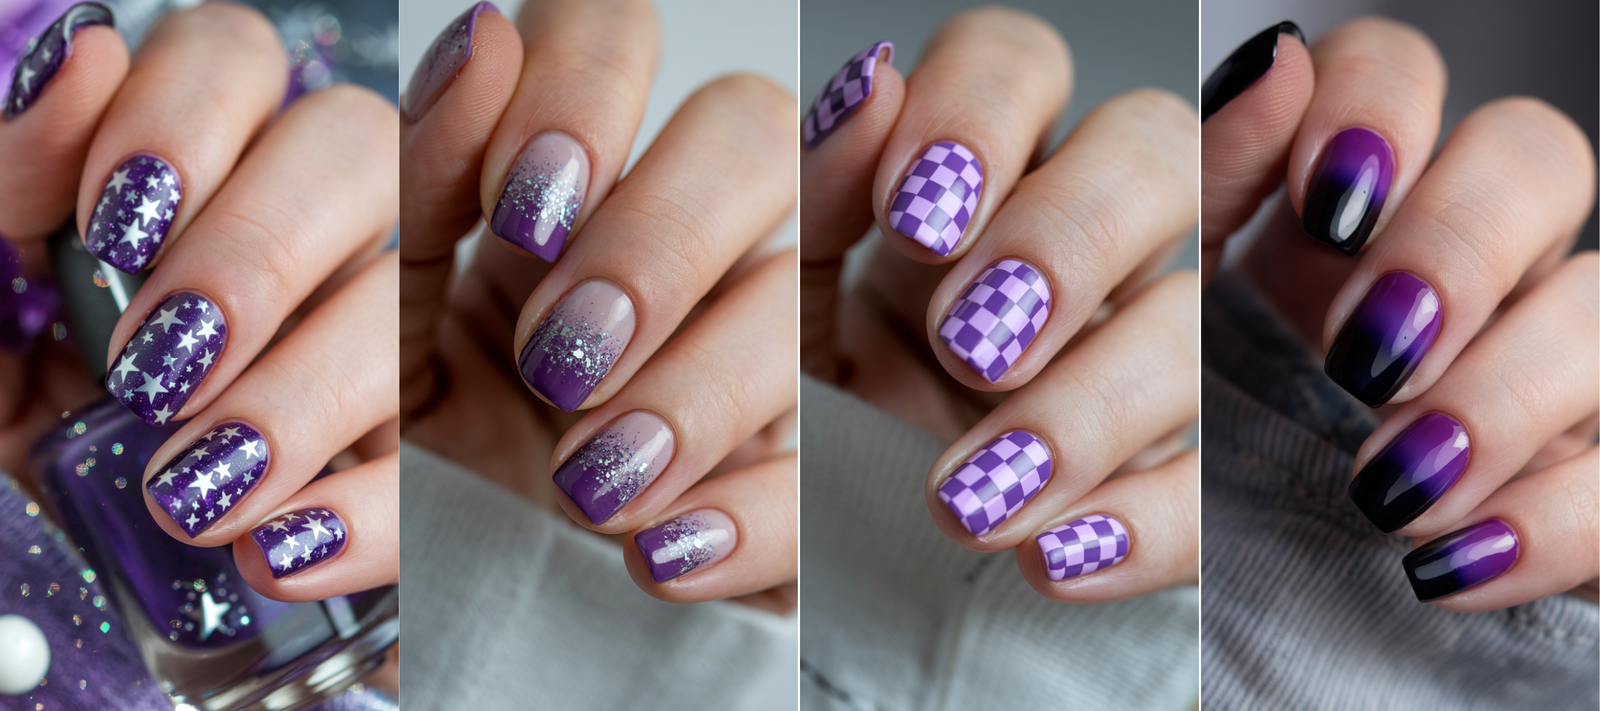
Violet nail art is an incredibly versatile and chic choice, perfect for adding a touch of elegance, whimsy, or boldness to any look.
From soft pastels to deep, mysterious purples, violet hues offer a wide range of design possibilities that suit every mood and occasion.
In this guide, you’ll find 35 stunning violet nail art ideas, each with step-by-step instructions and expert tips to achieve beautiful, hyper-realistic results.
Whether you’re looking for a minimalist design with subtle details or a bold, statement-making manicure, these violet nail art styles provide endless inspiration.
Dive into this collection and discover the perfect violet nail design to elevate your style.
Soft Violet Ombre Nails
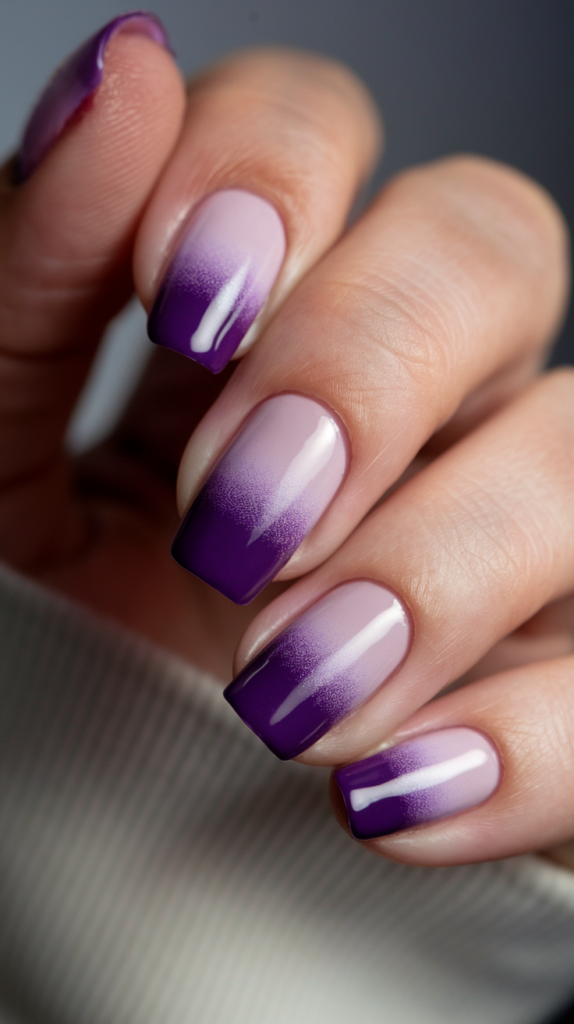
Description Of The Subtle Gradient Effect From Light To Dark Violet
Soft violet ombre nails are a stunning choice for anyone looking for a subtle yet elegant nail design.
This design features a gradient effect, where the color transitions smoothly from a light, pastel violet at the base to a deeper, richer violet shade at the tip.
The ombre effect adds depth and sophistication to the nails, creating a visually pleasing look that is both versatile and stylish.
The soft gradient is perfect for various occasions, whether formal or casual, as it effortlessly enhances the overall appearance without overwhelming the senses.
Tips For Achieving A Smooth Ombre Finish
To achieve a seamless ombre effect, start by applying the lightest shade of violet as the base color, ensuring it covers the entire nail evenly.
Use a makeup sponge to dab the darker violet shade onto the tips, gradually blending it upwards toward the base.
Repeat this dabbing process until you achieve a smooth transition between the two colors.
Finish with a glossy top coat to seal the look and add shine, enhancing the smooth blend of colors.
Remember, patience and precision are essential for achieving the perfect ombre finish, so take your time blending the colors for a flawless result.
Violet French Tips With A Twist
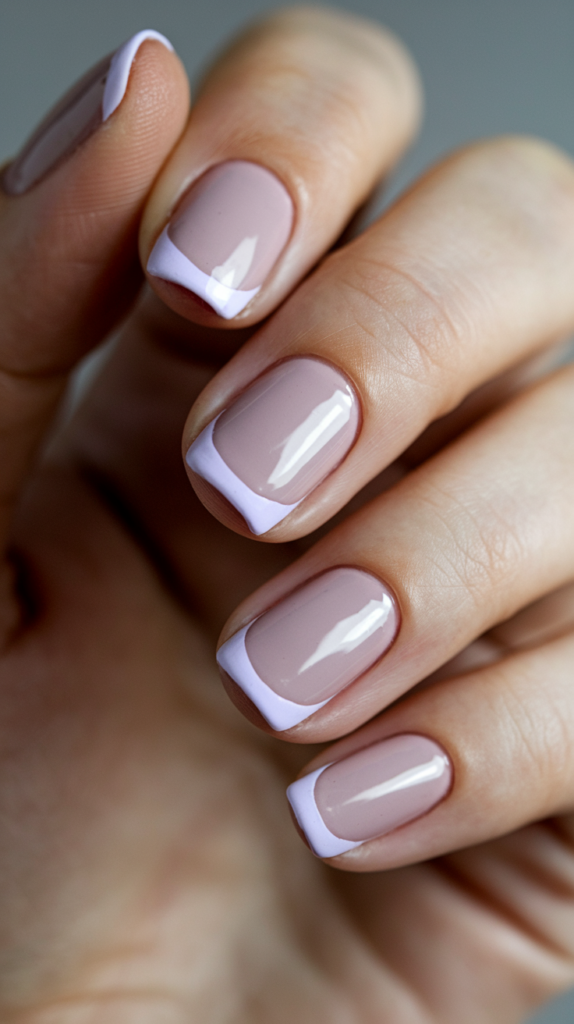
Explanation Of The Classic French Manicure With Lavender Or Deep Violet Tips
The Violet French Tips style brings a modern twist to the traditional French manicure by replacing the classic white tips with lavender or deep violet.
This design maintains the elegance of the French manicure but adds a pop of color that gives it a unique and contemporary look.
Using violet shades for the tips adds a playful, vibrant touch to the nails, making them stand out without compromising their sophistication.
The contrast between the soft violet or deep purple tips and the neutral base color creates a striking visual effect that draws attention in a tasteful way.
Suggested Base Colors To Complement Violet Tips
To enhance the look of Violet French Tips, choosing the right base color is crucial.
A soft pink or nude base complements lavender or deep violet tips beautifully, as these neutral shades allow the vibrant violet to stand out.
Another option is a sheer, pale lavender base that blends harmoniously with the violet tips, creating a cohesive look.
For a bolder appearance, try a shimmery silver base, which contrasts elegantly with the violet tips and adds a touch of glamour.
Whatever base color you choose, ensure it highlights the violet tips while keeping the overall look balanced and refined.
Cosmic Violet Galaxy Nails
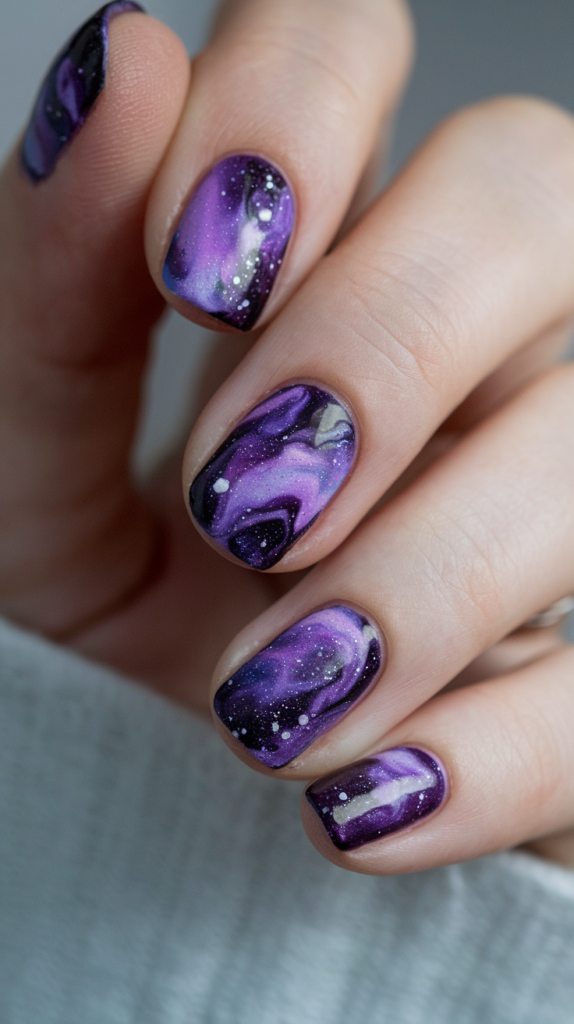
Step-By-Step Guide To Creating A Galaxy Effect With Swirling Violets
Cosmic Violet Galaxy Nails bring a mesmerizing, otherworldly vibe to your manicure.
Start by applying a deep violet base coat on each nail, setting the foundation for the galaxy effect.
Using a makeup sponge, dab lighter shades of violet and hints of black over the base, creating a swirling, nebulous effect.
Add tiny white specks across the nails to mimic stars, using a fine-tipped brush or toothpick.
For an even more captivating galaxy look, dab tiny amounts of silver or holographic glitter onto the nails, adding a cosmic shimmer that catches the light beautifully.
Tips For Adding Starry White Specks And Dark Accents
For realistic stars, dilute white polish with a little water to thin it out, then lightly flick a brush over the nails to create tiny specks.
Alternatively, use a fine-tipped brush to paint individual stars, focusing on creating random clusters to mimic a natural night sky.
For added depth, use a dark navy or black polish to add shadowy areas around the violet, enhancing the cosmic look.
Finish with a glossy top coat to give the nails a polished, galactic shine that will leave your manicure looking out of this world.
Marbled Violet Nail Art
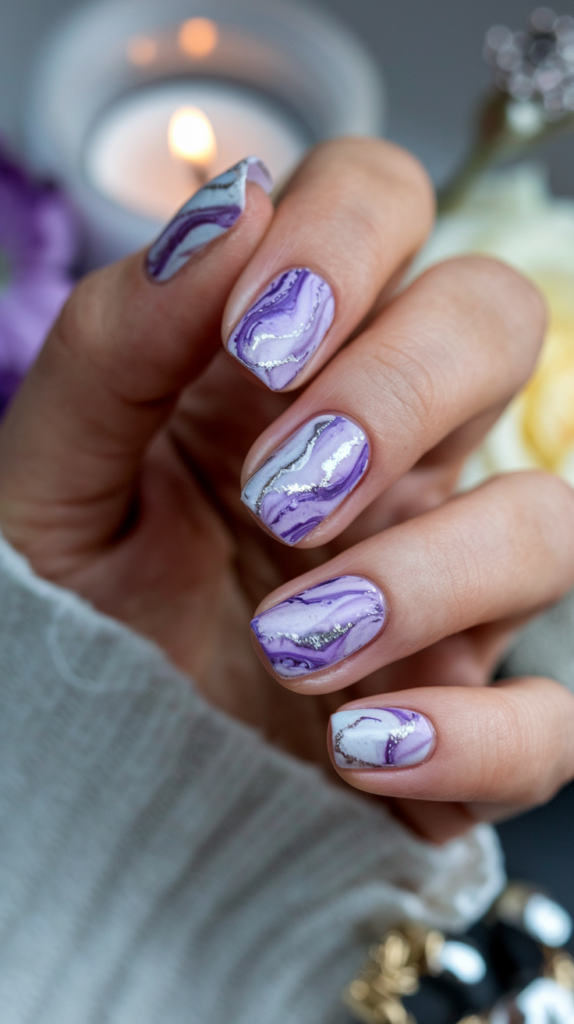
Explanation Of The Chic Marble Effect With Violet, White, And Silver
Marbled Violet Nail Art combines elegance with a touch of luxury, using shades of violet, white, and silver to create a chic marbled effect.
The design mimics the look of natural marble stone, with swirls of color that flow seamlessly across the nail.
The contrast between the rich violet, soft white, and shimmering silver adds depth and texture to the nails, creating an effect that is both sophisticated and visually interesting.
Marbled violet nails are a great choice for those looking to add a high-end, artistic flair to their manicure.
Tips On Using Different Shades For A Luxurious Appearance
To achieve a marbled effect, start with a light violet or white base.
Then, use a fine brush or toothpick to drag thin lines of darker violet and silver across the nail in random, swirling patterns.
To create a more natural marble look, vary the thickness and placement of the lines, blending some of them lightly with the base color.
For extra luxury, incorporate metallic silver foil pieces into the design, pressing them gently onto the nail for a subtle, reflective touch.
Finish with a glossy top coat to seal the design and give it a polished, marble-like shine.
Metallic Violet Accents For A Modern Look
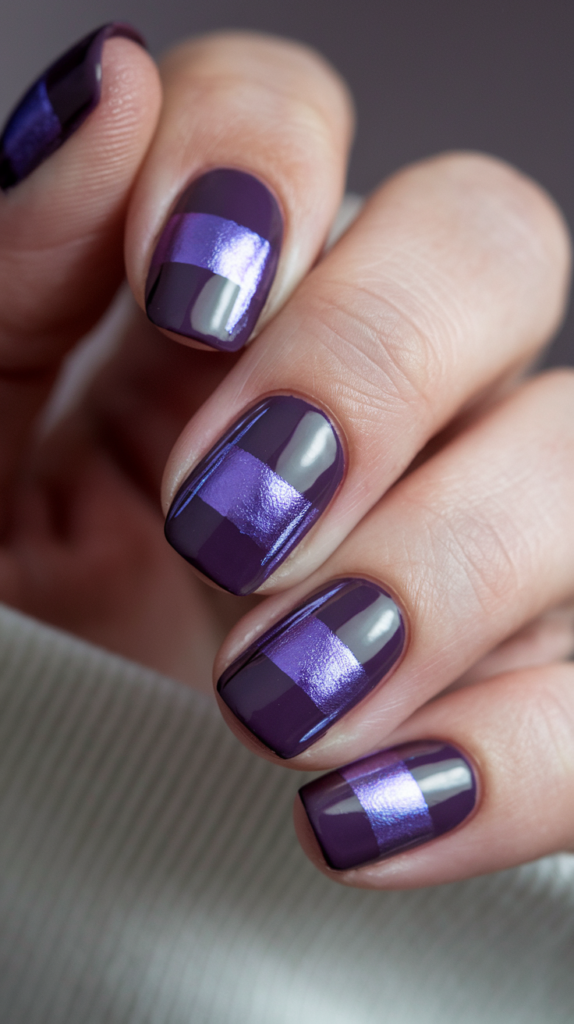
Ideas For Adding Metallic Violet As Stripes Or Accents
Metallic Violet Accents are perfect for those seeking a modern, edgy style.
To achieve this look, use a metallic violet polish to create stripes or accent lines on each nail.
Apply the stripes in various thicknesses, either horizontally, vertically, or diagonally, to add visual interest.
You could also experiment with geometric shapes or small dots of metallic violet to create a unique pattern.
The metallic finish gives the nails a reflective, high-shine appearance that captures light beautifully, enhancing the futuristic feel of the design.
How To Achieve A Futuristic, Sleek Finish
For a sleek, futuristic look, start with a matte black or deep violet base to make the metallic accents pop.
Use a striping brush or nail tape to achieve clean, sharp lines with the metallic violet polish.
Allow each layer to dry completely before adding more accents to avoid smudging.
Finish with a high-gloss top coat to intensify the metallic effect, or opt for a matte top coat to create a sophisticated contrast between the metallic and matte finishes.
The result is a modern, eye-catching design that is both sleek and stylish.
Violet Glitter Tips For Subtle Sparkle
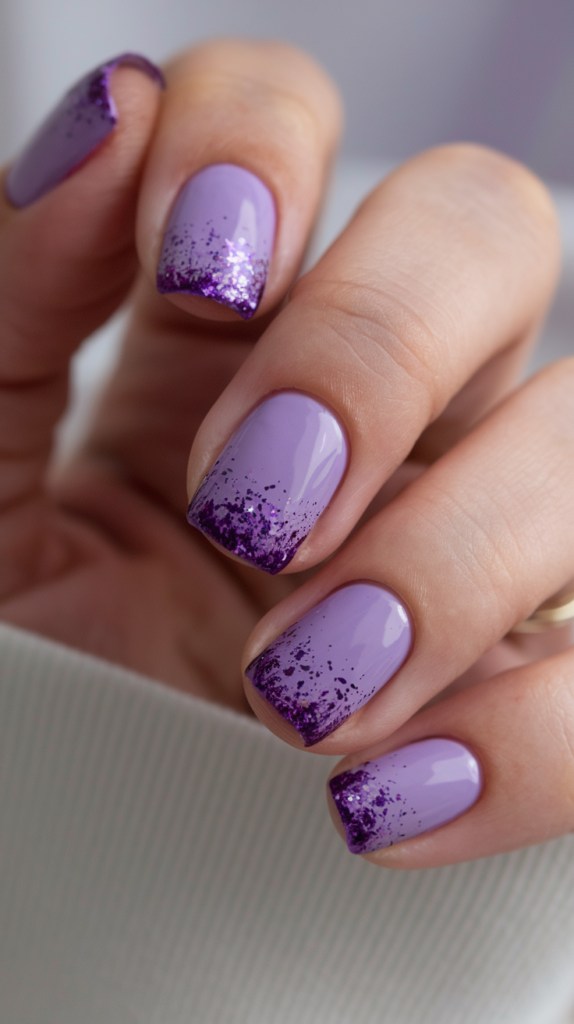
How To Create A Gradient Effect From Matte Violet To Glitter Tips
Violet Glitter Tips offer a playful yet elegant look, with a gradient effect that transitions from a matte violet base to sparkling glitter tips.
Start by applying a matte violet polish as the base color.
Once dry, apply a clear coat or glitter polish to the tips of the nails, concentrating the glitter near the tips and gradually fading it as you move towards the middle of the nail.
This creates a soft, sparkling gradient that adds just the right amount of shimmer without overpowering the matte base.
Tips On Applying Glitter For A Clean And Elegant Look
When applying glitter, use a thin brush to control the amount and placement of the glitter polish.
Concentrate the glitter at the very tips for a subtle sparkle, or layer it more heavily for a bolder effect.
For a cleaner look, consider using a clear tape as a guide to keep the glitter confined to the tips.
Once you’re satisfied with the gradient, seal the design with a glossy or matte top coat to secure the glitter and ensure a long-lasting finish.
The result is a beautiful, elegant design with just the right touch of sparkle.
Geometric Violet Nail Design
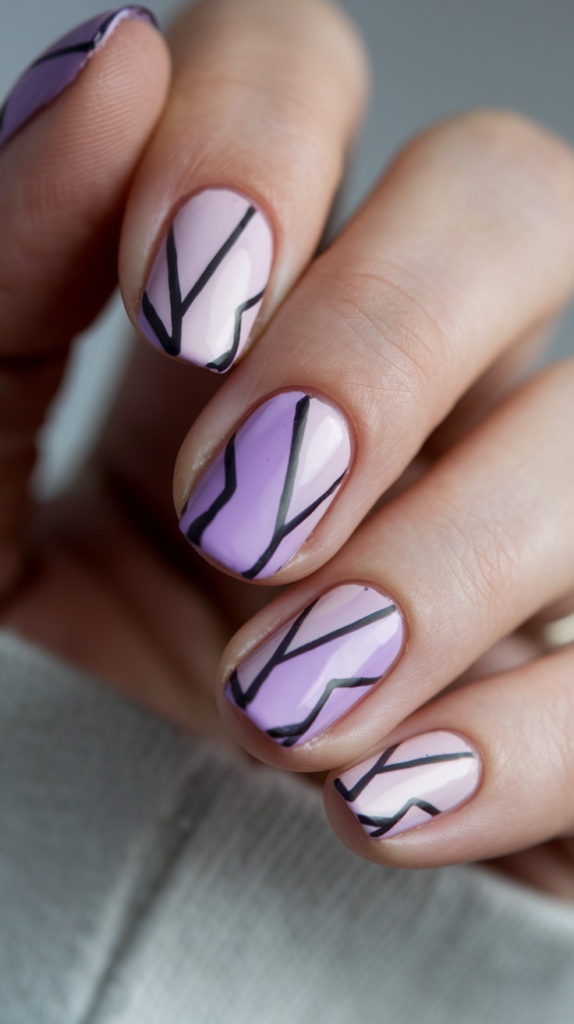
Guide To Creating Edgy, Modern Geometric Shapes With Violet Tones
Geometric Violet Nail Designs are a fantastic way to experiment with edgy, contemporary shapes and patterns.
Begin by selecting a combination of light and dark violet shades, which will serve as the primary colors for your design.
Apply a base coat of light violet for a soft background.
Once it’s dry, use nail tape or a fine brush to create sharp, angular shapes like triangles, rectangles, or diagonal lines on the nails with a darker violet shade.
This geometric style adds a dynamic, modern edge to your manicure, making it stand out with clean, bold lines and shapes.
Suggested Color Combinations For Added Contrast
For added contrast, consider incorporating neutral shades like white or black alongside the violet tones.
For example, a light lavender base paired with dark violet and white geometric shapes creates a balanced, high-contrast design.
Alternatively, add touches of metallic silver or gold within the geometric shapes for a hint of glamour and depth.
This combination of colors not only enhances the geometric effect but also brings a fresh, sophisticated twist to the overall look.
Finish with a high-gloss or matte top coat to add a sleek final touch to your edgy nail art.
Violet And Rose Gold Foil Elegance
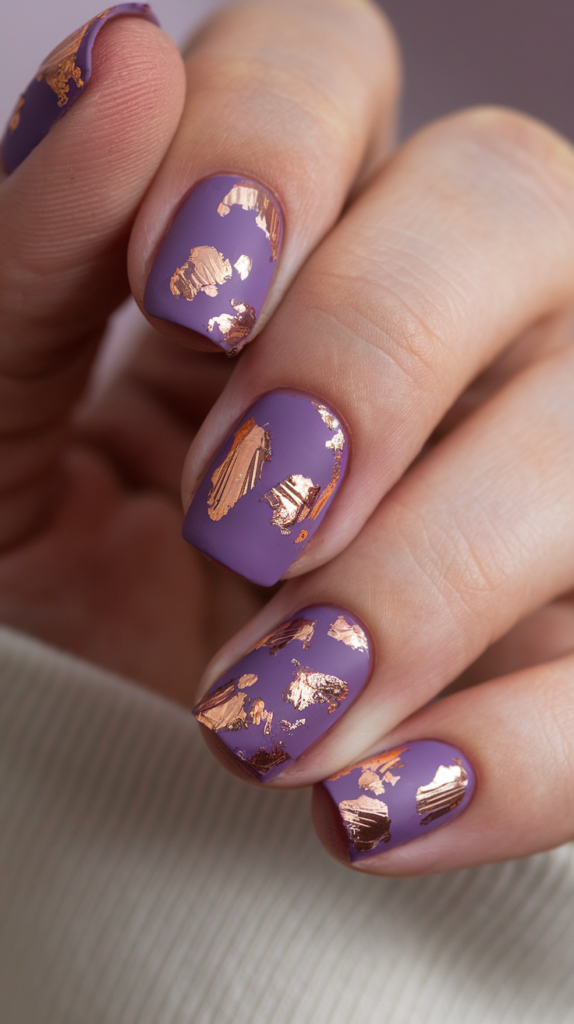
Step-By-Step For Adding Rose Gold Foil To A Matte Violet Base
Violet and Rose Gold Foil Elegance is a luxurious choice for anyone wanting a trendy yet refined manicure.
Begin by applying a matte violet base to all nails.
After the matte polish has dried, use tweezers to carefully place small pieces of rose gold foil onto the nails, focusing on the middle or edges for a scattered effect.
The foil pieces should adhere to the base easily, creating a contrasting texture that adds richness to the overall look.
Gently press the foil into the polish and ensure it sticks well before applying a top coat.
Tips For Achieving A Luxurious Finish
To achieve a truly luxurious finish, ensure the matte base is smooth and evenly applied, as this will enhance the contrast with the shiny rose gold foil.
Apply the foil sparingly to maintain an elegant, minimalist look—too much foil can overpower the matte effect.
For durability, use a clear top coat to secure the foil in place, while preserving its metallic sheen.
A glossy top coat can add extra dimension by contrasting with the matte base, creating a balanced, high-end look that exudes sophistication.
Delicate Violet Floral Nails
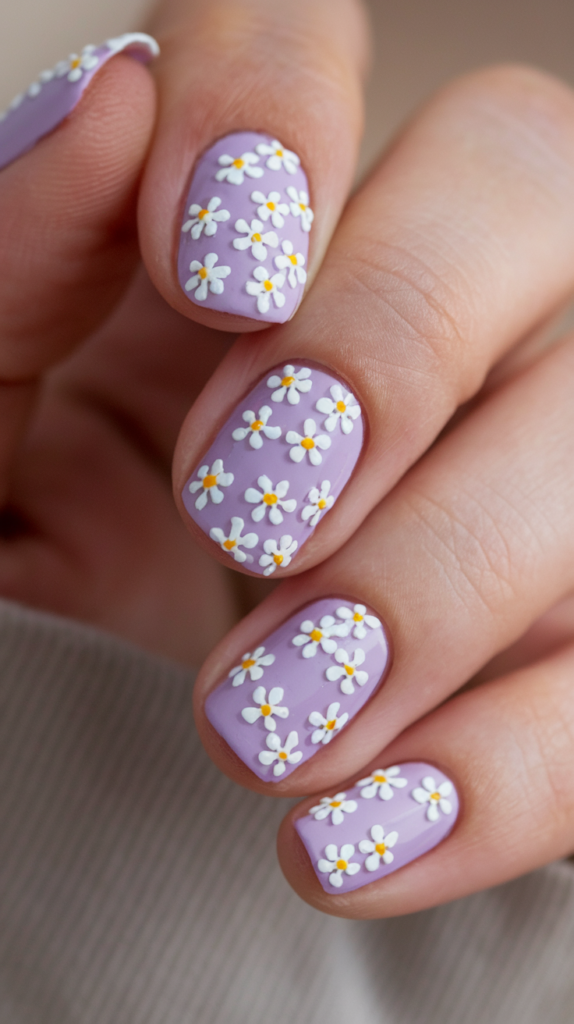
Guide To Painting Small White Or Lilac Blossoms Over A Light Violet Base
Delicate Violet Floral Nails bring a soft, spring-inspired aesthetic to any manicure.
Begin by applying a light violet base to all nails.
Once dry, use a fine-tipped brush to paint small blossoms, like daisies or cherry blossoms, in white or a slightly darker lilac shade.
Place the flowers in a random arrangement, focusing on the tips or corners of the nails for a natural look.
For added detail, use a tiny dot of yellow or gold in the center of each flower to mimic pollen, bringing the design to life.
Suggested Floral Designs For A Spring-Inspired Vibe
For a fresh, spring-inspired vibe, consider painting different floral varieties, such as roses, lilies, or dainty wildflowers, in pastel hues.
Experiment with mixing single flowers and clusters to give the nails a more organic, garden-like appearance.
For a romantic look, paint a few scattered petals alongside the flowers or add subtle leaf details in a soft green shade.
A clear top coat will seal the design and add a gentle shine, making your floral artwork stand out beautifully on the soft violet background.
Matte Violet Nails With Glossy Tips
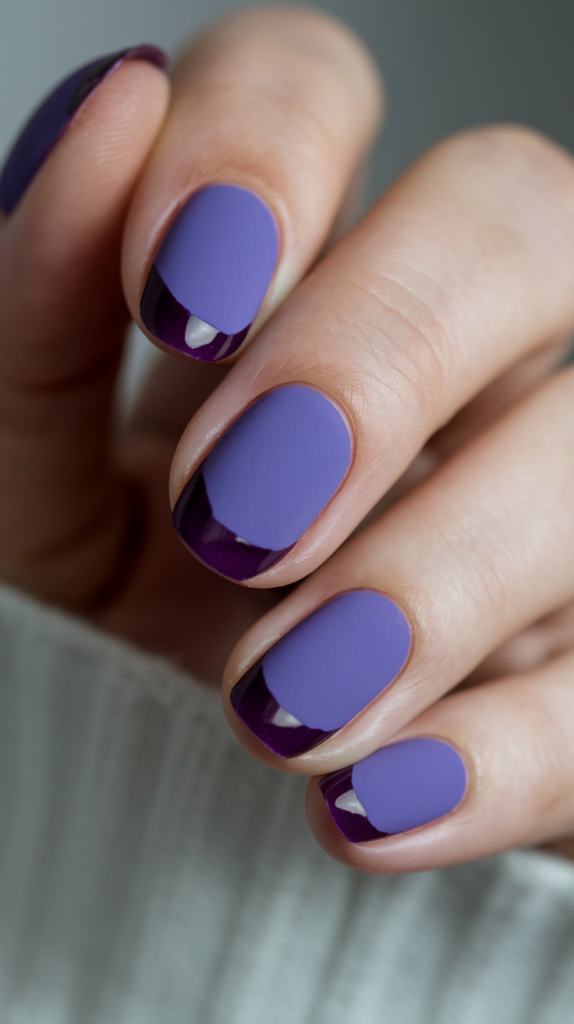
How To Create Depth With A Matte Violet Base And Glossy Violet Tips
Matte Violet Nails with Glossy Tips offer a sophisticated, modern look with a subtle contrast between textures.
Begin by applying a matte violet polish to all nails.
Once the matte base has dried completely, use a glossy top coat to paint the tips, creating a French tip effect.
The glossy finish on the tips contrasts beautifully with the matte base, adding depth and dimension to the overall look.
This technique is perfect for those who appreciate understated elegance with a hint of glamour.
Tips On Maintaining The Contrast Between Finishes
To maintain a sharp contrast between the matte and glossy finishes, ensure the matte base is fully dry before applying the glossy top coat to the tips.
Use nail tape to help define the glossy area, creating a clean line between the two finishes.
Avoid touching the matte areas to keep them free from smudges or fingerprints, which can dull the matte effect.
Sealing the design with a thin layer of matte top coat over the base area can also help keep the contrast sharp, ensuring that the matte remains matte and the glossy tips stay shiny.
Violet Tie-Dye Art For A Fun Look
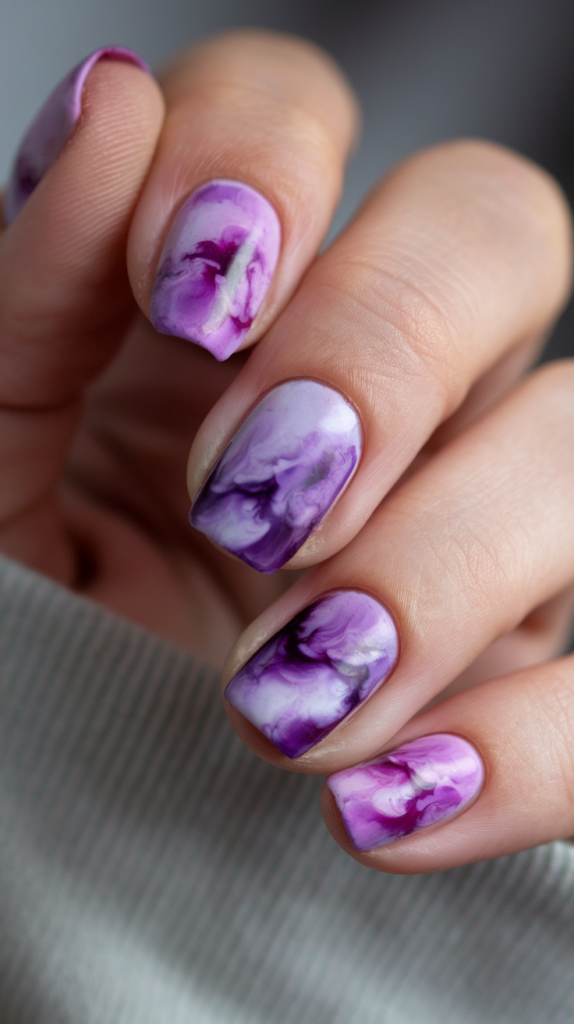
Step-By-Step Guide To Creating A Vibrant Tie-Dye Effect With Violet Shades
Violet Tie-Dye Art is a playful, artsy design that incorporates various shades of violet for a dynamic, vibrant effect.
Start by applying a white base coat on each nail, which will help the violet shades pop.
Once the base is dry, use a small sponge or a fine brush to apply different violet hues in random, swirling patterns.
Layer and blend the colors softly to create a natural, tie-dye effect.
The result should look like a mix of light and dark violets blending into one another, mimicking the classic tie-dye style with a modern twist.
Suggested Color Transitions For An Artsy Vibe
For a more cohesive tie-dye effect, blend shades such as lavender, plum, and deep violet to achieve a smooth transition between colors.
Adding hints of pink or pastel purple can create an extra pop, making the tie-dye pattern appear more dynamic.
A glossy top coat will enhance the colors and add shine, while a matte top coat can create a softer, more subdued finish.
The tie-dye effect is fun and versatile, making it a great option for those looking to add a burst of color and creativity to their nails.
Deep Violet Nails With Gold Flecks
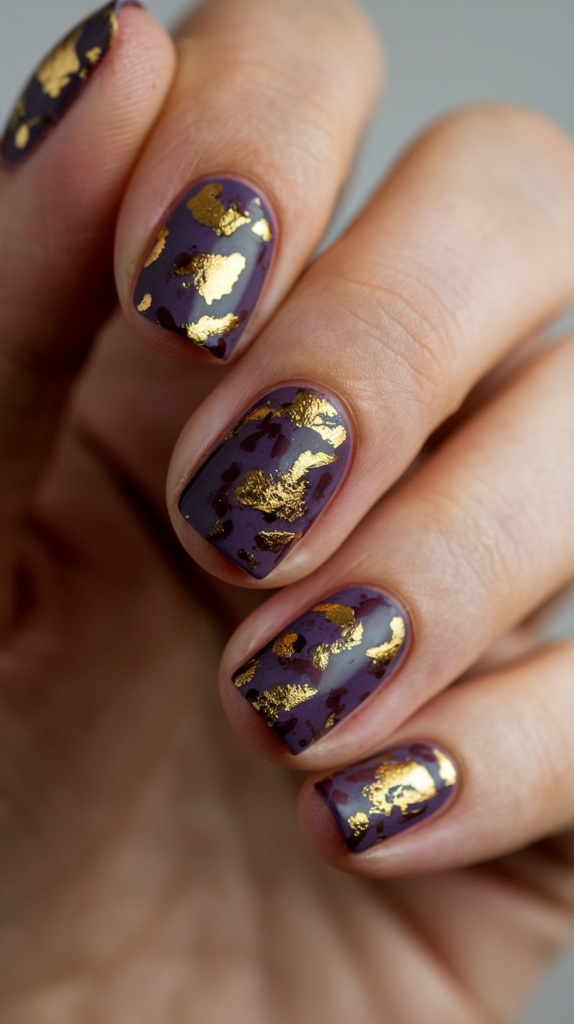
How To Add Gold Flecks To A Dark Violet Base For A Luxurious Look
Deep Violet Nails with Gold Flecks bring a luxurious, regal aesthetic to any manicure.
Start by applying a rich, dark violet polish as the base.
Once the base is dry, carefully place small flecks of gold foil on each nail.
The gold flecks should be scattered randomly across the surface to mimic a natural, organic texture, with some nails having more flecks than others.
Press the gold flecks gently into the polish to ensure they adhere well, creating a striking contrast with the deep violet background.
Tips On Balancing The Placement Of Gold Accents
To achieve a balanced look, vary the amount of gold flecks on each nail for a naturally scattered effect.
Concentrate the flecks near the cuticle or tips of the nails to create a gradient effect, or apply them sparingly across the entire nail for a more understated look.
Use a pair of tweezers for precision, and avoid applying too many flecks in one area to maintain the elegance of the design.
A clear top coat will lock the gold accents in place and enhance the luxurious, polished finish of the manicure.
Translucent Violet Jelly Nails
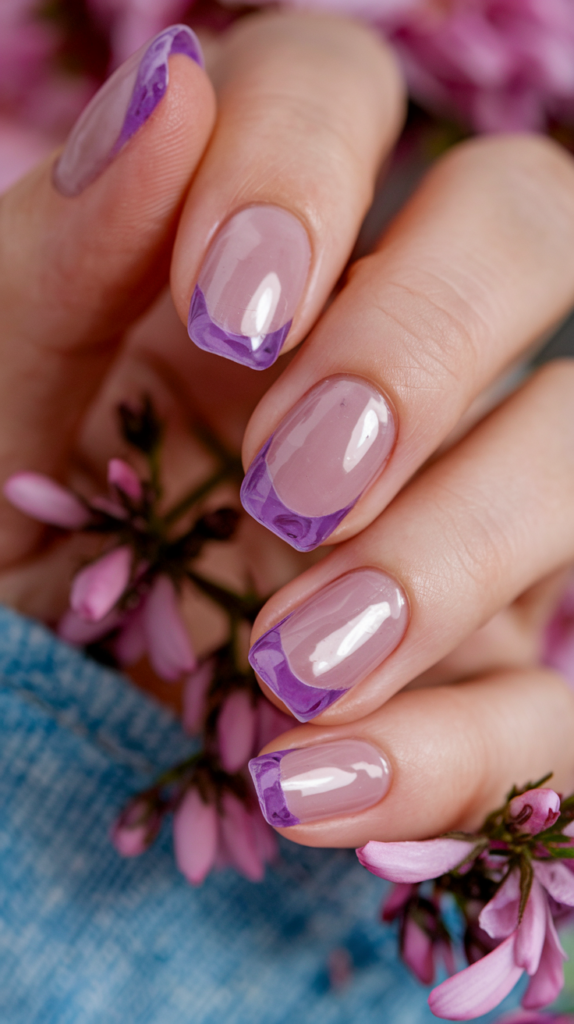
Guide To Achieving A Sheer, Jelly-Like Violet Effect
Translucent Violet Jelly Nails are a trendy, summery design that gives nails a light and airy appearance.
To achieve this look, use a sheer violet polish that allows some transparency, giving the nails a jelly-like effect.
Apply multiple thin coats to build up the color gradually, enhancing the transparency while creating a smooth finish.
This technique creates a soft, playful look that’s perfect for warmer seasons, as it offers a unique blend of color and light.
Tips On Creating A Light And Summery Appearance
For an extra summery vibe, try layering a touch of glitter polish between coats for added sparkle.
Keep the color light and buildable by using sheer polishes in shades of lavender or lilac.
Avoid using opaque polishes, as they can disrupt the translucent effect.
Finish with a glossy top coat to enhance the jelly-like shine, giving the nails a fresh, summery feel that’s perfect for days spent under the sun.
Pastel Violet Hearts For A Cute Touch
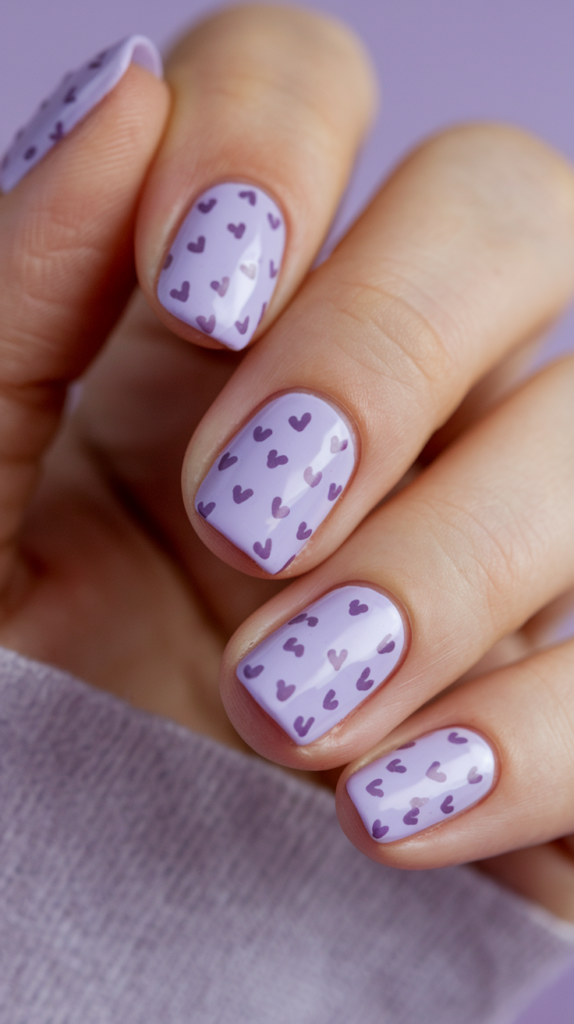
How To Add Tiny Pastel Violet Hearts On A Soft Violet Base
Pastel Violet Hearts bring a touch of cuteness and whimsy to your manicure.
Start by applying a soft violet polish as the base color.
Once the base is dry, use a fine brush or dotting tool to paint tiny heart shapes in a lighter pastel violet shade.
Place the hearts randomly across the nail, creating a playful pattern that’s both adorable and visually interesting.
The pastel hearts add a soft, sweet touch to the design, making it perfect for those who love delicate, romantic details.
Tips For Achieving Even Spacing And Clean Heart Shapes
To achieve a consistent look, use a dotting tool for precision and practice the heart shapes on paper beforehand.
Space the hearts evenly across the nails, ensuring each heart is clearly defined.
Apply a thin top coat once the hearts have dried to seal the design and add a smooth, glossy finish.
This will help protect the delicate details and make the pastel hearts appear even brighter and more pronounced on the soft violet background.
Elegant Violet Lace Design
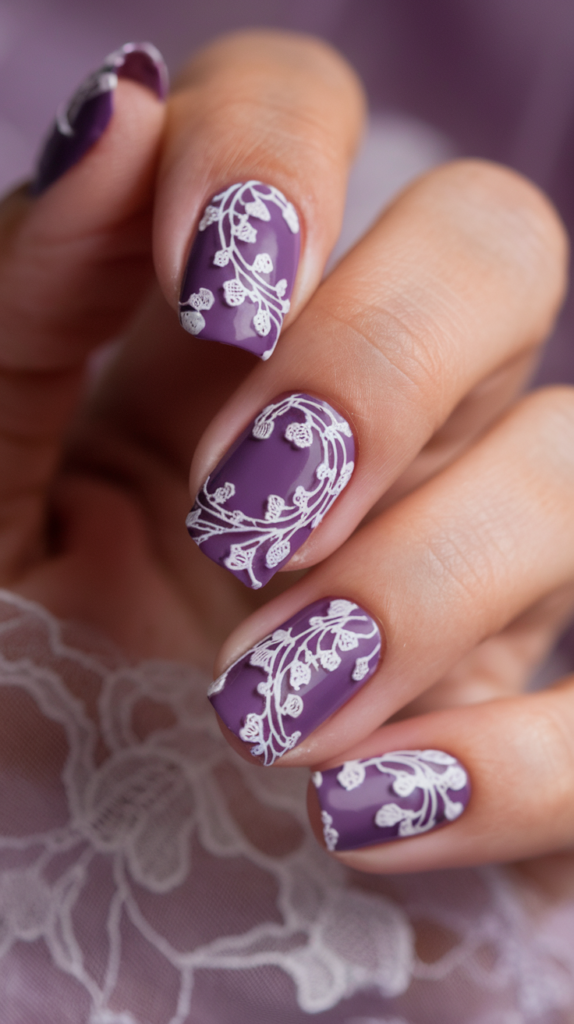
Step-By-Step Guide To Painting Delicate White Lace Over A Violet Base
The Elegant Violet Lace Design is perfect for adding a vintage, feminine touch to your manicure.
Begin by applying a rich violet polish as the base color and allowing it to dry completely.
Once dry, use a fine detail brush dipped in white polish to paint delicate lace patterns over the violet.
Focus on intricate details such as tiny loops, swirls, and dots to mimic real lacework.
For a more natural effect, concentrate the lace designs near the tips or cuticles of the nails, leaving parts of the violet base visible for a balanced, layered look.
Suggested Patterns For A Vintage-Inspired Look
For a vintage-inspired look, consider lace patterns that incorporate floral elements, like roses or daisies, woven into the lace.
You can also add smaller details, such as dots and tiny scallops, to make the lace appear more intricate and traditional.
Alternatively, paint the lace pattern on an accent nail while keeping the rest of the nails a solid violet to create an elegant, understated design.
Finish with a clear top coat to add shine and protect the lace artwork, ensuring it remains crisp and defined.
Gradient Stamping In Violet Shades
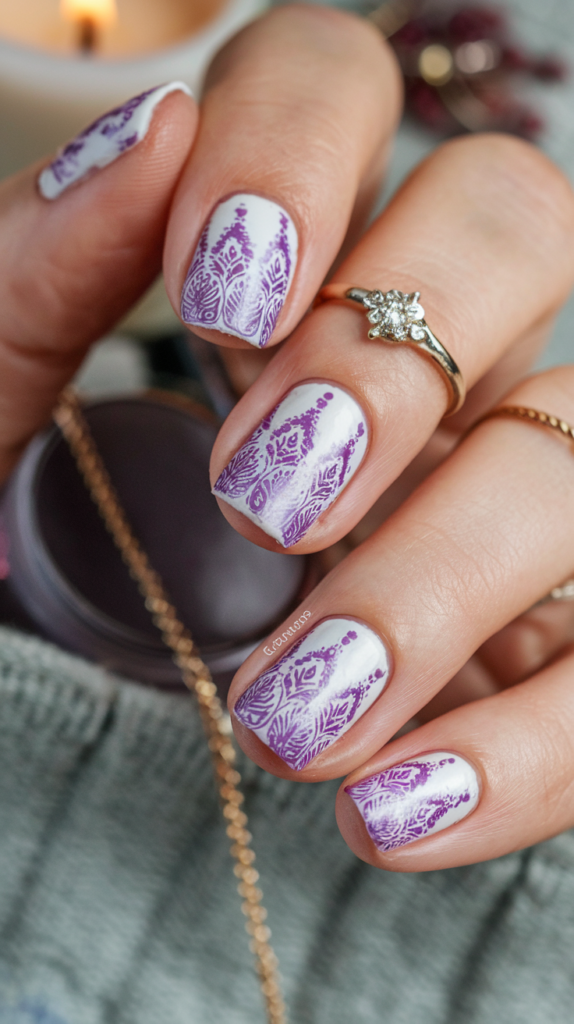
Guide To Using Gradient Stamping In Various Violet Hues
Gradient Stamping in Violet Shades offers a unique, artistic approach to nail art.
Start by selecting a few shades of violet, ranging from light lavender to deep purple.
Apply a white or pale lavender base on each nail.
Then, use a stamping plate with a pattern you like, such as floral or abstract shapes, and apply the different violet shades in gradient order on the stamping plate.
Carefully press the gradient-stamped design onto each nail, creating a smooth transition between the colors within the pattern.
Suggested Base Colors To Enhance Stamped Patterns
To make the gradient stamping stand out, choose a light, neutral base color like white, pale pink, or soft lavender.
These shades will provide a subtle background, allowing the vibrant violet hues to take center stage.
For a bolder contrast, you could use a soft gray or pastel mint green as the base color, which complements the violet gradient beautifully.
Once the stamping is complete, apply a glossy top coat to enhance the vibrancy of the design, ensuring a smooth, finished look.
Violet Checkerboard Pattern For Playful Style
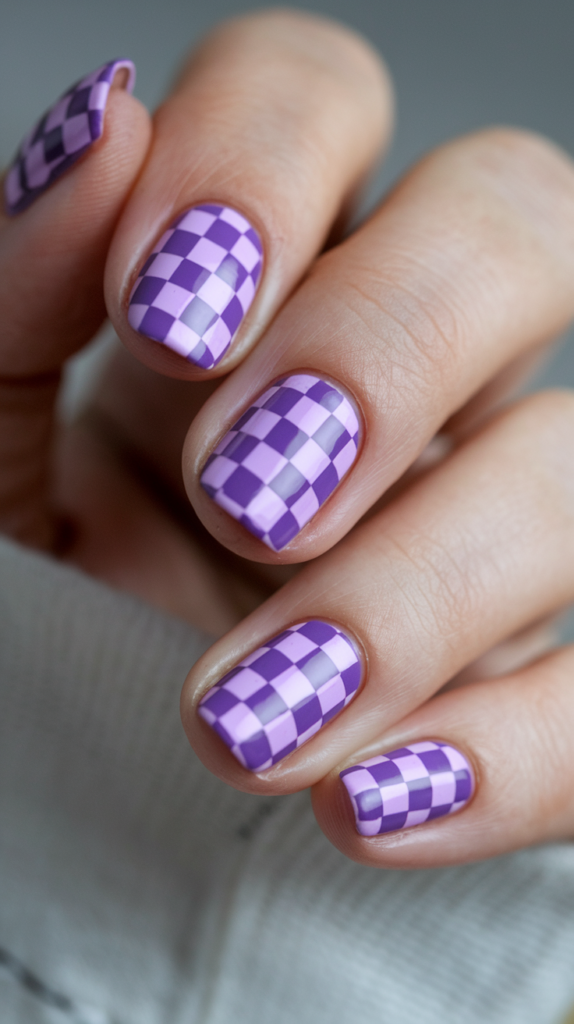
How To Create A Checkerboard Pattern In Light And Dark Violet
The Violet Checkerboard Pattern is a playful, trendy design that adds a pop of fun to your nails.
Begin by applying a light violet polish as the base.
Once dry, use a nail tape or thin brush to create square outlines on each nail.
Fill in alternating squares with a darker violet shade, creating a checkerboard effect.
Be precise with the squares to maintain a clean, uniform look, ensuring each square is roughly the same size for a balanced design.
Tips For Achieving Precision And Symmetry
For a precise, symmetrical checkerboard pattern, it’s helpful to use nail tape or a stamping tool.
Place the tape in a grid pattern on each nail before applying the dark violet polish.
Once the polish has dried, remove the tape to reveal a crisp, clean checkerboard design.
Use a fine brush for any touch-ups and to sharpen the edges.
Finish with a clear top coat to seal the design and add a glossy shine, giving the checkerboard pattern a polished, professional finish.
Crystal Violet Nails For Added Glamour
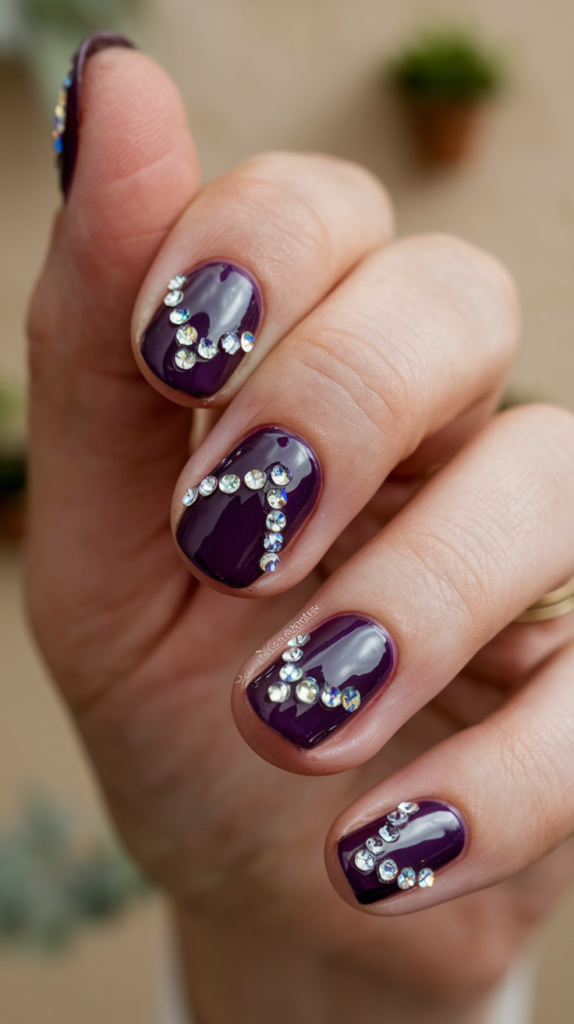
Guide To Adding Crystal Embellishments To A Dark Violet Base
Crystal Violet Nails add a glamorous, luxurious touch to your manicure, making them perfect for special occasions.
Start by applying a dark violet polish as the base color, allowing it to dry thoroughly.
Once dry, carefully place small crystal embellishments near the cuticle or along the edges of the nails, using a pair of tweezers for precision.
Position the crystals in clusters or single placements, depending on your preference, to create a dazzling effect against the deep violet background.
Tips On Placement And Adhesive For Durability
For secure placement, apply a small dot of clear nail glue on each spot where you intend to place a crystal, ensuring the embellishments stay in place.
Arrange the crystals symmetrically across each nail for a balanced look, or concentrate them on accent nails for a more subtle effect.
Apply a top coat over and around the crystals to secure them further and enhance the shine of the design.
This finishing step will ensure that your crystal-embellished nails remain intact and glamorous for days.
Modern Violet Negative Space Nails
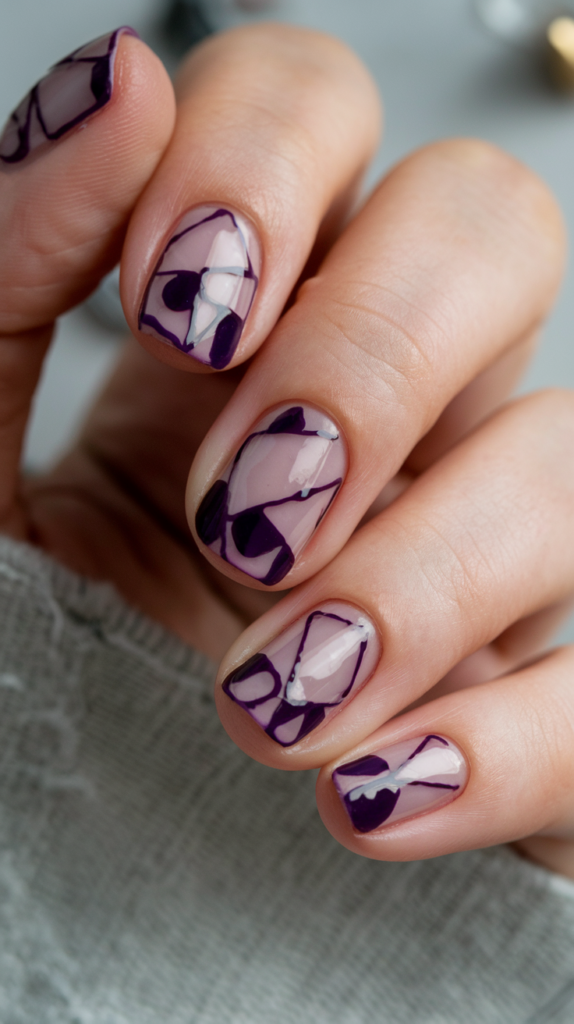
How To Create A Minimalist Look With Negative Space And Violet Polish
Modern Violet Negative Space Nails are perfect for achieving a minimalist, chic look that feels fresh and contemporary.
Start by applying tape or stencils in geometric shapes or half-moon patterns on each nail, leaving parts of the nail bare.
Use a violet polish to fill in the unmasked areas, creating a design that incorporates both painted and unpainted sections.
Once the polish dries, remove the tape to reveal the clean lines of the negative space, which adds an elegant, airy feel to the overall look.
Suggested Patterns For A Clean, Modern Effect
For a clean, modern effect, try using patterns such as diagonal lines, half-moon shapes near the cuticle, or asymmetrical blocks.
These designs offer a balanced look that highlights the natural beauty of the nails while adding a splash of violet.
A glossy top coat will enhance the overall appearance, providing a polished finish without overshadowing the simplicity of the negative space.
This look is versatile and adaptable, making it ideal for both casual and formal settings.
Matte Violet Nails With Elegant Gold Lines
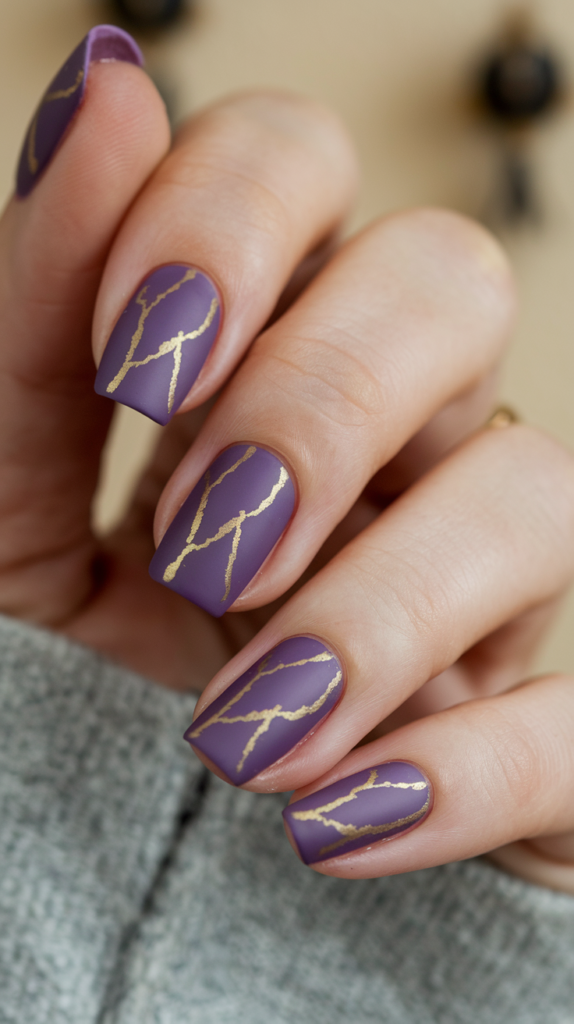
Guide To Adding Fine Gold Lines On A Matte Violet Base
Matte Violet Nails with Elegant Gold Lines bring a sophisticated, minimalist aesthetic to your manicure.
Begin by applying a matte violet polish to each nail as the base.
Once dry, use a fine striping brush to paint thin gold lines across the nails.
The lines can be applied diagonally, vertically, or horizontally, depending on your desired look.
The matte background contrasts beautifully with the metallic gold, creating a chic, refined appearance that’s both understated and stylish.
Tips For Achieving A Minimalist, Elegant Finish
For a minimalist finish, limit the number of gold lines to one or two per nail, focusing on keeping them straight and evenly spaced.
Use a striping brush or nail tape to help with precision, and apply a clear top coat over the gold lines only to keep the matte base intact.
This subtle touch of gold enhances the violet’s rich tones, creating a balanced, elegant look that’s perfect for a refined, modern manicure.
Violet Leopard Print For Animal Print Lovers
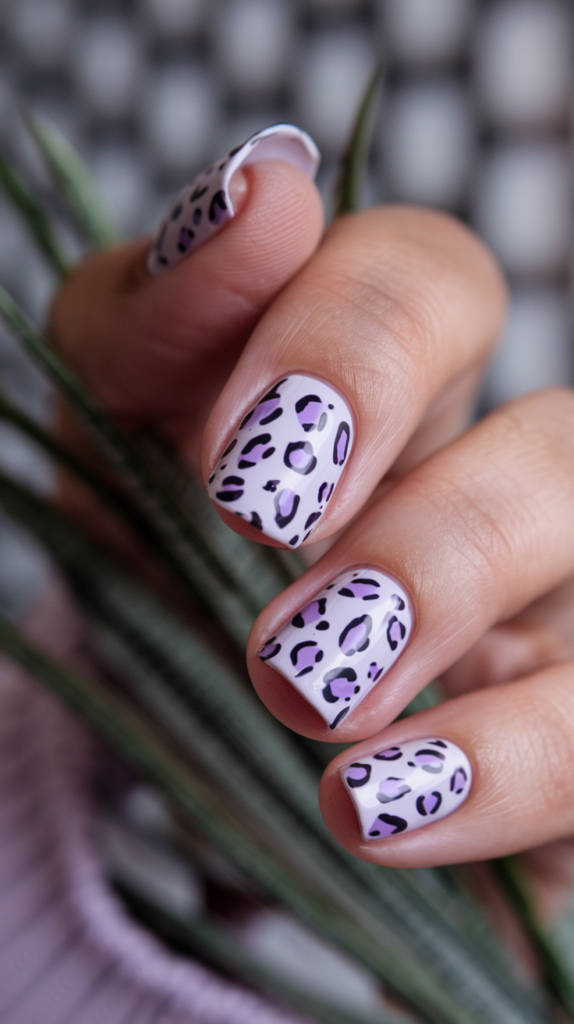
Step-By-Step Guide To Painting Violet Leopard Spots On A Light Lavender Base
Violet Leopard Print Nails combine the trendy animal print style with a fun, colorful twist.
Start by applying a light lavender polish as the base color.
Once dry, use a small dotting tool or fine brush to create irregular spots in a darker violet shade across each nail.
The spots should be small and randomly spaced, mimicking the natural look of leopard print.
For added detail, use a thin black outline around each spot, giving the print a realistic, chic finish.
Tips For Keeping The Animal Print Stylish And Chic
To keep the leopard print looking chic, avoid overcrowding the spots; instead, space them out evenly for a balanced effect.
Use smaller spots on shorter nails and larger ones on longer nails for proportion.
Adding a clear top coat will seal the design and enhance its durability while providing a smooth, glossy finish that highlights the intricate details of the leopard print.
This design is versatile and can be easily dressed up or down for any occasion.
Dark Violet And Black Ombre Nails
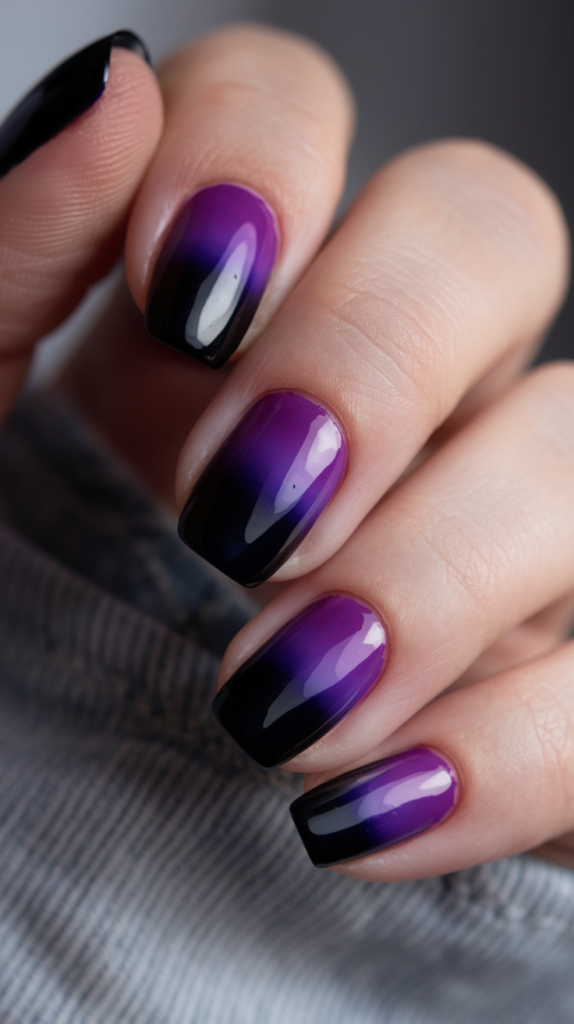
How To Create A Smooth Gradient From Black To Deep Violet
Dark Violet and Black Ombre Nails offer a bold, dramatic look that’s perfect for evening wear.
Begin by applying a black polish at the base of the nail, gradually fading into a deep violet toward the tip.
Use a makeup sponge to blend the black and violet shades seamlessly, creating a smooth, dark gradient that adds depth and dimension.
This striking ombre effect captures the essence of elegance with a touch of mystery.
Tips For Achieving A Bold And Edgy Look
To achieve a bold and edgy look, ensure the gradient is evenly blended by dabbing the colors lightly and layering them gradually.
For an extra dramatic effect, apply a matte top coat to give the nails a velvet-like texture, which enhances the richness of the colors.
Alternatively, a glossy top coat can add a touch of shine, making the dark ombre even more eye-catching.
This ombre design pairs well with darker attire, creating a cohesive and stylish look.
Watercolor Violet Nails For A Soft Look
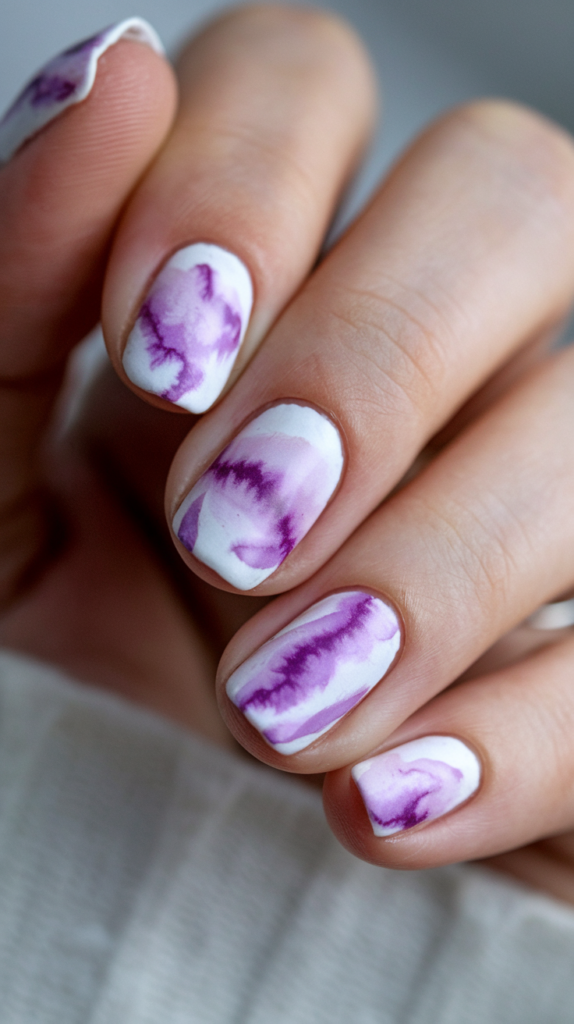
Guide To Using Watercolor Techniques With Violet Shades On A White Base
Watercolor Violet Nails create a dreamy, artistic effect that’s both soft and captivating.
Begin by applying a white base coat on each nail.
Once the base is dry, dilute different violet shades with a bit of clear polish or acetone to create a watercolor-like consistency.
Use a fine brush to apply the diluted colors onto the nails in random, soft strokes, blending the shades to create a washed-out, watercolor effect that resembles an abstract painting.
Suggested Blending Methods For A Dreamy Appearance
For a softer, more blended look, use a clean brush dipped in clear polish to blur the edges of each violet stroke, creating a smooth transition between colors.
Adding hints of pink or light blue within the design can give the nails a multi-dimensional, watercolor appearance.
A glossy top coat will amplify the dreamy effect, giving the nails a polished, artistic finish that is both gentle and eye-catching.
Violet Starry Night Nails
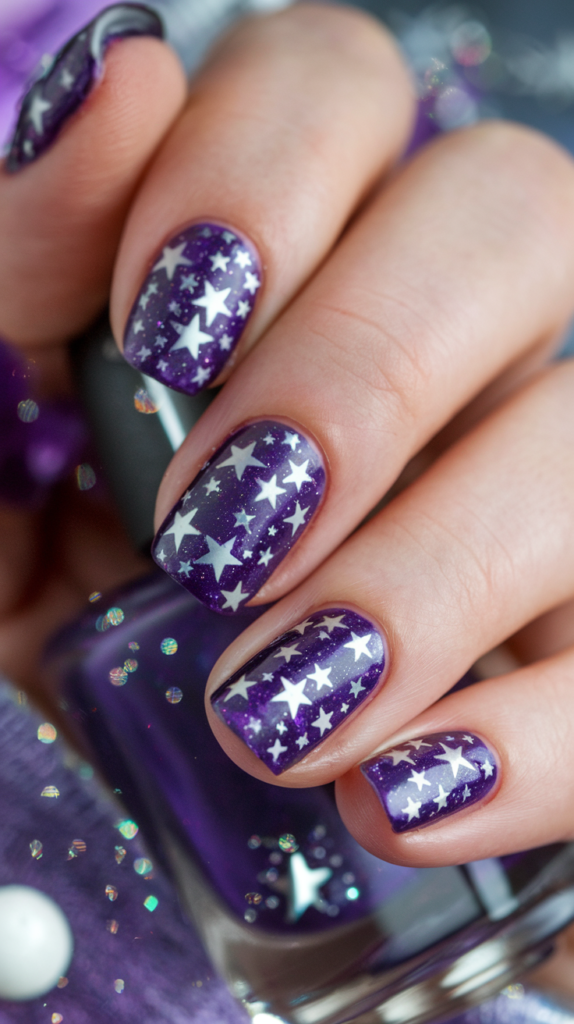
Step-By-Step Guide To Painting White And Silver Stars Over A Deep Violet Base
Violet Starry Night Nails are inspired by the beauty of a star-filled night sky.
Start by applying a deep violet base to all nails.
Once dry, use a fine-tipped brush or a toothpick to paint small white stars and dots across the nails, creating the appearance of stars.
For added depth, add silver stars or tiny sparkles to mimic constellations, focusing on random placements for a natural look.
The combination of violet, white, and silver gives this design a celestial, mystical vibe.
Tips For Creating A Night-Sky Aesthetic
To enhance the night-sky effect, vary the size of the stars, adding smaller dots around larger stars to mimic a true starry sky.
Use holographic glitter or a subtle shimmer over the base to add a cosmic glow to the nails.
Finish with a glossy top coat to give the nails a polished, glass-like finish, which will make the starry details appear more luminous.
This design is perfect for those who love a touch of the cosmos on their nails, bringing a bit of magic to everyday style.
Luxurious Violet Marble With Silver Foil
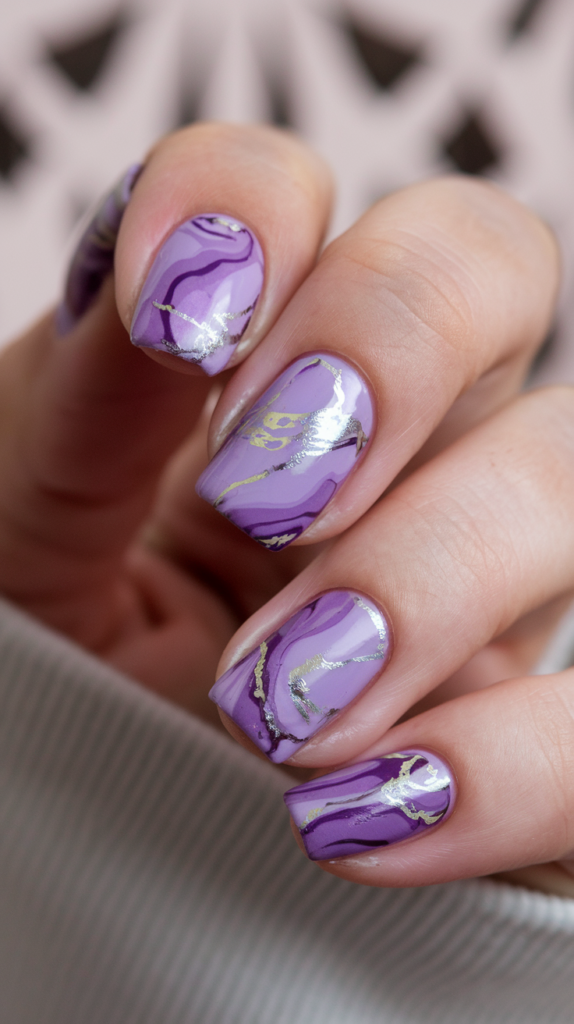
How To Achieve A Marbled Look With Silver Foil Accents On Violet Nails
The Luxurious Violet Marble with Silver Foil nail design brings an elegant, high-end feel to your manicure, perfect for special occasions.
Start by applying a soft violet base on all nails.
Once the base is dry, use a fine brush to paint thin swirls of darker violet in random, flowing patterns across each nail.
Next, place small pieces of silver foil on the nails, focusing on areas where the violet swirls create natural “veins.” The silver foil should enhance the marble effect, adding depth and a touch of shimmer that catches the light beautifully.
Tips For Adding Foil In A Balanced, Polished Way
For a balanced look, apply the silver foil sparingly, concentrating on the areas where it can highlight the marbled design without overpowering it.
Use tweezers to place each foil piece carefully, pressing it into the polish gently to secure it.
After applying the foil, finish with a clear top coat to lock in the design and protect the foil from chipping or peeling.
The glossy top coat enhances the luxurious effect, giving your marbled nails a refined, polished finish that will make them look like semi-precious stones.
Shiny Violet And Matte Lavender Duo
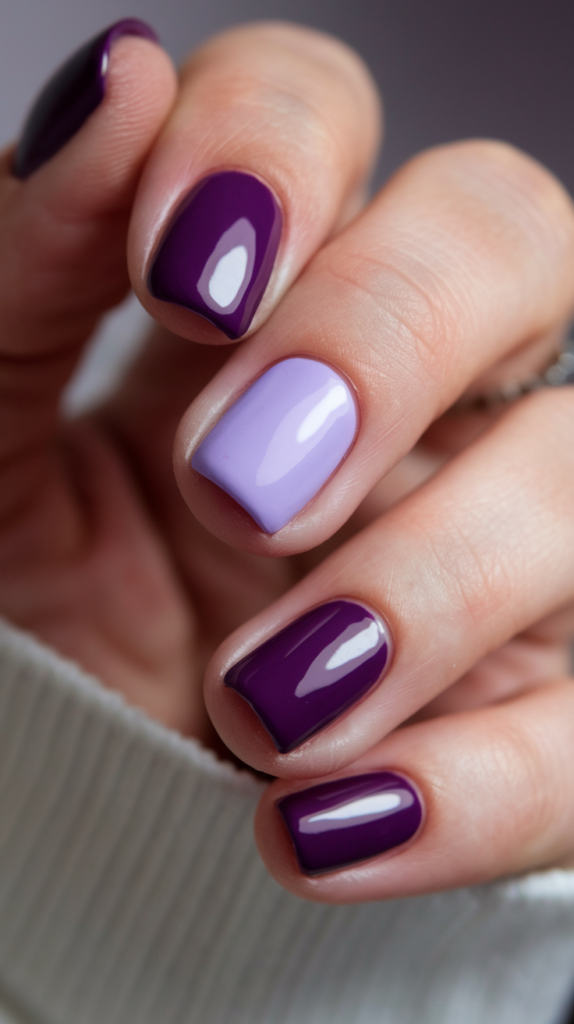
Guide To Alternating Between Shiny And Matte Finishes On Each Nail
The Shiny Violet and Matte Lavender Duo combines contrasting finishes for a modern, eye-catching manicure.
Start by painting half of the nails with a glossy, deep violet polish for a shiny, reflective look.
For the other half, use a matte lavender polish to create a soft, velvety finish.
This alternating design offers a unique contrast that is visually interesting and versatile.
You can also choose to alternate finishes on each nail for a twist, applying shiny tips over a matte base, or vice versa, for added variety.
Suggested Color Combinations For A Striking Contrast
To make the shiny and matte contrasts stand out even more, try combining a dark, bold violet with a pastel lavender for a high-contrast effect.
Alternatively, use a pearly lavender as the shiny option for a more subtle yet sophisticated look.
For added dimension, you could layer thin gold or silver lines between the glossy and matte sections, emphasizing the division and adding a touch of glamour.
Seal the glossy areas with a high-shine top coat and apply a matte top coat on the matte areas to maintain the contrast.
Edgy Violet Flames For Bold Style
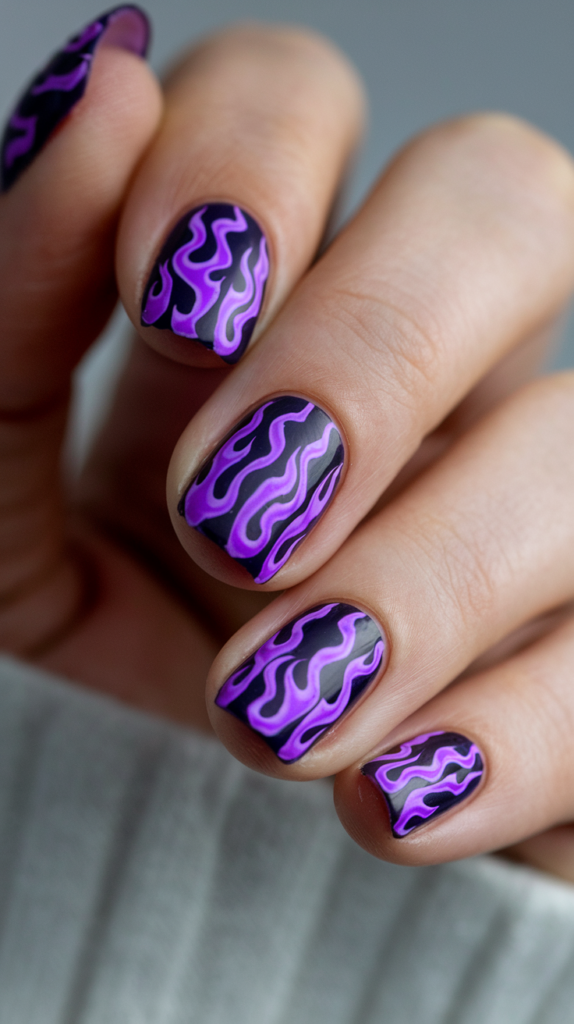
How To Paint Neon Violet Flames On A Dark Base
Edgy Violet Flames offer a bold, fierce look that’s perfect for making a statement.
Begin by applying a dark violet or black base color to each nail.
Once the base is dry, use a fine-tipped brush to paint flame shapes in neon violet polish, starting from the nail’s edge and tapering upwards.
The flames should have sharp, pointed tips, adding a dynamic, fiery effect.
For an extra pop, you can layer a thin outline in white or neon pink around the flames, intensifying their look.
Tips For Creating A Clean, Sharp Flame Effect
To ensure your flames look crisp and professional, use a nail art brush with a fine tip for precision.
Paint the flames in layers, beginning with the basic shape and gradually adding details for sharper edges.
For an ultra-glossy, high-impact finish, apply a glossy top coat that enhances the neon vibrancy and makes the flames appear more three-dimensional.
The contrast between the dark base and the bright flames creates a bold, edgy aesthetic that’s sure to stand out.
Subtle Violet Glitter Fade Nails
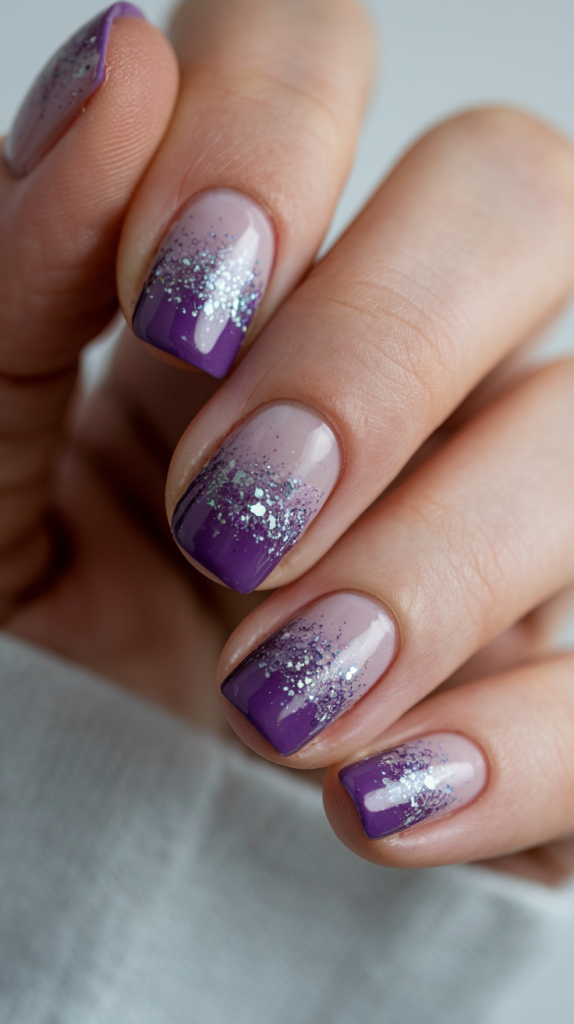
Guide To Applying Glitter Near The Cuticle And Fading It Over A Violet Base
The Subtle Violet Glitter Fade Nail design brings a hint of sparkle in a soft, sophisticated way.
Begin with a deep or pastel violet base on each nail.
Once the base coat is dry, apply glitter polish near the cuticle, focusing on a concentrated application at the base.
Gradually fade the glitter as you move towards the nail tip, creating a soft, gradient sparkle effect.
The glitter fade adds a gentle shimmer that catches light without overpowering the violet base, making it suitable for both everyday wear and special events.
Tips For Blending Glitter For A Soft Sparkle Effect
To create a natural fade, use a sponge or a small brush to dab the glitter near the cuticle, allowing it to disperse as you move towards the tip.
Be sure to avoid adding too much glitter to the nail’s center or tip to maintain a balanced gradient.
For a more refined look, choose fine glitter particles rather than chunky ones, which blend more smoothly into the violet base.
Seal the design with a glossy top coat to give the nails a polished finish and make the glitter sparkle subtly with every movement.
Lilac To Violet Gradient For A Sophisticated Look
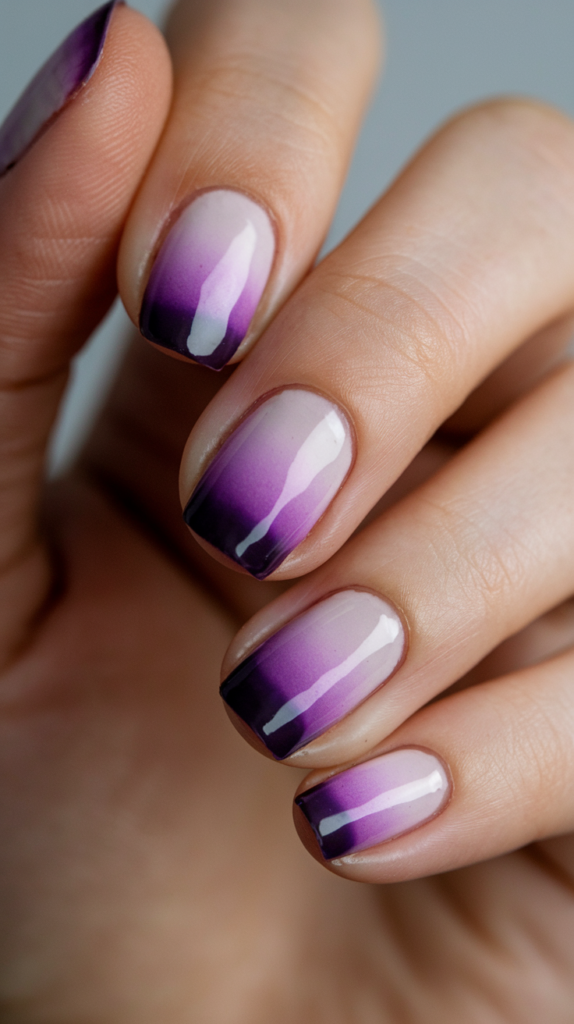
Step-By-Step Guide To Blending From A Soft Lilac To Deep Violet
The Lilac to Violet Gradient is a timeless and elegant design that transitions smoothly from soft lilac at the cuticle to deep violet at the tip.
Start by applying a base coat of lilac polish at the nail’s cuticle.
Use a sponge to dab on deeper violet polish near the tips, blending it gently with the lilac as you move upwards.
Repeat this layering process until you achieve a smooth gradient effect that transitions seamlessly from light to dark violet.
Tips On Achieving A Smooth, Elegant Gradient
For a flawless gradient, work in thin layers, allowing each layer to dry before applying the next.
This gradual layering will prevent harsh lines between the colors, resulting in a smooth, sophisticated gradient.
To add extra depth, try applying a thin layer of shimmer or iridescent polish over the gradient for a luminous, glowing effect.
Finish with a high-gloss top coat to bring out the richness of the colors and give the nails a polished, refined appearance.
Pearl Embellished Violet Nails
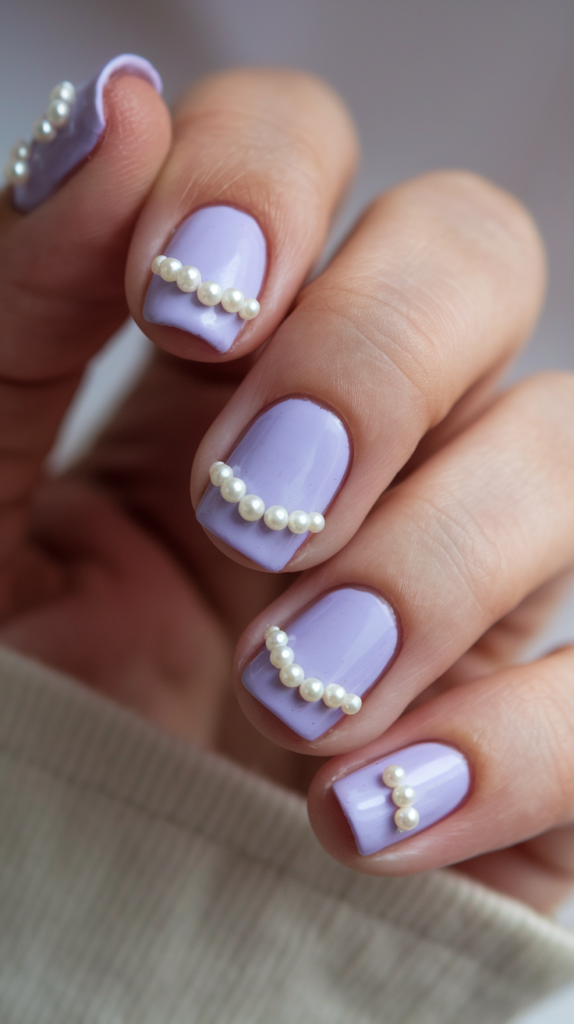
How To Add Pearl Accents On A Pastel Violet Base
The Pearl Embellished Violet Nails design exudes elegance and sophistication, perfect for those who love a touch of luxury.
Start by applying a pastel violet base to each nail.
Once the base is dry, place small pearl accents near the cuticle or along the nail’s edges, using a dot of nail glue to secure each pearl in place.
You can arrange the pearls in a straight line, cluster them in one area, or add a single pearl as a minimalist accent, depending on your desired look.
Tips On Creating A Refined And Unique Style
To maintain a sophisticated appearance, avoid overcrowding the nails with pearls.
A few carefully placed pearls can create a refined look without overwhelming the design.
For added detail, consider combining pearls with tiny gold beads or crystals, enhancing the elegance of the style.
Apply a clear top coat over and around the pearls to secure them and give the nails a glossy finish.
This design is ideal for formal events, weddings, or any occasion where you want to add a touch of glamour to your manicure.
Violet Nails With Delicate White Florals
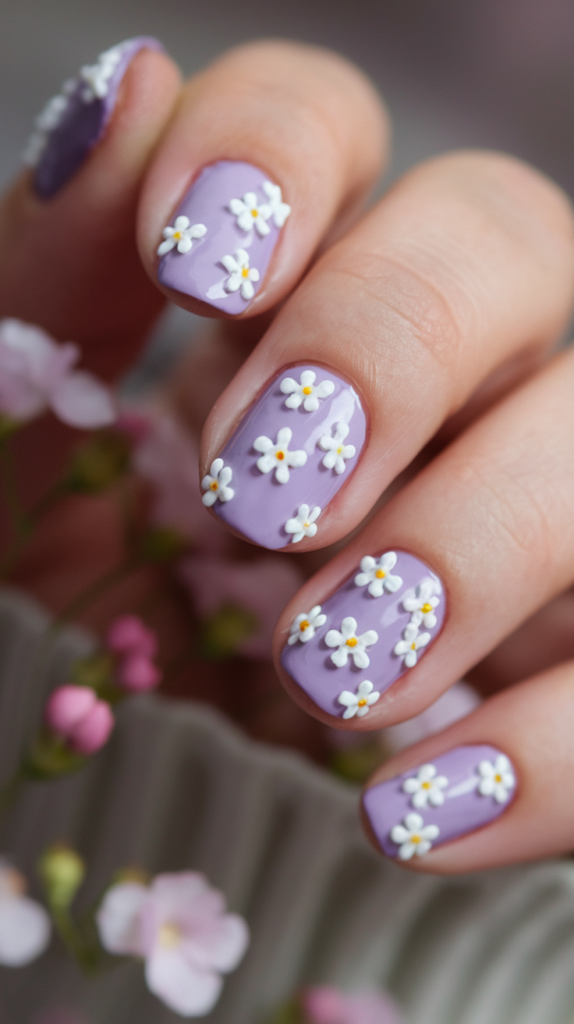
Guide To Painting White Floral Accents On A Soft Violet Base
Violet Nails with Delicate White Florals bring a fresh, feminine charm to your manicure.
Begin by applying a soft violet polish as the base color.
Once dry, use a fine brush to paint small, delicate white flowers across each nail.
Focus on creating intricate petal shapes and add tiny yellow or gold dots in the center of each flower for a realistic touch.
This floral design adds a romantic, spring-inspired vibe to the nails, making it a beautiful choice for any season.
Suggested Floral Designs For A Feminine Touch
To achieve a delicate look, consider painting smaller flowers or individual petals in random placements across the nail.
This scattered approach gives a more natural, garden-like effect.
For added depth, mix in different floral varieties, such as daisies, cherry blossoms, or lavender, to give the design a personalized touch.
Finish with a clear top coat to seal the artwork and add shine, enhancing the softness and femininity of the floral design on the violet background.
3D Violet Petals For A Dimensional Look
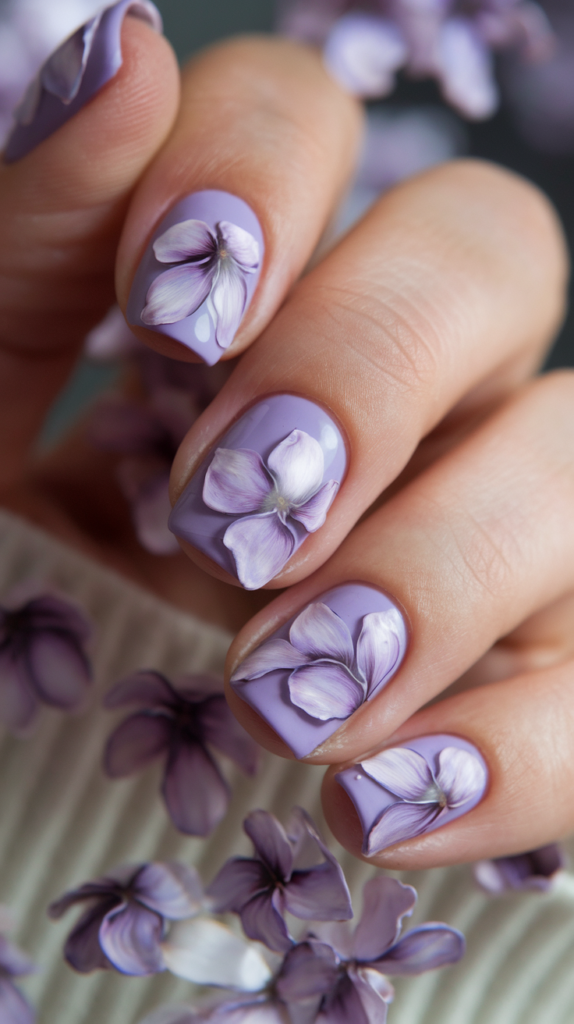
Step-By-Step Guide To Creating Three-Dimensional Flower Petals In Violet
The 3D Violet Petals design adds a unique, dimensional effect to your nails.
Start by applying a soft violet base on each nail.
Once dry, use a thick, pigmented polish or gel to create petal shapes on accent nails, layering the polish to build up the shape.
For a realistic look, place several petals around the center, leaving a small space in the middle for detail.
The layered effect gives the petals a three-dimensional appearance that stands out, adding depth and texture to your manicure.
Tips On Adding Dimension With Layering Techniques
To achieve a seamless 3D effect, work with a slightly thicker polish or gel and use a dotting tool to build up the petals in layers.
Let each layer dry before adding the next to create a sense of depth.
For extra detail, add a small amount of glitter or pearl polish in the center of the flower, giving it a touch of sparkle.
Seal with a thick, clear top coat to protect the 3D petals and enhance their shine, ensuring a long-lasting, eye-catching finish.
Violet And Chrome Tips For Glamorous Style
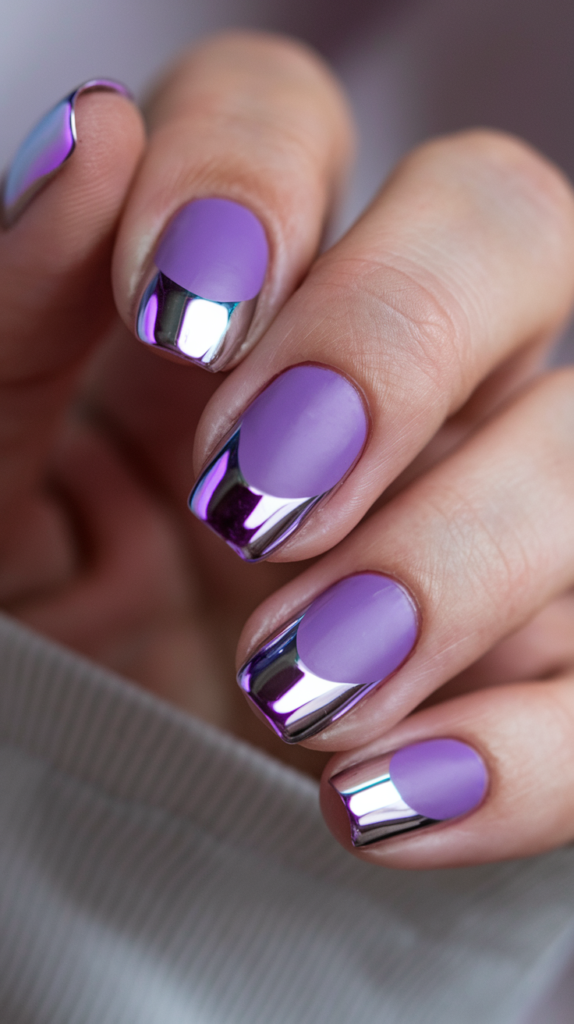
How To Add Chrome Violet Tips To A Deep Violet Base
The Violet and Chrome Tips design combines elegance with a touch of glamour, perfect for those who love a luxurious look.
Start by applying a deep violet polish to the entire nail as the base.
Once dry, use a chrome violet polish to paint just the tips, creating a French manicure effect with a modern twist.
The chrome finish adds a high-shine, reflective quality that elevates the classic look, making the nails appear glamorous and sophisticated.
Tips For Achieving A High-Shine, Metallic Finish
To make the chrome tips stand out, ensure the base polish is smooth and dry before applying the chrome.
Use a striping brush or nail tape to achieve a clean line between the base and tips, giving the design a crisp, professional look.
Apply a glossy top coat over the entire nail to amplify the chrome’s shine, giving the nails a mirror-like finish that catches the light.
This design is ideal for evening events or special occasions where you want to add an extra dose of elegance to your nails.
Lavender Quartz Nails For A Gem-Like Look
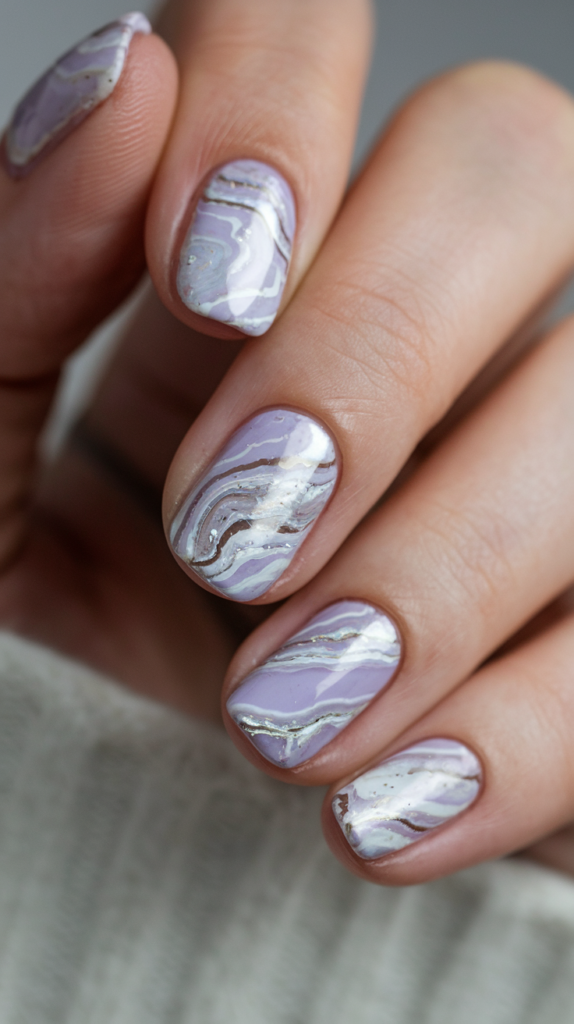
Guide To Recreating The Look Of Lavender Quartz Stones On Nails
Lavender Quartz Nails mimic the natural beauty of quartz stones, offering a soft, gem-inspired design.
Start by applying a sheer lavender base to each nail.
Once the base is dry, use a thin brush to paint soft, random lines in shades of white, silver, and deeper lavender across the nails, mimicking the patterns of quartz veins.
Blend the lines slightly with a sponge or a small brush to create a natural, layered effect that resembles real quartz stone.
Suggested Blending Methods For A Natural Stone Effect
For a realistic quartz appearance, keep the lines and patterns subtle and blended, avoiding harsh edges.
Layering sheer polish over the lines can help soften the design, creating a translucent, gem-like effect.
Adding small touches of shimmer or iridescent polish will enhance the stone-like quality, giving the nails a soft, glowing finish.
Apply a glossy top coat to seal the design, making the nails look like polished, semi-precious stones.
Violet Butterfly Accents For A Whimsical Touch
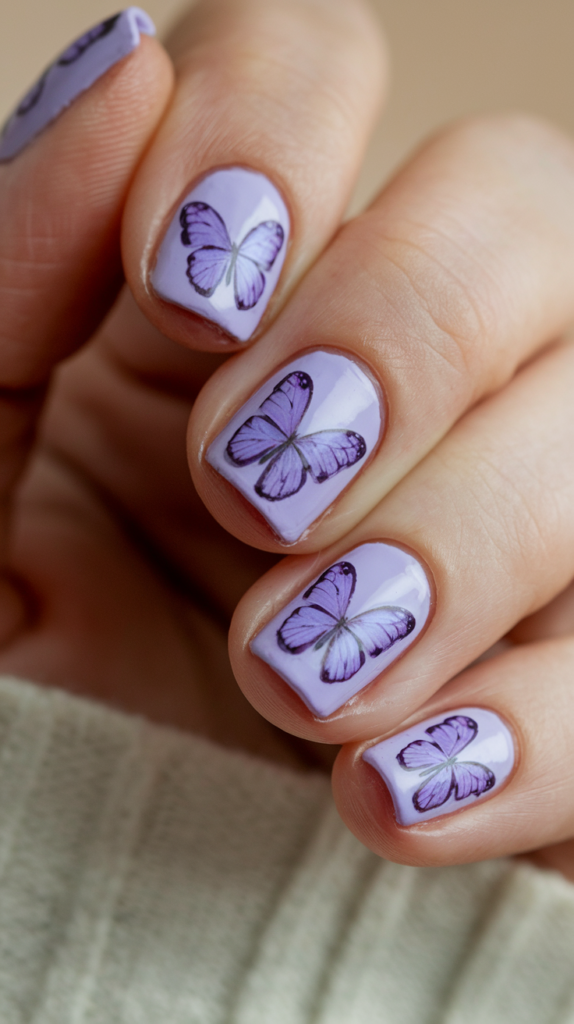
How To Add Tiny Violet Butterflies On A Soft Lavender Base
Violet Butterfly Accents bring a whimsical, charming touch to your manicure, ideal for those who love a playful style.
Begin by applying a soft lavender base on each nail.
Once dry, use a fine brush or nail stickers to add tiny butterfly shapes in darker violet.
Place the butterflies in random positions on each nail, making them appear as if they are gently fluttering across the surface.
For added dimension, outline the wings in white or add small dots to represent delicate details on the butterfly wings.
Tips For Creating A Delicate, Whimsical Effect With Butterfly Designs
To enhance the whimsical effect, try adding a few tiny white dots around the butterflies, mimicking the look of fluttering motion.
Keep the butterfly designs small and scattered to maintain an airy, lighthearted feel.
For an extra touch of elegance, consider adding a few metallic accents, such as tiny gold dots, to complement the butterflies.
Finish with a clear top coat to protect the design and add a gentle shine, ensuring the butterflies look lifelike and delicate against the lavender background.
Conclusion
Violet nail art is a wonderful way to express your personality, creativity, and sense of style.
With these 35 inspiring designs, you now have an array of techniques and ideas to try, from elegant ombre effects and shimmering galaxy nails to playful florals and chic geometric patterns.
Experimenting with different shades, finishes, and textures can transform your nails into mini masterpieces that reflect your unique aesthetic.
Remember to take your time, have fun with each design, and don’t be afraid to mix and match techniques.
Whether you’re new to nail art or a seasoned enthusiast, these violet nail designs offer endless ways to keep your manicure fresh, trendy, and truly eye-catching.
