As we eagerly anticipate the arrival of March 2025, it’s the perfect time to start thinking about refreshing our look, and what better way to add a touch of glamour than with a stunning gold manicure? Gold is a timeless color that exudes luxury, sophistication, and warmth.
Whether you prefer subtle hints of gold or bold, head-turning designs, there’s a gold nail look to suit every style and occasion.
Get ready to be inspired by 35 of the most eye-catching gold nail designs that will be trending in March 2025!
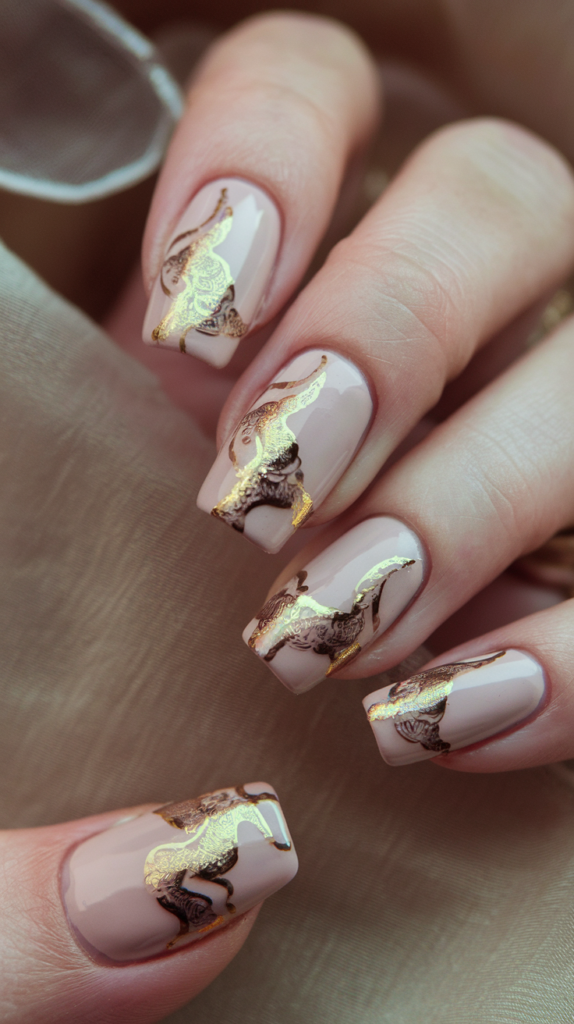
Golden Hour Ombre – A seamless blend of soft nude and shimmering gold for an elegant touch.
Design Features
Imagine the soft, warm hues of the golden hour painted onto your nails.
This design features a delicate gradient, starting with a subtle nude or light pink at the base and seamlessly transitioning into a shimmering gold towards the tips.
The effect is elegant, understated, and catches the light beautifully.
How To Achieve This Look
- Start with a clean base and apply a nude or light pink base coat.
Let it dry completely. - Apply a thin layer of the same base color over the entire nail.
- Using a makeup sponge, apply a shimmering gold polish to the tip of the sponge.
- Gently dab the gold polish onto the tips of your nails, slightly overlapping with the base color.
You may need to repeat this step for desired opacity. - For a smoother transition, you can use a clean part of the sponge to gently blend the colors where they meet.
- Once dry, seal the look with a glossy top coat to enhance the shimmer and longevity.
Why This Stands Out
This design offers a sophisticated and versatile look that’s perfect for both everyday wear and special occasions.
The ombre effect adds a touch of modern elegance, while the gold shimmer brings a subtle touch of glamour without being overpowering.
It’s a beautiful way to incorporate gold into your manicure for a refined finish.
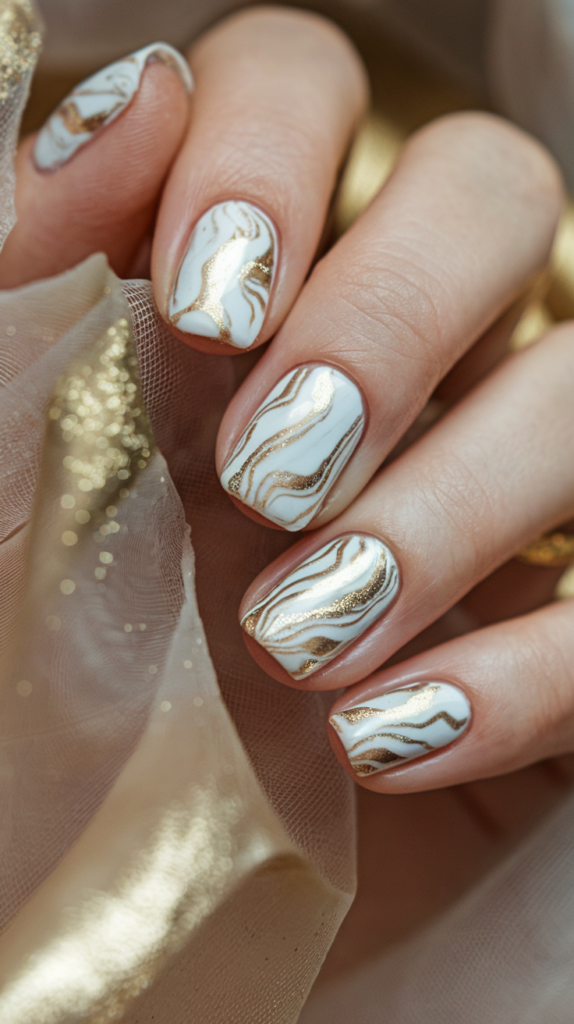
24K Marble Elegance – White and gold marble swirls for a luxurious effect.
Design Features
Indulge in the opulence of marble with a golden twist.
This design mimics the intricate veining of marble, using white as the primary color with stunning gold swirls and accents running through it.
The result is a manicure that looks like it’s been crafted from the finest stone.
How To Achieve This Look
- Apply a white base coat and let it dry thoroughly.
- Using a thin nail art brush or a toothpick, apply thin lines of gold polish randomly across your nail.
- Before the gold polish dries, take a clean, fine-tipped brush or a toothpick and gently swirl the gold lines into the white base to create a marbleized effect.
You can also add a touch of gray or black for more depth if desired. - Experiment with different swirling patterns on each nail for a unique look.
- Once you’re satisfied with the design and it’s completely dry, finish with a high-shine top coat for a smooth, luxurious finish.
Why This Stands Out
The 24K Marble Elegance design is a statement manicure that exudes luxury and sophistication.
The combination of classic white and rich gold creates a visually striking effect that’s sure to turn heads.
It’s a perfect choice for those who want a manicure that feels both elegant and unique.
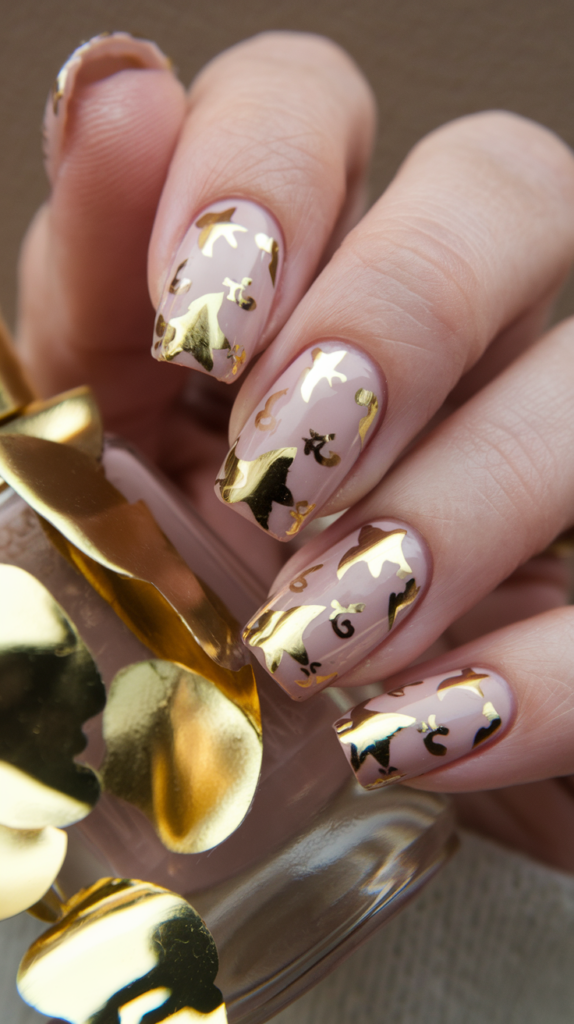
Golden Foil Fantasy – Clear or nude nails with scattered gold foil pieces for a chic aesthetic.
Design Features
Embrace a touch of whimsical charm with this design.
It features delicate, irregularly shaped pieces of gold foil scattered across a clear or nude base.
The foil catches the light beautifully, creating a dazzling and chic effect that’s both modern and effortless.
How To Achieve This Look
- Apply a clear or nude base coat and let it dry.
- Apply a thin layer of clear nail glue or a sticky base coat where you want to place the gold foil.
- Using tweezers or a cuticle pusher, carefully pick up small pieces of gold foil and gently place them onto the sticky areas of your nails.
You can create a random scattering or a more deliberate pattern. - Once the glue is dry, apply a generous layer of clear top coat to seal the foil and create a smooth surface.
Ensure the top coat fully covers the foil to prevent lifting.
Why This Stands Out
The Golden Foil Fantasy design is a chic and easy way to add a touch of glamour to your nails.
The scattered gold foil creates a playful yet sophisticated look that’s perfect for adding a bit of sparkle to any outfit.
It’s a versatile design that can be dressed up or down.
Sun-Kissed Chrome – Ultra-reflective gold chrome nails for a bold statement.

Design Features
Make a bold and glamorous statement with ultra-reflective gold chrome nails.
This design delivers a mirror-like shine that reflects light from every angle, creating a dazzling and futuristic effect.
It’s a manicure that’s impossible to ignore.
How To Achieve This Look
- Apply a black base coat and let it dry completely.
This is crucial for achieving the true chrome effect. - Apply a special chrome top coat or a no-wipe gel top coat and cure it under a UV/LED lamp (if using gel).
- Using an applicator sponge (often included with chrome powders), gently rub a gold chrome powder onto the nail surface until you achieve a smooth, reflective finish.
- Wipe away any excess powder with a soft brush.
- Seal the chrome with another layer of no-wipe gel top coat and cure it again.
Why This Stands Out
Sun-Kissed Chrome nails are the epitome of bold glamour.
The intense reflectivity of the gold chrome creates a striking and modern look that’s perfect for making a statement.
If you want a manicure that commands attention, this is the design for you.
Gilded French Tips – Classic French tips with a metallic gold twist.

Design Features
Put a luxurious spin on the classic French manicure by replacing the traditional white tips with a shimmering gold.
This design maintains the elegance of the French manicure while adding a touch of modern glamour and sophistication.
How To Achieve This Look
- Apply a nude or light pink base coat and let it dry.
- Using French tip guides or freehand, carefully paint the tips of your nails with a metallic gold polish.
Ensure the line is clean and even. - Let the gold tips dry completely.
- Apply a clear top coat over the entire nail to seal the design and add shine.
Why This Stands Out
The Gilded French Tips offer a sophisticated and modern take on a timeless classic.
The gold tips add a touch of luxury and elevate the traditional French manicure, making it perfect for both professional and special occasions.
It’s a subtle yet impactful way to incorporate gold into your nail look.
Royal Jewel Accents – Gold nails adorned with emerald and sapphire rhinestones.

Design Features
Embrace regal elegance with this luxurious design.
It features a solid gold base adorned with sparkling emerald and sapphire rhinestones, creating a manicure that looks like it belongs to royalty.
How To Achieve This Look
- Apply a solid gold base coat and let it dry.
You can choose a classic gold, a glittery gold, or a metallic gold depending on your preference. - Apply a small dot of nail glue where you want to place the rhinestones.
- Using tweezers or a rhinestone applicator tool, carefully pick up emerald and sapphire rhinestones and place them onto the glue dots.
You can create a pattern, focus on a single nail, or scatter them randomly. - Allow the glue to dry completely.
- Apply a top coat around the rhinestones to secure them, being careful not to cover the tops of the stones to maintain their sparkle.
Why This Stands Out
Royal Jewel Accents are the epitome of opulence.
The combination of rich gold and the vibrant sparkle of emerald and sapphire rhinestones creates a truly luxurious and eye-catching manicure.
It’s perfect for special events where you want to make a grand statement.
Molten Gold Drip – A dripping gold effect over a glossy base for a liquid gold illusion.

Design Features
Create a mesmerizing and artistic effect with the Molten Gold Drip design.
This look features a glossy base color (such as black, white, or a deep jewel tone) with metallic gold polish seemingly dripping down from the tips, creating a liquid gold illusion.
How To Achieve This Look
- Apply your chosen glossy base coat and let it dry completely.
- Using a thin nail art brush or a toothpick, dip it into a metallic gold polish.
- Starting near the cuticle area (or slightly below), create thin, wavy lines that appear to be dripping down towards the free edge of your nail.
Vary the thickness and length of the drips for a more realistic effect. - You can add a few smaller drips in between the larger ones for added dimension.
- Once the gold polish is dry, seal the design with a glossy top coat to enhance the liquid effect.
Why This Stands Out
The Molten Gold Drip design is a unique and artistic manicure that’s sure to spark conversation.
The illusion of liquid gold dripping down your nails is both captivating and stylish, making it a perfect choice for those who love unconventional and eye-catching nail art.
Golden Velvet Matte – Soft matte gold nails with a velvety finish.

Design Features
Experience the luxurious feel of velvet on your fingertips with this design.
It features a soft matte gold polish that creates a velvety, sophisticated look.
The matte finish adds a touch of understated elegance to the shimmering gold.
How To Achieve This Look
- Apply a gold base coat of your choice (metallic, shimmer, or glitter).
- Once the base coat is completely dry, apply a matte top coat.
This will transform the glossy gold into a soft, velvety finish. - Ensure the matte top coat is applied evenly for a consistent texture.
Why This Stands Out
Golden Velvet Matte nails offer a unique and sophisticated twist on traditional gold manicures.
The matte finish softens the intensity of the gold, creating a more subtle yet luxurious look.
The velvety texture adds an interesting tactile dimension to your manicure.
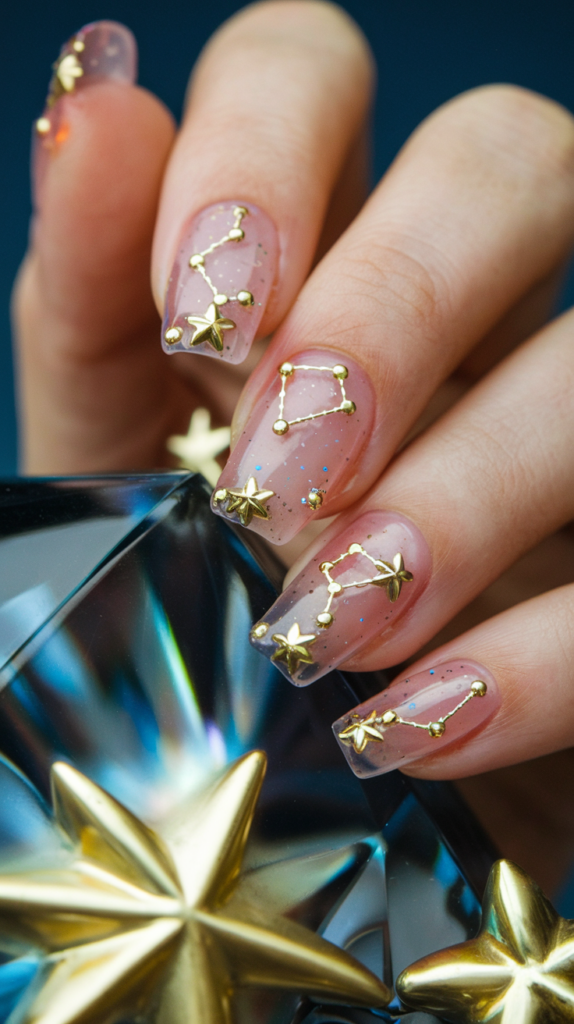
Celestial Gold Dust – Sheer nails sprinkled with tiny gold stars and constellations.
Design Features
Bring the magic of the night sky to your fingertips with this enchanting design.
It features sheer nails adorned with tiny gold stars, constellations, and perhaps even a crescent moon or two.
The effect is delicate, whimsical, and utterly captivating.
How To Achieve This Look
- Apply a sheer or milky white base coat and let it dry.
- Using a thin nail art brush and gold polish, carefully paint tiny stars, dots for constellations, and other celestial shapes onto your nails.
You can use stencils or nail art stickers for easier application. - Alternatively, you can use fine gold glitter in star shapes or loose gold star confetti.
Apply a thin layer of clear nail glue or a sticky base coat where you want the stars, then gently place them using tweezers. - Once the designs are dry or the glue has set, seal everything with a glossy top coat to protect the artwork.
Why This Stands Out
Celestial Gold Dust nails are a dreamy and whimsical manicure that’s perfect for those who love a touch of fantasy.
The delicate gold celestial elements against a sheer background create a subtle yet magical effect that’s sure to spark joy.
Golden Baroque Beauty – Ornate gold patterns over a deep-colored base for a regal look.

Design Features
Channel the grandeur of the Baroque era with this opulent design.
It features intricate and ornate gold patterns, such as swirls, flourishes, and damask-inspired motifs, painted over a deep and rich base color like black, burgundy, or emerald green.
How To Achieve This Look
- Apply a deep-colored base coat and let it dry completely.
- Using a thin nail art brush and gold nail polish (or gold acrylic paint), carefully paint intricate Baroque patterns onto your nails.
This requires a steady hand and patience.
You can find inspiration from Baroque art and textiles. - Alternatively, you can use gold nail art stickers or stencils with Baroque designs for easier application.
- Once the gold patterns are dry, seal the design with a glossy top coat to enhance the richness of the colors and protect the artwork.
Why This Stands Out
Golden Baroque Beauty nails are a statement manicure that exudes regal elegance and sophistication.
The contrast between the deep base color and the ornate gold patterns creates a visually stunning and luxurious look that’s perfect for special occasions where you want to make a lasting impression.
Sunburst Glitter Fade – A gradient effect from gold glitter to clear or nude polish.

Design Features
Capture the radiant energy of a sunburst with this sparkling design.
It features a gradient effect where dense gold glitter at the base of the nail gradually fades out towards the tips, blending into a clear or nude polish.
How To Achieve This Look
- Apply a clear or nude base coat and let it dry.
- Apply a layer of dense gold glitter polish starting from the cuticle area, covering about one-third to half of your nail.
- Before the glitter polish dries, use a clean makeup sponge to gently dab and spread the glitter upwards towards the tips, creating a fading effect.
You want the glitter to become less concentrated as you move towards the free edge. - You can apply a second thin layer of clear or nude polish over the tips to further blend the glitter.
- Once dry, seal the look with a glossy top coat to smooth out the glitter and add shine.
Why This Stands Out
The Sunburst Glitter Fade design is a fun and glamorous way to wear gold glitter.
The gradient effect adds a dynamic and stylish touch, making your nails sparkle and shine.
It’s a perfect choice for adding a touch of celebratory flair to your look.
Gold-Leaf Accent Nails – Minimalist gold leaf detailing on one or two accent nails.

Design Features
Embrace understated luxury with this minimalist design.
It features delicate pieces of genuine or imitation gold leaf applied to just one or two accent nails, while the rest of the nails can be painted in a solid color or a simple clear coat.
How To Achieve This Look
- Paint your nails with your desired base color (or leave them with a clear coat) and let them dry completely.
- On the accent nail(s), apply a thin layer of clear nail glue or a sticky base coat where you want to place the gold leaf.
- Using tweezers or a cuticle pusher, carefully pick up a small piece of gold leaf.
Gold leaf is very delicate, so handle it gently.
- Place the gold leaf onto the sticky area of your nail.
You can apply it as a whole piece or tear it into smaller fragments for a more abstract look. - Once the glue is dry, gently press down any edges of the gold leaf with a soft tool.
- Apply a generous layer of clear top coat to seal the gold leaf and create a smooth surface.
Ensure the top coat fully covers the gold leaf to prevent lifting.
Why This Stands Out
Gold-Leaf Accent Nails offer a touch of sophisticated glamour without being overwhelming.
The minimalist approach focuses attention on the beautiful texture and shine of the gold leaf, creating a chic and elegant look that’s perfect for those who prefer subtle yet luxurious details.
Golden Cuticle Glow – A reverse French manicure with gold at the cuticle.
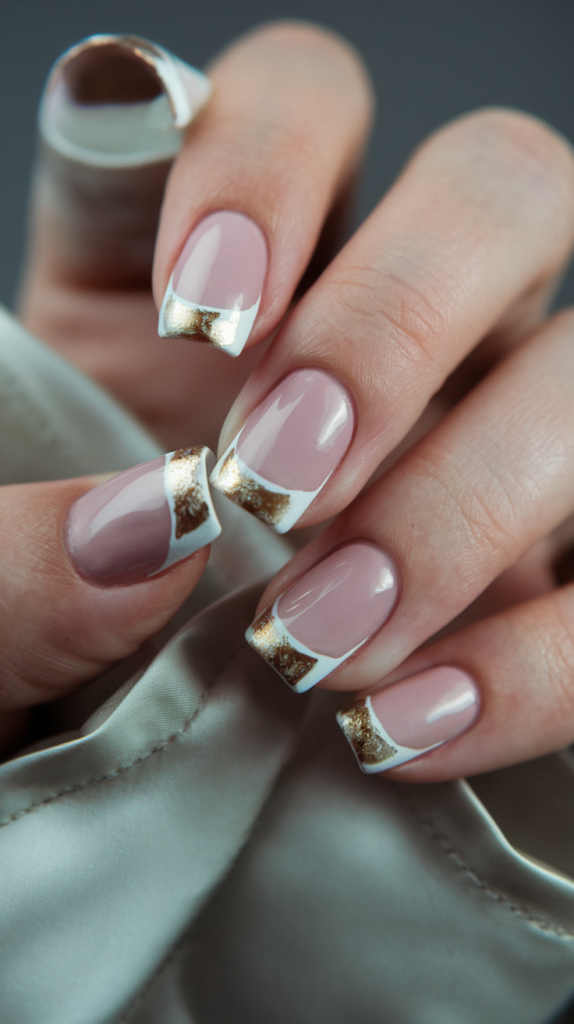
Design Features
Put a modern and stylish twist on the classic French manicure with the Golden Cuticle Glow.
This design features a thin, crescent-shaped line of metallic gold polish applied along the cuticle area, creating a subtle yet eye-catching detail.
The rest of the nail can be painted in a contrasting color or left nude.
How To Achieve This Look
- Apply your chosen base coat color (or a clear coat) and let it dry completely.
- Using a thin nail art brush or a striping tape as a guide, carefully paint a thin, crescent-shaped line of metallic gold polish along your cuticle area.
Ensure the line is clean and even. - Let the gold polish dry completely.
- Apply a clear top coat over the entire nail to seal the design and add shine.
Why This Stands Out
The Golden Cuticle Glow is a modern and unexpected take on nail art.
The gold accent at the cuticle adds a touch of sophistication and draws attention to the base of the nail, creating a unique and stylish look that’s perfect for those who like to experiment with subtle yet impactful details.
Rose Gold Glam – Soft rose gold metallic nails for a feminine and trendy vibe.
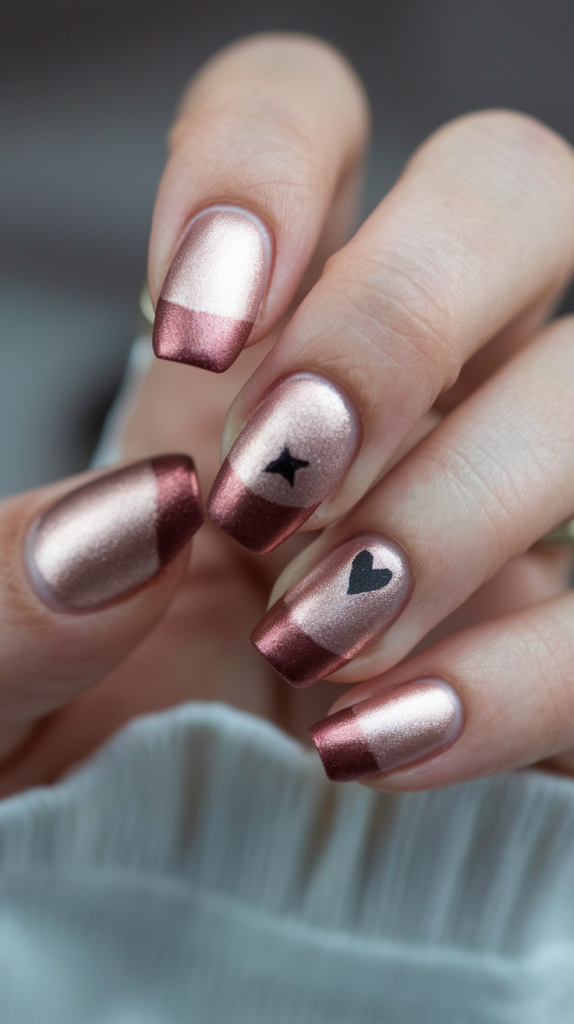
Design Features
Embrace the soft and romantic allure of rose gold with this glamorous design.
It features nails painted in a beautiful rose gold metallic polish, offering a trendy and feminine alternative to traditional yellow gold.
The metallic finish provides a lovely shine and reflects light beautifully.
How To Achieve This Look
- Apply a base coat to protect your natural nails.
- Apply two to three thin coats of your favorite rose gold metallic nail polish, allowing each coat to dry completely before applying the next.
This will ensure full opacity and a smooth finish. - Once the polish is completely dry, apply a glossy top coat to enhance the metallic shine and prolong the life of your manicure.
Why This Stands Out
Rose Gold Glam nails are a perfect choice for those who love a touch of feminine elegance with a modern twist.
Rose gold is a universally flattering shade that complements various skin tones and adds a trendy and sophisticated touch to any look.
It’s a versatile option that can be worn for any occasion.
Golden Lace Detail – Delicate lace-like gold designs on a soft pink or nude base.
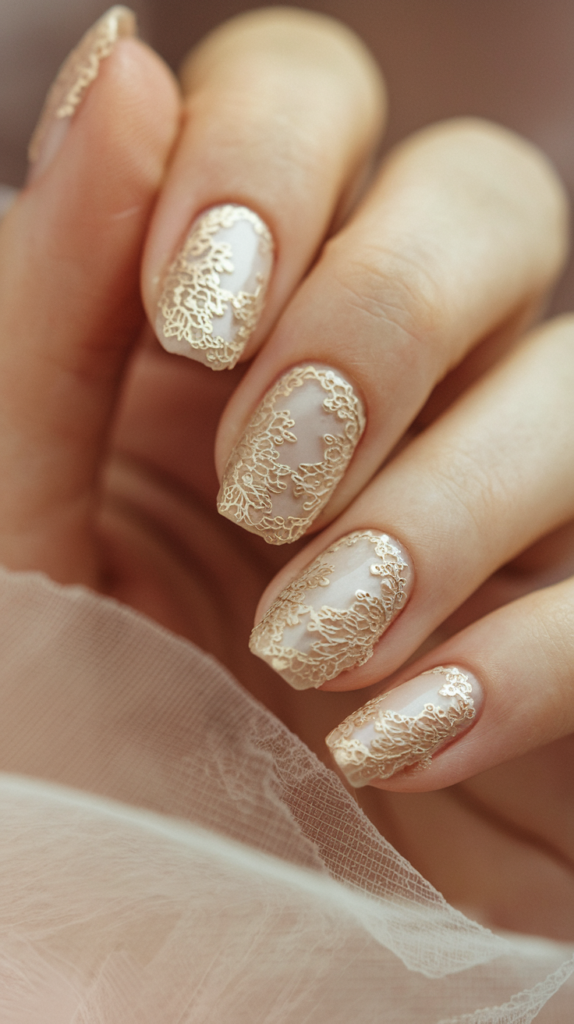
Design Features
Add a touch of delicate beauty to your nails with this intricate design.
It features fine, lace-like patterns created using gold nail polish over a soft pink or nude base.
The intricate details evoke a sense of elegance and femininity.
How To Achieve This Look
- Apply a soft pink or nude base coat and let it dry completely.
- Using a very thin nail art brush and gold nail polish, carefully paint delicate lace patterns onto your nails.
You can find inspiration from real lace or online tutorials.
This requires a steady hand and patience. - Alternatively, you can use gold lace nail art stickers or stencils for easier application.
- Once the gold lace details are dry, seal the design with a clear top coat to protect the artwork and add a smooth finish.
Why This Stands Out
Golden Lace Detail nails are a beautiful and intricate manicure that showcases delicate artistry.
The combination of the soft base color and the elegant gold lace creates a sophisticated and feminine look that’s perfect for special occasions or for those who appreciate detailed nail art.
Opulent Snake Skin – Gold reptile-inspired texture for an exotic finish.
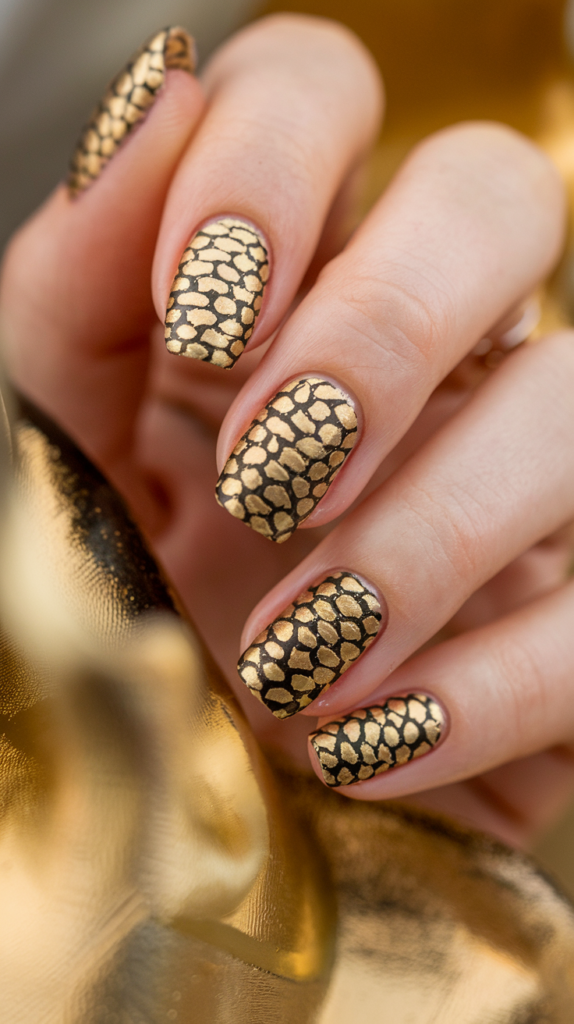
Design Features
Embrace your wild side with this bold and exotic design.
It features a textured effect that mimics the look of snakeskin, achieved using gold polish.
This manicure is sure to make a statement and add a touch of edgy glamour to your look.
How To Achieve This Look
- Apply a base coat in your desired color (you can choose a contrasting color like black or a similar gold tone).
Let it dry. - Apply a layer of gold nail polish.
While it’s still wet, gently press a piece of netting or fishnet over your nail. - Carefully remove the netting, leaving behind a textured pattern that resembles snakeskin.
- Alternatively, you can use special snakeskin nail art stickers or stamping plates.
- Once the design is dry, apply a top coat to seal and smooth the surface slightly.
Why This Stands Out
Opulent Snake Skin nails are a unique and daring manicure that stands out for its bold texture and exotic inspiration.
The gold reptile-inspired pattern adds a touch of edgy glamour and makes a strong fashion statement.
It’s perfect for those who love unconventional and attention-grabbing nail art.
Geometric Gold Chic – Modern gold lines and negative space for a trendy, artsy look.
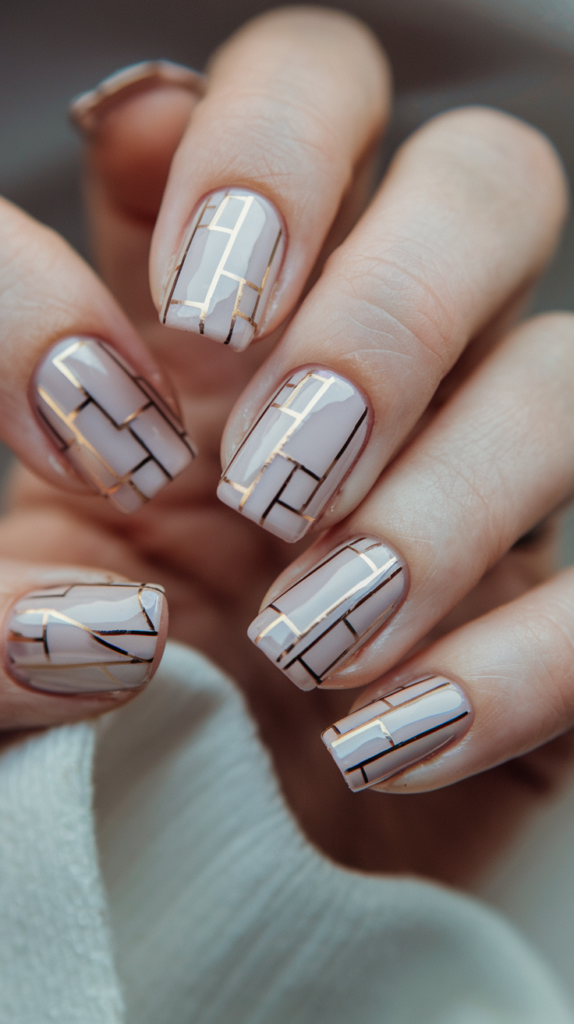
Design Features
Embrace modern minimalism with this trendy and artistic design.
It features clean, geometric lines and shapes created using gold nail polish, often incorporating negative space to create a visually striking and contemporary look.
How To Achieve This Look
- Apply a base coat in your desired color (or leave it nude).
Let it dry. - Use thin striping tape to create geometric patterns on your nails.
Press the tape firmly to ensure clean lines. - Paint over the tape with gold nail polish.
- Once the gold polish is slightly dry, carefully remove the striping tape to reveal the clean geometric lines.
- Alternatively, you can use a thin nail art brush to freehand geometric shapes or use stencils.
- Seal the design with a top coat.
Why This Stands Out
Geometric Gold Chic nails are a perfect choice for those who appreciate modern and minimalist design.
The clean lines and use of negative space create a visually interesting and trendy look that’s both sophisticated and artistic.
Glazed Gold Chrome – A sheer, reflective golden-glazed donut effect.

Design Features
Indulge in the sweet trend of glazed donut nails with a luxurious golden twist.
This design features a sheer, milky base with a reflective gold chrome powder rubbed on top, creating a subtle yet mesmerizing, glazed effect with a golden sheen.
How To Achieve This Look
- Apply a milky white or sheer nude base coat and let it dry completely.
- Apply a no-wipe gel top coat and cure it under a UV/LED lamp.
- Using an applicator sponge, gently rub a gold chrome powder onto the nail surface until you achieve a smooth, reflective, glazed finish.
- Wipe away any excess powder.
- Seal the chrome with another layer of no-wipe gel top coat and cure it again.
Why This Stands Out
Glazed Gold Chrome nails offer a sophisticated and trendy take on the popular glazed donut nail trend.
The subtle golden sheen adds a touch of luxury and warmth to the sheer, reflective finish, creating a look that’s both elegant and effortlessly chic.
Stardust Gold Veil – Subtle gold shimmer overlay for a dreamy finish.
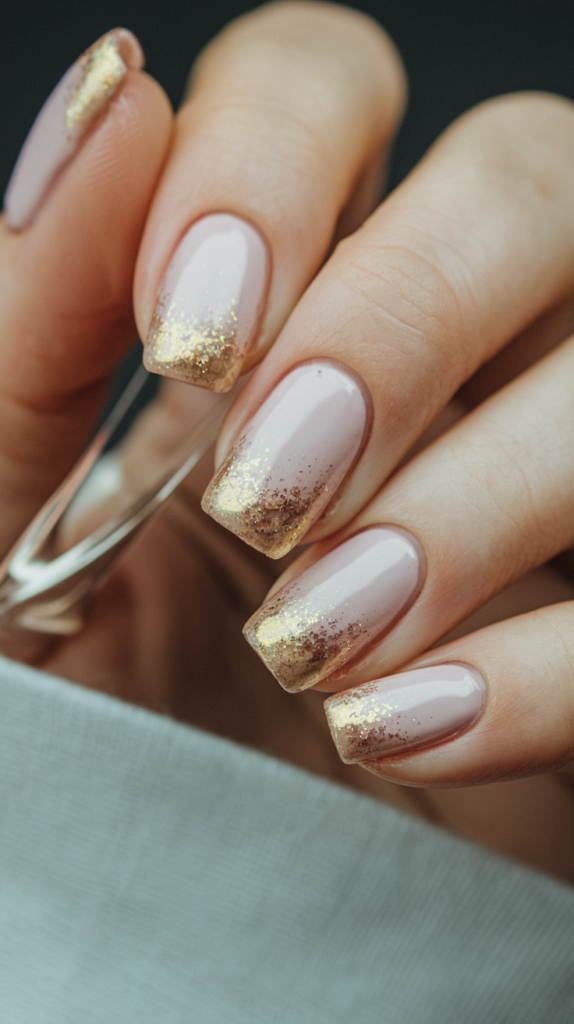
Design Features
Add a touch of ethereal beauty to your nails with this delicate design.
It features a sheer base color with a fine gold shimmer overlay, creating a subtle, dreamy, and almost magical effect.
It’s like a veil of stardust on your fingertips.
How To Achieve This Look
- Apply a sheer base coat (you can choose a clear, milky white, or light pink) and let it dry.
- Apply one or two thin coats of a gold shimmer nail polish.
The shimmer should be fine and create an overall veil of sparkle rather than chunky glitter. - Once dry, apply a glossy top coat to enhance the shimmer and create a smooth finish.
Why This Stands Out
Stardust Gold Veil nails are perfect for those who prefer a subtle touch of sparkle.
The fine gold shimmer adds a dreamy and elegant quality to the nails without being overpowering.
It’s a versatile design that can be worn for any occasion.
Art Deco Gold Glam – Black and gold lines with vintage-inspired geometric accents.
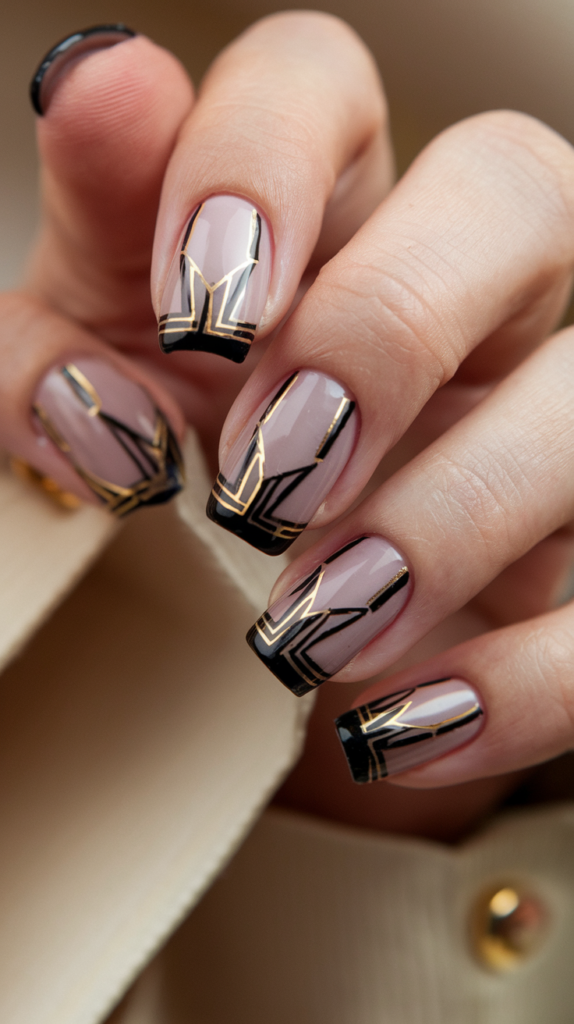
Design Features
Step back in time to the glamorous Art Deco era with this sophisticated design.
It features bold black lines and geometric shapes accented with gold, reminiscent of the iconic Art Deco style.
This manicure exudes vintage charm and elegance.
How To Achieve This Look
- Apply a base coat (you can choose black or a contrasting color).
Let it dry. - Using thin striping tape, create geometric patterns and lines on your nails.
- Paint over the tape with gold nail polish.
- Once the gold polish is slightly dry, carefully remove the striping tape to reveal the clean lines.
- You can also use a thin nail art brush and black polish to add further geometric details or outlines.
- Seal the design with a top coat.
Why This Stands Out
Art Deco Gold Glam nails are a stylish and sophisticated choice for those who appreciate vintage aesthetics.
The combination of bold black lines and glamorous gold accents creates a visually striking and timeless design that’s perfect for adding a touch of old-world charm to your look.
Brushed Gold Texture – A soft-brushed gold finish for a muted metallic look.
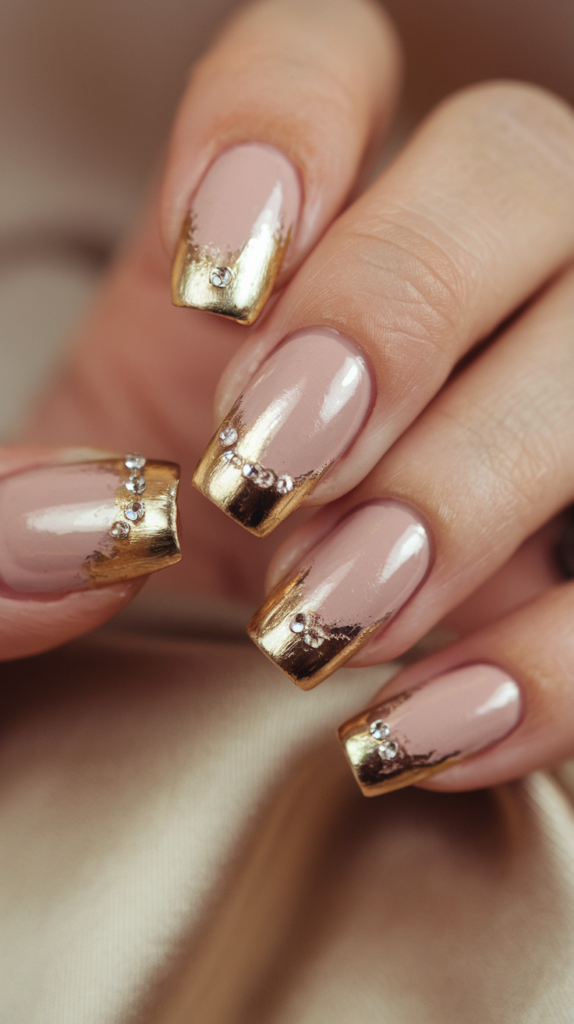
Design Features
Achieve a unique and subtle metallic look with the Brushed Gold Texture design.
This manicure features a soft, brushed finish on gold polish, creating a muted and slightly textured effect that’s both modern and sophisticated.
How To Achieve This Look
- Apply a gold base coat and let it dry.
- Apply a second coat of gold polish.
While it’s still slightly wet, use a dry fan brush or a stiff, flat brush to gently brush across the surface of your nail in horizontal or vertical strokes.
This will create a subtle textured effect. - Allow the polish to dry completely.
- You can apply a matte or satin top coat to enhance the brushed texture or a glossy top coat for a more traditional finish.
Why This Stands Out
Brushed Gold Texture nails offer a unique and understated way to wear metallic gold.
The soft-brushed finish creates a subtle texture and a muted shine, making it a sophisticated choice for those who prefer a less overtly glamorous metallic look.
Sunflower Gold Bloom – Gold floral accents for a springtime aesthetic.
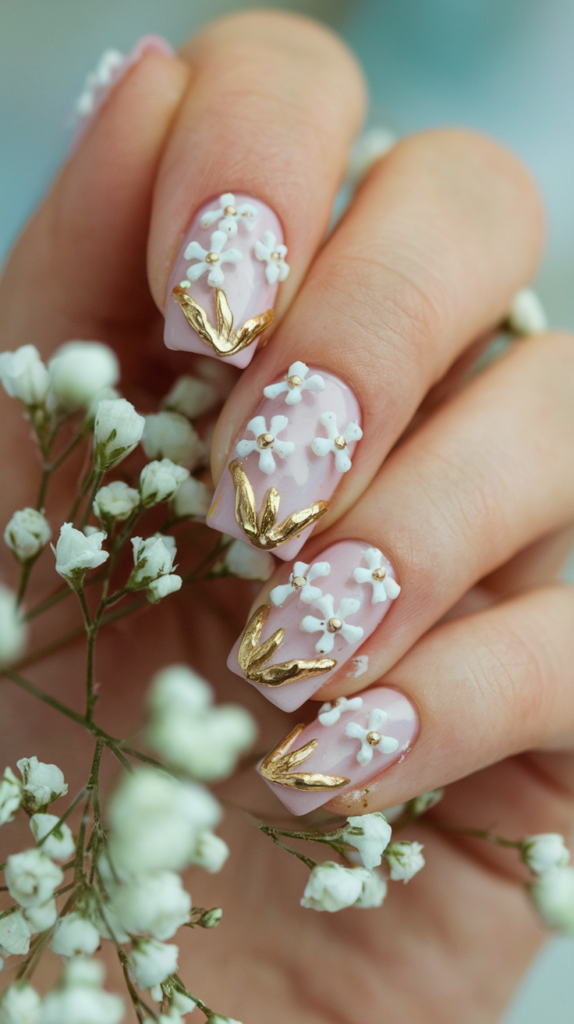
Design Features
Celebrate the arrival of spring with this cheerful and vibrant design.
It features delicate gold floral accents, such as sunflowers or other floral motifs, painted or applied over a bright or pastel base color.
How To Achieve This Look
- Apply a bright or pastel base coat and let it dry.
- Using a thin nail art brush and gold nail polish, carefully paint floral designs like sunflowers onto your nails.
You can paint individual petals or create full blooms. - Alternatively, you can use gold floral nail art stickers or stamping plates for easier application.
- Add small dots of another color (like brown or black) for the center of the sunflowers.
- Seal the design with a top coat.
Why This Stands Out
Sunflower Gold Bloom nails are a perfect way to welcome the spring season with a touch of golden elegance.
The cheerful sunflower motifs combined with the luxurious gold create a bright and joyful manicure that’s sure to lift your spirits.
Golden Aura Glow – Soft gradient nails glowing from gold at the center.
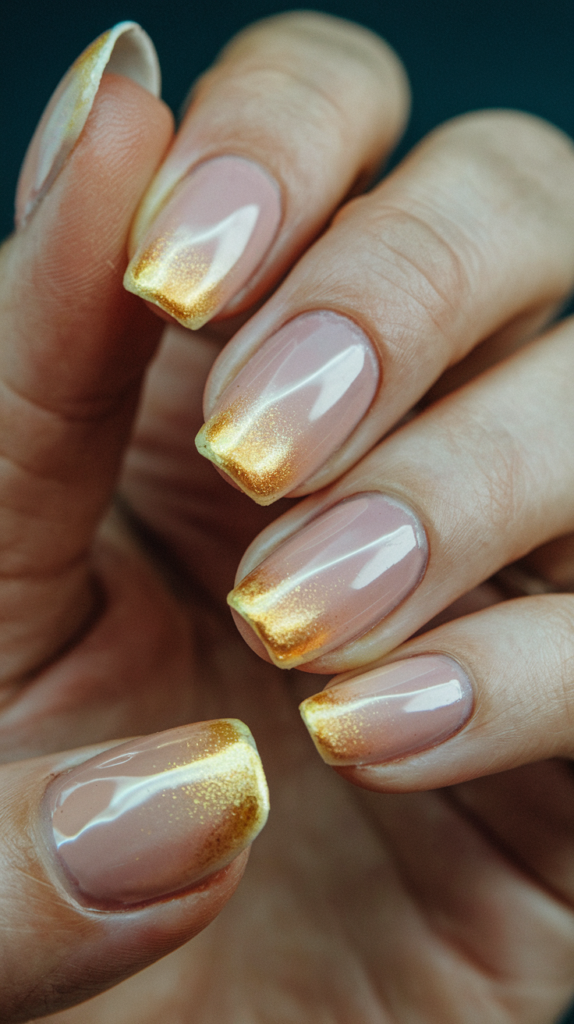
Design Features
Create a captivating and ethereal effect with the Golden Aura Glow design.
This manicure features a soft gradient where the gold color is most concentrated at the center of the nail, gradually fading out towards the edges, creating a glowing aura effect.
How To Achieve This Look
- Apply a base coat in a light or neutral color and let it dry.
- Apply a thin layer of the same base color over the entire nail.
- Using a makeup sponge, apply a concentrated amount of gold polish to the center of the sponge.
- Gently dab the gold polish onto the center of your nail, creating a concentrated spot of color.
- Using a clean part of the sponge, gently blend the gold outwards towards the edges of your nail, creating a soft gradient.
You may need to repeat this step for desired intensity. - Once dry, seal the look with a glossy top coat to enhance the glow.
Why This Stands Out
Golden Aura Glow nails offer a unique and mesmerizing take on gradient nails.
The concentrated gold at the center creates a captivating glowing effect that’s both ethereal and stylish.
It’s a beautiful way to incorporate gold into your manicure with a soft and modern touch.
Elegant Gold Pearl – Gold accents paired with soft pearl details for a luxurious touch.
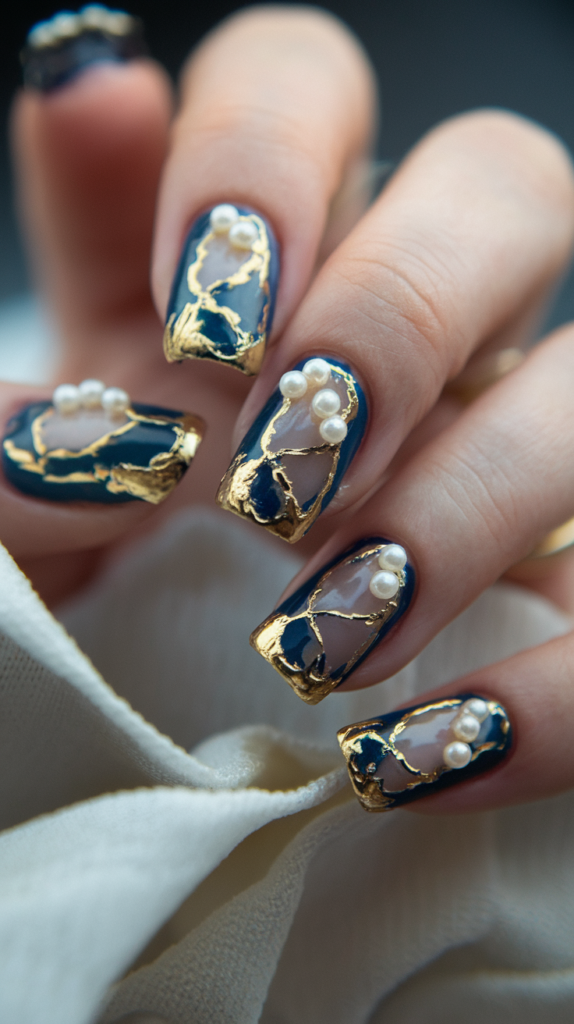
Design Features
Combine the shimmer of gold with the classic elegance of pearls in this luxurious design.
It features gold nail polish as a base or accent, paired with delicate pearl embellishments to create a sophisticated and timeless manicure.
How To Achieve This Look
- Apply a gold base coat or a base coat in a complementary color (like white or nude) and let it dry.
- If using gold as an accent, paint your nails with your base color and then use gold polish to create stripes, tips, or other designs.
- Apply a small dot of nail glue where you want to place the pearls.
- Using tweezers or a pearl applicator tool, carefully pick up small pearl beads and place them onto the glue dots.
You can create a pattern, focus on a single nail, or add a single pearl to each nail. - Allow the glue to dry completely.
- Apply a top coat around the pearls to secure them, being careful not to cover the tops of the pearls to maintain their luster.
Why This Stands Out
Elegant Gold Pearl nails are the epitome of classic luxury.
The combination of shimmering gold and the soft, iridescent beauty of pearls creates a sophisticated and timeless manicure that’s perfect for formal events or for adding a touch of refined elegance to your everyday look.
Abstract Gold Strokes – Modern art-inspired abstract gold brush strokes.

Design Features
Express your artistic side with this modern and unique design.
It features bold and free-flowing brush strokes of gold nail polish over a contrasting base color, creating an abstract and contemporary art-inspired look.
How To Achieve This Look
- Apply a base coat in a contrasting color (like black, white, or a bold jewel tone) and let it dry.
- Dip a nail art brush (a flat brush works well for this) into gold nail polish.
- Using bold and confident strokes, paint abstract lines and shapes onto your nails.
Don’t worry about perfection; the beauty of abstract art lies in its imperfections. - Experiment with different thicknesses and directions of your brush strokes.
- You can add multiple layers of gold strokes or use different shades of gold for added dimension.
- Once the gold polish is dry, seal the design with a top coat.
Why This Stands Out
Abstract Gold Strokes nails are a unique and expressive manicure that allows you to showcase your creativity.
The free-flowing gold brush strokes create a modern and artistic look that’s sure to stand out.
It’s a perfect choice for those who love unconventional and eye-catching nail art.
Mixed Metals Magic – Gold combined with silver and rose gold for a unique contrast.
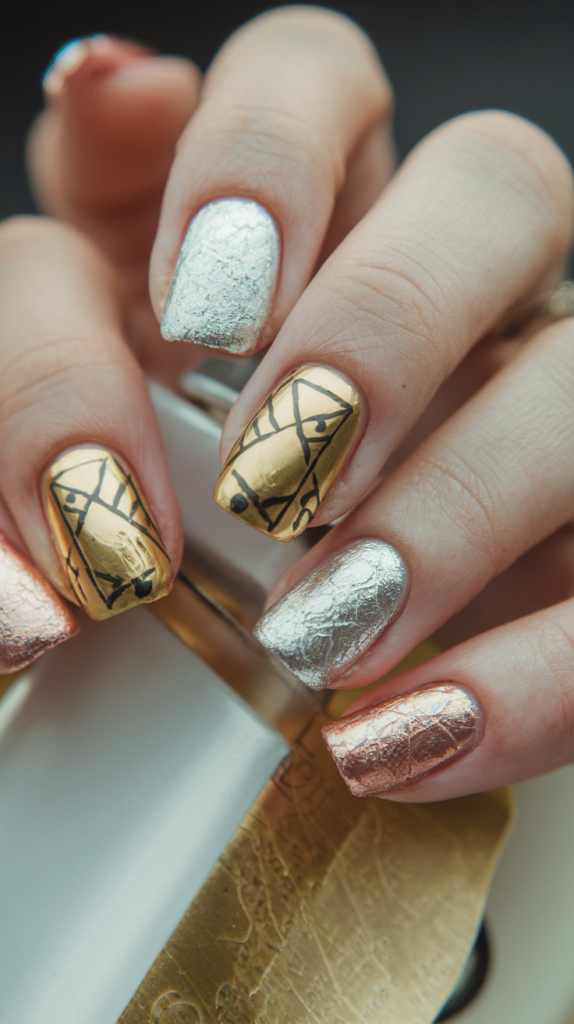
Design Features
Embrace the trend of mixing metals with this eye-catching design.
It features a combination of gold, silver, and rose gold elements in various patterns, such as stripes, geometric shapes, or even individual accent nails painted in different metallic shades.
How To Achieve This Look
- Apply a base coat and let it dry.
- You can create this look in several ways:
- Stripes: Use striping tape to create thin lines and alternate painting them with gold, silver, and rose gold polishes.
- Geometric Shapes: Use stencils or freehand to paint geometric shapes using the three different metallic shades.
- Accent Nails: Paint one or two nails in gold, another one or two in silver, and the remaining nails in rose gold.
- Mixed Detail: Use a thin nail art brush to add small details of silver and rose gold to a gold base (or vice versa).
- Allow each color to dry completely before adding the next.
- Seal the design with a top coat.
Why This Stands Out
Mixed Metals Magic nails offer a modern and stylish way to incorporate multiple metallic shades into your manicure.
The combination of gold, silver, and rose gold creates a unique and visually interesting contrast that’s both trendy and sophisticated.
Golden Crystal Tips – Transparent tips with embedded gold crystals.
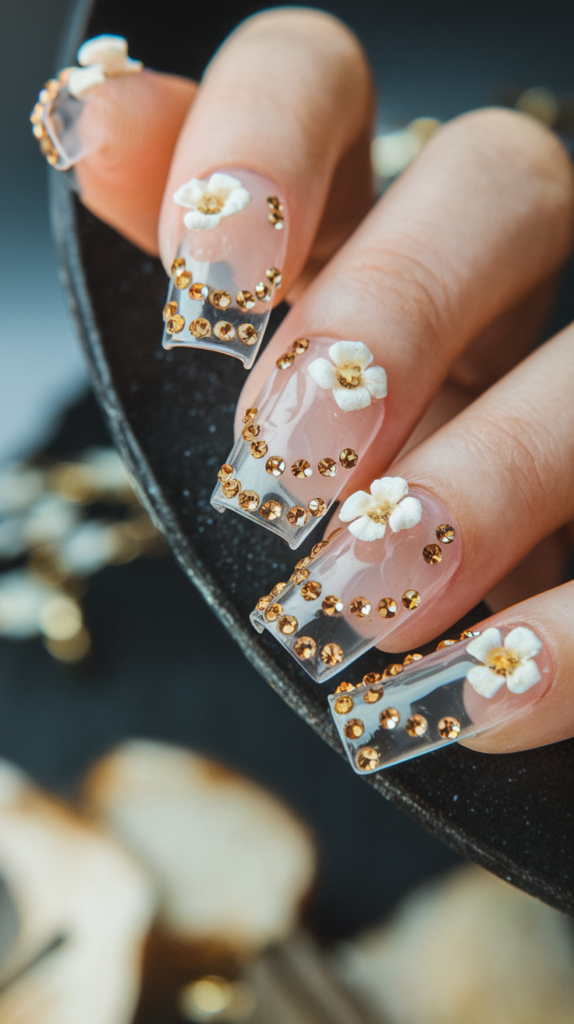
Design Features
Add a touch of sparkle and luxury to your nails with this glamorous design.
It features transparent or clear acrylic or gel nail extensions with tiny gold crystals embedded within the tips, creating a dazzling and unique effect.
How To Achieve This Look
This design typically requires the use of acrylic or gel nail extensions.
It’s best achieved by a professional nail technician:
- The nail technician will apply clear acrylic or gel to extend the tips of your nails.
- While the acrylic or gel is still wet, they will carefully embed tiny gold crystals into the tips.
- Once the extensions are set, they will shape and file them as desired.
- A clear top coat will be applied to seal the crystals and create a smooth finish.
Why This Stands Out
Golden Crystal Tips are a truly glamorous and unique manicure.
The embedded gold crystals within the transparent tips create a dazzling effect that catches the light beautifully.
It’s a perfect choice for special occasions where you want a manicure that’s both eye-catching and luxurious.
Golden Confetti Party – Tiny gold flakes scattered across a sheer base.

Design Features
Celebrate with sparkle and fun with the Golden Confetti Party design.
It features tiny gold flakes or glitter scattered across a sheer or light-colored base, creating a festive and playful look reminiscent of confetti.
How To Achieve This Look
- Apply a sheer or light-colored base coat and let it dry.
- Apply a thin layer of clear nail polish or a special glitter glue.
- While the polish or glue is still wet, sprinkle tiny gold flakes or fine gold glitter over your nails.
You can use a brush or your fingers to gently pat the glitter down. - Alternatively, you can use a gold glitter polish that contains small, scattered flakes.
Apply one or two coats for desired coverage. - Once dry, seal the look with a generous layer of glossy top coat to smooth out the glitter and add shine.
Why This Stands Out
Golden Confetti Party nails are a fun and festive way to add a touch of sparkle to your look.
The scattered gold flakes create a playful and celebratory vibe that’s perfect for parties or for adding a bit of joy to your everyday style.
Champagne Gold Sparkle – A sophisticated blend of champagne and gold glitter.

Design Features
Elevate your sparkle with the Champagne Gold Sparkle design.
This manicure features a sophisticated blend of champagne-toned and gold glitter, creating a refined and elegant shimmer that’s perfect for special occasions or for adding a touch of understated glamour.
How To Achieve This Look
- Apply a base coat and let it dry.
- Apply one or two coats of a champagne gold glitter nail polish.
Look for a polish that contains a mix of fine and slightly larger glitter particles in both champagne and gold hues for a multi-dimensional sparkle. - Ensure the glitter is distributed evenly across your nails.
- Once dry, apply a glossy top coat to smooth out the glitter and enhance its sparkle.
Why This Stands Out
Champagne Gold Sparkle nails offer a more sophisticated and subtle take on glitter manicures.
The blend of champagne and gold creates a refined and elegant shimmer that’s perfect for those who love a touch of glamour without being too flashy.
Golden Honey Drip – Warm-toned golden hues mimicking dripping honey.
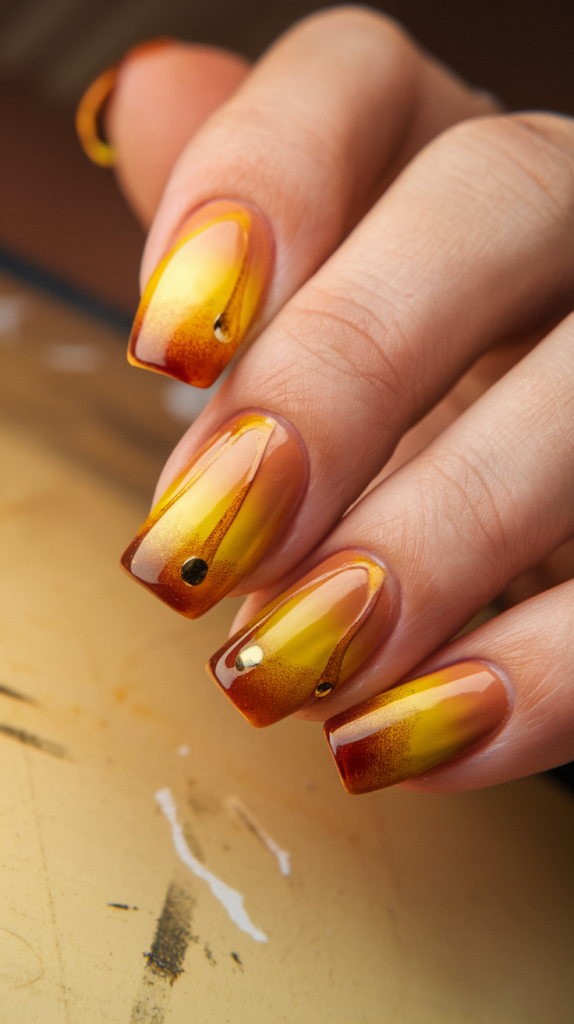
Design Features
Indulge in the rich and warm tones of honey with this delicious design.
It features a gradient of warm-toned gold hues, mimicking the look of golden honey dripping down your nails.
This manicure is both unique and visually appealing.
How To Achieve This Look
- Apply a base coat and then a base color in a light, warm gold shade.
Let it dry. - Using a slightly darker warm gold shade, use a thin nail art brush to create dripping lines starting from the cuticle area (or slightly below) and flowing down towards the free edge.
Vary the thickness and length of the drips. - You can add a third, even darker warm gold shade to create more dimension in the drips.
- Once the gold polish is dry, seal the design with a glossy top coat to enhance the liquid honey effect.
Why This Stands Out
Golden Honey Drip nails are a unique and visually appealing manicure that captures the warm and inviting tones of honey.
The dripping effect adds an artistic and slightly whimsical touch, making it a perfect choice for those who love creative and eye-catching nail art.
Serpentine Gold Swirls – Thin, intricate gold swirls over a neutral base.
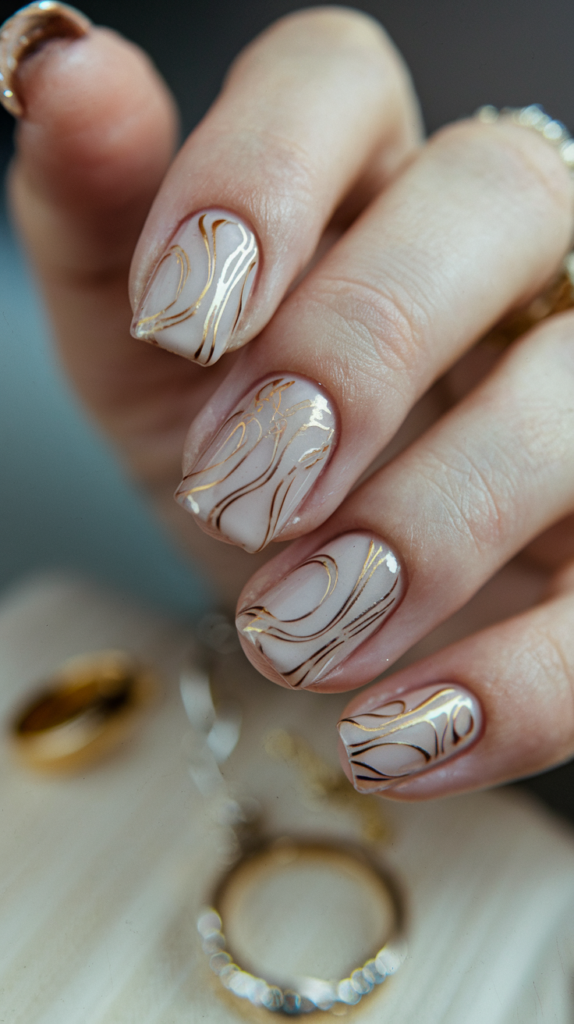
Design Features
Add a touch of elegance and movement to your nails with the Serpentine Gold Swirls design.
It features thin, intricate swirls of gold nail polish over a neutral base color like nude, white, or light gray.
The delicate swirls create a sophisticated and flowing look.
How To Achieve This Look
- Apply a neutral base coat and let it dry.
- Using a very thin nail art brush and gold nail polish, carefully paint thin, swirling lines across your nails.
You can create continuous swirls or overlapping patterns. - Experiment with different swirl shapes and directions on each nail for a unique look.
- Once the gold swirls are dry, seal the design with a clear top coat to protect the artwork and add a smooth finish.
Why This Stands Out
Serpentine Gold Swirls nails are a delicate and elegant manicure that showcases intricate artistry.
The flowing gold swirls over a neutral background create a sophisticated and eye-catching design that’s perfect for those who appreciate subtle yet detailed nail art.
Golden Abstract Flames – Fire-inspired gold flames over a glossy black or nude base.
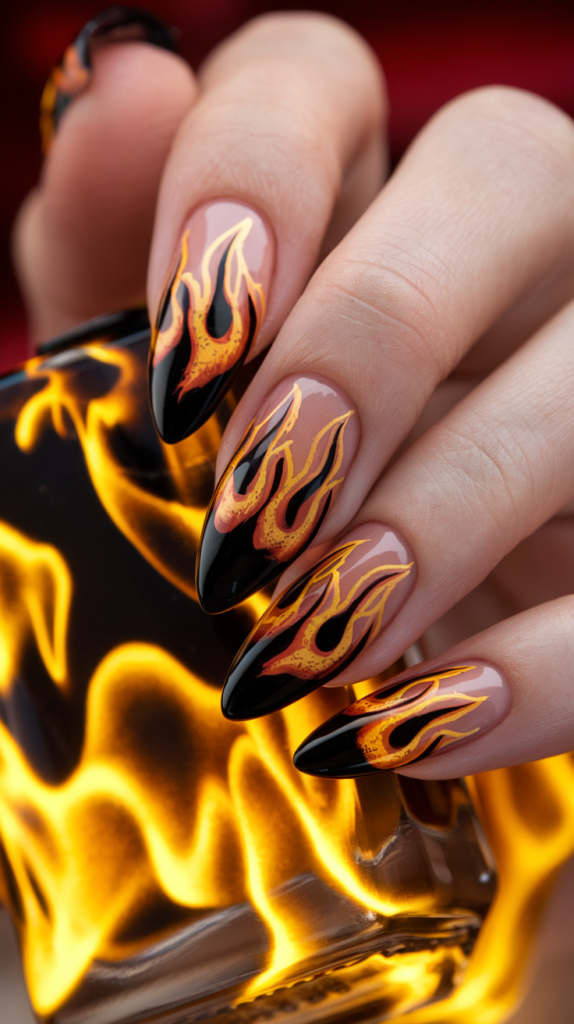
Design Features
Ignite your style with the Golden Abstract Flames design.
It features stylized, abstract flame shapes painted using gold nail polish over a glossy black or nude base.
This manicure is bold, edgy, and full of fiery energy.
How To Achieve This Look
- Apply a glossy black or nude base coat and let it dry completely.
- Using a thin nail art brush and gold nail polish, paint abstract flame shapes starting from the base of your nail and flicking upwards towards the tip.
Don’t aim for realistic flames; focus on stylized, flowing shapes. - You can vary the size and shape of the flames on each nail for a more dynamic look.
- You can also add a touch of red or orange within the gold flames for added depth.
- Once the gold polish is dry, seal the design with a glossy top coat to enhance the shine and the fiery effect.
Why This Stands Out
Golden Abstract Flames nails are a bold and edgy manicure that makes a strong statement.
The combination of the contrasting base color and the fiery gold flames creates a visually striking and energetic look that’s perfect for those who love unique and attention-grabbing nail art.
Regal Filigree Gold – Delicate gold filigree details for a vintage-inspired manicure.

Design Features
Transport yourself to a bygone era with the Regal Filigree Gold design.
It features delicate and intricate gold filigree patterns painted or applied over a deep or contrasting base color.
This manicure exudes vintage elegance and sophistication.
How To Achieve This Look
- Apply a base coat in a deep or contrasting color (like burgundy, navy, or emerald green) and let it dry.
- Using a very thin nail art brush and gold nail polish (or gold acrylic paint), carefully paint intricate filigree patterns onto your nails.
Filigree designs often involve delicate swirls, dots, and lines.
This requires a steady hand and patience. - Alternatively, you can use gold filigree nail art stickers or stamping plates for easier application.
- Once the gold details are dry, seal the design with a glossy top coat to enhance the richness of the colors and protect the artwork.
Why This Stands Out
Regal Filigree Gold nails are a sophisticated and timeless manicure that showcases intricate artistry.
The delicate gold filigree patterns evoke a sense of vintage elegance and luxury, making it a perfect choice for special occasions or for those who appreciate detailed and refined nail art.
Holographic Gold Magic – Shifting holographic gold for a futuristic effect.
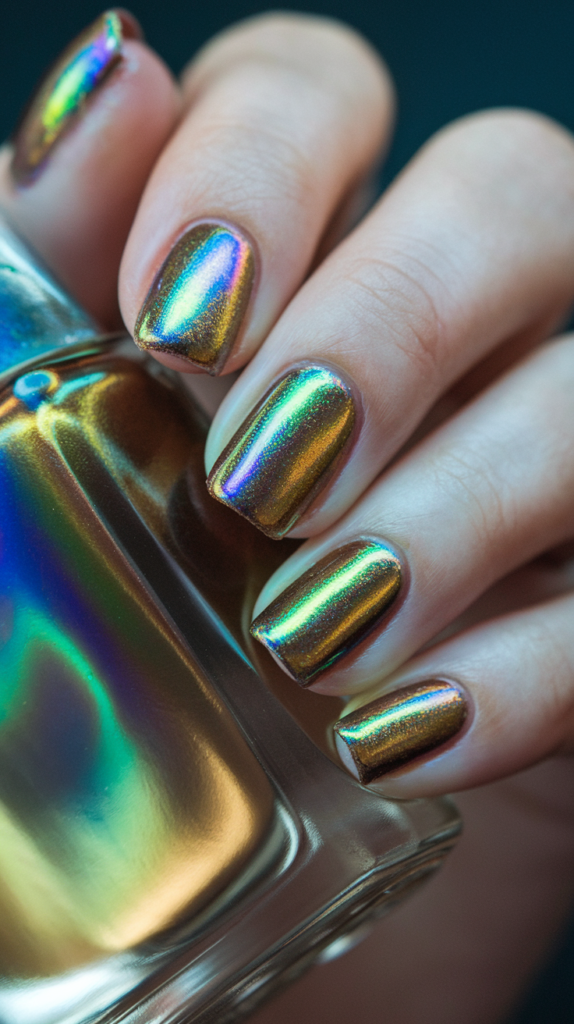
Design Features
Step into the future with the Holographic Gold Magic design.
This manicure features a holographic gold nail polish that shifts in color and reflects a rainbow of hues as it catches the light.
The effect is mesmerizing, futuristic, and utterly captivating.
How To Achieve This Look
- Apply a base coat and let it dry.
- Apply two to three thin coats of a holographic gold nail polish, allowing each coat to dry completely before applying the next.
This will ensure full opacity and the best holographic effect. - Once the polish is completely dry, apply a glossy top coat to enhance the holographic effect and prolong the life of your manicure.
Why This Stands Out
Holographic Gold Magic nails are a mesmerizing and futuristic manicure that’s sure to turn heads.
The shifting colors within the gold polish create a dynamic and eye-catching effect that’s perfect for those who love unique and modern nail looks.
Minimalist Gold Rings – Tiny, thin gold rings drawn onto each nail for a dainty look.

Design Features
Embrace simplicity and elegance with the Minimalist Gold Rings design.
It features tiny, thin gold rings painted onto each nail, usually placed near the cuticle or in the center.
This manicure is dainty, chic, and adds a subtle touch of golden sparkle.
How To Achieve This Look
- Apply a base coat and then a base color in a neutral shade like nude, white, or light pink.
Let it dry. - Using a very thin nail art brush and gold nail polish, carefully draw a tiny, thin ring onto each nail.
You can place the ring near the cuticle, in the center, or even slightly off-center for a more modern look. - Ensure the lines are clean and delicate.
- You can add multiple rings to a single nail or vary the placement on each finger.
- Once the gold rings are dry, seal the design with a clear top coat to protect the artwork and add a smooth finish.
Why This Stands Out
Minimalist Gold Rings nails are a chic and understated manicure that adds a subtle touch of elegance to your look.
The dainty gold rings are both modern and timeless, making it a perfect choice for those who prefer minimalist nail art with a hint of sparkle.
Conclusion
March 2025 is shaping up to be a dazzling month for nail enthusiasts, with a plethora of stunning gold designs to choose from.
Whether you’re drawn to the subtle elegance of a golden hour ombre or the bold statement of sun-kissed chrome, there’s a gold manicure to perfectly express your personal style.
Don’t be afraid to experiment with different textures, finishes, and embellishments to create a gold nail look that’s uniquely yours.
Embrace the warmth and luxury of gold and let your fingertips shine throughout March 2025!
