A new school year offers the perfect opportunity for a fresh start, not just with your classes but with your style too.
What better way to express your unique personality and creativity than with a stunning, eye-catching manicure?
Forget boring, single-color nails and get ready to transform your fingertips into miniature works of art that tell a story.
This guide features thirty-five incredible back-to-school designs, ensuring there is a perfect look for every student.From playful nods to classic school supplies to chic, sophisticated patterns, we have curated the ultimate list of nail art inspiration.
Get ready to explore these amazing ideas and choose the perfect design to start the semester with confidence and flair.
Pencil Perfection
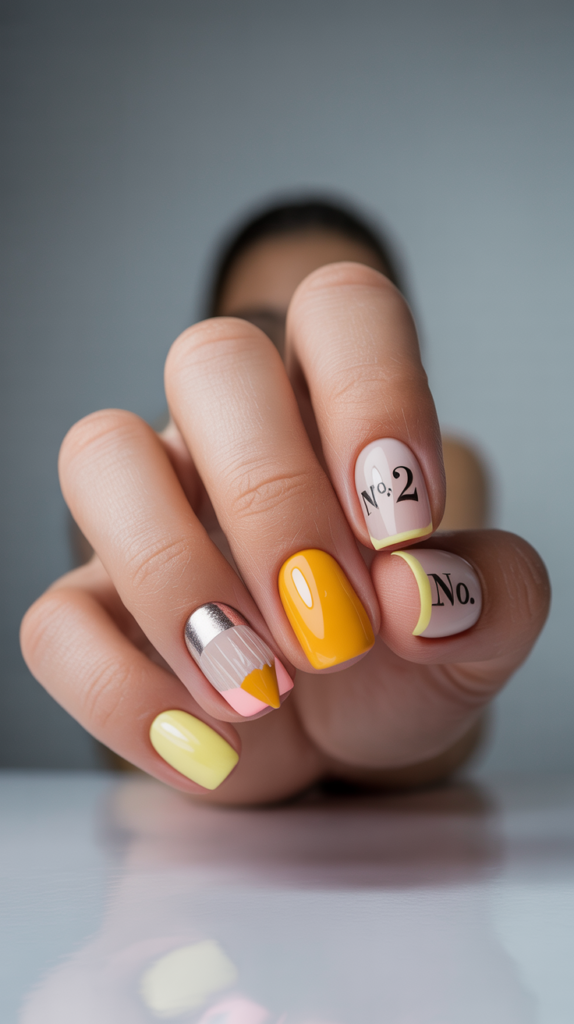
A timeless classic. Paint your nails a vibrant yellow with a silvery band and a pink tip to mimic a freshly sharpened pencil.
An accent nail with a No.2 is a perfect touch.
Design Features
The design’s primary feature is a bright, optimistic yellow that covers most of the nail, reminiscent of a classic school pencil.
A sleek, metallic silver band separates the yellow body from the soft pink tip, which perfectly mimics a pencil’s eraser.
For an extra touch of authenticity, an accent nail proudly displays the iconic “No. 2” in a clean black font.
The overall finish is glossy, giving it a polished and freshly lacquered appearance that catches the eye.
How To Achieve This Look
Begin your masterpiece by applying a solid base coat to protect your nails and create a smooth canvas for the polish.
Once the base coat is dry, paint the entire nail with two coats of a vibrant, opaque yellow polish for full coverage.
After the yellow has completely dried, use striping tape to create a clean line and paint a band of metallic silver polish near the top.
Carefully paint the tip of the nail above the silver band with a soft pink polish to form the eraser.
For the accent nail, use a very fine-tipped nail art brush and black polish to carefully write “No.
2″ on the yellow section.
Finish the entire design with a generous layer of high-gloss top coat to seal in the art and provide a durable, shiny finish.
Why This Stands Out
This design is instantly recognizable and universally loved, making it a perfect conversation starter for the new school year.
It showcases a playful and creative spirit while remaining incredibly neat and thoughtfully executed.
The classic color combination is cheerful and energetic, setting a positive tone for heading back to the classroom.
It is a brilliant blend of nostalgia and modern nail art, proving that inspiration can be found in the simplest of school supplies.
Composition Notebook

Go for a marbled black and white pattern on your nails to replicate the iconic cover of a composition notebook.
Add a white accent nail with a “label” for your name.
Design Features
The core feature of this look is the iconic black and white marbled pattern, which perfectly emulates the cover of a traditional composition book.
The marbling effect creates a dynamic and abstract visual that is both intricate and instantly familiar.
A key element is the accent nail, which serves as the notebook’s label with a solid white background.
This space can be personalized with your name or a small doodle, making the design uniquely yours.
How To Achieve This Look
Start with a protective base coat on all nails to ensure a smooth application and prevent staining.
On all but the accent nail, apply a white base coat and while still wet, drop small dots of black polish onto the nail.
Use a fine needle or toothpick to gently swirl the black and white polishes together to create the marbled effect.
For the accent nail, simply paint it with two coats of opaque white polish.
Once dry, use a fine-tipped black brush to carefully draw a small rectangle and write your name on the white accent nail.
Seal all your nails with a high-gloss top coat for a finished and durable look.
Why This Stands Out
This design is a clever and stylish nod to a classic school supply without being overly literal or colorful.
Its monochrome palette is chic and versatile, matching any first-day-of-school outfit.
The personalized label on the accent nail adds a fun, bespoke element that sets it apart from other designs.
It’s a sophisticated and artistic choice for the student who appreciates a touch of graphic flair.
Loose-Leaf Paper
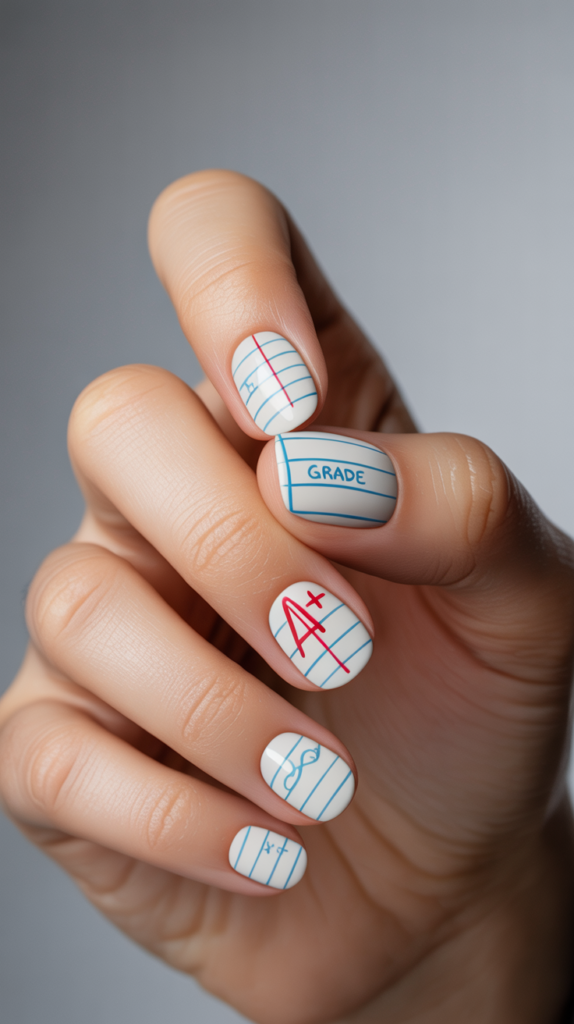
Start with a crisp white base, draw on light blue horizontal lines and a single vertical red line for that authentic notebook paper feel.
You can even add tiny doodles or A+ grades.
Design Features
This design captures the essence of a fresh sheet of notebook paper with its clean, crisp white base.
The defining features are the delicate, light blue horizontal lines that run across the nail.
A single, sharp vertical red line along the side of the nail completes the illusion of a ruled margin.
Tiny, hand-drawn doodles or a proud “A+” in red ink add a layer of playful detail and personalization.
How To Achieve This Look
First, apply a clear base coat to protect your natural nails and create a smooth surface.
Follow this with two to three coats of a pure, opaque white polish until you achieve a solid, streak-free foundation.
Once the white base is completely dry, use an extremely fine-tipped nail art brush or a striping brush dipped in light blue polish to draw the horizontal lines.
Use a steady hand to create the single vertical red line along one side.
After adding any personal touches like doodles or grades with a fine brush, let the design dry thoroughly.
Finish with a glossy top coat to protect the intricate lines and add a beautiful shine.
Why This Stands Out
The Loose-Leaf Paper design is charmingly nostalgic and incredibly detailed, showing off a high level of precision and care.
It’s a clean and bright look that feels both academic and whimsical.
This design is a conversation starter because it so perfectly replicates a real object on a miniature scale.
It’s a testament to creativity, turning something mundane into a work of wearable art.
Chalkboard Dreams
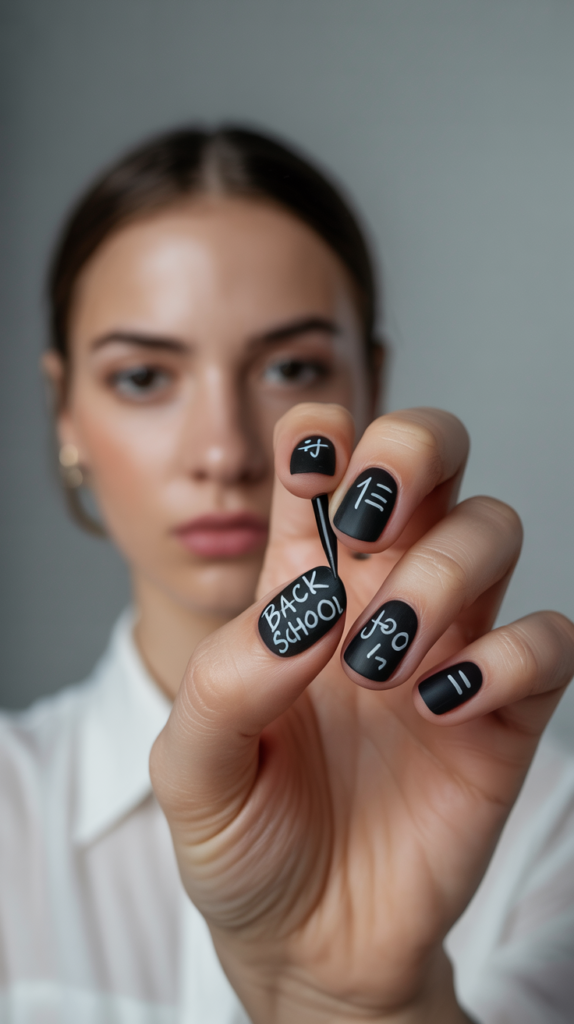
A matte black polish serves as the perfect chalkboard.
Use a fine-tip brush and white polish to sketch out simple equations, doodles, or “Back to School” messages.
Design Features
The standout feature of this look is its authentic, non-reflective matte black base, which perfectly mimics a real classroom chalkboard.
The design is brought to life with fine, white details that look just like chalk markings.
These chalk-like details can be anything from mathematical equations and chemical formulas to whimsical doodles and inspiring words.
The contrast between the stark white and the deep black creates a powerful visual impact.
How To Achieve This Look
Begin the process by applying a base coat to prepare your nails for the dark polish.
Next, apply two coats of a rich, opaque black nail polish for a completely solid background.
After the black polish has dried, apply a special matte top coat over it; this is the crucial step to transform the glossy black into a flat chalkboard finish.
Once the matte coat is set, use a very fine nail art brush and white polish to carefully draw on your chosen designs.
Let the white “chalk” art dry completely before deciding if you want to add another matte top coat, which can slightly soften the white details.
For a sharper look, you can leave the white art as is.
Why This Stands Out
Chalkboard Dreams is an edgy and creative take on the back-to-school theme, perfect for those who prefer a darker color palette.
The matte finish is sophisticated and trendy, setting it apart from typical glossy manicures.
The ability to customize the “chalk” drawings makes this design deeply personal and endlessly versatile.
It’s an interactive and fun look that showcases both artistic skill and a love for learning.
Ruler Realness

Measure up to the style competition with nails that look like a classic wooden or bright yellow ruler.
Add black tick marks and numbers for a precise design.
Design Features
This design’s primary characteristic is its faithful replication of a ruler, complete with precise measurement markings.
You can choose between a natural, light brown wood grain effect or a bold, bright yellow base.
The essential details are the crisp, black tick marks of varying lengths that denote inches or centimeters.
The inclusion of small, clear numbers along the nail edge solidifies the ruler illusion.
How To Achieve This Look
First, apply a protective base coat to all nails.
For a yellow ruler, apply two coats of a vibrant yellow polish; for a wood grain look, use a light brown polish and a darker brown to create subtle streaks with a fan brush.
Once your base color is completely dry, use a very fine-tipped black nail art brush or a nail stamping plate designed with ruler markings.
Carefully paint the tick marks along the length of your nail, ensuring they are straight and evenly spaced.
Add the numbers next to the main tick marks for that final touch of authenticity.
Seal your precise work with a high-gloss top coat to give it a smooth, finished appearance.
Why This Stands Out
Ruler Realness is a sharp, graphic design that is both playful and impressive due to its precision.
It is a clever and unexpected choice that demonstrates a keen eye for detail.
This manicure is a fun way to incorporate a fundamental school tool into your look.
It stands out for its linear, organized aesthetic, appealing to those who love clean lines and a touch of novelty.
Highlighter Hues
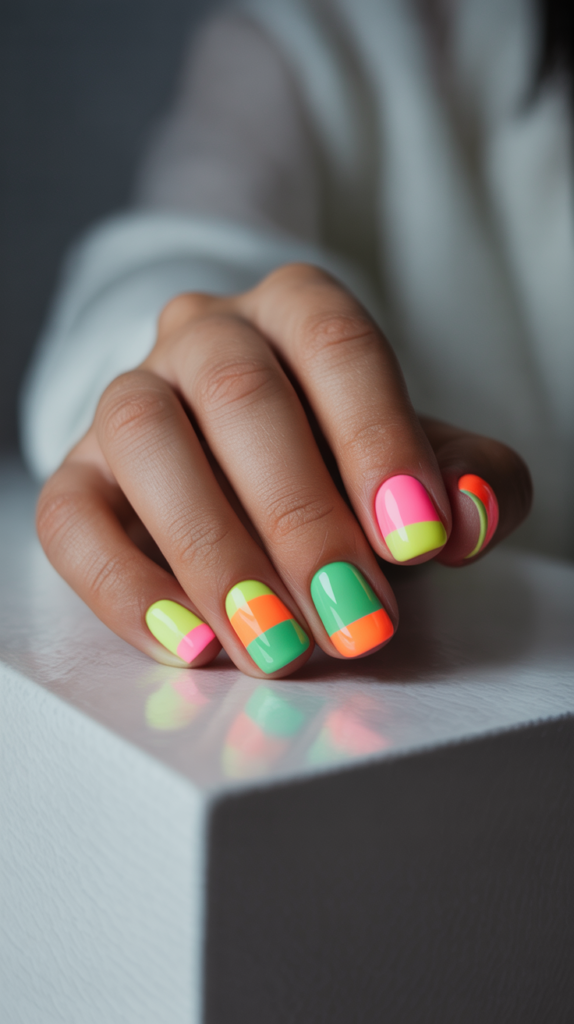
Make your nails pop with neon shades of yellow, pink, green, and orange, just like your favorite highlighters.
A glossy top coat can mimic the wet ink.
Design Features
The defining feature of this look is its use of intensely bright, neon colors that are characteristic of highlighter pens.
Each nail can be a different shocking shade, from electric yellow and hot pink to lime green and vibrant orange.
A crucial element is the ultra-glossy finish, which gives the nails a wet and freshly-inked appearance.
The design is all about pure, unadulterated color and high-impact vibrancy.
How To Achieve This Look
Always begin with a base coat, which is especially important with neon polishes as they can sometimes be prone to staining.
To make the neon colors truly pop, apply a single coat of opaque white polish first and let it dry.
Next, paint each nail with two to three coats of your chosen neon polishes until you achieve full, streak-free opacity.
You can alternate colors, create a rainbow effect across your nails, or stick to one favorite shade.
The final and most important step is to apply a thick, high-shine glossy top coat.
This will not only protect the color but also deliver that signature wet-look finish that mimics fresh highlighter ink.
Why This Stands Out
Highlighter Hues is an unapologetically bold and energetic design that is guaranteed to turn heads.
It’s a fun and modern look that radiates positivity and confidence.
This manicure is perfect for those who love color and want to make a statement.
The electrifying shades are a stylish way to add a playful pop to your back-to-school wardrobe.
Crayon Box
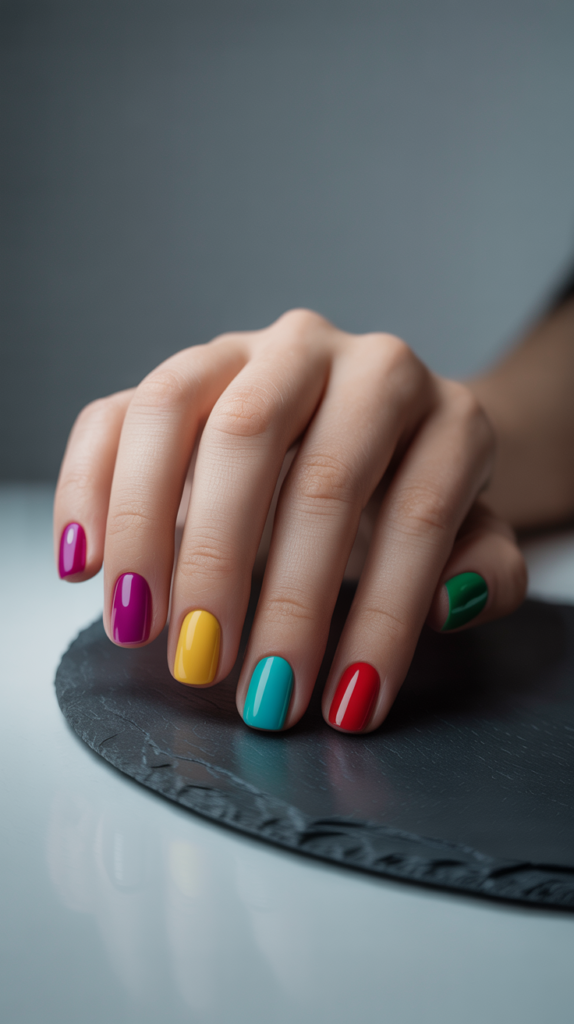
Unleash your inner child by painting each nail a different, bold color, as if you’ve just opened a brand-new box of crayons.
Design Features
This design is characterized by its vibrant, multi-colored approach, where each nail is painted a different solid, primary-like color.
The look is meant to evoke the simple joy of a freshly opened box of crayons.
The key is to use pure, opaque crème polishes in classic shades like cherry red, grass green, sky blue, and sunshine yellow.
A subtle, waxy or demi-matte finish can enhance the crayon-like texture.
How To Achieve This Look
Start by applying a good quality base coat to protect your nails and provide a smooth foundation.
Select five to ten different bold, crème-finish nail polishes from your collection.
Carefully paint each nail with a different color, applying two coats of each to ensure the color is rich and completely opaque.
Take your time with each nail to ensure clean lines around the cuticles.
To achieve a subtle, waxy finish like a real crayon, you can use a satin or demi-matte top coat.
Alternatively, a glossy top coat will give the colors a more vibrant, candy-like appearance.
Why This Stands Out
The Crayon Box design is a cheerful and nostalgic celebration of color and creativity.
It’s an incredibly simple concept with a powerful visual impact that is sure to bring a smile to your face.
This look is effortlessly playful and shows a fun-loving personality.
It stands out for its simplicity and boldness, proving that you don’t need complex art to have eye-catching nails.
Apple For The Teacher
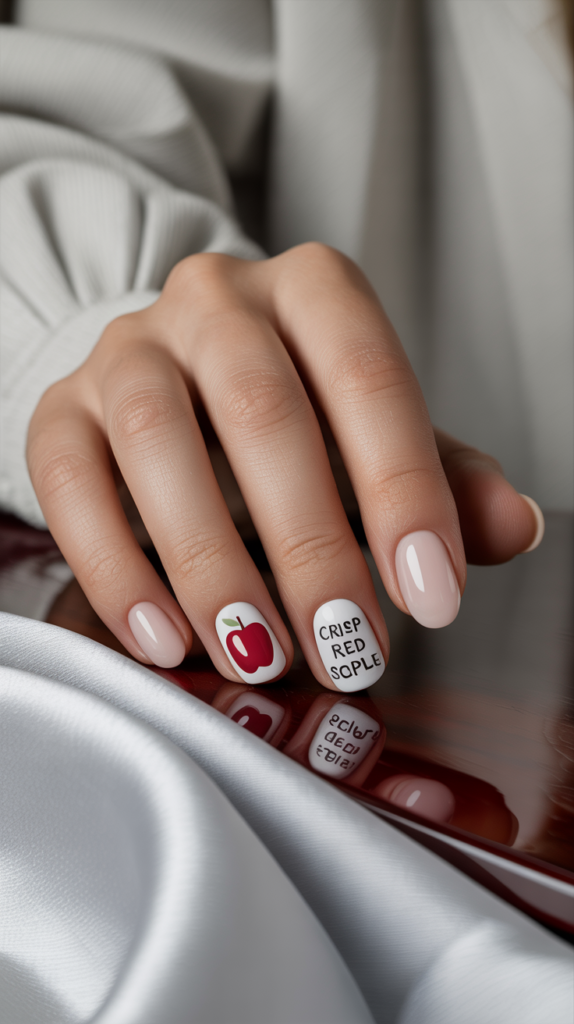
A crisp red apple on an accent nail is a sweet and classic tribute to the start of school.
For a modern twist, try a green apple or a pop-art-style design.
Design Features
The central feature of this design is a beautifully rendered apple, traditionally a bright, shiny red, on a single accent nail.
The other nails are often painted in a complementary neutral or solid color to let the apple take center stage.
Key details include a small brown stem and a single green leaf, which make the apple instantly recognizable.
A high-gloss finish on the apple gives it a juicy, freshly-picked appearance.
How To Achieve This Look
Begin by applying a base coat to all your nails.
Paint your non-accent nails with two coats of a complementary color like white, nude, or even a chalkboard matte black.
On your accent nail, create a clean base, perhaps in white to make the red pop.
Use a dotting tool or a small brush to create the round shape of the apple with a bright red polish.
While the red is still slightly tacky, use a fine-tipped brush to add the small brown stem and a delicate green leaf at the top.
Seal all nails with a glossy top coat, paying extra attention to the apple to enhance its shine.
Why This Stands Out
This design is a timeless and charming symbol of school, respect, and new beginnings.
It’s a sweet and endearing choice that is both pretty and thematically perfect.
The “Apple for the Teacher” manicure stands out for its classic appeal and heartwarming sentiment.
It’s a polished and sophisticated way to embrace the back-to-school spirit with a touch of traditional charm.
Math Whiz
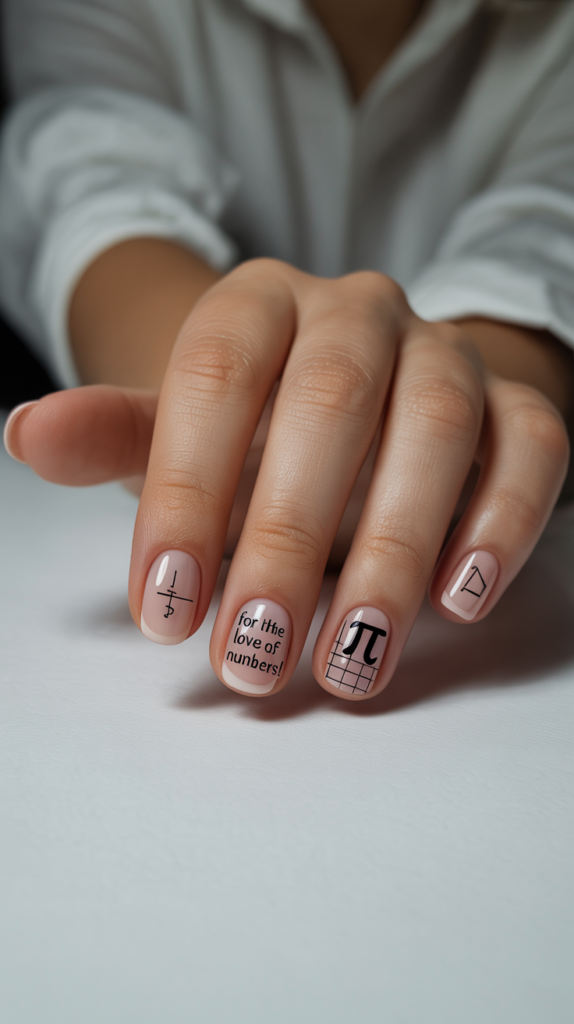
For the love of numbers! Create a graph paper grid on some nails and showcase simple equations, geometric shapes, or the pi symbol on others.
Design Features
This design is defined by its clever use of mathematical symbols and patterns.
A key feature is a graph paper grid, created with fine blue or gray lines over a white base.
Other nails can feature iconic mathematical elements like simple equations, the pi symbol, square root signs, or geometric shapes.
How To Achieve This Look
After applying your base coat, paint the nails you’ve chosen for the graph paper design with an opaque white polish.
For the other nails, you can use white, black, or gray as a base.
Once the white is dry, use a very fine striping brush and a light blue or gray polish to carefully draw a grid pattern.
For the other nails, use a fine-tipped black brush to meticulously paint on your chosen equations and symbols.
You can use nail stamping plates for more complex symbols or geometric shapes to ensure precision.
Finish the look with a matte top coat to mimic paper or a glossy top coat for a more polished feel.
Why This Stands Out
The Math Whiz design is an intelligent and witty manicure that showcases a love for logic and numbers.
It’s a unique and intricate look that highlights precision and creativity.
This manicure stands out for its intellectual flair and graphic appeal.
It’s a perfect choice for the STEM-loving student who wants a design that is both smart and stylish.
Stargazer’s Guide (Astronomy)
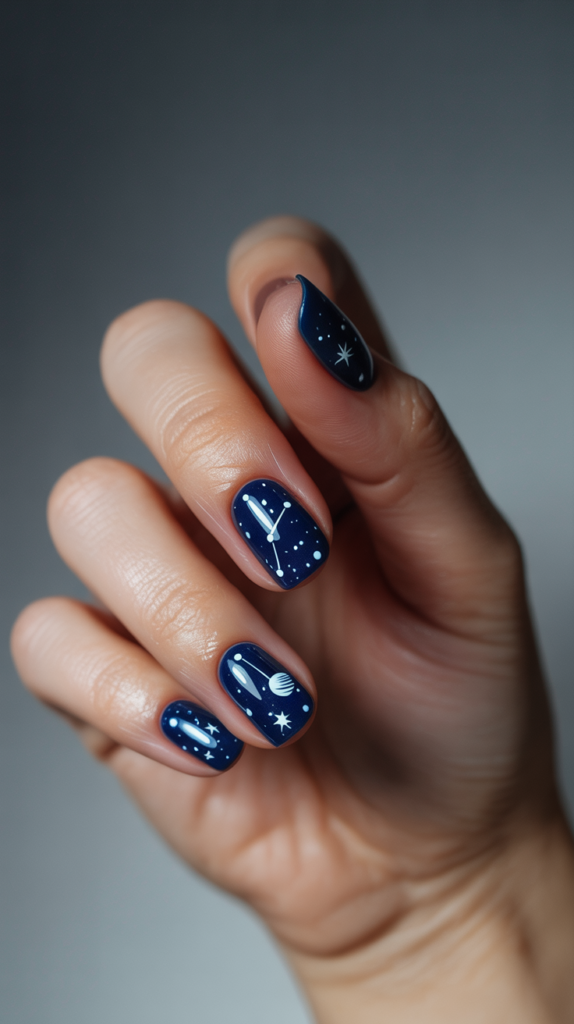
A deep, dark blue or black base speckled with tiny white stars, constellations, and maybe a miniature planet or two, will have you reaching for the stars.
Design Features
The core of this design is a deep, dark base color of navy blue or black, representing the vastness of the night sky.
This dark canvas is then adorned with a scattering of tiny white or silver specks to create a field of stars.
To elevate the look, specific, recognizable constellations can be drawn by connecting the star dots with fine lines.
An accent nail might feature a detailed miniature planet, like Saturn with its rings, for a celestial focal point.
How To Achieve This Look
Start with a protective base coat, then apply two coats of a deep navy blue or black polish.
For extra depth, you can sponge on a bit of purple or darker blue to create a nebula effect before the base dries.
To create the stars, you can use a fine dotting tool dipped in white or silver polish, or lightly flick the bristles of a toothbrush with white paint for a more random splatter effect.
For constellations, use a fine brush to connect the dots.
For a planet accent nail, create a colored orb and then add details like rings or swirls.
Finish the entire manicure with a high-gloss, glittery top coat to add extra sparkle and dimension to your galaxy.
Why This Stands Out
This design is breathtakingly beautiful and captures a sense of wonder and infinite possibility.
It’s a dreamy and enchanting look that is both artistic and sophisticated.
The Stargazer’s Guide stands out for its depth and intricate detail, transforming your nails into miniature cosmic canvases.
It’s perfect for the dreamer and the thinker, reminding you to always look up and aim high.
Biology Class

Get scientific with nails featuring DNA double helixes, petri dish-inspired swirls, or microscopic organisms.
Design Features
This design is characterized by its use of imagery taken directly from the world of biology.
A standout feature is the iconic DNA double helix, often rendered in contrasting colors like blue and purple, spiraling down the nail.
Other nails can mimic the look of a petri dish, with translucent, jelly-like base colors and abstract swirls of “cultures.” You could also feature artistic interpretations of cells or other microscopic organisms for a truly scientific vibe.
How To Achieve This Look
After applying your base coat, choose your design for each nail.
For a DNA helix, paint a neutral base and then use two different colors and a fine brush to create the two intertwining strands, adding small horizontal lines to connect them.
For a petri dish effect, use a sheer or jelly nail polish as a base.
While it’s still wet, drop in small amounts of other colors and gently swirl them with a needle to create an organic, growing pattern.
A glossy top coat is essential for this look, especially for the petri dish nails, as it enhances the wet, Agar gel appearance.
Let everything dry completely to preserve the detailed biological art.
Why This Stands Out
The Biology Class manicure is an incredibly clever and unique design that celebrates the beauty of science.
It’s an intellectual and artistic choice that is bound to impress your teachers and classmates.
This design stands out for its originality and intricate execution.
It transforms complex scientific concepts into beautiful, wearable art, perfect for the future doctor or scientist.
Art Student
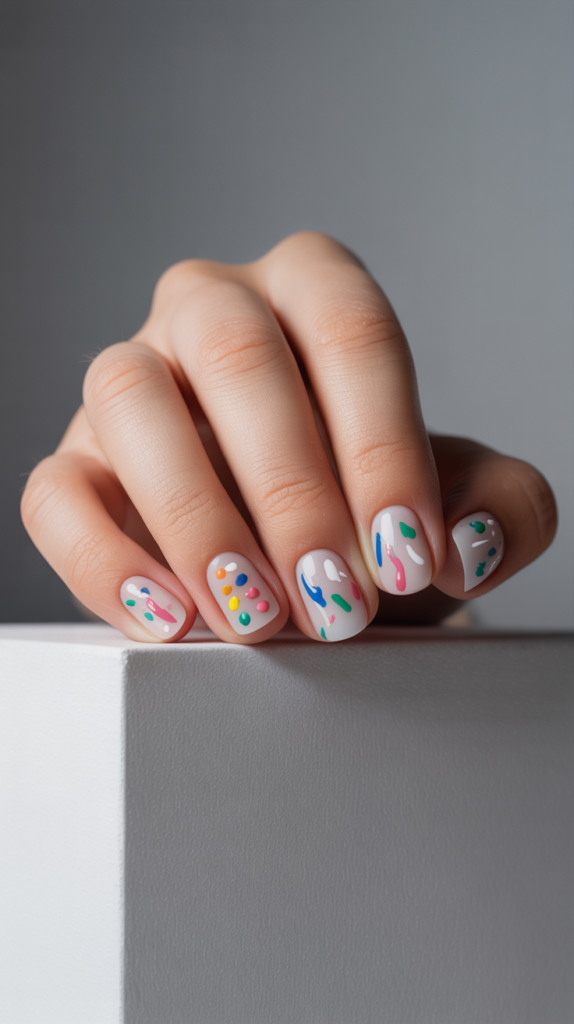
Let your creativity run wild with a paint palette on one nail and colorful paint splatters over a white base on the others.
Design Features
The centerpiece of this manicure is the accent nail, meticulously designed to look like an artist’s paint palette.
This nail typically features a neutral base with several distinct, colorful dabs of polish and a thumb hole illusion.
The other nails serve as the canvas, usually with a crisp white base to make the colors pop.
They are adorned with a chaotic yet beautiful splatter of various bright paint colors.
How To Achieve This Look
After applying your base coat, paint your accent nail with a nude or light brown polish to mimic a wooden palette.
On the other nails, apply two coats of opaque white polish.
On the palette nail, use a dotting tool to place small, slightly raised dots of various colors like red, blue, yellow, and green.
Use a fine brush and black polish to draw a small thumb hole.
For the splatter effect, you can use a straw or a toothbrush to flick small specks of different colored polishes onto the white nails.
Clean up any polish on your skin with acetone and a brush, and then seal all nails with a glossy top coat.
Why This Stands Out
This design is a vibrant and literal expression of creativity and artistic passion.
It’s a bold, fun, and slightly messy look that perfectly captures the spirit of an art student.
The Art Student manicure stands out because it’s so dynamic and full of energy.
The combination of the neat palette and the chaotic splatter creates a beautiful contrast that is both eye-catching and inspiring.
History Buff

Take a trip back in time with nails that feature ancient Egyptian hieroglyphics, Roman numerals, or a vintage-style map.
Design Features
This manicure is defined by its use of historical motifs and aged aesthetics.
One key feature could be a sandy, textured base on a nail, adorned with precisely drawn Egyptian hieroglyphics.
Another nail might showcase elegant, chiseled Roman numerals, while an accent nail could feature a sepia-toned, vintage world map with delicate longitude and latitude lines.
The color palette often includes earthy tones, aged parchment colors, and metallic accents.
How To Achieve This Look
Start with your base coat.
For a hieroglyphics nail, use a textured or sandy beige polish; for a map, use a creamy off-white and sponge on brown polish at the edges to create an aged look.
Use very fine-tipped nail art brushes to carefully paint the historical details.
For hieroglyphics and Roman numerals, black or gold polish works well.
For the map, use a fine black or brown pen to draw the continents and lines.
You might consider a matte top coat for the sandy or parchment-textured nails to enhance the aged feel.
For any metallic details, a glossy top coat will make them shine.
Why This Stands Out
The History Buff design is a sophisticated and intellectual manicure that tells a story.
It’s a unique and captivating look that reflects a deep appreciation for the past.
This manicure stands out for its intricate detail and unique subject matter.
It transforms your nails into historical artifacts, making it a perfect choice for the student who loves stories and ancient worlds.
Bookworm’s Bliss
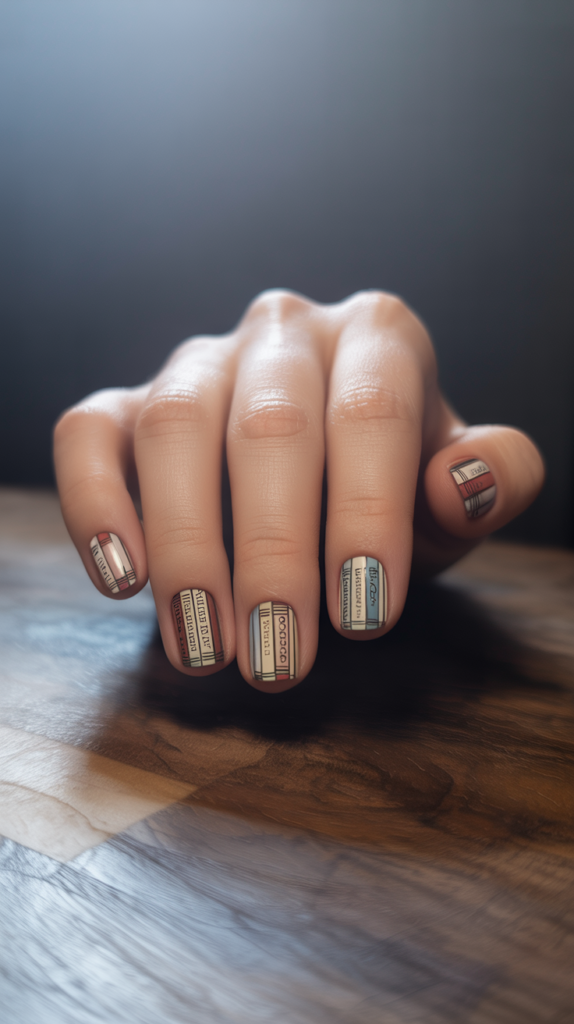
For the literature lovers, design your nails to look like the spines of your favorite classic books, or paint tiny open pages with delicate script.
Design Features
The main feature of this design is the illusion of a miniature library on your fingertips.
Each nail is designed to look like the spine of a book, complete with a title and decorative elements in gold or silver.
Alternatively, an accent nail might feature an open book, with pages filled with tiny, illegible script and perhaps a small illustration.
The color palette is often rich and deep, with colors like burgundy, navy, and forest green to mimic classic leather-bound books.
How To Achieve This Look
After your base coat, paint each nail with a different rich, solid color.
Use a fine-tipped brush and a metallic gold, silver, or white polish to add decorative lines and the title of a favorite book on each “spine.”
For an open book accent nail, start with a white or cream base.
Use a fine black brush to draw the outline of the book and then fill the pages with tiny, script-like lines.
Seal the design with a glossy top coat to give the book spines a polished look and protect the intricate details.
This will make your miniature library look pristine and well-cared-for.
Why This Stands Out
This design is a beautiful and heartfelt tribute to the magic of reading and literature.
It’s a deeply personal manicure that allows you to carry your favorite stories with you.
Bookworm’s Bliss stands out for its incredible detail and charming concept.
It’s a sophisticated and elegant choice for any literature enthusiast, turning your nails into a testament to your love for books.
Musical Notes
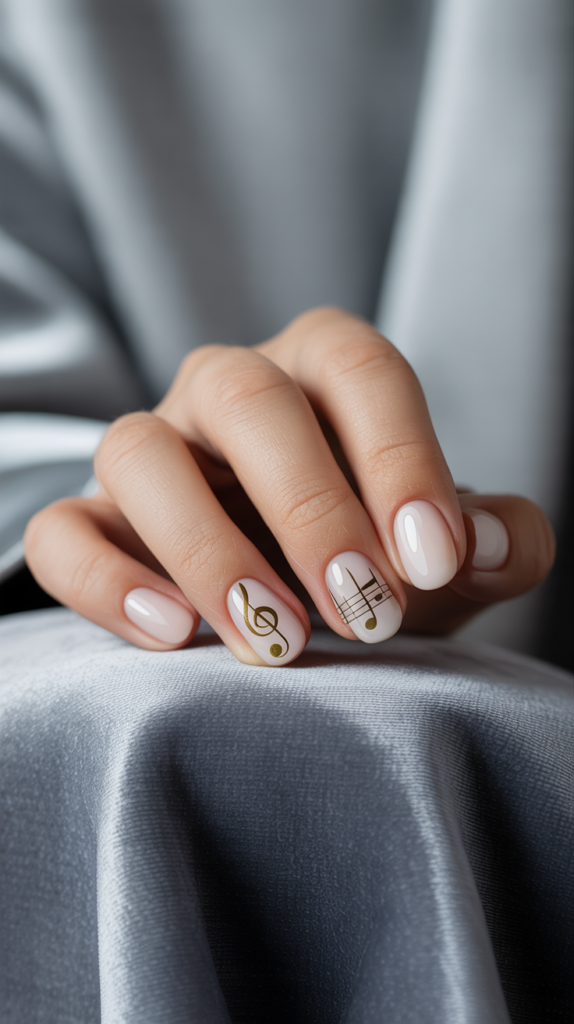
A simple and elegant design featuring musical notes and clefs floating across a neutral or white background is perfect for any music enthusiast.
Design Features
This design is characterized by its clean, minimalist aesthetic and its graceful subject matter.
A crisp white or soft nude base provides the perfect canvas for the delicate musical symbols.
The key features are the elegantly drawn musical notes, such as quarter notes and eighth notes, along with treble and bass clefs.
The symbols are typically done in a sharp, contrasting black for a classic, sheet music appearance.
How To Achieve This Look
Begin by applying a base coat to protect your nails.
Follow with two coats of a high-quality white or nude polish to create a flawless, neutral background.
Once the base is completely dry, use a very fine-tipped nail art brush or a nail stamping plate with musical designs.
With black polish, carefully place the notes and clefs across the nails in a flowing, random pattern.
You can also add the lines of a musical staff on one or two nails for added detail.
Finish the entire manicure with a glossy top coat to seal in the delicate designs and give it a polished, elegant finish.
Why This Stands Out
This design is the epitome of elegance and sophistication, translating a love for music into a chic, wearable art form.
Its minimalist design is timeless and suitable for any occasion.
The Musical Notes manicure stands out for its graceful simplicity and artistic flair.
It’s a perfect choice for the musician or music lover who wants a design that is both beautiful and meaningful.
School Colors
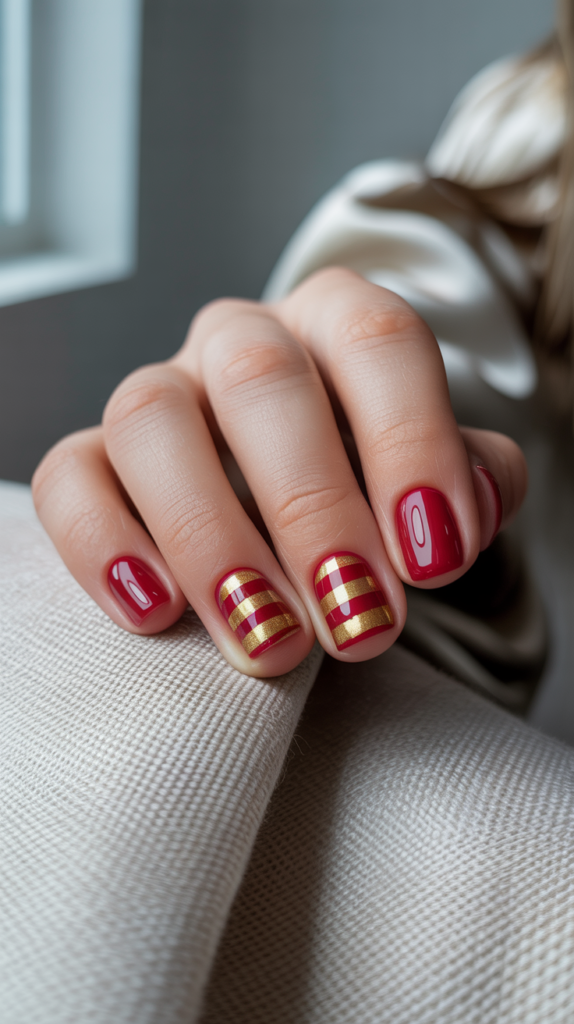
Proudly display your school’s colors with bold stripes, color-blocking, or alternating color patterns.
Design Features
The defining characteristic of this design is the proud and prominent use of your official school colors.
The look can be executed in various patterns, such as bold diagonal stripes, modern color-blocking, or a simple alternating color on each nail.
The key is to use the colors in a way that is clean, sharp, and intentional.
The finish is typically glossy to give the colors a vibrant and energetic feel, reflecting true school spirit.
How To Achieve This Look
After applying a protective base coat, decide on your chosen pattern.
For alternating colors, simply paint each nail with one of your school colors, applying two coats for opacity.
For stripes or color-blocking, start with the lighter of your school colors as a base on all nails.
Once completely dry, use nail striping tape to mask off sections and then paint the darker color in the exposed areas for crisp, clean lines.
Remove the tape while the second color is still slightly wet to prevent smudging.
Finish with a high-gloss top coat to make the colors pop and to smooth out any edges from the design work.
Why This Stands Out
This design is the ultimate expression of school pride and team spirit.
It’s a bold and direct way to show support for your school community from the very first day.
School Colors stand out for their personal significance and spirited energy.
It’s a powerful, graphic look that is both fun to wear and a great way to bond with fellow students.
Varsity Letters

Get a sporty and spirited look with a collegiate-style letter, perhaps your school’s initial or your own, on an accent nail.
Design Features
The central element of this design is a bold, collegiate-style varsity letter, typically placed on a single accent nail.
The letter is often designed with a contrasting outline to mimic the look of a classic chenille patch on a letterman jacket.
The other nails are usually painted in a solid, complementary school color, such as deep maroon, navy blue, or forest green.
A mix of glossy and matte finishes can add textural interest to the design.
How To Achieve This Look
Start with a base coat.
On your chosen accent nail, paint a solid base color, and on the other nails, apply your main school color.
Once the accent nail is dry, use a fine-tipped brush to carefully paint the outline of your chosen varsity letter in a contrasting color.
Fill in the letter with the main color, ensuring the lines are sharp and clear.
For an authentic chenille patch look, you can use a flocking powder on the letter while the polish is still wet.
Seal the non-accent nails with a glossy top coat and leave the varsity letter with its textured or matte finish.
Why This Stands Out
The Varsity Letters design is a cool and preppy way to show school spirit with a touch of athletic-inspired style.
It’s a classic look that is both bold and personal.
This manicure stands out for its iconic, nostalgic appeal, instantly evoking images of team spirit and school pride.
It’s a strong, confident design that is perfect for the student who is proud of their affiliations.
Preppy Plaid
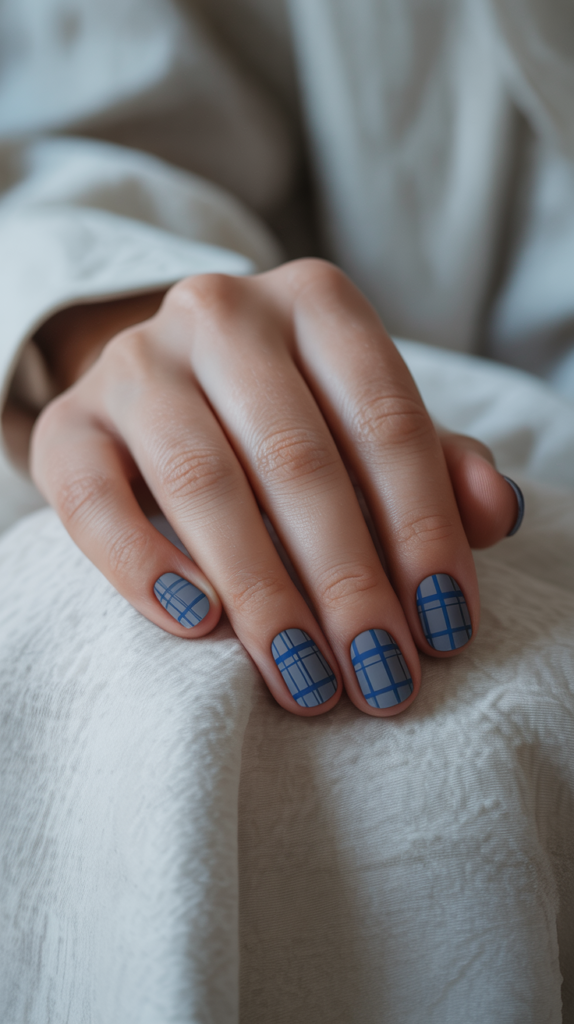
A timeless plaid pattern, reminiscent of school uniforms, is a chic and sophisticated choice.
Use your school colors for a personalized touch.
Design Features
This design is characterized by its intricate pattern of intersecting horizontal and vertical lines in varying thicknesses and colors.
The look is inspired by classic tartan and plaid fabrics often found in school uniforms.
The color palette can be traditional, using tones like navy, hunter green, and red, or it can be personalized with your own school colors.
The key to the design is the clean, straight lines that create a woven, fabric-like effect.
How To Achieve This Look
After your base coat, paint your nails with the lightest color in your chosen plaid palette.
This will serve as the background for your pattern.
Once the base is dry, use a very long, thin striping brush to paint on the lines.
Start with the main horizontal and vertical lines in your darkest color, then add thinner accent lines in other colors, layering them carefully.
Allow each layer of lines to dry before adding the next to prevent smudging.
Finish with a glossy top coat to smooth over the layered design and give it a polished, cohesive look.
Why This Stands Out
The Preppy Plaid design is a classic and sophisticated manicure that is eternally stylish.
It’s a chic and polished look that adds a touch of academic flair to your appearance.
This manicure stands out for its detailed craftsmanship and timeless appeal.
It’s a versatile design that looks smart and put-together, perfect for making a great first impression.
Mascot Mania
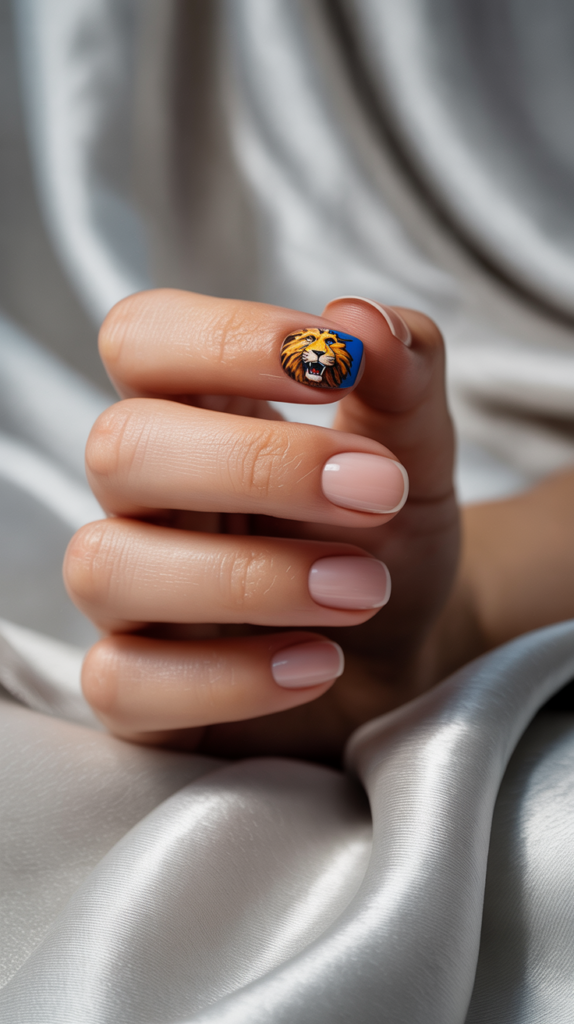
Show your ultimate school pride by dedicating an accent nail to a detailed painting of your school’s mascot.
Design Features
The undisputed star of this design is a meticulously hand-painted, detailed representation of your school’s mascot on a single accent nail.
The artwork should be as accurate as possible, capturing the mascot’s colors and features.
The remaining nails are best kept simple, painted in one or two of the main school colors.
This allows the intricate mascot art to be the focal point without distraction.
How To Achieve This Look
This is an advanced design that requires patience and a steady hand, or a visit to a talented nail artist.
After a base coat, paint your non-accent nails with your chosen school colors.
On the accent nail, create a neutral base, usually white, to ensure the mascot’s colors are true and vibrant.
Use a set of extremely fine nail art brushes and a dotting tool to carefully sketch and paint the mascot, working in layers from the largest shapes to the smallest details.
Allow ample drying time between colors to keep the details crisp.
Protect your masterpiece with a durable, glossy top coat.
Why This Stands Out
Mascot Mania is the boldest and most spirited declaration of school pride you can make with your nails.
It’s a truly custom and impressive piece of miniature art that shows incredible dedication.
This design stands out for its sheer artistic skill and personal significance.
It’s a guaranteed conversation starter and a powerful way to show your support for your school’s teams and community.
First Day Florals
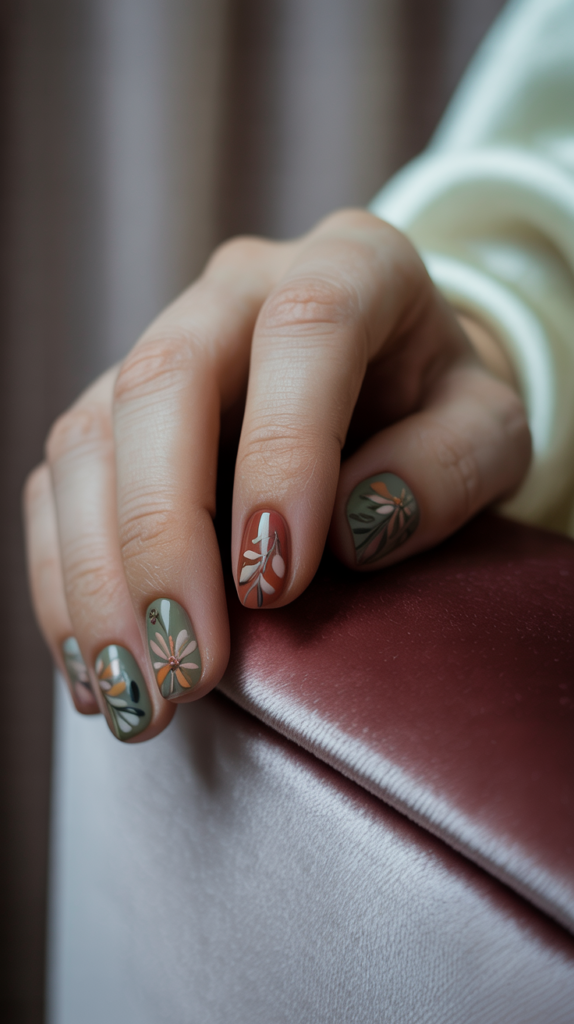
For a more subtle and stylish approach, a delicate and sophisticated floral pattern in a muted fall color palette is a beautiful choice.
Design Features
This design is characterized by its delicate and artistic floral patterns.
Instead of bright summer colors, it utilizes a more subdued and sophisticated autumn palette, featuring shades like dusty rose, sage green, burgundy, and mustard yellow.
The florals are often small and intricately detailed, scattered across a neutral or sheer base.
The overall effect is soft, romantic, and elegant, perfect for a more mature back-to-school look.
How To Achieve This Look
Begin with a clear or sheer nude base coat to create a natural, clean look.
Using a fine-tipped dotting tool and nail art brushes, begin creating your floral elements.
Use your chosen muted colors to create small flowers and leaves, working in layers to add depth and detail.
You can paint the florals on all nails or create a cascade of flowers on just an accent nail.
The key is to keep the designs delicate and not overcrowded.
Finish with a matte top coat to enhance the soft, romantic feel, or a glossy top coat for a more polished appearance.
Why This Stands Out
First Day Florals offers a refreshing and sophisticated alternative to more literal school-themed nail art.
It’s a beautiful and timeless design that speaks to a refined and elegant personal style.
This manicure stands out for its understated beauty and artistic grace.
It’s a perfect way to start the school year feeling polished, pretty, and confident without being overly flashy.
Golden Rule
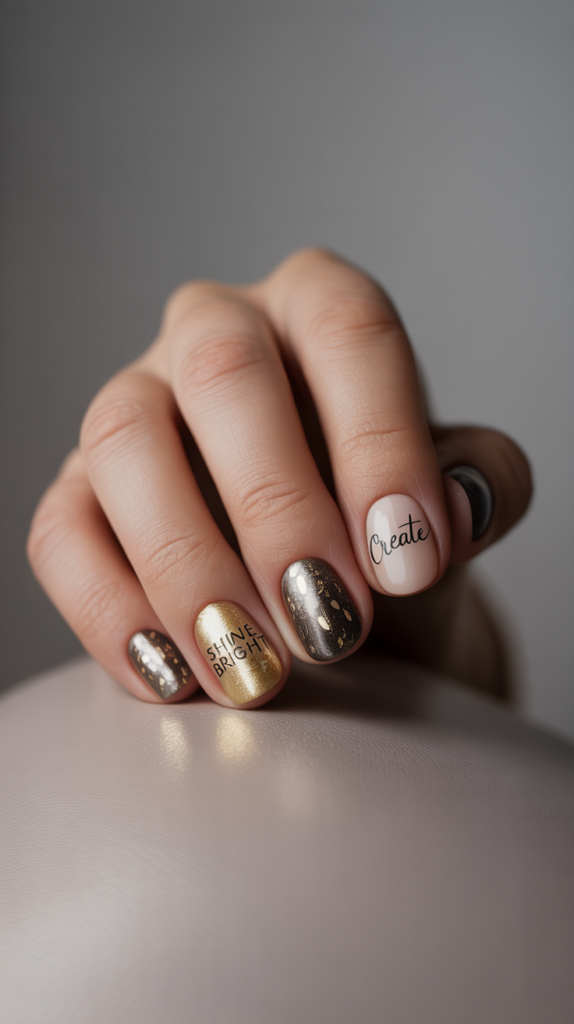
Shine bright with metallic gold nails.
On an accent nail, use a fine brush to write an inspiring word like “Learn,” “Create,” or “Shine.”
Design Features
The defining feature of this manicure is its luxurious and eye-catching metallic gold finish.
The nails are painted with a highly reflective, chrome or foil-effect gold polish for maximum impact.
The thoughtful centerpiece is a single accent nail that carries an inspirational word, such as “Learn,” “Create,” or “Shine,” written in a clean, elegant script.
The script is typically done in a contrasting black or white for readability.
How To Achieve This Look
For a true chrome effect, you may need a special gel system and chrome powder, but a high-quality metallic foil polish can achieve a similar look.
After your base coat, apply two to three thin coats of your metallic gold polish.
On your chosen accent nail, wait for the gold to dry completely.
Use a very fine-tipped brush and a steady hand to carefully write your inspirational word in black or white acrylic paint or polish.
Seal the design with a high-shine top coat to protect the lettering and enhance the metallic gleam.
Be sure to use a top coat that is known not to streak nail art.
Why This Stands Out
The Golden Rule design is a glamorous and empowering statement piece.
It combines a trendy, high-fashion finish with a positive and motivating message.
This manicure stands out for its bold, luxurious look and its personal, uplifting touch.
It’s a stylish reminder of your goals and potential, encouraging you to have a brilliant and successful school year.
Doodle Diary
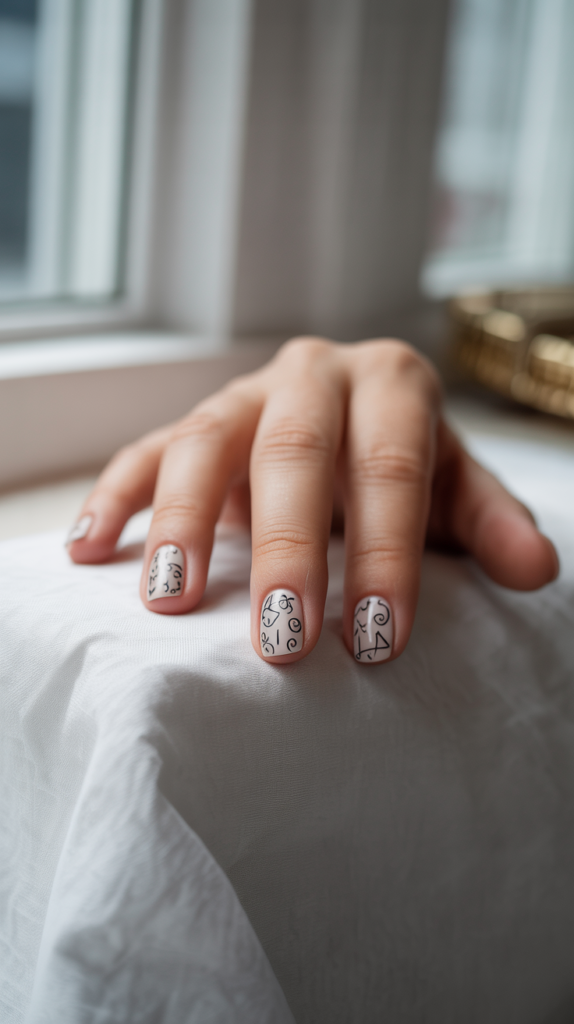
Start with a white or nude base and use a fine-line black brush to create doodles just like you would in the margins of your notebook—think stars, swirls, hearts, and abstract shapes.
Design Features
This design’s charm lies in its spontaneous and whimsical aesthetic, perfectly mimicking the look of notebook margin doodles.
It features a clean white or nude base that acts as the “paper.”
The artwork consists of various small, random doodles drawn in a fine black line.
Popular motifs include stars, hearts, swirls, smiley faces, and abstract squiggles, creating a busy yet cohesive pattern.
How To Achieve This Look
After applying a base coat, paint all your nails with two coats of an opaque white or your favorite nude polish.
Allow this to dry completely to create a smooth canvas for your art.
Using a very fine-tipped black nail art brush or a nail art pen, begin drawing your doodles.
Scatter them randomly across the nails, varying their shape and size to create a balanced, collage-like effect.
Don’t worry about perfection; the charm of this look is in its hand-drawn, slightly imperfect quality.
Finish with a matte top coat to enhance the paper-and-ink feel, or a glossy top coat for a more polished look.
Why This Stands Out
Doodle Diary is a fun, creative, and highly personalized design that perfectly captures a youthful, carefree spirit.
It’s a playful nod to classroom daydreams and creative energy.
This manicure stands out because it feels authentic and unique to the wearer.
It’s a fantastic way to express your personality and artistic side in a fun, stylish, and understated way.
Watercolor Wonder
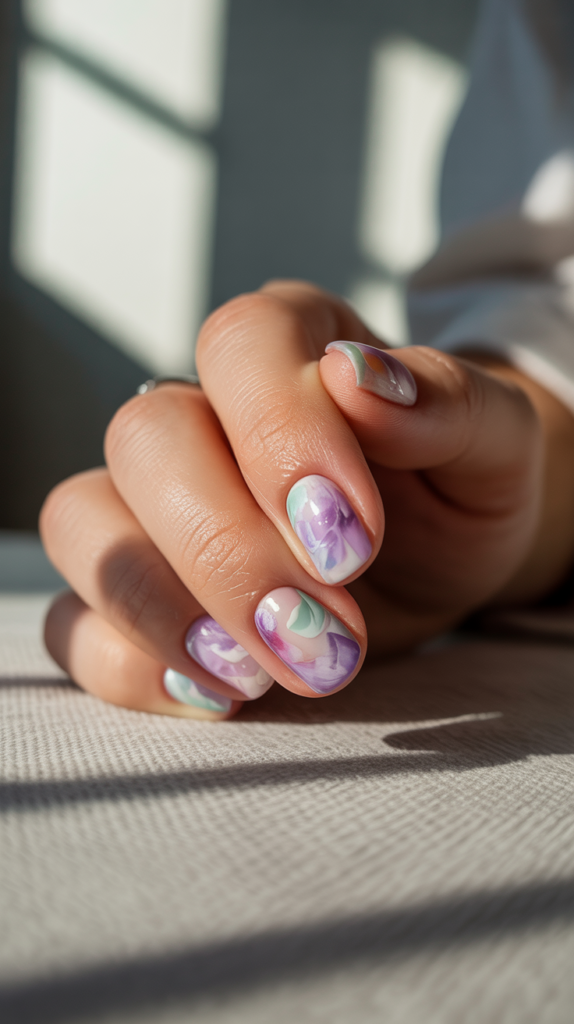
A soft, blended watercolor effect using pastel shades creates a dreamy and artistic look that’s sure to impress.
Design Features
The defining characteristic of this design is its soft, ethereal appearance, which mimics the gentle bleed of watercolor paints on paper.
It features a beautiful blend of soft pastel shades, such as lavender, baby blue, mint green, and pale pink.
There are no harsh lines in this design; the colors seamlessly melt into one another, creating a dreamy, cloud-like effect.
The look is often applied over a white base to ensure the pastel colors remain true and vibrant.
How To Achieve This Look
Start with a protective base coat followed by one or two coats of a solid white polish.
Once the white is dry, you can begin the watercolor technique.
Place small dots of your chosen pastel polishes onto the nail.
Before they dry, use a small brush dipped in acetone or rubbing alcohol to gently dab and blend the colors together, creating that soft, diffused look.
Work on one nail at a time to ensure the polishes are workable.
Seal your dreamy creation with a glossy top coat to enhance the colors and give the design a smooth, blended finish.
Why This Stands Out
Watercolor Wonder is a stunningly beautiful and artistic manicure that is both soft and eye-catching.
It’s a sophisticated and elegant choice that showcases a delicate, creative touch.
This design stands out for its unique, non-traditional application technique and its beautiful, dreamy result.
It’s perfect for the artistic soul who wants a manicure that is truly a work of art.
Gradient Goals
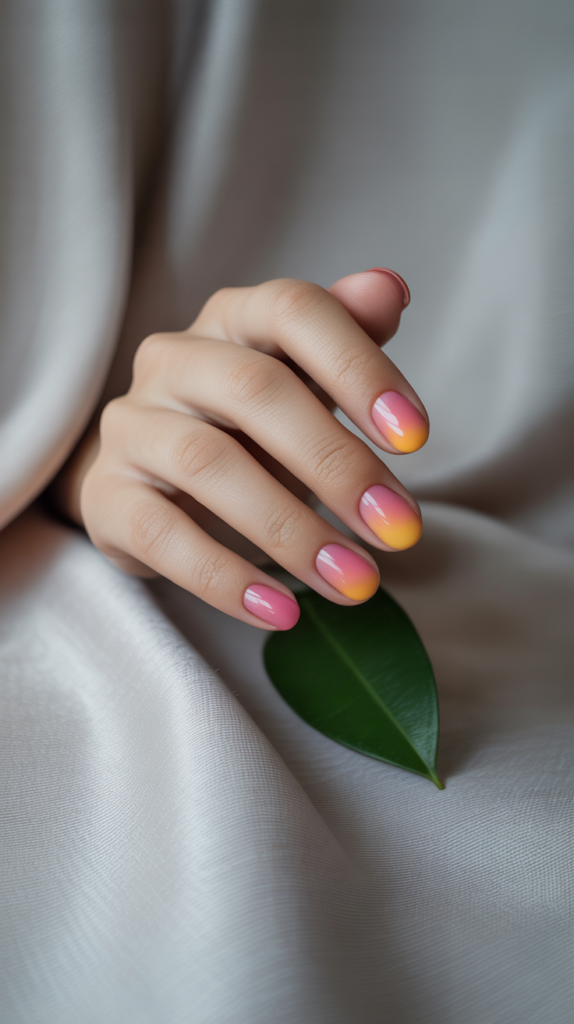
A smooth color transition, like a sunrise to represent early mornings or your school’s colors blending into each other, is both stunning and symbolic.
Design Features
The key feature of this design is the flawless, seamless transition from one color to another, known as a gradient or ombré effect.
This can be done with two or more colors, creating a beautiful and smooth color melt.
The color choices can be symbolic, such as the warm oranges and pinks of a sunrise for early school mornings, or you can use your school colors for a spirited yet stylish look.
The smooth blend is the most critical element of the design’s success.
How To Achieve This Look
After your base coat, paint a coat of the lightest color from your gradient onto all your nails.
While that dries, paint stripes of your chosen gradient colors directly onto a disposable makeup sponge, slightly overlapping them.
Gently dab the sponge onto your nail, rolling it slightly from side to side to blend the colors.
Repeat this process to build up the opacity and smoothness of the gradient.
Clean up the inevitable polish mess on the skin around your nail using a brush and acetone.
Finish with a generous layer of glossy top coat, which helps to further blend the colors and create a perfectly smooth finish.
Why This Stands Out
The Gradient Goals design is visually stunning and requires a skillful application, making it an impressive choice.
The smooth transition of colors is mesmerizing and aesthetically pleasing.
This manicure stands out for its professional and polished appearance.
It’s a versatile look that can be either soft and subtle or bold and vibrant, depending on your color choices.
Abstract Academia
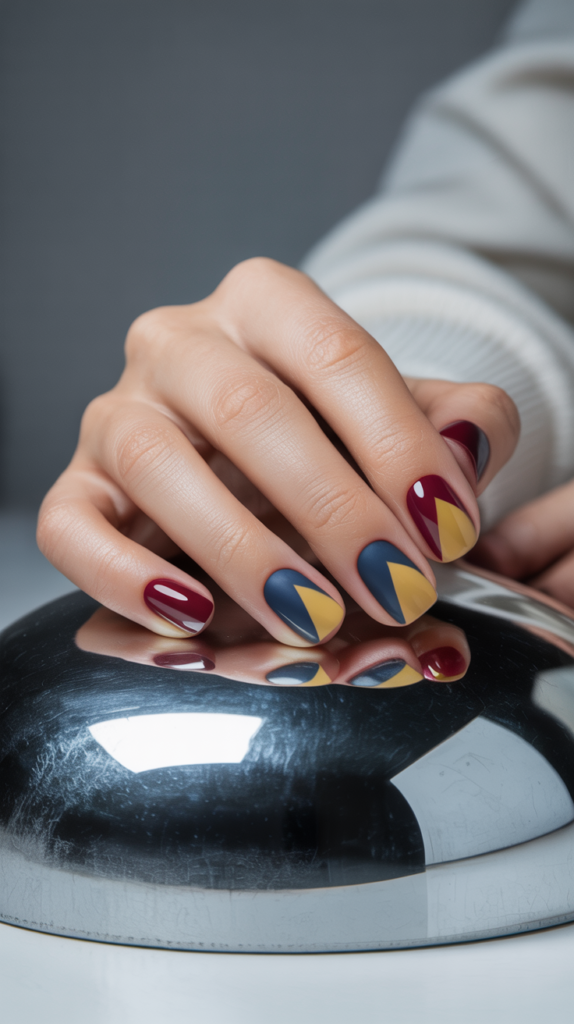
Use a scholarly color palette of burgundy, navy, and mustard yellow to create bold geometric shapes and lines for a modern, artistic vibe.
Design Features
This design is defined by its sophisticated color palette, featuring deep, scholarly tones like burgundy, navy, forest green, and mustard yellow.
It avoids literal representations in favor of a modern, artistic interpretation of the academic theme.
The artwork consists of bold geometric shapes, clean lines, and color-blocking.
The composition on each nail is different yet cohesive, creating a look that is both intellectual and high-fashion.
How To Achieve This Look
After your base coat, you can start by painting each nail with one of the colors from your academic palette as a base.
Let this dry completely.
Using thin nail art tape or striping tape, mask off different geometric shapes on your nails, such as triangles, rectangles, or sharp angles.
Paint within the taped-off sections with a contrasting color from your palette.
Carefully remove the tape while the polish is still wet to reveal crisp, clean lines.
You can also add thin lines in a metallic gold or silver for an extra touch of sophistication.
Seal with either a matte or glossy top coat.
Why This Stands Out
Abstract Academia is a chic and mature take on the back-to-school theme, perfect for the high school or college student with a refined sense of style.
It’s an artistic and thought-provoking design.
This manicure stands out for its sophisticated color palette and modern, graphic composition.
It’s a powerful and confident look that is both on-theme and incredibly fashionable.
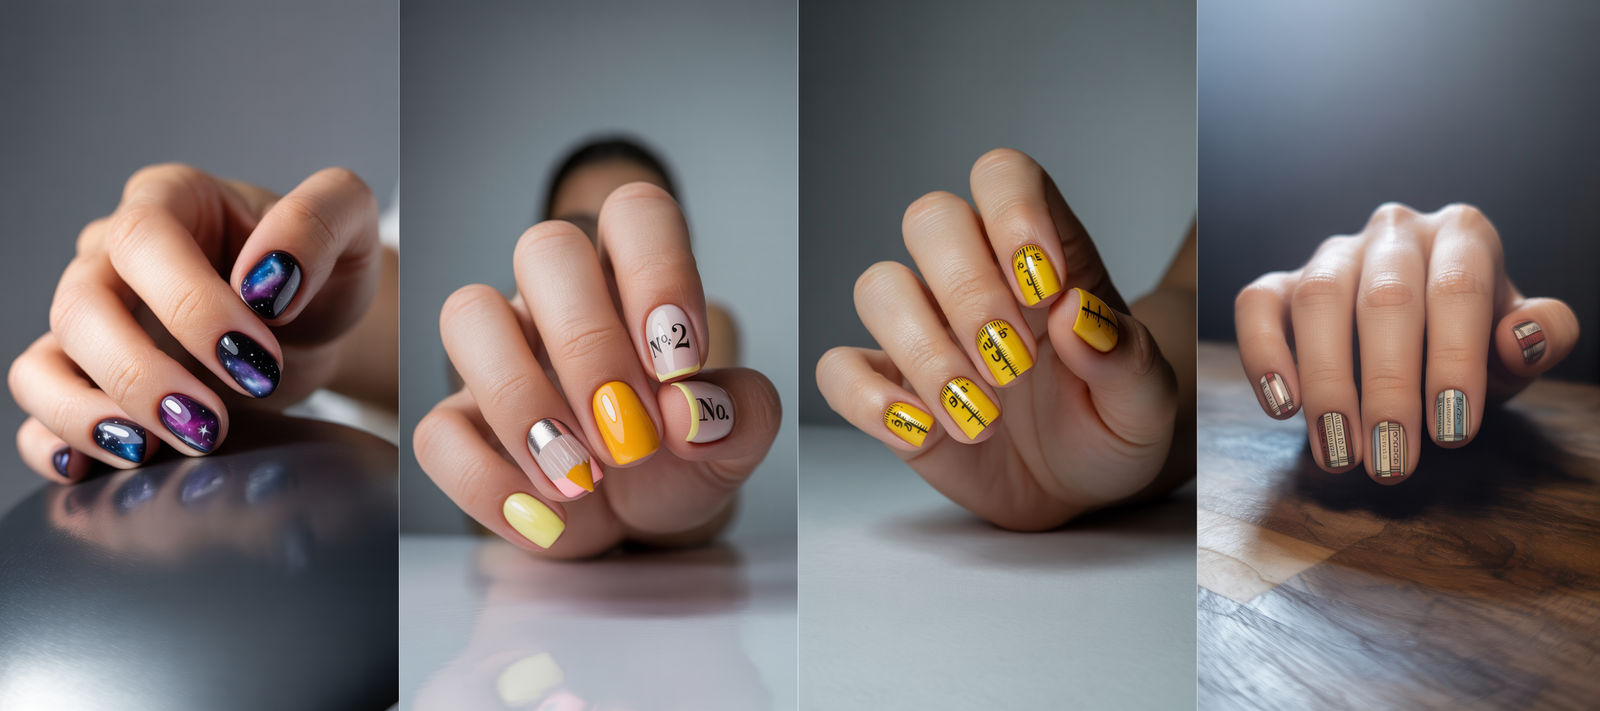
Galaxy Quest
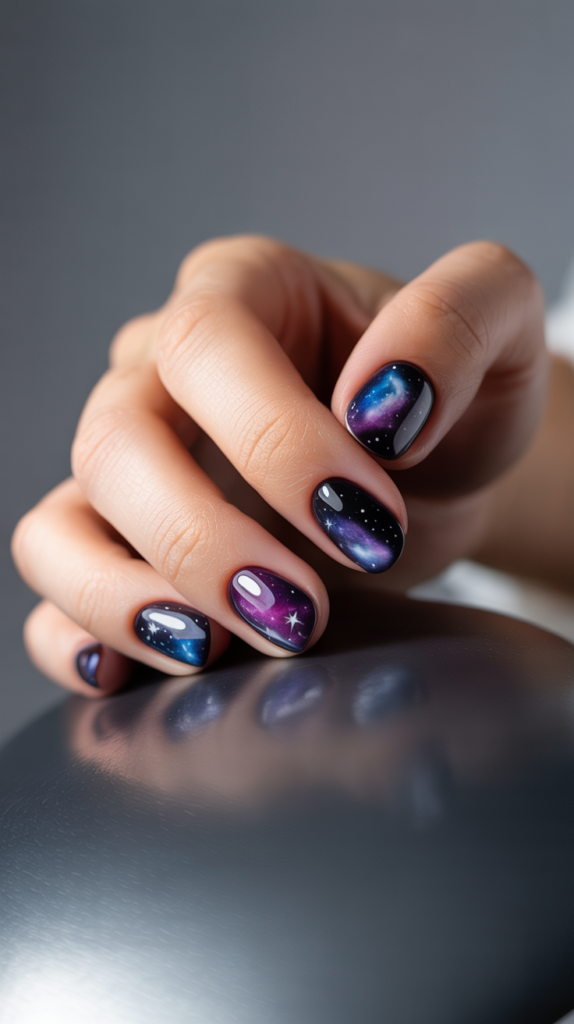
Dive into the vastness of knowledge with a detailed galaxy nail art design, complete with nebulas, stars, and deep space colors.
Design Features
This design is a detailed and mesmerizing depiction of outer space on your nails.
It starts with a deep black or navy blue base, representing the void of space.
The key features are the swirling nebulas, created with sponges and vibrant colors like purple, pink, and blue.
The look is completed with a dense scattering of tiny white stars and sometimes a touch of fine glitter for extra cosmic sparkle.
How To Achieve This Look
Begin with a base coat followed by two coats of a solid black or very dark navy blue polish.
Once dry, use a makeup sponge to dab on patches of purple, blue, and pink polish to create the nebula clouds.
You can layer the colors to create depth and dimension.
To create the stars, dip a toothpick or a very fine dotting tool in white polish and place tiny dots all over the nail.
For a final touch of magic, apply a thin coat of a scattered holographic or fine glitter top coat.
Finish with a thick, glossy top coat to encapsulate the design and create the illusion of looking deep into space.
Why This Stands Out
Galaxy Quest is an awe-inspiring and intricate design that symbolizes the vastness of knowledge and the infinite possibilities of learning.
It’s a truly captivating manicure that is both beautiful and meaningful.
This design stands out for its incredible depth, detail, and cosmic beauty.
It’s a perfect choice for the science lover or dreamer who wants a manicure that is out of this world.
The Perfect Nude
You can never go wrong with a clean, polished, and perfectly flattering nude manicure.
It’s sophisticated and always in style.
Design Features
The primary feature of this look is its elegant simplicity and flawless execution.
The design consists of a single, perfectly chosen nude polish that complements your skin tone.
The nails are impeccably shaped and groomed, and the polish application is smooth, opaque, and free of any streaks or bubbles.
The finish is typically a classic, high-gloss shine that looks healthy and polished.
How To Achieve This Look
The key to this look is preparation.
Start by carefully filing and shaping your nails, pushing back or trimming your cuticles, and buffing the nail surface for a smooth canvas.
Apply a ridge-filling base coat to ensure the final look is perfectly smooth.
Choose a nude polish that flatters your skin tone; some have pink undertones, while others have beige or peach undertones.
Apply two to three thin coats of the nude polish, allowing each coat to dry in between to prevent streaking.
Finish with a high-quality, long-lasting glossy top coat for that impeccable, sophisticated shine.
Why This Stands Out
The Perfect Nude stands out for its timeless elegance and understated sophistication.
In a sea of complex nail art, its simplicity is a powerful statement of confidence and polish.
This manicure is a go-to for any occasion because it is always appropriate, clean, and professional.
It’s a chic and minimalist choice that proves you don’t need bright colors or intricate designs to have beautiful, eye-catching nails.
Minimalist French
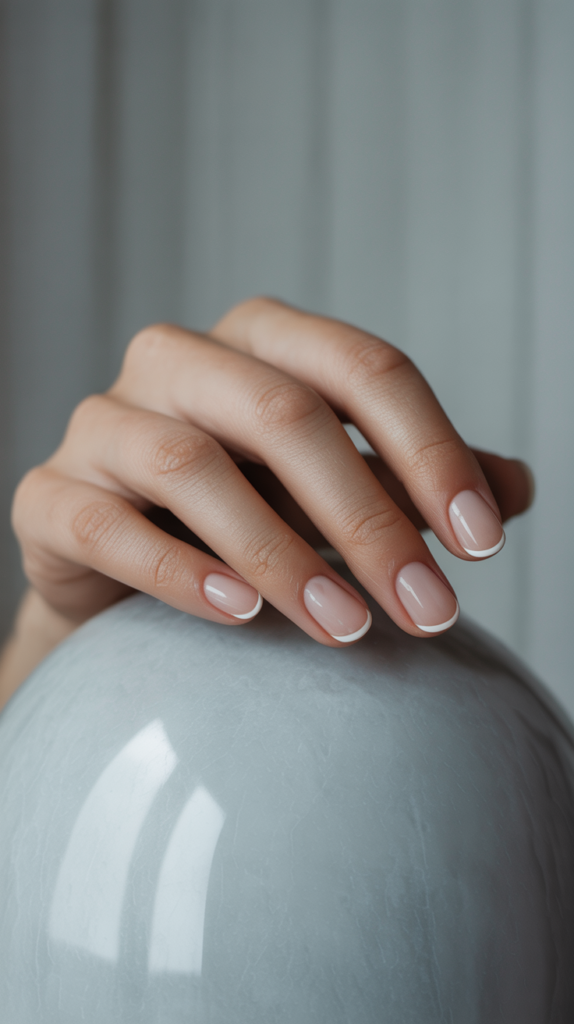
A modern take on a classic.
Opt for a super-thin, crisp white line at the tip of a natural-looking nail for a chic and understated look.
Design Features
This design is a delicate and refined update to the traditional French manicure.
It features a natural, sheer pink or nude base that enhances the look of the natural nail.
The defining characteristic is the “micro” or “skinny” French tip, which is a super-thin, crisp white line painted just along the very edge of the nail.
The look is clean, sharp, and incredibly chic.
How To Achieve This Look
Start with meticulous nail prep, ensuring your nails are perfectly shaped and your cuticles are neat.
Apply a sheer pink or nude base coat that gives your nails a healthy, polished glow.
Instead of using thick guide stickers, use a very fine, long striping brush for this look.
Dip the brush in white polish and, with a steady hand, paint a very thin line across the free edge of your nail.
Alternatively, you can paint the tip as usual and use a clean-up brush dipped in acetone to carve out the thin line from underneath.
Finish with a glossy top coat to seal the design and provide a beautiful shine.
Why This Stands Out
The Minimalist French manicure is the epitome of modern elegance.
It’s a subtle and sophisticated look that is both trendy and timeless.
This design stands out for its delicate precision and its “your nails but better” aesthetic.
It’s perfect for the student who wants a polished and put-together look that is effortlessly chic and understated.
Negative Space Notes

Use a clear base and add small, simple designs like a tiny book, a pencil, or an apple for a subtle and trendy nod to school.
Design Features
The core feature of this design is the use of “negative space,” where the natural, bare nail is a key component of the art.
The nail is coated with a clear or very sheer polish, keeping it looking clean and healthy.
The artwork consists of tiny, minimalist doodles or symbols related to school, such as a tiny open book, a single apple, or a small pencil.
These small designs are strategically placed, often near the cuticle or the corner of the nail.
How To Achieve This Look
Begin by ensuring your natural nails are perfectly groomed, as they will be on full display.
Apply a clear, glossy base coat to give your nails a healthy shine and a smooth surface.
Using a very fine-tipped nail art brush and your chosen colors, carefully paint your tiny school-themed designs onto the nail.
Because they are so small, precision is key.
You can place one small design on each nail or just on a single accent nail for an even more minimalist feel.
Finish with another layer of glossy top coat to protect the tiny art and enhance the overall shine.
Why This Stands Out
Negative Space Notes is a trendy and modern design that is perfect for the minimalist at heart.
It’s a subtle and clever way to participate in the back-to-school theme without committing to a full-coverage manicure.
This look stands out for its chic, airy feel and its “less is more” approach.
It’s a stylish and understated choice that is both creative and effortlessly cool.
Matte-nificent
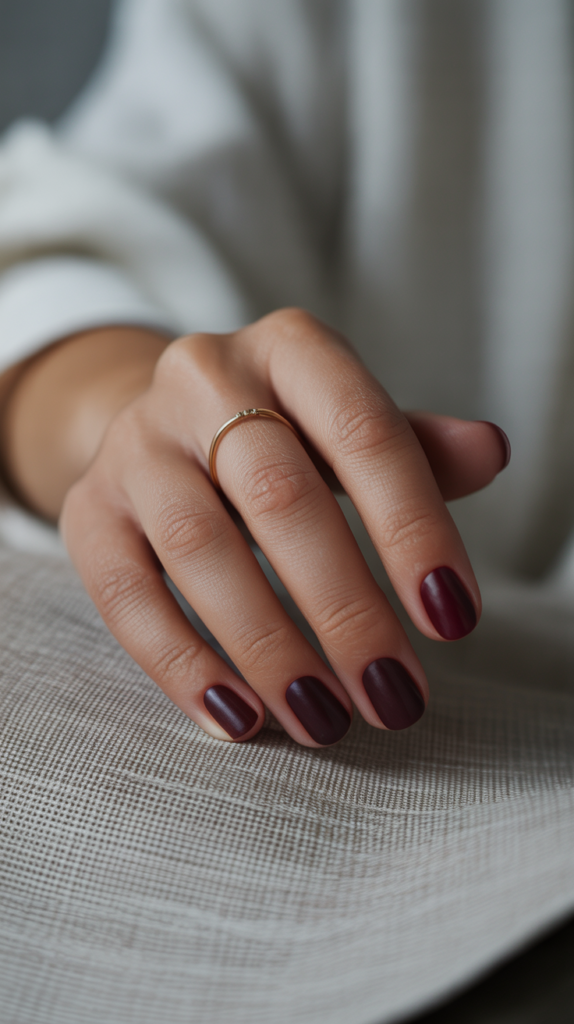
Choose your favorite fall colors—like deep maroon, forest green, or navy blue—and finish with a matte top coat for a chic and modern look.
Design Features
This design’s primary feature is its unique, non-reflective velvety finish.
The look focuses on rich, sophisticated colors often associated with the autumn season, such as deep maroon, forest green, navy blue, or burnt orange.
The beauty of this manicure lies in its simplicity and its focus on texture.
The solid, matte color creates a bold yet understated statement that is incredibly chic.
How To Achieve This Look
Start with a smoothing base coat to prevent any imperfections from showing through the matte finish.
Apply two coats of your chosen rich, autumnal nail polish color.
Allow the color to dry completely.
The final, transformative step is to apply a specialty matte top coat over the polish.
Watch as the matte top coat instantly transforms the glossy color into a flat, velvety finish.
Be aware that matte top coats can sometimes show oils from lotions, so keep your nails clean to maintain the effect.
Why This Stands Out
The Matte-nificent design is effortlessly cool and modern, offering a sophisticated alternative to the traditional glossy finish.
The matte texture gives deep colors an incredible richness and depth.
This manicure stands out for its edgy yet elegant vibe.
It’s a simple but powerful way to make a fashion-forward statement as you head back to school.
One-Word Inspiration
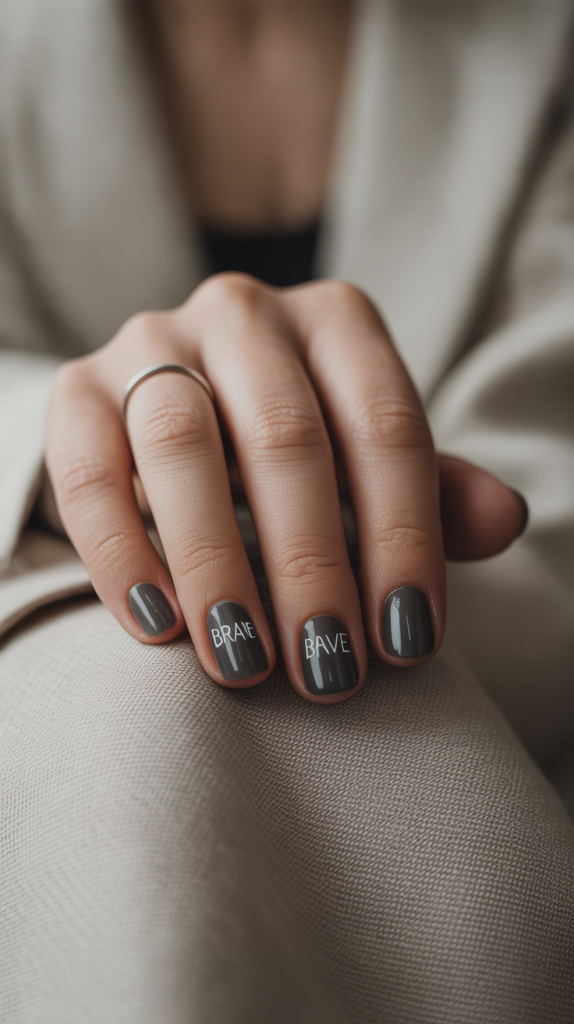
A single, powerful word like “Focus,” “Future,” or “Brave” painted in a minimalist font on an accent nail can be a personal and motivating reminder.
Design Features
This design is characterized by its profound simplicity and its powerful, personal message.
Most nails are painted in a clean, neutral color like a soft nude, pale gray, or classic white.
The focal point is a single accent nail which features one inspirational word, such as “Focus,” “Brave,” “Future,” or “Shine.” The word is typically written in a clean, minimalist font using a contrasting black or metallic polish.
How To Achieve This Look
After your base coat, paint your non-accent nails with your chosen neutral shade.
On your accent nail, apply the same neutral color or a slightly different one to make it stand out.
Once the base is completely dry, use a very fine-tipped nail art brush or a nail art pen to carefully write your chosen word.
You can also use pre-made nail decals or stencils for a perfectly clean font.
Take your time to ensure the lettering is neat and legible.
Seal the design with a glossy or matte top coat, depending on your preferred finish.
Why This Stands Out
This design is a beautiful and intimate form of self-expression and motivation.
It serves as a constant, personal reminder of your goals and inner strength every time you look at your hands.
One-Word Inspiration stands out for its meaningful and minimalist elegance.
It’s a sophisticated and empowering choice that is much more than just a pretty manicure.
Delicate Dots
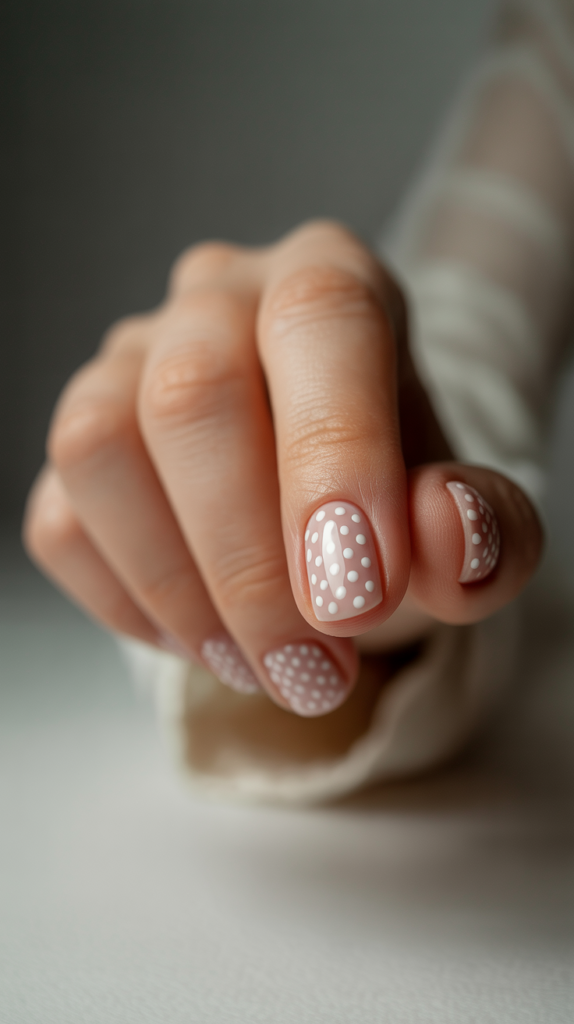
A simple polka dot pattern over a neutral or colored base is playful, easy to do, and always looks cute.
Design Features
The defining feature of this look is its classic and charming polka dot pattern.
The design can be versatile, with options for tiny, delicate micro-dots or larger, bolder spots.
The color combination is key; you can create a classic look with black or white dots on a colored base, or a more subtle version with white dots on a nude base.
The pattern is typically uniform and evenly spaced for a clean, cohesive appearance.
How To Achieve This Look
After applying your base coat, paint your nails with two coats of your chosen base color and let it dry completely.
Pour a small amount of your dotting polish onto a piece of foil or a palette.
Dip the end of a dotting tool, the head of a pin, or the rounded end of a bobby pin into the polish.
Carefully place the dots onto your nail, reloading your tool with polish every few dots to ensure they are uniform in size.
You can arrange the dots in straight lines or a staggered pattern.
Seal your playful design with a glossy top coat to give it a smooth and shiny finish.
Why This Stands Out
The Delicate Dots design is timelessly cheerful and playful, adding a touch of fun to any look.
It’s an easy and accessible nail art option that always looks put-together and cute.
This manicure stands out for its sweet, retro-inspired charm and its incredible versatility.
It’s a simple yet effective way to show off your personality and start the school year with a bit of whimsy.
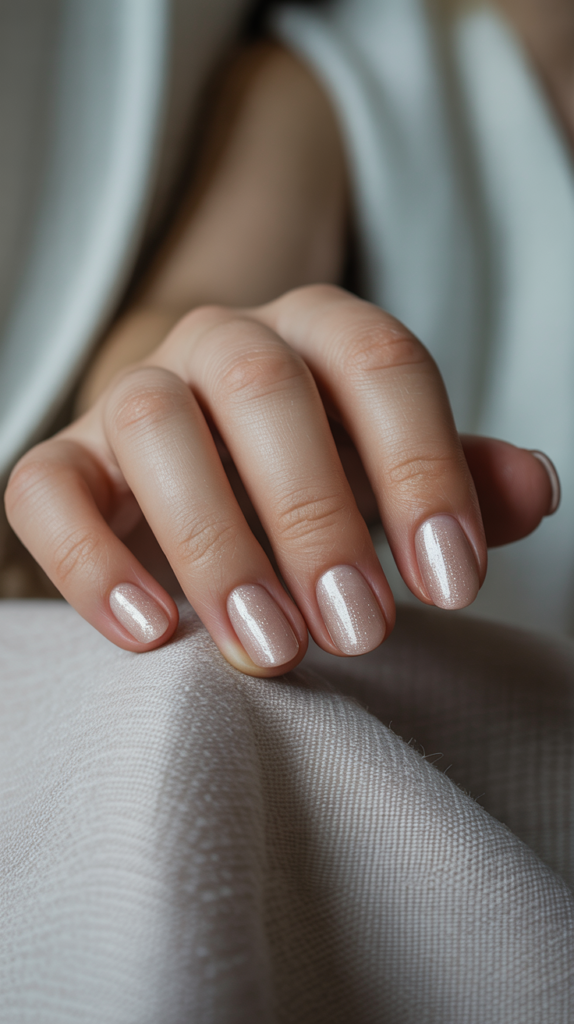
Subtle Shimmer
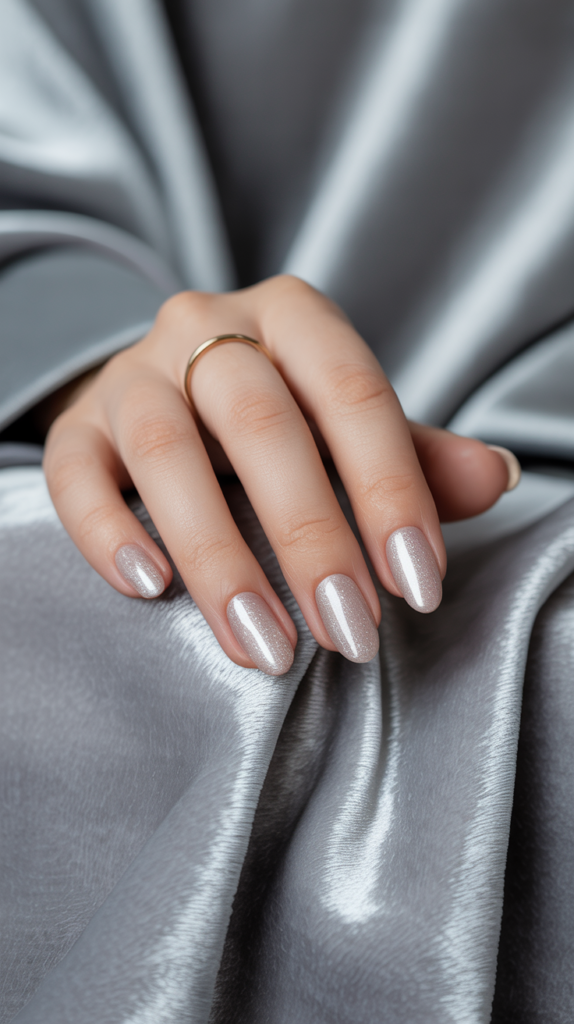
A sheer polish with a hint of shimmer or glitter can catch the light and add a touch of magic to your school day without being distracting.
Design Features
This design’s beauty lies in its understated sparkle.
It features a sheer, often milky or translucent base polish that is infused with very fine, micro-shimmer or subtle iridescent glitter.
The effect is not overtly glittery but rather a delicate, ethereal glow that catches the light as you move your hands.
It enhances the natural nail while adding a touch of quiet magic.
How To Achieve This Look
Start with perfectly groomed nails, as the sheer polish will not hide any imperfections.
Apply a smoothing or ridge-filling base coat to create a flawless canvas.
Apply one to three thin coats of your chosen sheer shimmer polish, depending on the level of opacity and sparkle you desire.
Each thin coat will build up the delicate shimmer for a more noticeable effect.
The key is to keep the application smooth and not too thick.
Finish with a high-gloss top coat to enhance the shimmer and give your nails a healthy, luminous glow.
Why This Stands Out
Subtle Shimmer is the perfect manicure for when you want a little something special without being over-the-top.
It’s an elegant, professional, and enchanting look.
This design stands out for its delicate, “lit-from-within” radiance.
It’s a beautiful and sophisticated choice that adds a touch of magic to your everyday routine, making you feel polished and special.
Sweater Weather Texture
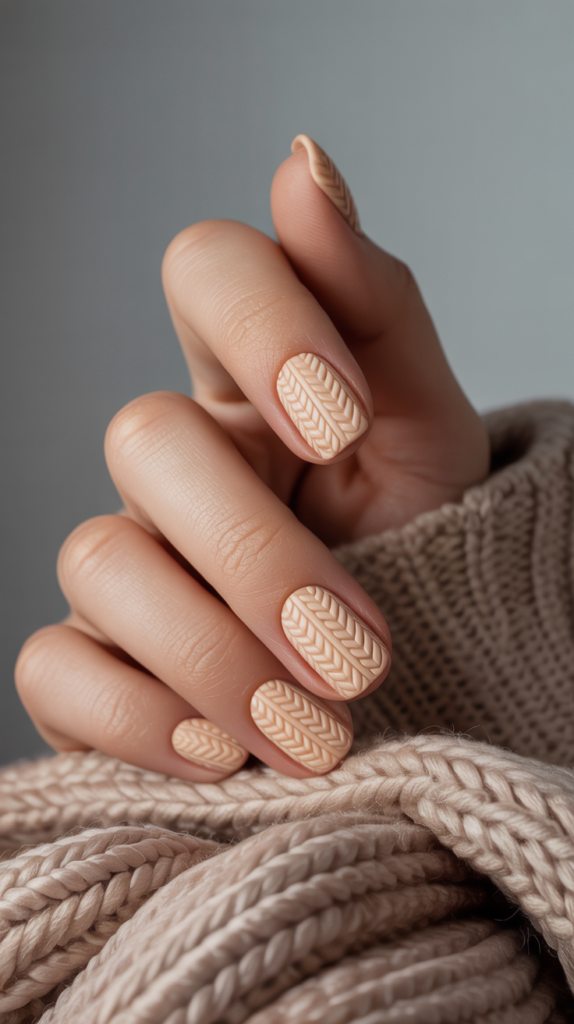
Mimic the cozy feel of your favorite fall sweater with a textured polish or a cable-knit nail art design.
Design Features
This design is all about capturing the cozy, tactile sensation of a warm sweater.
This can be achieved in two ways: with a textured polish or with a three-dimensional, hand-painted cable-knit pattern.
The cable-knit design features raised, interwoven lines that perfectly mimic the pattern of a classic sweater.
The look is often done in cozy, creamy colors like off-white, beige, or soft gray and finished with a matte top coat to enhance the fabric-like feel.
How To Achieve This Look
After a base coat, paint your nails with two coats of a creamy, sweater-like color.
For the 3D effect, you will build up the design using the same polish or a slightly thicker gel polish.
Using a fine nail art brush, carefully paint the cable-knit pattern onto the nail.
Let it dry, then trace over the same lines again to build up their height and create the raised, 3D effect.
You may need to repeat the tracing process two or three times to get the desired texture.
Finish the look with a matte top coat, which is essential for giving the nails that soft, yarn-like appearance.
Why This Stands Out
Sweater Weather Texture is an incredibly unique and cozy design, perfect for the first crisp days of fall semester.
It’s a tactile and visually interesting manicure that is sure to garner compliments.
This look stands out for its innovative 3D effect and its comforting, seasonal theme.
It’s a creative and stylish way to embrace the changing seasons and feel cozy from your head to your fingertips.
Half-Moon Mani
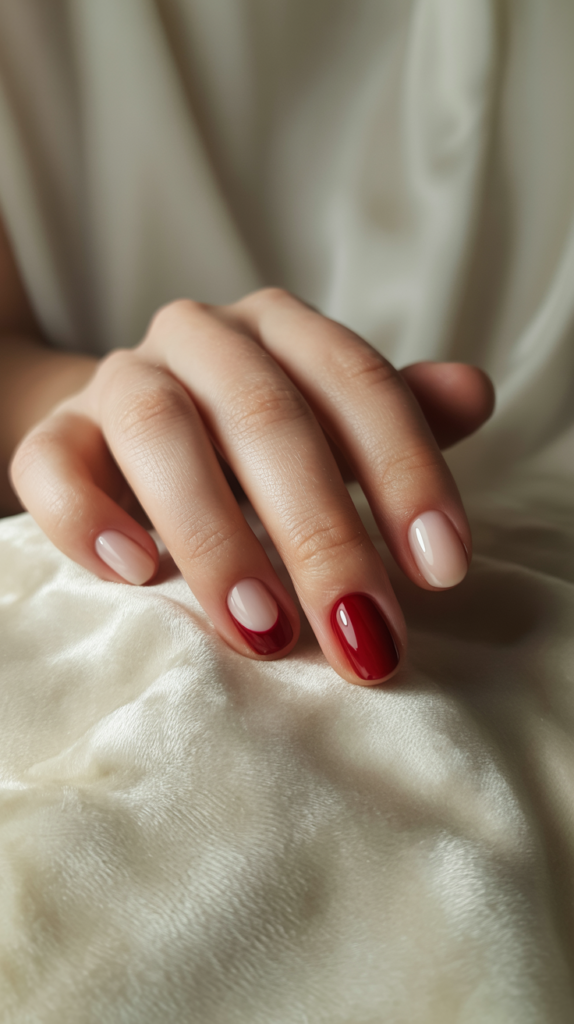
A classic vintage look that’s making a comeback.
Leave the half-moon area at the base of your nail bare or paint it a contrasting color for a stylish and sophisticated design.
Design Features
This design is a chic, vintage-inspired look that focuses on the lunula, the half-moon shape at the base of the nail.
The main part of the nail is painted a solid color, while the half-moon area is either left bare or painted in a contrasting shade.
The key to this look is the crisp, perfectly curved line that separates the two sections.
The color combinations can be classic, like red and nude, or modern and bold, like navy and metallic silver.
How To Achieve This Look
A simple way to achieve this look is by using paper reinforcement stickers, the kind used for hole-punched paper.
After your base coat, place a sticker at the base of your nail, covering the area you want to keep bare or paint later.
Paint the rest of your nail with two coats of your main color.
Carefully remove the sticker while the polish is still slightly wet to ensure a clean, crisp line.
If you are painting the half-moon a different color, you can do so with a fine brush after the main color has dried.
Finish the entire nail with a glossy top coat to seal the design and create a smooth, polished look.
Why This Stands Out
The Half-Moon Mani is a nod to old-school glamour that feels incredibly modern and sophisticated today.
It’s an elegant and graphic design that is both unique and timeless.
This manicure stands out for its clean lines and its interesting use of color and negative space.
It’s a polished and fashionable choice for the student who appreciates a touch of vintage flair in their modern style.
Conclusion
As we have seen through these thirty-five unique designs, your nails can be a powerful canvas for self-expression.
The start of a new school year is the perfect time to showcase your creativity and personal style.Whether you choose a simple, chic design or an intricate, artistic masterpiece, the most important thing is to have fun with it.
Let your manicure be a small source of joy and confidence as you walk through the hallways.