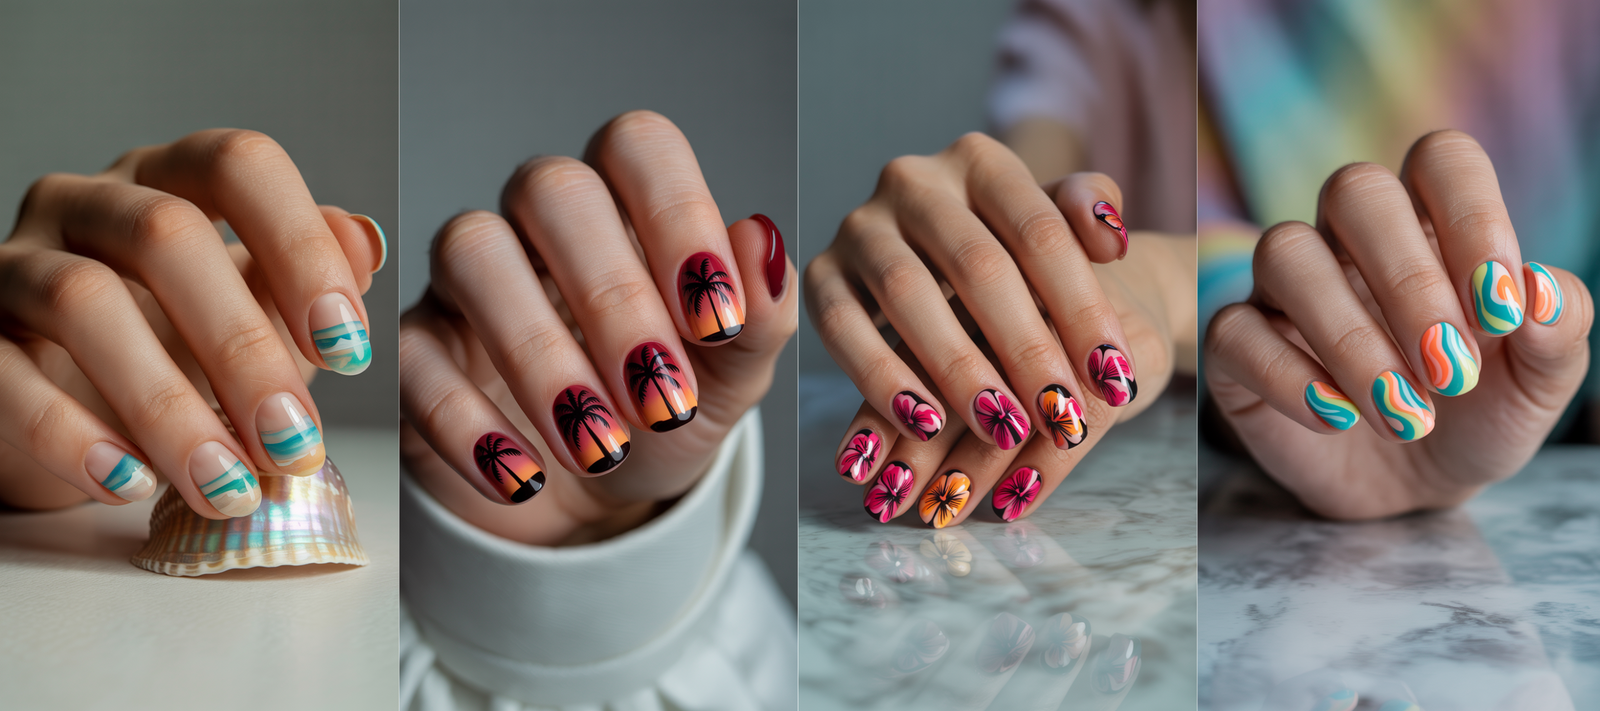
Summer 2025 is on the horizon, and with it comes the anticipation of sun-drenched days and breezy beach outings.
It is the perfect season to refresh your style, and what better way to do so than with stunning nail art.
Your nails can be miniature canvases, reflecting the vibrant energy and serene beauty of the seaside.
This year, beach nail designs are all about creativity, blending timeless oceanic motifs with fresh, modern aesthetics.
Whether you prefer bold tropical statements or subtle sandy shimmers, there is a perfect design waiting for you.
Get ready to dive into an ocean of inspiration as we explore thirty-five eye-aweing beach nail designs.
These curated looks are sure to make your fingertips the talk of the summer.
Prepare to be inspired and find the perfect nail art to complement your sun-kissed glow.
Realistic Ocean Waves

Intricate wave art crashing onto a sandy beige base, perhaps with a touch of glitter for a sun-kissed water effect.
Design Features
This captivating nail design meticulously recreates the dynamic movement of ocean waves with remarkable realism.
The primary colors used are varying shades of blue, from deep navy to light turquoise, seamlessly blended with white.
A sandy beige or soft nude polish often forms the base, representing the shore meeting the sea.
To enhance the sun-kissed water effect, a subtle sprinkle of fine silver or iridescent glitter is typically incorporated.
The waves themselves are often depicted with a foamy texture, achieved through skillful layering or specialized techniques.
This creates a sense of depth and motion, making the nails look like miniature seascapes.
How To Achieve This Look
Achieving this hyperrealistic look often involves the expertise of a skilled nail artist familiar with freehand painting.
They would typically start by applying the sandy beige base color, ensuring it is smooth and even.
Next, using fine brushes and various blue and white polishes, the artist carefully paints the wave patterns.
Layering different shades and creating highlights and shadows are crucial for the three-dimensional effect.
For the sun-kissed sparkle, a light dusting of cosmetic-grade glitter can be applied while the polish is still tacky.
Finally, a high-gloss top coat is essential to seal the design and enhance its watery appearance.
Why This Stands Out
Realistic Ocean Waves stand out due to their incredible artistry and the serene yet powerful imagery they evoke.
The design is a conversation starter, drawing admiration for its detailed execution and lifelike appearance.
It perfectly encapsulates the essence of the beach, making it an ideal choice for summer vacations or any time you want to carry a piece of the ocean with you.
The touch of glitter adds a playful sophistication, catching the light beautifully.
This design is both elegant and thematic, appealing to those who appreciate intricate nail art.
It transforms your nails into a captivating visual tribute to the sea’s mesmerizing beauty.
Deep Sea Blues With Foil Accents

A mix of navy and teal polished with silver or gold foil lines mimicking light reflection on deep waters.
Design Features
This nail design plunges into the mysterious beauty of the deep sea, utilizing a rich palette of navy and teal.
These colors are often swirled or blended together to create a sense of depth and movement.
The defining characteristic of this look is the strategic placement of metallic foil accents, typically in silver or gold.
These thin foil lines or flakes are designed to mimic the way sunlight fractures and reflects in deep waters.
The overall finish is usually glossy, enhancing the aquatic illusion and the brilliance of the foil.
The combination of dark blues and metallic shimmer creates a sophisticated and enigmatic allure.
How To Achieve This Look
To create Deep Sea Blues with Foil Accents, one would begin by applying layers of navy and teal polish.
These can be applied in a marbled fashion or as a smooth gradient for a more subtle transition.
Once the base colors are dry or cured, small pieces of nail foil are carefully applied.
This can be done using foil glue or by pressing the foil onto a slightly tacky layer of polish.
The foil should be applied sparingly to create delicate lines or scattered flecks rather than full coverage.
A clear top coat is then applied to seal the foil and give the nails a polished, luminous shine.
Why This Stands Out
This design stands out for its elegant and dramatic interpretation of the ocean’s depths.
The contrast between the dark, moody blues and the bright, reflective foil is visually striking.
It offers a more abstract and artistic take on beach-themed nails, perfect for evening events or a sophisticated summer look.
The foil accents add a touch of luxury and intrigue, making the nails appear like precious gems.
This style is ideal for those who desire a beachy vibe that is both chic and subtly mysterious.
It captures the captivating allure of the ocean’s unexplored regions.
Turquoise Water Marble

Swirls of turquoise, aqua, and white to create a mesmerizing water marble effect on each nail.
Design Features
The Turquoise Water Marble nail design is characterized by its fluid, swirling patterns that emulate calm, clear ocean waters.
It primarily uses shades of turquoise, aqua, and white to achieve this refreshing look.
Each nail showcases a unique marble pattern, ensuring that no two nails are exactly alike.
This technique creates an organic and free-flowing aesthetic, much like the natural movement of water.
The finish is typically very glossy, enhancing the watery illusion and making the colors appear more vibrant.
The interplay of light and dark blues with white creates a sense of depth and clarity.
How To Achieve This Look
The water marble technique itself requires a bit of practice and patience.
It involves dropping concentric circles of the chosen nail polish colors onto the surface of room-temperature water.
A tool like a toothpick or a specialized marbling tool is then used to gently drag through the colors, creating the desired swirl patterns.
The finger is then dipped into the water, allowing the polish film to adhere to the nail.
After cleaning up the excess polish from the skin, a top coat is applied to protect the design.
Alternatively, a similar effect can be achieved by skilled nail artists using fine brushes to paint swirl patterns directly onto the nail.
Why This Stands Out
This design is exceptionally eye-catching due to its intricate and unique patterns on every nail.
The vibrant turquoise and aqua hues are inherently summery and evoke feelings of tropical lagoons.
The water marble effect has a mesmerizing quality, drawing attention to the delicate swirls and color blends.
It is a playful yet elegant choice that perfectly complements beachwear and sunny dispositions.
Its organic and fluid appearance makes it a refreshing alternative to more structured designs.
It truly captures the essence of tranquil, shimmering waters in a very artistic way.
Seashell And Starfish Accents

Nude or light blue base with tiny, delicate varlak 3D seashell and starfish embellishments on accent nails.
Design Features
This charming nail design features a subtle and elegant base, typically a soft nude, sandy beige, or pale sky blue polish.
This understated background allows the delicate accent pieces to take center stage.
The main attraction is the use of tiny, three-dimensional seashell and starfish embellishments.
These are usually applied to one or two accent nails per hand to maintain a balanced and sophisticated look.
The embellishments themselves can be made from various materials, including resin, metal, or even actual tiny, ethically sourced shell fragments.
Sometimes, small pearls or microbeads are added to further enhance the oceanic theme.
How To Achieve This Look
To achieve this look, begin by applying the chosen base color smoothly across all nails.
Once the base is completely dry or cured, the 3D embellishments can be applied.
Nail glue or a strong gel adhesive is used to secure the tiny seashells, starfish, or other oceanic charms onto the accent nails.
Care must be taken to place them aesthetically, often near the cuticle or along one side of the nail.
After the embellishments are firmly in place, a top coat is carefully applied around them to seal the design.
Some prefer to encapsulate smaller, flatter charms within a layer of clear gel for durability.
Why This Stands Out
Seashell and Starfish Accents stand out for their delicate charm and understated elegance.
The 3D elements add a tactile and visual interest that is both playful and sophisticated.
This design offers a subtle nod to the beach theme without being overly bold or graphic.
It is perfect for those who appreciate minimalist nail art with a whimsical touch, suitable for weddings or everyday summer wear.
The contrast between the smooth base and the textured embellishments is particularly appealing.
It transforms the nails into miniature treasure troves, reminiscent of keepsakes found along the shoreline.
“Message In A Bottle” Nail

One clear nail with tiny gold glitter “sand” and a miniature rolled-up paper scroll detail encapsulated.
Design Features
This imaginative nail design centers around a single accent nail that tells a whimsical story.
The accent nail features a clear or slightly tinted translucent polish, creating a “bottle” effect.
At the tip or base of this clear nail, tiny gold or beige glitter is carefully placed to resemble “sand.” The most captivating element is a miniature, rolled-up paper scroll detail, seemingly encapsulated within the nail.
The other nails are typically painted in a complementary color, such as a soft seafoam green or sandy beige.
This ensures the “message in a bottle” nail remains the focal point of the design.
How To Achieve This Look
Creating this intricate design requires precision and is often best executed using gel polish for encapsulation.
After preparing the accent nail, a thin layer of clear gel is applied.
The “sand” glitter is then carefully placed, followed by the miniature paper scroll, which must be tiny and sealed to prevent damage.
More layers of clear gel are applied over these elements to fully encapsulate them, creating a smooth finish.
The gel is cured between layers, and a final top coat ensures durability and shine.
The other nails are painted with the chosen solid color and finished with a top coat.
Why This Stands Out
The “Message in a Bottle” nail is exceptionally unique and stands out due to its storytelling element and intricate detail.
It is a conversation starter, sparking curiosity and admiration for its creativity.
This design is perfect for those who love whimsical and artistic nail art that goes beyond simple patterns.
It adds a touch of romance and adventure to your summer look, evoking dreams of desert islands and hidden treasures.
The encapsulated elements create a fascinating three-dimensional effect, making the accent nail a true work of art.
It is a playful and memorable way to celebrate the spirit of summer.
Shimmering Fish Scales

Iridescent or holographic scale patterns, possibly using mermaid-effect chrome powders.
Design Features
This enchanting nail design captures the magical allure of mermaid tails and shimmering fish scales.
It is characterized by a repeating scale pattern that covers each nail or is used on accent nails.
The key to this look is the use of iridescent or holographic polishes or powders.
These create a multi-tonal shimmer that changes color depending on the light and angle, much like real fish scales.
Colors often seen include blues, greens, purples, and pinks, often blended or layered for a more complex effect.
Mermaid-effect chrome powders are particularly popular for achieving an intense, reflective scale finish.
How To Achieve This Look
There are several ways to achieve the shimmering fish scale pattern.
One method involves hand-painting the scales using a fine nail art brush and various iridescent polishes.
Another popular technique is to use nail stencils or vinyls specifically designed with a scale pattern.
These are applied over a base color, and another color is painted or sponged over the stencil before it is removed.
For the most intense shimmer, chrome powders can be burnished onto a cured gel top coat.
A scale pattern can then be created by painting with a gel polish and then applying the chrome powder, or by using a stamping plate with a scale design.
Why This Stands Out
Shimmering Fish Scales are incredibly eye-catching due to their captivating iridescence and magical theme.
The way the colors shift and play with the light is mesmerizing and truly stands out.
This design is perfect for anyone embracing their inner mermaid or looking for a fantasy-inspired summer look.
It is both playful and glamorous, suitable for beach parties or festivals.
The intricate scale pattern adds a beautiful texture and depth to the nails.
It is a bold statement that showcases a love for vibrant colors and enchanting effects.
Coral Reef Brights

Vibrant coral, orange, and pink shades with delicate white “coral branch” designs.
Design Features
This lively nail design draws inspiration from the vibrant colors and intricate structures of coral reefs.
It features a base of bright, warm shades such as vivid coral, sunny orange, and hot pink.
These base colors can be applied as solid coats, blended in an ombre effect, or marbled together.
The defining detail is the addition of delicate, white “coral branch” patterns painted over the bright background.
The white coral designs are typically fine and intricate, mimicking the organic, branching shapes of real coral.
This contrast between the bright base and the white details creates a striking visual impact.
How To Achieve This Look
To create this look, begin by applying the vibrant base colors to the nails.
Allow them to dry completely or cure if using gel polish.
Using a very fine nail art brush and opaque white polish, carefully hand-paint the coral branch patterns.
The branches should be delicate and varied, spreading organically across the nail surface.
For added dimension, some artists might use a slightly raised white gel for the coral.
A glossy top coat is then applied to protect the intricate design and enhance the brightness of the colors.
Why This Stands Out
Coral Reef Brights stand out for their cheerful and energetic color palette, perfectly embodying summer vibrancy.
The delicate white coral patterns add an element of elegance and intricacy to the bold background.
This design is a beautiful tribute to marine life and the stunning beauty of coral reefs.
It is an excellent choice for those who love colorful, nature-inspired nail art.
The contrast between the bright hues and the white detailing makes this design pop.
It is both playful and sophisticated, making your nails a vibrant focal point.
Jellyfish Glow

Sheer, translucent nails with ethereal jellyfish painted in white or iridescent polish, perhaps with glow-in-the-dark details.
Design Features
This mystical nail design aims to capture the ethereal and bioluminescent beauty of jellyfish.
It typically starts with a sheer, translucent base polish, often in pale blue, lavender, or clear, to mimic the ocean’s expanse.
The stars of the show are the delicately painted jellyfish, usually rendered in opaque white or shimmery iridescent polish.
Their characteristic bell shape and long, flowing tentacles are key features.
To enhance the otherworldly glow, some designs incorporate glow-in-the-dark polish for the jellyfish or as subtle accents.
This makes the nails truly come alive in low-light conditions.
How To Achieve This Look
Achieving the Jellyfish Glow look begins with applying the sheer, translucent base color.
Several thin coats may be needed to build up the desired level of translucency.
Next, using a fine nail art brush, the jellyfish are carefully painted onto the nails.
White polish creates a classic look, while iridescent polishes add a magical shimmer.
If using glow-in-the-dark elements, this polish is applied to the jellyfish bodies or tentacles.
Finally, a glossy top coat seals the design and adds to the watery, ethereal effect.
Why This Stands Out
This design stands out for its unique and ethereal subject matter, offering a dreamlike quality.
The translucent base combined with the delicate jellyfish creates a sense of depth and mystery.
The potential addition of glow-in-the-dark details makes this design particularly captivating and fun, especially for evening events or beach bonfires.
It is a sophisticated yet whimsical choice.
It appeals to those who appreciate artistic and imaginative nail art that tells a subtle story.
The Jellyfish Glow nails are like carrying a piece of the ocean’s magic at your fingertips.
Blue Lagoon Ombre

A gradient from deep blue at the cuticle to a sparkling clear turquoise at the tip.
Design Features
The Blue Lagoon Ombre design beautifully captures the transition of water colors found in a tropical lagoon.
It features a smooth gradient that starts with a deep, rich blue at the cuticle area.
This deep blue gradually lightens and transitions into a sparkling, clear turquoise or aqua blue towards the tip of the nail.
The “sparkling” effect is often achieved by incorporating fine glitter into the lighter blue polish.
The blend between the colors is seamless, creating a serene and captivating visual effect.
The overall finish is usually very glossy to enhance the watery, luminous quality of the design.
How To Achieve This Look
To create a flawless ombre effect, a makeup sponge is often the preferred tool.
After applying a base coat, the deep blue and sparkling turquoise polishes are painted in stripes directly onto the sponge.
The sponge is then gently dabbed onto the nail, transferring the colors and creating the gradient.
This process may need to be repeated a couple of times to achieve the desired opacity and blend.
Careful cleanup around the cuticles is necessary, followed by a generous layer of high-gloss top coat.
This not only protects the ombre but also helps to further smooth out the transition between colors.
Why This Stands Out
This design is striking due to its beautiful and smooth color transition, reminiscent of pristine tropical waters.
The gradient effect is inherently elegant and visually soothing.
The addition of sparkle to the turquoise tip adds a touch of magic and mimics the way sunlight dances on the water’s surface.
It is a sophisticated take on beach-themed nails, suitable for any summer occasion.
The Blue Lagoon Ombre is both refreshing and glamorous, making your nails look like they have been dipped into a crystal-clear paradise.
It is a timeless summer look that exudes tranquility.
Sea Glass Effect

Matte, translucent pastels (seafoam green, soft blue, pale lavender) that mimic the look of worn sea glass.
Design Features
The Sea Glass Effect nail design aims to replicate the soft, frosted appearance of sea glass pieces found on the beach.
It utilizes translucent pastel polishes in shades like seafoam green, soft sky blue, pale lavender, or cloudy white.
A key characteristic of this look is its matte finish, which is crucial for achieving the worn, frosted texture of real sea glass.
The colors are often slightly muted and have a milky translucency.
Each nail can be a single pastel shade, or different pastels can be used on different nails for a subtly varied look.
The edges of the nails might even be slightly rounded to enhance the “tumbled” sea glass feel.
How To Achieve This Look
To achieve the Sea Glass Effect, start by applying a few thin coats of your chosen translucent pastel polish.
Building the color in thin layers helps maintain the desired sheerness.
Once the color coats are dry, the magic happens with the application of a matte top coat.
This instantly transforms the glossy polish into a soft, frosted finish that mimics sea glass.
For an even more authentic look, some might lightly buff the matte top coat once it’s fully dry to create an ultra-smooth, velvety texture.
Precision in application ensures a clean, sophisticated outcome.
Why This Stands Out
This design stands out for its unique texture and subtle, sophisticated beauty.
The matte finish combined with translucent pastels creates an ethereal and understated elegance.
It is a refreshing departure from high-gloss summer nails, offering a soft and calming aesthetic.
The Sea Glass Effect is perfect for those who appreciate minimalist designs with a touch of nature-inspired artistry.
This look is incredibly versatile, complementing both casual beachwear and more dressed-up summer outfits.
It evokes a sense of nostalgia and the simple beauty of beachcombing treasures.
Sunset Gradient

Smooth ombre from fiery red to orange, yellow, and a hint of purple, like a summer sunset.
Design Features
The Sunset Gradient nail design vividly captures the breathtaking beauty of a summer sunset.
It features a seamless ombre transition of warm, fiery colors across the nail.
Typically, the gradient starts with a deep fiery red or a rich magenta near the cuticle.
This then blends smoothly into vibrant orange, followed by a sunny yellow, and often finishes with a hint of soft purple or lavender at the tip.
The blend between these colors is crucial, aiming for a soft, diffused look reminiscent of the sky at dusk.
A glossy top coat is usually applied to enhance the vibrancy and depth of the colors.
How To Achieve This Look
Creating a smooth multi-color gradient like a sunset often involves using a makeup sponge.
The chosen polish colors are painted in horizontal stripes onto the sponge in the desired order.
The sponge is then carefully dabbed onto the nail, transferring the colors and creating the gradient.
This step might be repeated to intensify the colors and ensure a seamless blend.
After cleaning any excess polish from the skin around the nail, a high-gloss top coat is applied.
This not only seals the design but also helps to further meld the colors together for a flawless finish.
Why This Stands Out
This design is incredibly striking due to its vibrant and warm color palette, instantly evoking the romance and beauty of a summer evening.
The smooth transition of colors is mesmerizing and artistically impressive.
It is a bold and cheerful statement, perfect for making your nails a focal point of your summer look.
The Sunset Gradient is universally flattering and radiates a joyful, energetic vibe.
This nail art is like carrying a miniature masterpiece on your fingertips, celebrating nature’s spectacular daily show.
It is a timeless summer favorite that never fails to impress.
Golden Hour Shimmer

Warm gold glitter polish with a gradient into a soft peach or coral.
Design Features
The Golden Hour Shimmer nail design aims to capture the magical, warm glow of the sun during the golden hour.
It features a beautiful gradient that incorporates warm gold glitter.
The design typically starts with a dense application of warm gold glitter polish near the cuticles or at the tips.
This glitter then fades softly into a soft peach or warm coral base color.
The transition between the glitter and the base color is soft and diffused, creating a sparkling, ethereal effect.
A glossy top coat enhances the shimmer and the warmth of the colors.
How To Achieve This Look
To achieve this look, begin by applying the soft peach or coral base color to the entire nail.
Once this is dry, the gold glitter polish can be applied to create the gradient.
Using the glitter polish brush or a separate sponge, apply the glitter more densely at one end of the nail.
Then, lightly drag or dab the glitter towards the center of the nail to create a fading effect.
Several thin coats of glitter may be needed to build up the desired opacity and gradient.
A good quality glossy top coat will smooth out the glitter texture and maximize the shimmer.
Why This Stands Out
This design stands out for its warm, radiant glow and sophisticated sparkle.
The combination of gold glitter with soft peach or coral is both elegant and inviting.
It perfectly captures the enchanting light of the golden hour, adding a touch of romance and glamour to your nails.
This look is versatile enough for both daytime beach outings and summer evening events.
The Golden Hour Shimmer is subtly luxurious and incredibly flattering, making your nails look like they are bathed in soft sunlight.
It is a chic and timeless choice for a radiant summer style.
Palm Tree Silhouettes At Sunset

Black palm tree silhouettes painted over a vibrant sunset gradient background.
Design Features
This iconic nail design combines two beautiful summer elements: a vibrant sunset and elegant palm trees.
The background features a stunning sunset gradient, typically blending shades of orange, pink, yellow, and purple.
Over this colorful canvas, crisp black silhouettes of palm trees are meticulously painted.
The silhouettes often include one or two palm trees, perhaps with a hint of a distant shoreline or setting sun.
The contrast between the bright, blended background and the sharp black silhouettes is key to this design’s impact.
A glossy top coat enhances the vibrancy of the sunset and the definition of the palm trees.
How To Achieve This Look
The first step is to create the sunset gradient background using the sponge technique with warm sunset polishes.
This needs to be smooth and well-blended for the best effect.
Once the gradient background is completely dry, the palm tree silhouettes are carefully hand-painted using an opaque black polish and a very fine nail art brush.
Precision is crucial for creating sharp, clean outlines.
Alternatively, palm tree nail stickers or stamping plates can be used for a quicker and more uniform result.
Finally, a glossy top coat is applied to seal the design and make the colors pop.
Why This Stands Out
Palm Tree Silhouettes at Sunset is a quintessential summer nail design that is instantly recognizable and widely loved.
It perfectly encapsulates the dreamy, tropical vacation vibe.
The striking contrast between the colorful sunset and the dark silhouettes creates a dramatic and visually appealing effect.
It is both artistic and evocative, transporting you to a serene beach paradise.
This design is a timeless classic that remains popular year after year.
It is a beautiful way to express your love for summer and tropical landscapes through your nail art.
Pink And Orange Tie-Dye

Playful and bright, reminiscent of beach towels and summer skies.
Design Features
This fun and vibrant nail design takes inspiration from the retro charm of tie-dye patterns.
It features a playful mix of bright pink and sunny orange shades swirled together.
The tie-dye effect is characterized by its organic, free-flowing patterns with soft, blended edges between the colors.
White or a lighter shade of pink or orange might also be incorporated to enhance the psychedelic swirls.
Each nail typically displays a unique variation of the tie-dye pattern, adding to its handcrafted appeal.
The finish is usually glossy to make the bright colors appear even more vivid and summery.
How To Achieve This Look
There are several techniques to achieve a tie-dye effect on nails.
One common method involves dropping dots of pink and orange polish onto the nail while they are still wet.
Then, a fine tool like a toothpick or a marbling tool is used to gently swirl the colors together.
Care must be taken not to over-blend, which can muddy the colors.
Another technique involves applying the colors to a plastic sheet, swirling them, and then transferring the pattern to the nail using a stamper.
A glossy top coat is essential to smooth out the surface and boost the vibrancy.
Why This Stands Out
Pink and Orange Tie-Dye nails stand out for their cheerful, energetic, and nostalgic vibe.
The bright color combination is inherently summery and exudes a sense of fun and freedom.
The organic, swirly patterns are eye-catching and playful, reminiscent of carefree summer days and beach festivals.
It is a perfect choice for those who love bold, colorful, and expressive nail art.
This design adds a pop of retro cool to any summer outfit.
It is a guaranteed mood-booster that brings a touch of sunshine to your fingertips.
Warm Sand And Rose Gold

A matte sandy beige base with delicate rose gold geometric lines or half-moons.
Design Features
This sophisticated nail design combines the earthy feel of warm sand with the chic allure of rose gold.
It features a base of matte sandy beige or soft nude polish, providing an understated and elegant canvas.
The defining characteristic is the addition of delicate rose gold accents.
These accents are typically in the form of precise geometric lines, minimalist half-moon shapes near the cuticle, or subtle striping.
The contrast between the matte, textured appearance of the sandy base and the metallic sheen of the rose gold creates a refined and modern look.
This design focuses on clean lines and subtle luxury.
How To Achieve This Look
To create this look, begin by applying the sandy beige polish and allowing it to dry completely.
Then, apply a matte top coat to achieve the signature matte finish.
Once the matte top coat is fully dry, the rose gold accents can be added.
This is best done using a very fine striping brush and rose gold metallic nail polish or by using thin rose gold striping tape.
For half-moon designs, nail guides or stencils can be helpful for achieving crisp, clean edges.
The rose gold elements should be applied with precision for a polished and contemporary feel.
Why This Stands Out
Warm Sand and Rose Gold nails stand out for their chic minimalism and elegant color combination.
The matte finish adds a modern touch, while the rose gold provides a hint of understated glamour.
This design offers a sophisticated and subtle nod to the beach theme, perfect for those who prefer less literal interpretations.
It is versatile enough for everyday wear yet special enough for occasions.
The combination of textures – matte sand and metallic rose gold – is particularly appealing.
It is an effortlessly stylish choice that exudes a quiet confidence and refined taste.
Micro Tropical Fruit Salad

Tiny, detailed paintings of pineapples, watermelons, and kiwis on a bright or white base.
Design Features
This playful and whimsical nail design is a vibrant celebration of summer fruits.
It features tiny, meticulously detailed paintings of various tropical fruits like pineapples, watermelon slices, and kiwi rounds.
These micro fruit designs are typically set against a bright, clean base color such as crisp white, sunny yellow, or vibrant turquoise.
This allows the colorful fruit details to pop.
Each nail might showcase a different fruit, or a selection of fruits can be artfully arranged on accent nails.
The level of detail in the miniature paintings is key to the charm of this design.
How To Achieve This Look
Achieving this detailed look requires patience and a steady hand, often best executed by a skilled nail artist.
After applying the base color, the micro fruit designs are hand-painted using very fine nail art brushes and various acrylic paints or highly pigmented polishes.
Multiple colors are used to create the realistic appearance of each fruit, including their textures, seeds, and rinds.
For example, tiny black dots for kiwi seeds or green stripes for watermelon rind.
A glossy top coat is essential to protect the intricate artwork and enhance the vibrancy of the fruit colors.
Some designs might incorporate tiny 3D fruit slices for an even more playful effect.
Why This Stands Out
Micro Tropical Fruit Salad nails stand out for their incredible cuteness, intricate detail, and vibrant, cheerful aesthetic.
The miniature fruit paintings are delightful and showcase impressive artistic skill.
This design is a fun and refreshing way to embrace the summer spirit, perfect for vacations or adding a pop of color to your everyday look.
It is a guaranteed conversation starter and mood-lifter.
The playful theme and bright colors make this nail art irresistibly charming.
It is like having a tiny, edible-looking piece of summer joy on each fingertip.
Hibiscus Flower Power

Bold hibiscus flower designs, either as full nail art or accent nails, in vibrant pinks, reds, or oranges.
Design Features
The Hibiscus Flower Power nail design is a bold and beautiful tribute to one of summer’s most iconic tropical flowers.
It features large, prominent hibiscus flower motifs as the central focus.
These flowers are typically rendered in vibrant, warm colors such as hot pink, fiery red, sunny orange, or bright coral.
The intricate details of the hibiscus petals and stamen are often highlighted.
The hibiscus designs can cover the entire nail for a statement look or be used more sparingly on accent nails against a contrasting or complementary base color.
A glossy finish usually enhances the floral vibrancy.
How To Achieve This Look
Creating bold hibiscus flowers requires skillful freehand painting.
Nail artists typically start with the base color on the nails.
Then, using fine nail art brushes and various shades of the chosen floral color, they paint the distinctively shaped hibiscus petals.
Shading and highlighting techniques are used to give the flowers depth and a three-dimensional appearance.
The prominent stamen is often detailed in a contrasting color like yellow or white.
For those less confident with freehand, hibiscus nail stickers or stamping plates can offer a beautiful alternative.
A top coat seals and protects the design.
Why This Stands Out
This design stands out due to its bold floral statement and vibrant, eye-catching colors.
The hibiscus flower is universally recognized as a symbol of tropical beauty and paradise.
It is an elegant yet powerful way to embrace summer, adding a touch of exotic charm to your style.
The large scale of the flowers makes a confident and fashionable impact.
Hibiscus Flower Power nails are perfect for making a statement at summer parties, beach outings, or any occasion where you want your nails to exude warmth and tropical allure.
Lush Green Monstera Leaves

Deep green monstera leaf patterns, possibly over a nude or light-colored base.
Design Features
This chic and trendy nail design features the iconic, fenestrated leaves of the Monstera plant.
It typically showcases deep, lush green shades for the leaf patterns, evoking a sense of tropical foliage.
The Monstera leaf designs can be painted over a clean, contrasting base color such as nude, white, pale pink, or even a soft gold.
This helps the green leaves to stand out prominently.
The leaves can be depicted as full leaves on each nail or as partial leaf details, sometimes overlapping or cascading.
The distinctive splits and holes in Monstera leaves are key characteristics of the design.
How To Achieve This Look
To achieve the Lush Green Monstera Leaves look, begin by applying the chosen base color.
Once dry, the leaf patterns are carefully hand-painted using various shades of green polish and a fine nail art brush.
Darker greens can be used for the main leaf shape, with lighter greens or white used for highlighting veins or adding dimension.
Precision is needed to accurately depict the unique cutouts of the Monstera leaf.
Nail stamping plates or high-quality nail stickers featuring Monstera leaf designs are also excellent options for achieving a clean and consistent look.
A glossy or matte top coat can be used depending on the desired finish.
Why This Stands Out
This design stands out for its trendy, botanical aesthetic and sophisticated use of green.
Monstera leaves are a popular motif in fashion and interior design, making these nails feel very current.
It offers a more subtle and elegant way to incorporate tropical vibes into your nail art compared to brighter floral or fruit designs.
The clean lines and organic shapes are visually appealing.
Lush Green Monstera Leaves nails are perfect for those who appreciate modern, nature-inspired designs.
They add a touch of refined tropical chic to any summer ensemble.
Colorful Parrots Or Toucans

A detailed and artistic representation of a tropical bird on an accent nail.
Design Features
This exotic nail design features a highly detailed and artistic representation of a colorful tropical bird, such as a parrot or a toucan.
This intricate artwork is typically reserved for one or two accent nails to serve as a focal point.
The bird is painted using a vibrant array of colors, capturing its bright plumage, distinctive beak, and lively expression.
The level of detail aims for realism or a beautifully stylized interpretation.
The remaining nails are often painted in a solid complementary color, like a deep jungle green, a sky blue, or a bright tropical hue that echoes one of an accent color in the bird’s feathers.
This helps the accent nail to truly shine.
How To Achieve This Look
Creating a detailed tropical bird on a nail is a true test of artistic skill and is usually done by experienced nail artists.
They begin by painting the base color on all nails.
On the chosen accent nail, the artist will meticulously hand-paint the bird using very fine brushes and a wide palette of acrylic paints or highly pigmented nail polishes.
Layering colors, blending, and adding minute details are crucial.
Patience and precision are paramount for capturing the bird’s likeness and vibrant colors.
A glossy top coat is applied to protect the intricate artwork and enhance its brilliance.
Why This Stands Out
This design stands out for its exceptional artistry and the sheer wow-factor of having a miniature, detailed bird painting on your nails.
It is a unique and captivating choice that showcases individuality.
The vibrant colors of the tropical bird instantly evoke a sense of exotic paradise and adventure.
It is perfect for those who want their nails to be a true statement piece and a conversation starter.
Colorful Parrots or Toucans nail art is a bold and beautiful way to express a love for nature’s most flamboyant creatures.
It transforms your nails into tiny, wearable masterpieces.
Playful Pineapple Upside Down

A fun design with stylized pineapples, perhaps with some glitter accents.
Design Features
This fun and quirky nail design offers a playful take on the classic pineapple motif.
It features stylized pineapples, which might be depicted whole, as slices, or even in an “upside-down” abstract pattern.
The pineapples are typically rendered in bright yellows for the fruit and vibrant greens for the crown.
The stylization allows for creative interpretations, such as geometric patterns within the pineapple or exaggerated features.
Glitter accents, often in gold or green, may be added to the pineapple design or as a sparkling background element to enhance the playful vibe.
The overall look is cheerful and summery.
How To Achieve This Look
To create Playful Pineapple Upside Down nails, one would start with a bright base color, or leave some nails for full pineapple art.
The stylized pineapple shapes are then painted on.
This can be done freehand with nail art brushes, focusing on bold shapes and fun details rather than strict realism.
For example, using dotting tools for texture or creating a simplified, almost cartoonish pineapple.
Glitter can be incorporated by using a glitter polish for parts of the pineapple, like the crown, or by lightly dusting glitter over the design.
A glossy top coat will make the colors and glitter pop.
Why This Stands Out
This design stands out for its lighthearted and cheerful approach to a popular summer fruit.
The stylized nature of the pineapples adds a unique and artistic touch.
It is a less formal and more whimsical alternative to realistic fruit nail art, perfect for those who enjoy playful and imaginative designs.
The potential for glitter accents adds an extra layer of fun.
Playful Pineapple Upside Down nails are sure to bring a smile and a touch of tropical cheer to your summer look.
They are all about embracing the sunny, carefree spirit of the season.
“Life’s A Beach” Typography

One or two nails with cute, beach-related quotes or words in a stylish font.
Design Features
This expressive nail design incorporates typography, featuring cute and inspiring beach-related quotes or single words.
Phrases like “Life’s a Beach,” “Sun Kissed,” “Ocean Air,” or words like “Aloha” or “Beach” are popular choices.
The text is typically applied to one or two accent nails to make a statement without cluttering the overall look.
The font style is crucial, ranging from elegant script to playful sans-serif, chosen to match the desired vibe.
The background for the typography is often a complementary beachy color, such as sandy beige, ocean blue, or a sunset gradient.
The text itself is usually in a contrasting color like white, black, or metallic gold for readability.
How To Achieve This Look
Achieving crisp and clear typography on nails requires a steady hand or specialized tools.
For hand-painted lettering, a very fine nail art brush and opaque polish or acrylic paint are used.
Alternatively, nail art stamping plates with text designs or high-quality nail decals with pre-printed words and quotes are excellent options.
These tools help ensure the lettering is neat and legible.
The chosen background color should be applied and allowed to dry completely before adding the text.
A top coat is then carefully applied to seal the typography and protect it from wear.
Why This Stands Out
“Life’s a Beach” Typography nails stand out for their ability to convey a message or mood directly.
It is a fun and personal way to express your love for the beach and summer.
The choice of quote and font allows for a high degree of customization, making the design unique to the wearer.
It can be witty, inspirational, or simply evocative of happy beach memories.
This nail art is a chic and modern way to wear your summer sentiments on your sleeve, or rather, on your fingertips.
It is a stylish statement that adds personality to your look.
Bright Neon French Tips

Classic French manicure but with vibrant neon tips in shades like electric blue, hot pink, or lime green.
Design Features
This electrifying nail design puts a modern, summery twist on the timeless French manicure.
It retains the classic nude or pale pink base on the nail bed.
The standout feature is the replacement of the traditional white tip with a vibrant, eye-popping neon color.
Popular neon shades include electric blue, hot pink, lime green, neon orange, or sunny yellow.
The neon tip line is usually kept crisp and well-defined, following the natural curve of the nail or shaped into a V-cut or almond style.
The contrast between the neutral base and the bright neon is striking.
How To Achieve This Look
To create Bright Neon French Tips, start by applying a sheer nude or pale pink polish to the entire nail for the base.
Allow this to dry completely.
Next, using the chosen neon polish, carefully paint the tips of the nails.
Nail guides or striping tape can be very helpful in achieving a sharp, clean line.
Alternatively, a fine brush can be used for freehand application if you have a steady hand.
A glossy top coat is then applied to enhance the vibrancy of the neon and provide a polished finish.
Why This Stands Out
This design stands out for its bold and energetic update to a classic look.
The neon tips add an instant pop of color and a playful, modern edge to the sophisticated French manicure.
It is a perfect way to incorporate bright summer colors without committing to a full neon nail.
The design is both chic and fun, making it incredibly versatile for various summer occasions.
Bright Neon French Tips are undeniably eye-catching and exude confidence.
They are a stylish statement for anyone looking to embrace the vibrant energy of the summer season.
Classic Navy And White Stripes

Crisp navy blue and white horizontal or vertical stripes, perhaps with a tiny gold anchor charm.
Design Features
This timeless nail design embodies a sophisticated nautical theme with its clean and crisp stripes.
It features alternating horizontal or vertical stripes of deep navy blue and stark white.
The stripes are typically uniform in width and precisely painted to create a sharp, polished look.
The contrast between the dark navy and the bright white is classic and visually appealing.
To further enhance the maritime theme, a tiny metallic gold anchor charm or a painted anchor motif can be added to an accent nail.
This adds a touch of elegance and character to the design.
How To Achieve This Look
Achieving perfectly straight and even stripes requires precision.
After applying a base coat, one of the colors (either navy or white) is applied as the base for the stripes.
Once this base color is dry, thin striping tape is carefully applied to mask off the areas for the contrasting stripes.
The second color is then painted over the nail and tape.
The tape is gently removed while the second color is still slightly wet to reveal crisp lines.
For the anchor detail, a small charm can be affixed with nail glue, or it can be hand-painted.
A glossy top coat completes the look.
Why This Stands Out
Classic Navy and White Stripes stand out for their timeless elegance and chic nautical appeal.
The design is clean, sophisticated, and effortlessly stylish.
It is a versatile look that can be dressed up or down, perfect for summer yacht parties, beach outings, or even everyday wear.
The addition of a gold anchor charm adds a delightful thematic detail.
This nail art is a testament to the enduring appeal of nautical fashion.
It is a polished and refined choice for those who appreciate classic patterns with a maritime twist.
Rope And Knot Details

Nude or white nails with textured “rope” details painted on, possibly forming a knot on an accent nail.
Design Features
This unique nail design brings a tactile and thematic element with its textured “rope” details.
The base color is typically a simple nude or crisp white, allowing the rope texture to be the main focus.
The “rope” is created using a slightly raised or textured polish or gel, often in a creamy white, beige, or light brown color to mimic actual rope.
These lines are twisted or braided in appearance.
An accent nail might feature a more intricate design, such as a painted nautical knot formed by the rope details.
This adds a clever and eye-catching focal point to the manicure.
How To Achieve This Look
Creating textured rope details often involves using a thick nail polish or a 3D gel.
After applying the base color, the rope lines are carefully piped or painted onto the nail using a fine brush or a dotting tool.
To achieve the twisted rope look, two fine lines can be painted closely together and then textured.
For a knot, the rope lines are intricately interwoven on the accent nail.
Some artists might use actual thin twine or string, carefully adhered and sealed onto the nail, though painted texture is more common for wearability.
A matte or satin top coat can enhance the rope’s texture.
Why This Stands Out
Rope and Knot Details stand out for their innovative use of texture and subtle nautical theme.
The 3D rope effect is intriguing and adds a unique tactile dimension to the nails.
This design is more understated than overtly graphic nautical patterns, offering a sophisticated and artistic interpretation.
The knot detail, in particular, is a clever and memorable touch.
It is perfect for those who appreciate intricate details and a refined, beach-inspired aesthetic.
This nail art is both creative and elegant, adding a touch of maritime charm.
Little Lighthouse Scene

A miniature, artistic painting of a lighthouse on a rocky shore.
Design Features
This picturesque nail design features a miniature, artistic painting of a classic lighthouse scene.
This detailed artwork is typically showcased on one or two accent nails.
The scene often includes a lighthouse tower, usually in traditional red and white or stark white, set against a backdrop of a blue sky or a dusky evening.
Elements like a rocky shore, crashing waves, or distant seagulls might also be incorporated.
The remaining nails are usually painted in a complementary solid color, such as a sea blue, a sandy beige, or a soft grey, to keep the focus on the intricate lighthouse art.
How To Achieve This Look
Painting a detailed lighthouse scene on a tiny nail canvas requires significant artistic skill and patience.
Nail artists use very fine brushes and a palette of acrylic paints or highly pigmented polishes.
They begin by sketching the basic outline of the lighthouse and shore on the accent nail.
Then, they meticulously fill in the colors, adding shading, highlights, and tiny details to bring the scene to life.
Layering is key to achieving depth and realism in the miniature painting.
A glossy top coat is applied to protect the artwork and enhance its visual appeal.
Why This Stands Out
The Little Lighthouse Scene stands out for its charming narrative quality and impressive miniature artistry.
It evokes a sense of coastal nostalgia and the enduring symbolism of lighthouses.
This design is a beautiful choice for those who appreciate detailed, picturesque nail art that tells a story.
It is a unique and captivating way to carry a piece of seaside scenery with you.
The intricate painting transforms the accent nail into a tiny masterpiece.
It is a conversation starter that showcases a love for maritime landscapes and artistic detail.
Sailboat Silhouettes

Simple and elegant sailboat silhouettes against a light blue or sunset background.
Design Features
This serene and elegant nail design features minimalist sailboat silhouettes as the focal point.
These silhouettes are typically painted in a dark, contrasting color like black, navy blue, or deep grey.
The background for the sailboats is often a soft, light blue, mimicking a calm daytime sky, or a beautiful sunset gradient of oranges, pinks, and yellows.
This creates a peaceful and picturesque scene.
The sailboat silhouettes are usually simple and graceful, capturing the essence of sailing with just a few clean lines.
This design emphasizes elegance and tranquility through its understated approach.
How To Achieve This Look
To create Sailboat Silhouettes, the first step is to prepare the background.
This involves painting the light blue base or creating the sunset gradient using a sponge technique.
Once the background is completely dry, the sailboat silhouettes are carefully painted on using a fine nail art brush and the chosen dark polish.
Precision is needed for crisp, clean outlines.
Alternatively, sailboat nail stickers or stamping plates can be used for a more uniform and quicker application.
A glossy top coat is then applied to seal the design and enhance the background colors.
Why This Stands Out
Sailboat Silhouettes stand out for their minimalist elegance and the sense of calm and freedom they evoke.
The simple yet evocative imagery is both sophisticated and charming.
This design is perfect for those who prefer understated nail art with a subtle nautical or beachy theme.
It is a timeless look that speaks of leisurely summer days and seaside adventures.
The contrast between the dark silhouettes and the lighter, airy background is visually appealing.
It is a graceful and refined choice that adds a touch of quiet beauty to your nails.
Abstract Sand And Sea

Textured sand-like polish on one half of the nail, meeting a glossy blue “sea” on the other, separated by a wavy gold line.
Design Features
This contemporary nail design offers an abstract interpretation of the beach, focusing on contrasting textures and colors.
One half of the nail features a textured polish that mimics the look and feel of sand.
This “sand” portion is often in beige or light brown and may have a matte or slightly gritty finish.
The other half of the nail is painted with a glossy blue polish, representing the “sea.”
A delicate, wavy metallic gold or silver line often separates the sand and sea sections, adding a touch of elegance and defining the boundary.
The contrast between matte texture and high gloss is a key element.
How To Achieve This Look
To achieve this look, begin by applying the textured sand polish to one diagonal or vertical half of the nail.
Special “sand effect” polishes are available, or a fine grit can be mixed with regular polish.
Once the sand portion is dry, carefully paint the other half of the nail with the glossy blue polish, ensuring a clean meeting line.
For the separating line, a fine striping brush and metallic polish are used to paint a wavy border.
Alternatively, thin metallic striping tape can be applied along the division.
It is important to allow each section to dry thoroughly before applying the next to maintain crispness.
A top coat may be selectively applied to the blue “sea” part to maintain the sand’s texture.
Why This Stands Out
Abstract Sand and Sea nails stand out for their modern, artistic approach and intriguing textural contrast.
The design is a sophisticated and unconventional take on beach-themed nail art.
It appeals to those who appreciate contemporary aesthetics and tactile elements in their manicures.
The gold or silver dividing line adds a touch of luxury and visual separation.
This style is both chic and thought-provoking, offering a minimalist yet impactful representation of the shoreline.
It is a unique way to wear the beach on your fingertips.
Watercolor Beach Scene

Soft, blended watercolors depicting an abstract beach and ocean landscape.
Design Features
This artistic nail design uses a watercolor technique to create a soft, dreamy, and abstract representation of a beach and ocean landscape.
It features beautifully blended shades of blue, beige, white, and perhaps hints of green or pink.
The colors are applied in a way that mimics the fluidity and transparency of watercolor paints.
There are no harsh lines; instead, the colors bleed softly into one another, creating an ethereal effect.
The overall look is painterly and impressionistic, focusing on capturing the mood and essence of the seaside rather than precise details.
A glossy top coat can enhance the blended, watery appearance.
How To Achieve This Look
The watercolor effect on nails can be achieved in several ways.
One method involves diluting nail polish colors with a clear polish or acetone and then dabbing them onto the nail, allowing them to spread and blend organically.
Another technique uses specialized watercolor inks for nails, which are applied over a matte white or light base and then activated or blended with a brush dipped in alcohol or a special blending solution.
The key is to work with light layers and allow the colors to interact naturally.
Tiny dabs of white can create seafoam effects, while beiges can suggest sand.
A top coat seals the delicate artwork.
Why This Stands Out
Watercolor Beach Scene nails stand out for their soft, artistic, and dreamlike quality.
The delicate blending of colors creates a unique and sophisticated look that is both calming and beautiful.
This design is perfect for those who appreciate painterly aesthetics and a more abstract interpretation of nature.
It is a subtle yet captivating way to wear beach-inspired art.
The ethereal, blended effect is mesmerizing and gives the nails a touch of romantic artistry.
It is like having a miniature, serene watercolor painting on each fingertip.
Negative Space Beach Elements

Using the natural nail as part of the design, with minimalist outlines of waves, sun, or shells.
Design Features
This modern and minimalist nail design cleverly incorporates the natural nail (negative space) as an integral part of the artwork.
It features minimalist outlines or simple shapes of beach elements like waves, sunbursts, or seashells.
These outlines are typically painted in a single, contrasting color such as white, black, gold, or a bright ocean blue.
The focus is on clean lines and understated simplicity.
The strategic use of negative space creates a light, airy, and contemporary feel.
This design is not about full coverage but rather about subtle, artful placements of beach-inspired motifs.
How To Achieve This Look
To create Negative Space Beach Elements, begin by ensuring the natural nail is perfectly prepped, buffed, and possibly coated with a clear base coat.
This makes the negative space look polished.
Using a fine nail art brush or striping tape, carefully paint the minimalist outlines of the chosen beach elements directly onto the nail.
Precision is key to achieving sharp, clean lines.
Nail stamping can also be used for precise outline designs.
The artwork is often kept small and strategically placed, for instance, a tiny wave line near the cuticle or a sun outline on one corner.
A top coat seals the design.
Why This Stands Out
This design stands out for its chic, contemporary, and understated approach to nail art.
The use of negative space is trendy and adds an element of modern sophistication.
It is perfect for those who prefer minimalist aesthetics and want a subtle nod to the beach theme without overwhelming patterns or colors.
The design feels light, breathable, and effortlessly cool.
Negative Space Beach Elements showcase a refined taste and an appreciation for subtle artistry.
It is a very modern way to incorporate beachy vibes into your summer style.
Geometric Beach Colors

Color blocking with sandy beige, aqua blue, coral, and white in geometric patterns.
Design Features
This vibrant and contemporary nail design utilizes a beach-inspired color palette within bold geometric patterns.
Key colors include sandy beige, aqua blue, bright coral, and crisp white.
These colors are used in color-blocked sections, featuring sharp lines and distinct geometric shapes like triangles, squares, chevrons, or asymmetrical blocks.
Each nail can have a different arrangement of these shapes and colors.
The overall look is modern, graphic, and energetic, combining the serenity of beach colors with the dynamism of geometric art.
The finish can be either glossy or matte, depending on the desired effect.
How To Achieve This Look
Achieving sharp geometric color blocking requires careful planning and precise application.
Start by applying a base coat, and then paint the entire nail with the lightest of the chosen colors, or section by section.
Use thin striping tape or nail vinyls to mask off sections of the nail to create the desired geometric shapes.
Paint within the taped-off sections with the different beach colors.
Allow each color section to dry completely before removing the tape or applying tape for the next section.
A top coat, either glossy or matte, will complete the look and even out the surface.
Why This Stands Out
Geometric Beach Colors stand out for their bold, modern aesthetic and playful use of color.
The combination of sharp geometric patterns with a soothing beach palette creates a striking and unique contrast.
This design is perfect for those who love contemporary art and want a graphic, eye-catching nail look for summer.
It is a stylish and energetic way to wear your favorite beach hues.
The structured patterns offer a modern alternative to more organic beach themes.
It is a fashion-forward choice that showcases a creative and confident style.
Sandy Speckles

A nude or beige polish with fine gold or brown speckles to mimic sand.
Design Features
This understated and elegant nail design aims to replicate the natural texture and appearance of fine beach sand.
It features a base of nude, creamy beige, or soft taupe polish.
The key characteristic is the addition of fine speckles in shades of gold, light brown, dark brown, or even black.
These speckles are sparsely and randomly distributed across the nail to mimic individual grains of sand.
The overall effect is subtle, textured, and natural-looking.
The finish can be matte to enhance the sandy texture or slightly glossy for a more polished appearance.
How To Achieve This Look
To achieve the Sandy Speckles look, begin by applying the nude or beige base color.
While the polish is still slightly tacky, the speckles can be added.
This can be done by using a specialized “speckled” or “sand effect” top coat or polish.
Alternatively, a very fine nail art brush or a toothpick can be used to delicately dot on tiny specks of contrasting brown or gold polish.
Another technique is to lightly flick a stiff brush dipped in a tiny amount of polish towards the nail from a distance, creating a fine spray of speckles.
A top coat (matte or gloss) seals the design.
Why This Stands Out
Sandy Speckles stand out for their subtle, natural beauty and sophisticated simplicity.
The design offers a minimalist nod to the beach without being overtly thematic.
It is perfect for those who appreciate understated elegance and want a versatile nail look that evokes the beach in a refined way.
The textured appearance adds a unique point of interest.
This nail art is chic and timeless, suitable for any occasion during the summer months.
It is an effortlessly stylish way to carry a hint of the shoreline with you.
Single Seashell Outline

A minimalist white or gold outline of a seashell on a single accent nail with a sheer or pastel base.
Design Features
This minimalist and chic nail design focuses on a single, delicate seashell outline as its subtle centerpiece.
The outline is typically drawn on just one accent nail per hand.
The seashell outline is rendered in a fine line of white, metallic gold, or silver polish for an elegant touch.
The base color for the nails is usually a sheer nude, a soft pastel (like baby pink or sky blue), or even clear polish.
The design emphasizes simplicity and negative space, allowing the delicate seashell outline to be the focal point without overwhelming the overall look.
It is a very refined and modern approach.
Why This Stands Out
This design stands out for its elegant minimalism and understated charm.
The single seashell outline is a subtle yet beautiful nod to the ocean, perfect for those who prefer less intricate nail art.
The use of a sheer or pastel base enhances the delicacy of the design.
It is a sophisticated and contemporary choice that is both office-appropriate and beach-ready.
The Single Seashell Outline is effortlessly chic and timeless.
It offers a touch of coastal grace without being overtly thematic, appealing to a refined aesthetic.
How To Achieve This Look
To achieve this minimalist look, start by applying the sheer or pastel base color to all nails.
Ensure this base is smooth and perfectly applied.
On the chosen accent nail, carefully hand-paint a delicate outline of a seashell using a very fine nail art brush and white or metallic polish.
The lines should be thin and precise.
Alternatively, a high-quality seashell outline nail decal or a stamping plate can be used for a perfect shape.
A glossy top coat is then applied to protect the delicate design and add a polished finish.
Mother Of Pearl Sheen

An iridescent, pearly white or light pink polish that mimics the inside of a seashell.
Design Features
This elegant and ethereal nail design captures the luminous, shifting colors found on the inside of a seashell, often referred to as mother of pearl.
It utilizes polishes with a distinct pearlescent or iridescent sheen.
The base colors are typically soft and delicate, such as pearly white, creamy off-white, light pink, or pale lavender.
The key is the multi-tonal shimmer that reflects light beautifully, showing subtle flashes of different hues.
The finish is inherently glossy and luminous, creating a sophisticated and almost magical effect.
Some designs might incorporate subtle textures or layering to enhance the shell-like appearance.
How To Achieve This Look
To achieve the Mother of Pearl Sheen, select a nail polish specifically marketed as pearlescent, iridescent, or having a “mother of pearl” effect.
These polishes contain fine shimmer particles that create the desired luminous finish.
Apply two to three thin coats of the chosen polish, allowing each coat to dry thoroughly for an even and smooth application.
The beauty of this look lies in the quality and reflective properties of the polish itself.
A high-gloss top coat can further enhance the sheen and protect the delicate pearlescent finish.
For a more dimensional look, some artists might layer slightly different pearly shades or use chrome powders.
Why This Stands Out
This design stands out for its understated elegance and captivating, luminous quality.
The soft, shifting colors of the mother of pearl effect are mesmerizing and incredibly sophisticated.
It is a timeless and versatile look that is perfect for summer weddings, special occasions, or everyday wear when you want a touch of refined glamour.
It mimics a natural gem found by the sea.
The Mother of Pearl Sheen is effortlessly beautiful, adding a touch of ethereal charm to your nails.
It is a classic choice that exudes grace and subtle luxury.
Delicate Wave Line

A single, fine wavy line in blue or white across a nude or clear base.
Design Features
This minimalist nail design features a single, fine wavy line as its subtle yet impactful focal point.
The line is typically painted in a classic ocean blue or crisp white.
This delicate wave traverses horizontally or diagonally across a nude, sheer pink, or clear polished base.
The beauty of this design lies in its simplicity and the graceful movement of the single line.
It captures the essence of a gentle ocean ripple or a distant wave in a very understated and modern way.
The focus is on clean execution and the elegance of the solitary motif.
How To Achieve This Look
Creating a perfect, fine wavy line requires a steady hand and a very fine nail art brush.
Begin by applying the nude or clear base coat and allowing it to dry completely.
Using the chosen blue or white polish, carefully paint a single, continuous wavy line across the nail.
The line should be consistent in thickness and flow gracefully.
For those less confident with freehand, a very thin wavy nail sticker or a custom-cut piece of striping tape used as a guide could be alternatives, though freehand often yields the most organic look.
A glossy top coat seals the minimalist design.
Why This Stands Out
The Delicate Wave Line stands out for its extreme minimalism and sophisticated simplicity.
It is a chic and contemporary way to nod to the ocean theme without any elaborate artwork.
This design is perfect for those who love understated nail art and clean aesthetics.
It is incredibly versatile, suitable for any occasion, and adds a touch of serene elegance to the nails.
Its subtlety is its strength, offering a modern and refined interpretation of a wave.
It is an effortlessly cool look that speaks volumes with a single, graceful stroke.
“Golden Sand” French Manicure

A classic French tip but using a shimmering gold polish for the tip on a sandy beige base.
Design Features
This luxurious nail design reimagines the classic French manicure with a beach-inspired twist.
It features a warm, sandy beige or soft nude polish as the base color on the nail bed.
Instead of the traditional white tip, this version uses a shimmering, rich gold polish to create the French tip.
The gold tip can be fine and delicate or slightly bolder, depending on preference.
The combination of the earthy sandy base with the glamorous gold tip creates a look that is both beachy and incredibly chic.
The gold shimmer mimics sun-kissed sand or golden treasures.
How To Achieve This Look
To create the “Golden Sand” French Manicure, start by applying the sandy beige or nude base polish to the entire nail.
Ensure it is smooth and opaque.
Once the base is dry, carefully paint the tips with the shimmering gold polish.
French manicure guide stickers can be very helpful in achieving a neat, curved or straight tip line.
Alternatively, a fine brush can be used for freehand application of the gold tip.
A glossy top coat is then applied to enhance the shimmer of the gold and give a polished finish to the overall look.
Why This Stands Out
This design stands out for its elegant and luxurious take on a beloved classic.
The swap from white to gold tips instantly elevates the French manicure, making it feel more opulent and special.
The “Golden Sand” French Manicure is perfect for summer evenings, weddings, or any time you want a sophisticated nail look with a warm, beachy undertone.
The gold adds a touch of glamour that is undeniably eye-catching.
It beautifully combines understated earthiness with radiant shimmer.
This nail art is a chic and modern way to wear a French manicure with a sun-kissed, golden twist.
Conclusion
Summer is a time for vibrant self-expression, and your nails provide the perfect canvas to showcase your personal style.
The thirty-five beach nail designs explored offer a diverse range of inspiration, from the intricately realistic to the elegantly minimalist.
Each design carries a unique charm, ready to complement your summer adventures and sun-filled days.
Whether you are drawn to the serene blues of the ocean, the fiery hues of a sunset, or the playful charm of tropical motifs, there is a look to fall in love with.
We hope this extensive list has sparked your creativity and provided you with plenty of ideas for your Summer 2025 manicures.
Embrace the season with confidence, and let your eye-aweing beach nails make a beautiful splash wherever you go.
Remember to consult with a professional nail artist to bring these more intricate visions to life.
Here is to a summer filled with stunning nails and unforgettable memories by the shore.