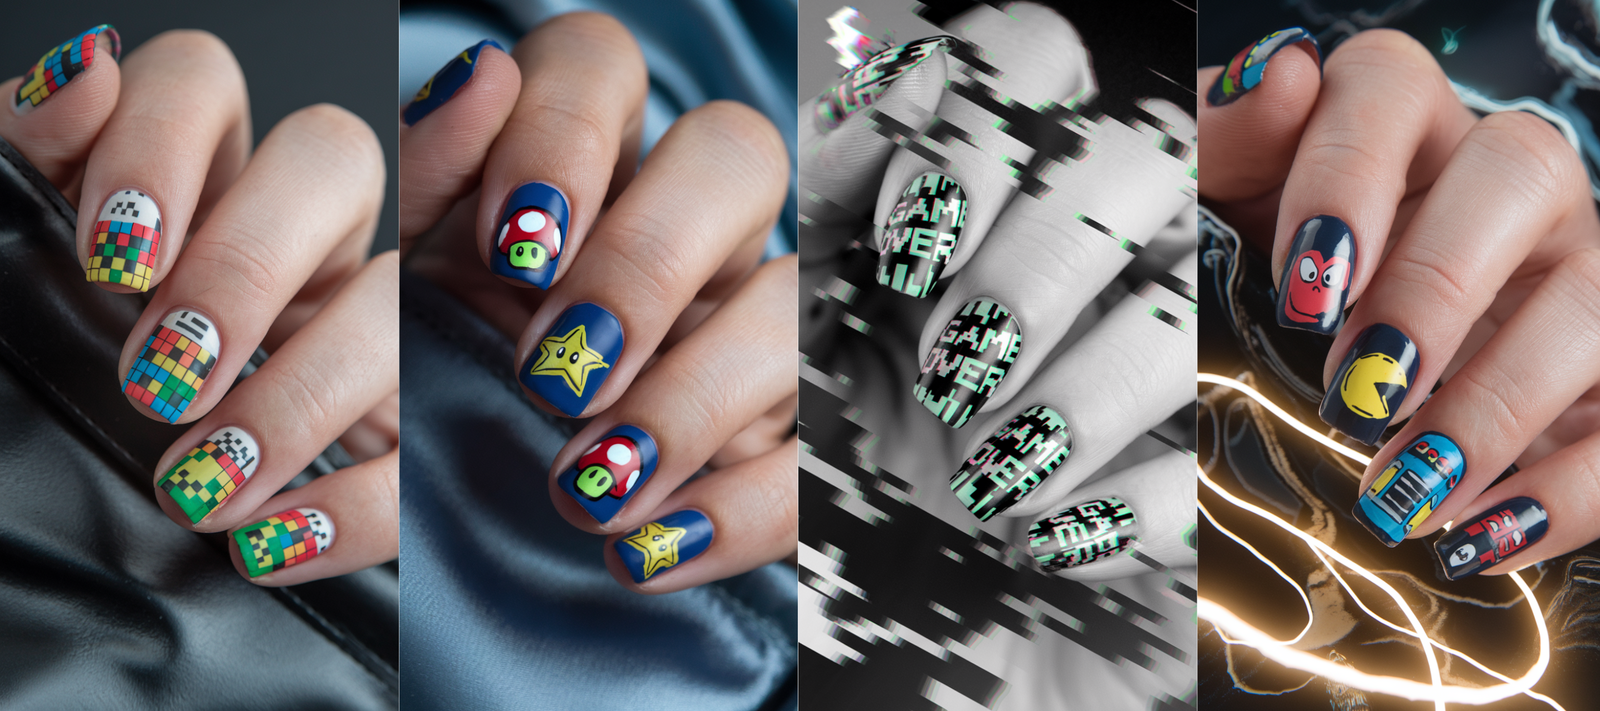
Introduction
Nail art is an ever-evolving form of self-expression, and for passionate gamers, it’s the perfect canvas to showcase their love for video games.
From retro classics and neon circuit board patterns to iconic game symbols and fantasy-inspired designs, there’s no shortage of creative possibilities when it comes to Gamer nail art.
This blog will take you through 35 detailed and inspiring Gamer nail art designs, each with its own unique flair, to help you channel your inner gaming enthusiast and turn your nails into miniature works of art.
Whether you’re a fan of action-packed adventures, pixelated retro games, or cute and colorful party games, you’ll find plenty of ideas to spark your creativity and level up your nail game.
Pixel Perfect Nail Designs
Retro Pixel Art Inspiration
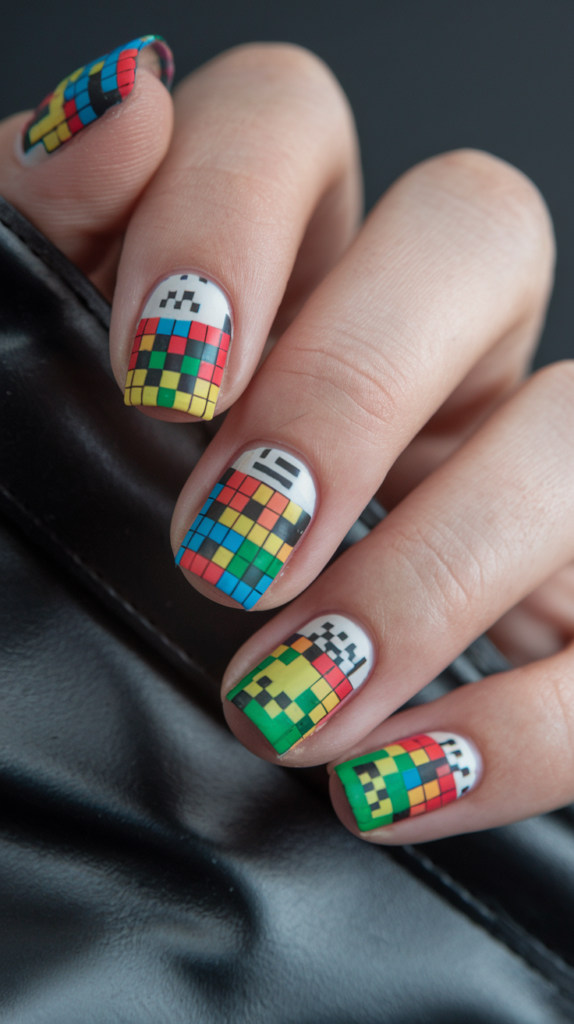
The beauty of retro pixel art lies in its simplicity and nostalgic charm, making it a perfect choice for gamers looking to express their passion for classic games.
These designs capture the essence of arcade games from the ’80s and ’90s, like Tetris, Space Invaders, and Pong.
Each nail can be transformed into a miniature canvas filled with bright, square pixels arranged to create characters or game elements.
Imagine nails decorated with tiny Tetris blocks falling in perfect alignment or rows of Space Invader aliens lined up for battle.
To achieve this, artists can carefully paint each square to mimic the blocky, low-resolution graphics of the era.
The vibrant colors of red, blue, green, and yellow play a pivotal role in bringing these pixel creations to life, making each nail a statement piece.
How to Achieve Crisp Pixel Patterns
Achieving sharp and defined pixel patterns on nails requires precision and the right tools.
Nail art brushes with ultra-fine tips are essential for painting crisp edges, ensuring each square looks clean and distinct.
Alternatively, nail artists can use tiny stencil stickers to outline the shape of each pixel before filling them in with vibrant nail polish.
It’s crucial to let each color dry completely before applying the next layer to avoid smudging and maintain a crisp, pixelated effect.
A matte top coat can be applied for a classic, retro feel, while a glossy top coat can add a modern twist, making the colors pop and appear more vibrant.
Must-Have Colors for a Pixel Perfect Look
The color palette for pixel art nail designs should be bold and eye-catching.
Essential shades include primary colors like red, blue, yellow, and green, as well as contrasting black and white for outlining and adding depth.
Neon colors can also be incorporated for a more playful and modern take on pixel art, reminiscent of arcade lights and neon signage.
For a cohesive look, choose one or two game themes and stick to their iconic color schemes, like using bright pinks and blues for a Pac-Man theme or earth tones for a retro dungeon crawler vibe.
Gaming Controller Vibes
Modern Controller Symbols and Designs
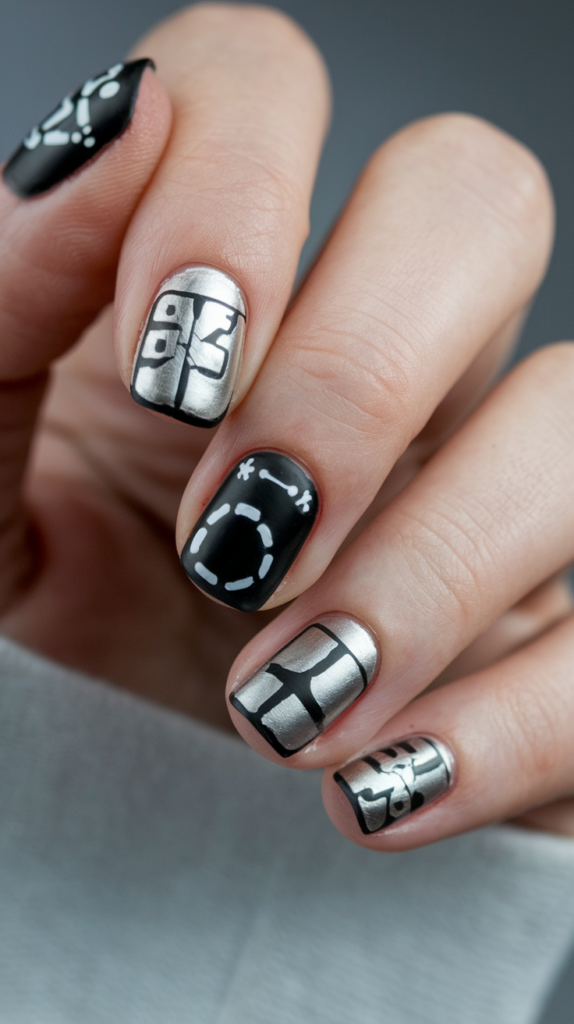
Gaming controller symbols, like the X, O, triangle, and square from the PlayStation, or the A, B, X, and Y buttons from Xbox, are instantly recognizable and a favorite choice for nail art enthusiasts.
These designs combine the sleek, modern aesthetic of today’s gaming culture with bold, glossy finishes.
Each nail can feature a different symbol, painted in metallic silver or glossy black for an elegant and cohesive look.
For a more playful approach, consider adding a splash of color to represent the vibrant buttons found on many modern controllers.
The overall design should exude a sense of tech sophistication, paying homage to the tactile experience of pressing those buttons.
Adding a Metallic Finish for Extra Pop
A metallic finish can elevate a gaming controller nail design, giving it a futuristic and high-tech appearance.
Silver, gold, and gunmetal gray are popular choices, and these shades work beautifully when paired with a matte or glossy base color.
Metallic polish can be used to accentuate the symbols, adding a reflective quality that mimics the look of actual controller buttons.
To enhance the design further, nail artists can experiment with metallic foil or chrome powder to achieve a mirror-like effect that truly stands out.
The juxtaposition of matte and metallic elements creates a dynamic contrast, making the designs appear more intricate and refined.
Glossy vs. Matte: Which Look Wins?
Choosing between a glossy and matte finish can dramatically change the overall vibe of your gaming controller nail art.
A glossy top coat will make the colors and symbols appear vibrant and polished, perfect for those who want a bold and attention-grabbing look.
On the other hand, a matte finish provides a more understated, modern feel, adding a subtle sophistication that appeals to minimalist gamers.
Both finishes have their charm, and nail enthusiasts can even mix and match, using a matte base with glossy symbols or vice versa.
This combination adds an extra layer of depth and intrigue to the design.
Level-Up Power Designs
Iconic Mario Power-Ups and How to Recreate Them
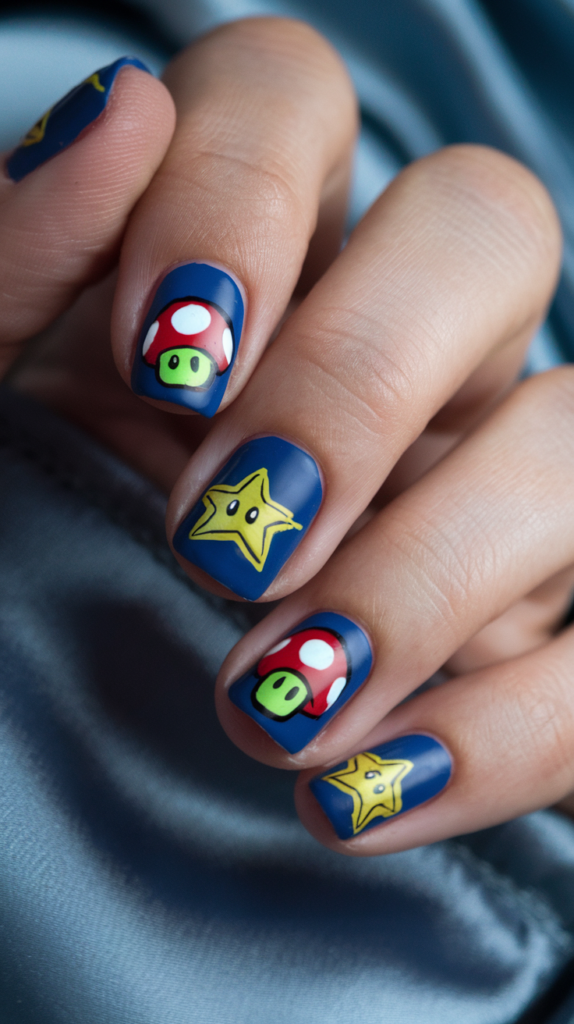
The world of Mario Kart is filled with iconic power-ups like red and green mushrooms, golden stars, and banana peels, all of which make for playful and fun nail designs.
These symbols are instantly recognizable and bring a sense of nostalgia to any gamer’s nails.
To recreate them, artists can use a mix of 3D embellishments and detailed hand-painting techniques.
For example, a red mushroom can be painted on one nail with its classic white spots, while another nail features a glittering gold star with a radiant aura.
The banana peel can be outlined in bright yellow, with subtle shading to give it a realistic, three-dimensional look.
The key is to make each power-up as vibrant and lifelike as possible, using bold colors and crisp lines.
3D Elements for a Playful Look
Incorporating 3D elements into your nail designs can add a playful and tactile dimension.
Small, raised decals shaped like power-up items, such as miniature stars or mushrooms, can be adhered to the nails for an eye-catching effect.
These elements can be paired with hand-painted designs to create a layered, dynamic look.
The use of gel polish can also help create raised effects, such as domed mushrooms or puffy clouds.
These 3D embellishments are perfect for special occasions or gaming conventions, as they make a bold statement and allow the wearer to showcase their love for the Mario universe in a fun and interactive way.
Color Combinations That Scream “Power-Up”
When it comes to color combinations, the brighter, the better.
Classic red, blue, and yellow shades are essential for replicating the look of Mario power-ups, while white is used for accenting and outlining.
A gradient background in sky blue can mimic the game’s whimsical world, while glittery polish can add a magical touch.
Neon colors are also a fantastic option, making the designs glow under blacklight and adding an extra layer of excitement.
The goal is to create a set of nails that not only look playful and vibrant but also instantly remind gamers of the thrill of collecting power-ups and leveling up.
Neon Gamer Girl
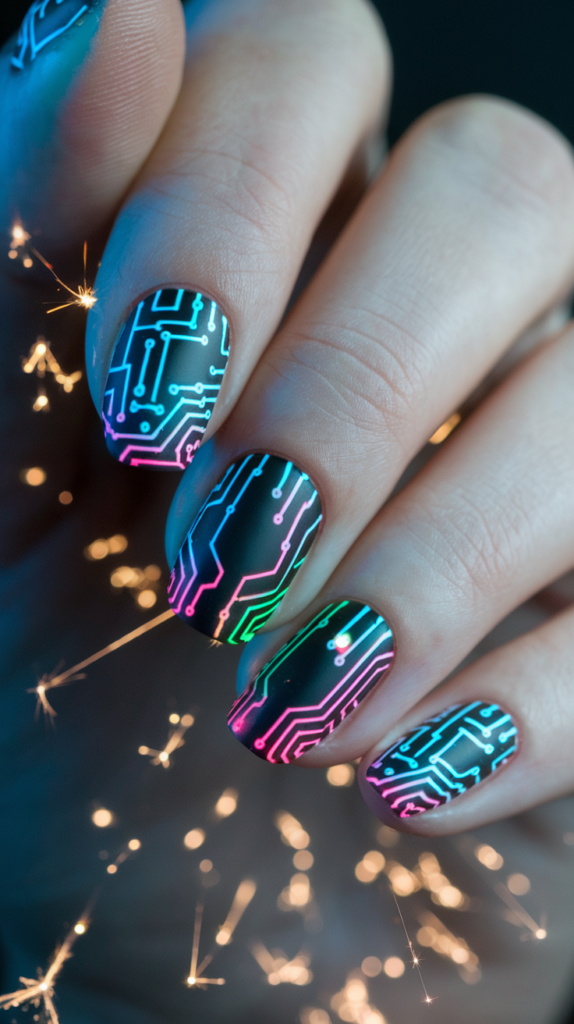
Circuit Board Patterns for Tech Lovers
Neon circuit board nail designs offer a modern, tech-inspired look that any gamer would adore.
The key to creating these designs is to mimic the intricate lines and patterns found on a circuit board, but with a bright, neon twist.
Using a matte black base as a backdrop, neon green, blue, and pink polishes are perfect for drawing fine lines that connect in angular, geometric shapes, just like the pathways on a circuit board.
These lines can be made to glow under UV light, giving the nails a futuristic, Tron-like aesthetic.
The design can be further enhanced with small, detailed accents, such as microchip patterns or LED symbols, painted with metallic polish for a high-tech look.
Neon Colors That Glow Under UV Light
Neon colors are a must for achieving a vibrant, eye-catching design that truly stands out, especially in a club or gaming lounge.
UV-reactive polishes can make your neon nail art glow in the dark, adding an exciting dimension to your look.
Shades like electric blue, lime green, hot pink, and bright orange are popular choices.
Nail artists can use these colors to outline gaming symbols, paint glowing arrows, or create intricate, interconnected patterns.
The UV effect works best with a matte black or deep navy base, allowing the neon colors to pop dramatically.
For added flair, consider adding small neon dots or splashes of color to mimic the look of a digital glitch.
Pairing Neon with Matte for Contrast
Combining neon and matte finishes creates a striking contrast that can elevate your nail art from simple to extraordinary.
A matte black base provides a sleek and modern backdrop for neon accents, allowing the bright colors to stand out even more.
Alternatively, a matte neon base can be accented with glossy black patterns for a reversed, equally stunning look.
This combination works well for designs that incorporate both straight lines and curved shapes, adding visual interest and complexity.
Experiment with matte and glossy finishes to find the perfect balance between bold and subtle, ensuring that your neon gamer girl nails are as eye-catching as they are stylish.
Virtual Reality Nail Art
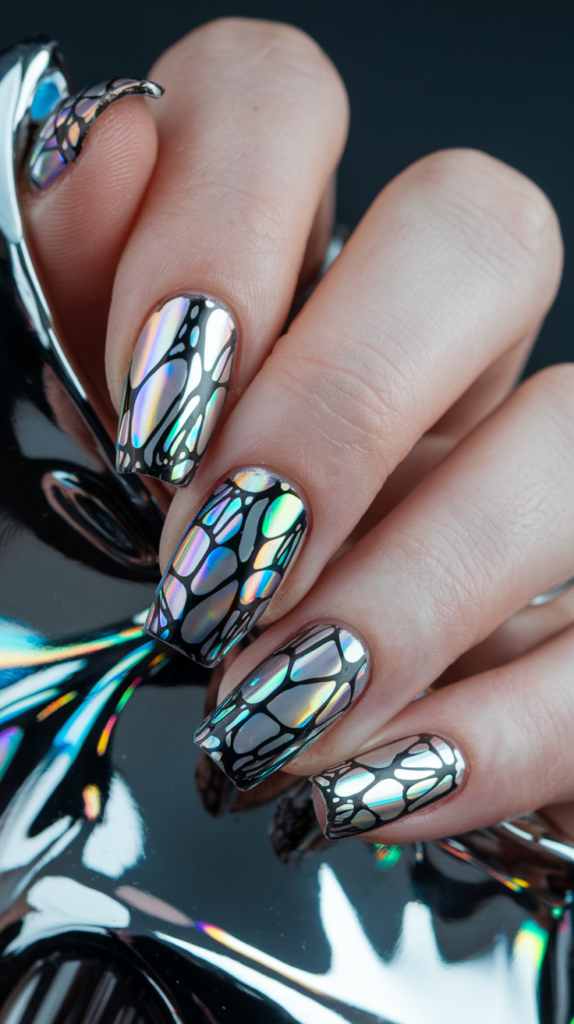
Creating a 3D Holographic Effect
Virtual reality (VR) nail art captures the essence of a digital, otherworldly experience.
To create a 3D holographic effect, start with a chrome or holographic base polish that shifts in color as the light hits it.
This base will serve as the foundation for layered, abstract designs that appear to float above the nail surface.
Use fine black or white lines to outline geometric shapes, spirals, or grid patterns, giving the illusion of depth and movement.
To enhance the 3D effect, apply a translucent jelly polish over certain areas, making them look as if they’re projecting out of the nail.
The goal is to create a mesmerizing, immersive design that reflects the futuristic vibe of VR technology.
Chrome and Metallic Finishes That Wow
Chrome and metallic finishes are essential for a VR-inspired look.
Silver chrome polish can be used to create a mirror-like effect, while holographic powders can be buffed onto the nail for a rainbow-shifting finish.
These metallic elements can be paired with bold, graphic designs, such as circuit-like lines or angular shapes, to enhance the high-tech aesthetic.
For a more dimensional effect, consider layering metallic foils in various shades of blue, purple, and green.
The reflective quality of these finishes makes the designs come to life, giving them a futuristic, almost robotic appearance.
Best Base Colors for a Futuristic Look
The choice of base colors can make or break a VR-inspired nail design.
Black is a classic option that provides a stark contrast to chrome and holographic finishes, making the metallic elements appear more vibrant.
Deep navy and charcoal gray are also excellent choices for a subtle, yet modern look.
For those who prefer a more ethereal vibe, a white or light gray base can be used, with metallic and holographic accents layered on top.
The key is to select colors that complement the futuristic theme, ensuring that each element of the design stands out and contributes to the overall high-tech feel.
Arcade Classics Nail Designs
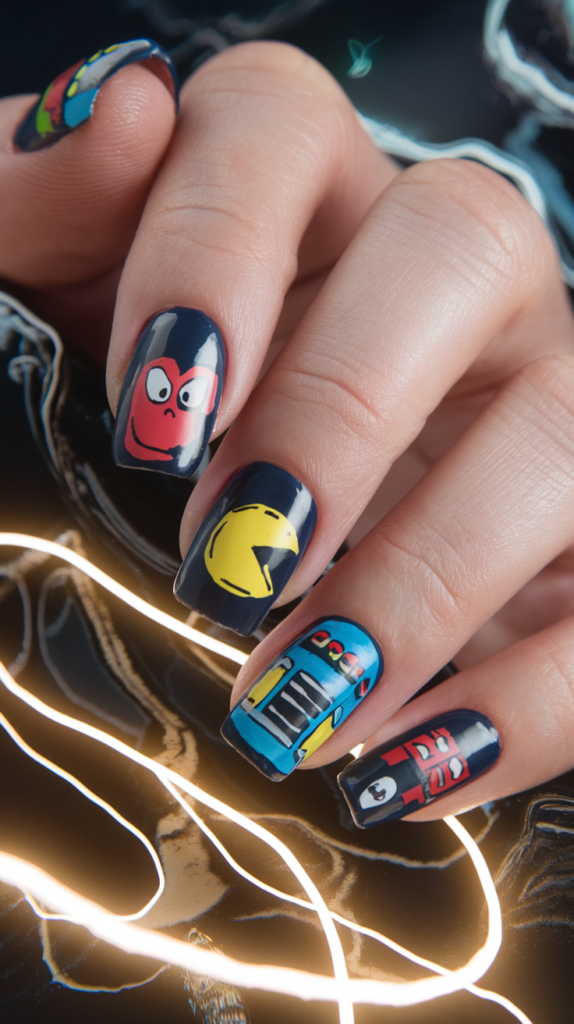
Recreating Characters from Retro Games
Arcade classics like Pac-Man, Donkey Kong, and Galaga are beloved by gamers of all ages, and recreating these characters on nails can bring a sense of nostalgia and fun.
Each nail can feature a different retro game character or scene, painted in hyper-realistic detail.
For example, one nail could show Pac-Man chasing a line of blue ghosts, while another features Donkey Kong throwing barrels.
The background can be painted in a deep, glossy black to mimic the look of an old arcade screen, with bright, neon colors bringing the characters to life.
Using fine brushes and a steady hand is crucial for capturing the pixelated charm of these classic game characters.
Combining Glossy and Matte Finishes
Mixing glossy and matte finishes can add depth and texture to your arcade-themed nail designs.
The game characters and elements can be painted in a glossy finish, making them stand out against a matte black or dark blue background.
This contrast enhances the vibrancy of the characters and creates a dynamic, eye-catching look.
Alternatively, use a matte top coat on the background and keep the characters glossy, giving the impression that they are popping out of the screen.
This combination not only adds visual interest but also highlights the playful and nostalgic elements of the design.
Adding Fun Details Like Joysticks and Coins
Small, playful details like joysticks, coins, and arcade buttons can complete the look of your arcade classic nails.
These elements can be painted on accent nails or added as 3D embellishments for a tactile, interactive feel.
Metallic gold polish can be used to paint shiny coins, while tiny, glittery circles can represent joystick buttons.
These details add a whimsical touch and bring the overall theme together.
For a cohesive design, consider adding tiny white dots or lines to mimic the glowing trails of arcade games, creating a sense of movement and energy.
Speed Racer Nail Art
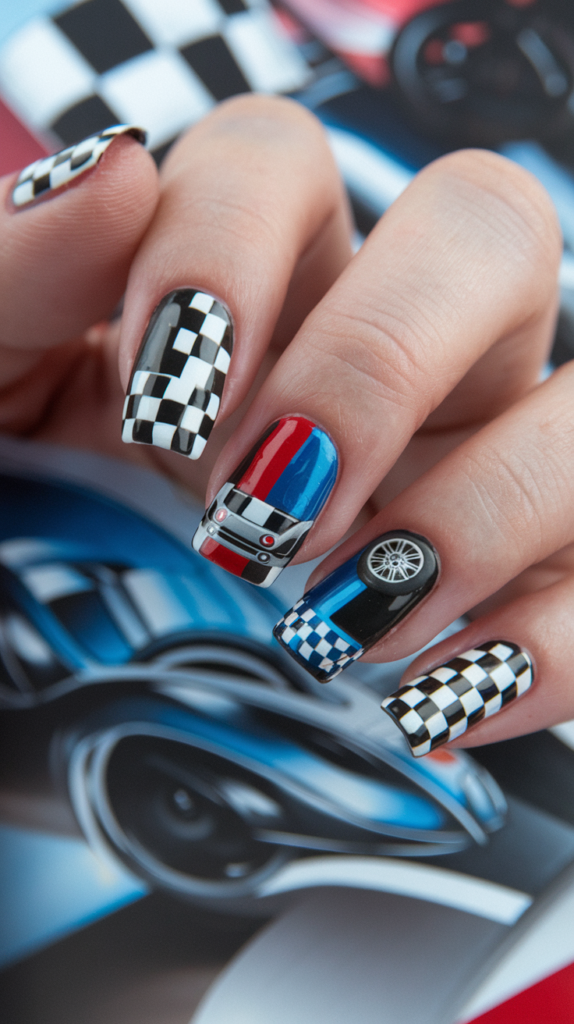
Checkered Flag Patterns for Racing Enthusiasts
Speed racer nail art is all about capturing the thrill and excitement of the racetrack, and checkered flag patterns are a must-have for any racing enthusiast.
The classic black-and-white checkered pattern can be painted diagonally across the nails for a sleek and dynamic look.
To add a modern twist, consider incorporating metallic silver accents or a gradient effect that fades from black to white.
The design can be further elevated with tiny racing stripes or numbers, giving each nail a personalized and high-speed feel.
A glossy top coat is essential to make the design look polished and professional, perfect for anyone who wants to channel their inner speed demon.
Metallic Stripes for a Sleek Look
Metallic stripes are a great way to add a touch of luxury and sophistication to your racing-themed nails.
Silver, gold, or gunmetal gray stripes can be painted over a matte or glossy base, running vertically or diagonally across the nails.
These metallic elements mimic the look of racecar decals and give the design a futuristic edge.
To create a more cohesive look, pair the stripes with bold, solid colors like red, blue, or yellow, reminiscent of racecar liveries.
The combination of metallic and solid colors adds a striking contrast, making the design stand out and shimmer under the light.
Game-Inspired Racecar Details
Incorporating game-inspired details like racecar numbers, logos, and tire marks can make your speed racer nail art even more exciting.
Each nail can feature a different element, such as a speedometer, a stylized racecar, or the logo of a favorite racing game like Gran Turismo or Mario Kart.
Tire mark patterns can be created using a stamping tool, while small decals or hand-painted designs can depict racecar details like headlights or spoilers.
The key is to keep the design cohesive and balanced, using a combination of bold colors, metallic accents, and graphic elements to capture the adrenaline-fueled world of racing.
Console Love Nail Designs
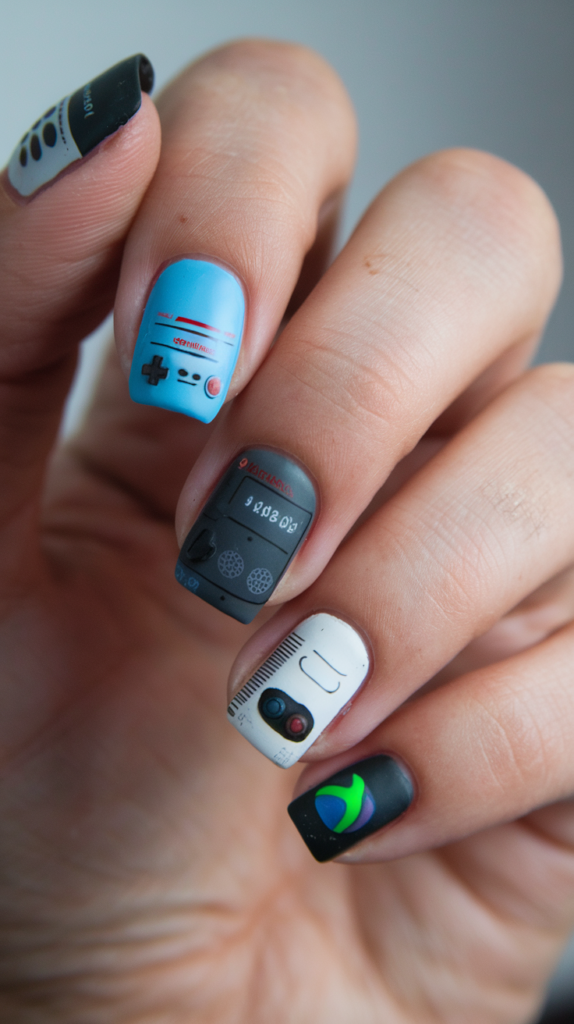
Iconic Console Logos and Their Colors
For gamers who have a deep appreciation for classic and modern consoles, designing nails with iconic console logos is a fantastic way to showcase that love.
Each nail can be dedicated to a different console, featuring logos from the NES, PlayStation, Xbox, and more.
The designs should be painted with hyper-realistic detail, using the signature colors associated with each brand.
For example, the PlayStation logo can be rendered in its iconic red, blue, yellow, and green hues, while the Xbox logo is painted in vibrant green against a black or white background.
Adding small controller symbols, like the PlayStation’s X, O, triangle, and square, can further tie the theme together.
How to Blend Multiple Console Themes
Blending multiple console themes into one cohesive nail design requires careful planning and a balanced color palette.
Start by choosing a neutral base color, such as black or white, to unify the different elements.
Each nail can then feature a different console logo or controller symbol, painted in colors that complement each other.
To add depth and texture, consider using metallic or holographic accents, which can give the design a futuristic and high-tech feel.
By keeping the overall layout clean and organized, the design will look sophisticated and not overly cluttered, allowing each console theme to shine.
Tips for Adding Realistic Controller Details
Adding realistic controller details, such as thumbsticks, D-pads, and buttons, can make your console-themed nail art look incredibly lifelike.
Use fine brushes to paint each detail with precision, paying close attention to shading and highlights to create a three-dimensional effect.
For an extra touch of realism, small rhinestones or studs can be used to represent buttons, giving the design a tactile and interactive feel.
A glossy top coat can be applied to make the buttons look shiny and polished, while a matte top coat can be used on other areas to create contrast.
The result is a set of nails that look like miniature replicas of your favorite gaming controllers.
Retro Consoles Nail Art
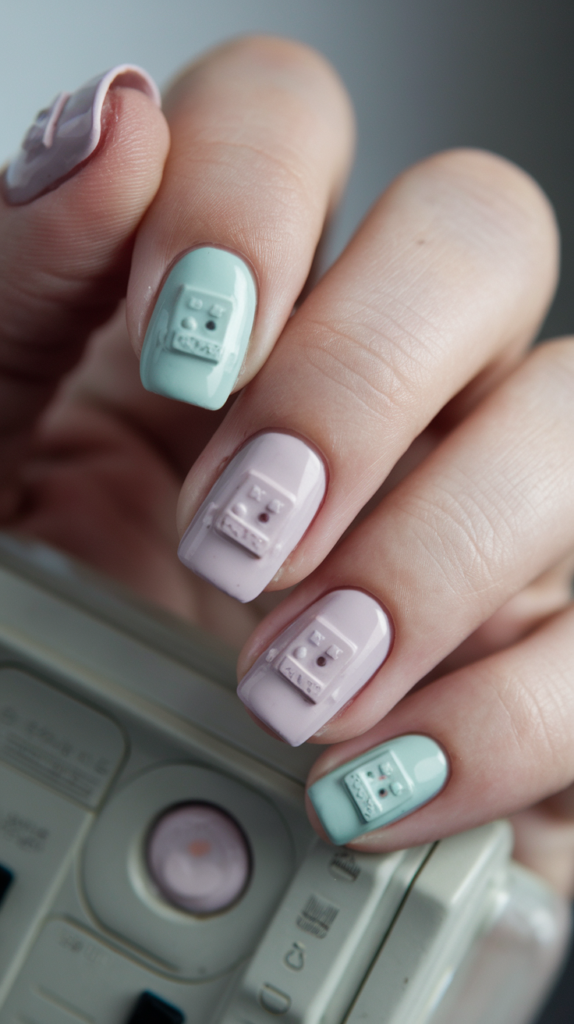
Pastel Tones for a Vintage Feel
Retro console nail art is a tribute to the early days of gaming, and using pastel tones can give the designs a soft, nostalgic touch.
Colors like dusty pink, baby blue, mint green, and pale yellow work beautifully to capture the essence of classic consoles like the SNES, Dreamcast, and Game Boy.
The nails can be decorated with pixelated heart symbols, retro game logos, or even small outlines of vintage handheld consoles.
To achieve a smooth and polished finish, apply a glossy top coat that enhances the pastel hues, making the colors look vibrant yet delicately vintage.
For an extra dose of charm, consider adding small, white polka dots or subtle stripes to emulate the playful patterns seen in retro design.
Patterns Inspired by the SNES and Dreamcast
For those who are fans of specific consoles like the SNES or Dreamcast, incorporating patterns inspired by these gaming systems can elevate your nail art.
The SNES, with its classic purple and gray color scheme, lends itself well to nail designs featuring chunky, retro buttons and pixelated graphics.
Dreamcast-inspired nails can be painted in sleek, white tones accented with orange and gray details, resembling the console’s iconic swirl logo.
Nail artists can use fine brushes to paint these patterns with precision, ensuring that each detail, from the Start button to the directional pad, is accurate.
Layering these elements over a simple background creates a clean, cohesive look that evokes memories of childhood gaming sessions.
Adding Subtle Embossed Details
Embossed details can add a sophisticated and tactile element to retro console nail art.
This technique involves creating raised designs, such as controller outlines or game logos, using gel polish or nail stickers.
The embossed elements can be left in a matte finish for a subtle, understated effect or painted in metallic or glossy hues to make them pop.
For a more authentic retro feel, try embossing pixelated shapes or classic gaming symbols like hearts, stars, or game cartridges.
The combination of flat and raised designs adds depth and dimension to the nails, making them a true work of art that honors the retro gaming era.
Zelda’s World Designs
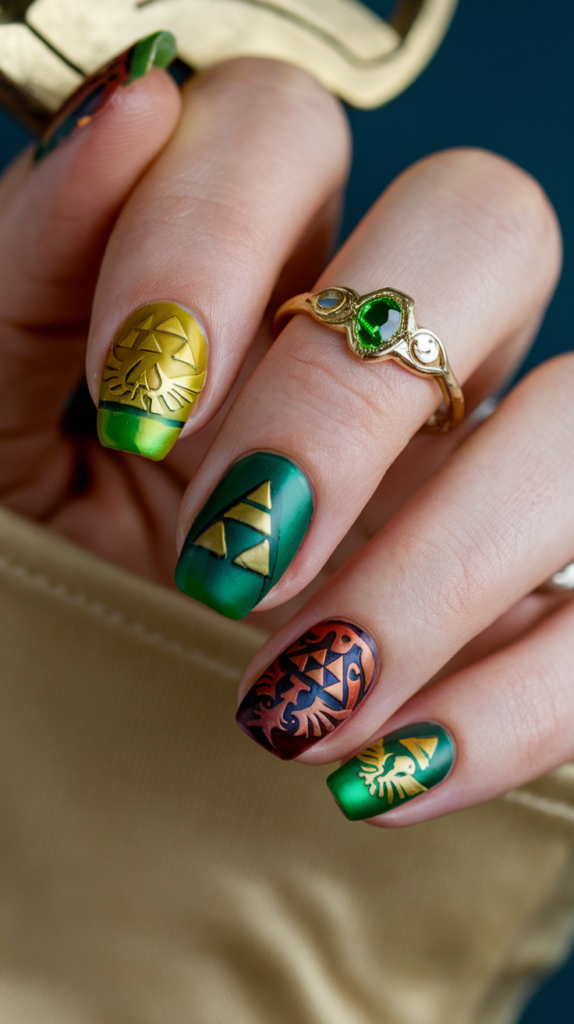
Triforce Symbols and Other Hyrule Icons
The world of The Legend of Zelda is full of rich, mystical imagery, making it a perfect theme for nail art.
The Triforce symbol, with its three golden triangles, is a must-have element that can be painted on a single nail or spread across multiple nails for a cohesive look.
Other iconic Hyrule symbols, such as Link’s Master Sword, the Hylian Shield, and the Ocarina of Time, can be intricately detailed with fine brushes.
The designs should be painted with a mix of metallic gold, deep green, and rich blue to capture the magical and adventurous feel of the series.
To add a touch of shimmer, consider using a holographic top coat, which will make the symbols look as if they’re glowing with ancient power.
Earthy Greens and Gold Accents
Earthy green tones and gold accents are essential for recreating the lush, mystical landscapes of Hyrule.
Start with a base of deep forest green or olive, and add gold detailing to highlight the symbols and patterns.
This combination creates a regal and adventurous look that reflects the essence of The Legend of Zelda.
For added depth, nail artists can incorporate subtle ombre effects, blending shades of green from dark to light, to mimic the rolling hills and enchanted forests of the game.
Gold foil or glitter can be used sparingly to add a touch of sparkle, representing the magical light of fairies or the shimmer of ancient treasures hidden within the land.
Best Techniques for a Magical Effect
To achieve a truly magical effect, experiment with layering translucent colors and using fine glitter or shimmer powders.
Painting wispy, ethereal lines around the Triforce symbol or the Master Sword can create the illusion of a magical aura.
Gel polish can be used to create 3D effects, such as raised gemstones or the hilt of a sword, adding a tactile element to the design.
For a more mystical look, add small, glowing dots of light around key symbols, representing Navi the fairy or the twinkling stars in the night sky.
These techniques help bring the magic of Hyrule to life on your nails, making each design a miniature masterpiece.
Fighter Mode Nail Art
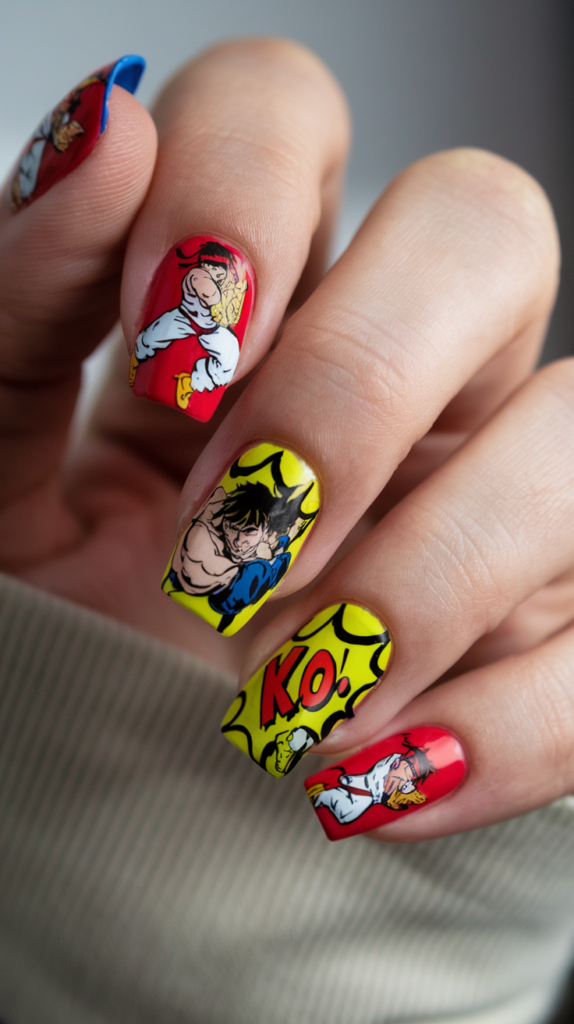
Bold Colors and Dynamic Character Designs
Fighter games like Street Fighter and Mortal Kombat are known for their intense action and colorful characters, making them a perfect inspiration for bold and dynamic nail art.
Each nail can feature a different fighter, painted in vivid colors that capture the essence of their signature moves and outfits.
For example, Ryu’s iconic red headband and white gi can be painted with precise, hyper-realistic shading, while Scorpion’s yellow and black ninja suit can be highlighted with metallic accents.
The designs should be full of movement and energy, with action lines or comic book-style bursts that make the characters look like they’re ready to leap off the nails.
Adding Comic Book-Style Details
Comic book-style details, such as bold outlines, dramatic shading, and action words like “K.O.” or “Hadouken,” can add an extra layer of excitement to fighter mode nail art.
These elements should be painted with high-contrast colors, like black outlines against bright red or yellow backgrounds.
Using fine brushes, artists can add details like motion blur lines or comic book-style dots, which give the design a sense of movement and urgency.
A matte top coat can be used to give the nails a true comic book finish, or a glossy top coat can be applied to make the colors pop even more.
This style is perfect for anyone who loves the adrenaline and drama of fighting games.
Creating Action Words with a 3D Effect
Action words like “K.O.,” “BAM!,” or “SMASH!” can be painted in bold, blocky letters with a 3D effect, making them look like they’re bursting out of the nail.
This can be achieved by using a shadowing technique, where a second layer of color is painted slightly offset from the main letters.
Using contrasting colors, such as red and black or white and blue, can enhance the three-dimensional look.
For an even more dramatic effect, add a drop of clear gel polish over the letters to create a raised, tactile finish.
This technique adds a fun and interactive element to the design, making it perfect for fans of fast-paced, action-packed games.
Joystick Glam Nail Art
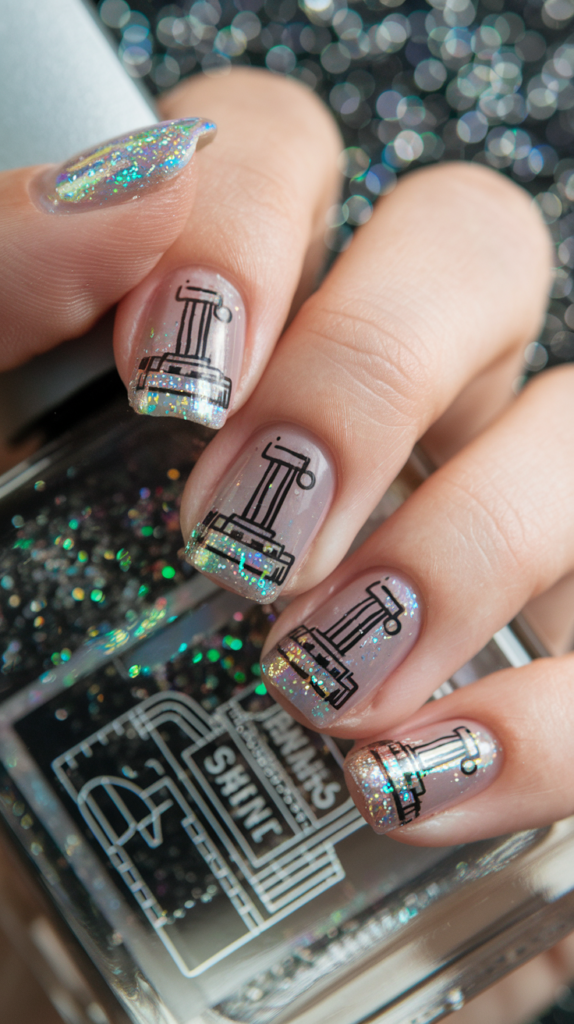
Glittery Details for a Glamorous Look
Joystick glam nail art combines the world of gaming with a touch of luxury and sparkle.
Start with a glittery base in colors like gold, silver, or iridescent pink, and add small, hand-painted joysticks and game cartridges for a fun and glamorous vibe.
The glitter can be applied in a gradient, starting from the cuticle and fading toward the tip, or it can cover the entire nail for maximum shine.
Rhinestones and metallic studs can be used to add texture and dimension, mimicking the look of controller buttons.
This design is perfect for gamers who want to show off their love for retro games while keeping things chic and sophisticated.
How to Paint Realistic Game Cartridges
Painting realistic game cartridges on your nails requires attention to detail and a steady hand.
Start with a rectangular outline in black or gray, and fill it in with the signature colors and labels of classic game cartridges.
Adding fine lines for the ridges and tiny, hyper-realistic stickers can make the design look incredibly lifelike.
Using a glossy top coat will give the cartridges a plastic-like finish, making them appear almost tangible.
For a more nostalgic feel, consider painting cartridges from beloved retro games like The Legend of Zelda, Super Mario Bros., or Donkey Kong.
These tiny works of art can be paired with glitter or metallic accents to complete the joystick glam look.
Choosing the Right Shimmer Finish
Choosing the right shimmer finish is crucial for achieving a glamorous, eye-catching effect.
Iridescent shimmer polishes that change color in the light are perfect for a playful and dynamic look.
Holographic glitter can add a rainbow-like effect, while metallic foils can give a mirror-like shine.
Experiment with layering different types of shimmer to create a multi-dimensional look that sparkles from every angle.
A glossy top coat will enhance the shimmer and make the nails look even more dazzling.
The key is to balance the glittery elements with the gaming designs, ensuring that both aspects stand out and complement each other.
FPS Thrills Nail Designs
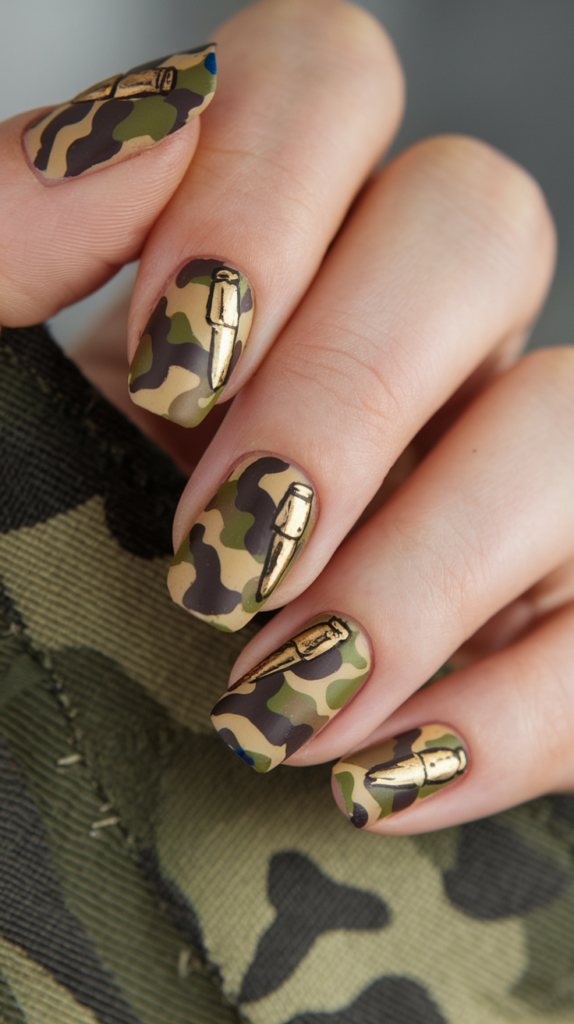
Camouflage Patterns and Bullet Details
First-person shooter (FPS) games often feature military themes, making camouflage patterns a popular choice for nail art inspired by this genre.
Start with a matte base in shades of olive green, tan, and black, and use a sponge or fine brush to create a rugged, camo pattern.
Adding small, metallic bullet details can enhance the design, making it look more realistic.
These bullet accents can be painted in gold or silver, with fine lines and shadows to create a three-dimensional effect.
For an even more immersive look, consider adding dog tag details or miniature crosshairs, painted with precision and care.
Using Matte Finishes for a Rugged Look
Matte finishes are perfect for achieving a rugged, tactical feel that suits FPS-themed nail art.
The matte texture gives the nails a gritty, military-inspired look, which pairs well with camouflage patterns and metallic accents.
A matte top coat can be applied over the entire design, or it can be used selectively to create contrast.
For example, a matte base can be paired with glossy bullet details or metallic dog tags, creating a striking and textured effect.
This combination of matte and glossy finishes adds depth and intrigue to the design, making it perfect for fans of intense, action-packed shooter games.
Adding 3D Elements Like Ammo Shells
3D elements, such as tiny ammo shells or raised crosshairs, can take FPS nail art to the next level.
These details can be created using gel polish, which allows for a raised, three-dimensional effect.
Small, metallic studs can be used to represent bullet casings, while clear gel can be shaped into crosshair designs.
These tactile elements add an interactive quality to the nails, making them stand out even more.
To complete the look, use a matte top coat on the background and a glossy top coat on the 3D elements, creating a bold contrast that highlights the details.
E-Sports Arena Nail Art
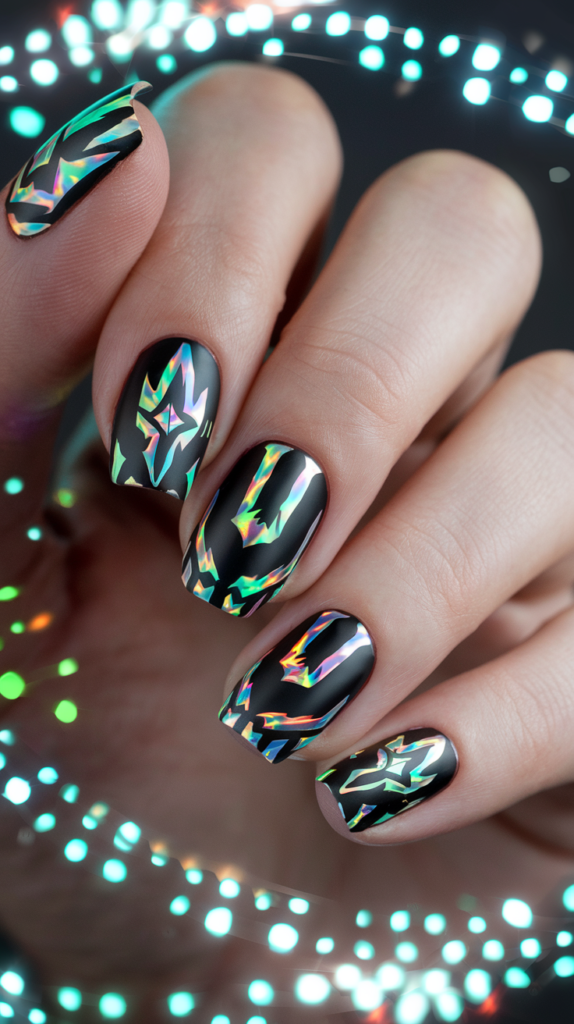
Bright LED Patterns That Pop
E-sports arena nail art captures the vibrant energy and excitement of professional gaming events.
Bright LED patterns, painted in neon colors, can be used to mimic the look of arena lights and digital displays.
These designs work best with a black or dark blue base, allowing the neon colors to pop and create a striking effect.
Using fine brushes, artists can paint intricate patterns, such as wavy lines, geometric shapes, or digital symbols, in shades of electric blue, hot pink, and neon green.
For an extra glow, use UV-reactive polish that lights up under blacklight, adding an immersive and dynamic element to the design.
Painting E-Sports Team Logos
Painting e-sports team logos on your nails is a fun way to show support for your favorite teams.
These logos often feature bold colors and graphic designs, making them perfect for nail art.
Start by outlining the logo in black or white, and fill it in with the team’s signature colors.
Using a glossy top coat will make the logos look polished and professional.
To make the design more cohesive, consider adding small accents like championship trophies, laurel wreaths, or LED-inspired details.
This design is perfect for e-sports fans who want to show off their team pride in a unique and stylish way.
Techniques for a Championship-Inspired Look
To achieve a championship-inspired look, use metallic gold and silver accents to represent trophies and medals.
These elements can be painted as small, detailed symbols on one or two accent nails, with the rest of the nails featuring bright LED patterns or team logos.
Glitter polish can be used to add a touch of sparkle, mimicking the excitement and grandeur of a championship event.
For a more dynamic design, incorporate gradient effects that fade from dark to light, symbolizing the energy and intensity of an e-sports tournament.
The result is a bold and vibrant nail design that captures the spirit of competitive gaming.
Cyberpunk Edge Designs
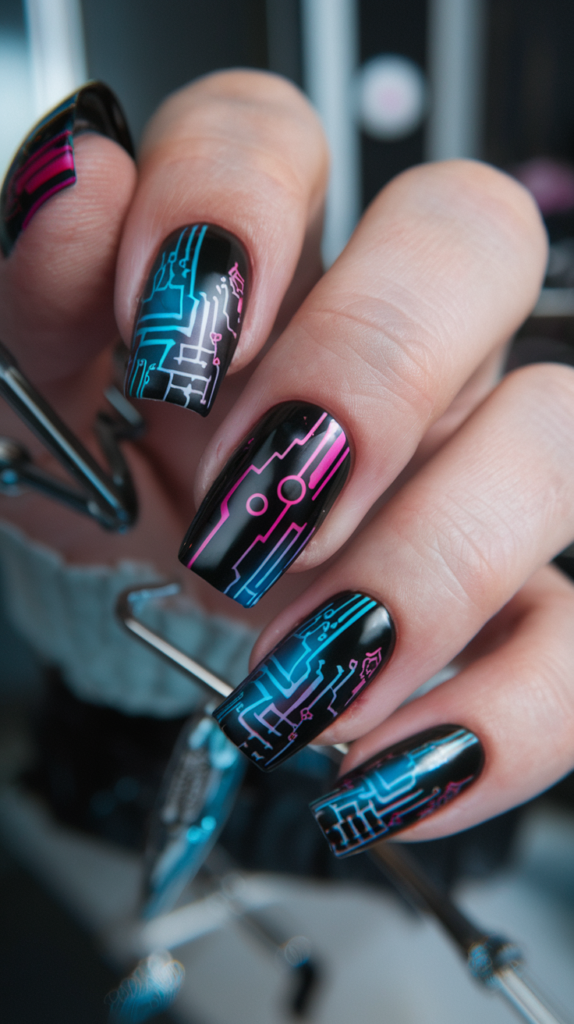
Creating Neon Gradients and Glitch Effects
Cyberpunk-inspired nail art is all about bright neon colors, glitchy patterns, and futuristic vibes.
To create neon gradients, start with a dark, matte base, like black or deep navy, and blend bright neon shades like electric pink, blue, or green from the cuticle to the tip.
This gradient effect gives the illusion of neon lights glowing in the night, perfect for capturing the essence of a cyberpunk cityscape.
For glitch effects, use a fine brush to paint broken, pixelated lines in contrasting colors, creating the appearance of digital glitches.
Layering these glitch patterns over the neon gradient adds depth and complexity to the design, making it look straight out of a sci-fi world.
Using Metallic Accents for a Cyberpunk Feel
Metallic accents, such as chrome or gunmetal gray, can add a high-tech, cybernetic feel to your nail art.
Apply metallic polish to create circuit-like patterns, robotic details, or futuristic symbols.
These accents pair beautifully with neon gradients, creating a bold contrast that draws the eye.
For a more industrial look, use metallic foils or powders to give the nails a reflective, mirror-like finish.
To add even more dimension, consider incorporating metallic studs or small gears as 3D embellishments.
The combination of neon and metallic elements captures the spirit of the cyberpunk genre, giving your nails a cutting-edge, dystopian look.
Best Practices for a High-Tech Finish
To achieve a flawless, high-tech finish, it’s important to use smooth, even strokes and layer your colors carefully.
Neon shades often require a white base coat to make them pop, while metallic polishes should be applied in thin layers to prevent streaking.
A high-gloss top coat will give the design a sleek, polished look, making the colors and metallic accents shine.
For a more industrial feel, consider using a matte top coat on some areas while keeping others glossy, creating a textured, multi-dimensional effect.
These finishing touches will make your cyberpunk nail art look professional and futuristic, ready for any neon-lit adventure.
Kawaii Gamers Nail Art
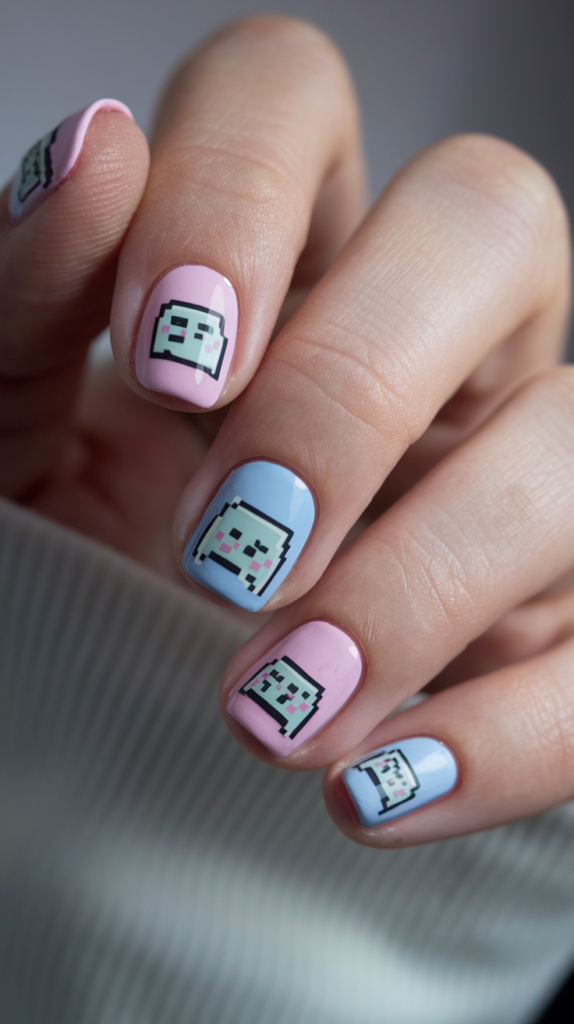
Pastel Colors and Cute Gaming Symbols
Kawaii gamer nail art combines the adorable world of Japanese “kawaii” culture with gaming symbols, resulting in a fun and playful design.
Start with a pastel color palette, using shades like baby pink, mint green, lavender, and sky blue as your base.
Each nail can be decorated with cute gaming symbols, like pixelated hearts, smiling controllers, or tiny, pastel-colored game cartridges.
These elements can be painted in soft, rounded shapes to give them a kawaii look, with small, white highlights added to create a three-dimensional, cartoon-like effect.
A glossy top coat will enhance the pastel colors, giving the nails a smooth and shiny finish.
Painting Adorable Pixelated Characters
Pixelated characters, like chibi versions of popular video game icons, can add a whimsical touch to your kawaii gamer nails.
Using a fine brush, paint characters in a pixelated style, with each “pixel” outlined in black to make them stand out.
Choose characters from beloved games like Animal Crossing or Kirby, and use soft, pastel shades to give them a cute and cuddly appearance.
Adding small, pink blush marks and big, sparkling eyes will make the characters even more adorable.
This design is perfect for gamers who want to express their love for video games in a sweet and playful way.
Adding a Glossy Top Coat for a Kawaii Look
A glossy top coat is essential for achieving the signature kawaii look.
The glossy finish makes the pastel colors appear vibrant and gives the nail art a smooth, jelly-like appearance.
To add an extra touch of cuteness, consider using a clear top coat with small, iridescent glitters, which will catch the light and add a bit of sparkle.
This final layer not only enhances the design but also helps protect the intricate details, ensuring that your kawaii gamer nails stay looking fresh and adorable for longer.
Boss Battle Nails
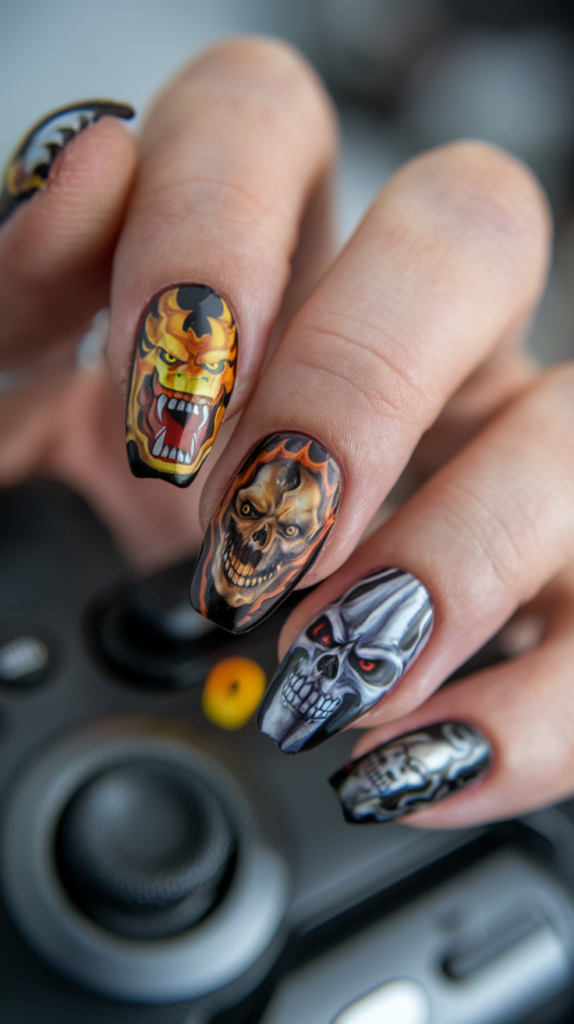
Dragons, Skulls, and Monster Designs
Boss battle nail art takes inspiration from the most epic and intense moments in video games, featuring dragons, skulls, and monstrous creatures.
Each nail can depict a different element of a boss fight, such as a fearsome dragon breathing fire, a skull surrounded by dark flames, or a massive, menacing monster ready to attack.
Use a mix of dark, moody colors like deep red, black, and metallic gold to create a sense of drama and danger.
For added intensity, use shading and highlights to make the designs look three-dimensional, and consider adding small, glowing eyes or fiery accents to bring the monsters to life.
Using Bold and Fierce Colors
Bold colors are a must for creating a fierce and powerful design.
Deep reds, midnight blues, and metallic silvers work beautifully for painting dragons and other mythical creatures.
Black can be used to outline and add shadows, while gold and silver accents provide a regal, powerful touch.
For fire effects, use gradients of red, orange, and yellow, blending them smoothly to mimic the look of flames.
The bold, high-contrast color palette adds to the overall intensity of the design, making it perfect for gamers who want to channel the energy of a final boss fight.
Adding Metallic Accents for Drama
Metallic accents can elevate your boss battle nail art, giving it a dramatic and otherworldly feel.
Use gold or silver polish to highlight key details, like the scales of a dragon or the hilt of a monster-slaying sword.
Metallic foil can also be applied to create the illusion of shattered armor or magical energy.
For an even more striking effect, add 3D elements like metallic studs or small chains, which can represent battle gear or enchanted relics.
These accents add texture and dimension to the nails, making them look like miniature battle scenes that are ready to come to life.
Game Over Glitch Nail Designs
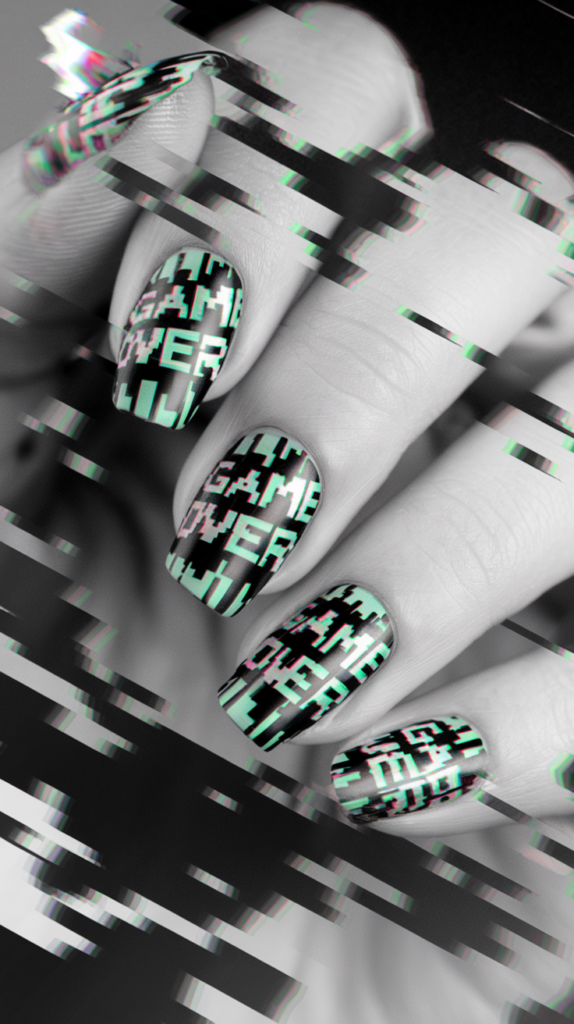
How to Create Glitchy Text Patterns
Glitch nail art is a nod to the digital world, featuring broken, pixelated text that looks as if it’s malfunctioning.
To create a “Game Over” glitch effect, start by painting the text in bold, blocky letters using a contrasting color, such as white on a black background.
Then, use a fine brush to add fragmented lines and scattered pixels around the edges of the letters, giving the appearance of digital distortion.
You can also add tiny, jagged lines in neon colors, like electric blue or hot pink, to enhance the glitchy look.
Layering these details creates a sense of movement and chaos, making the design look dynamic and eye-catching.
Black, White, and Neon Color Combinations
Black and white are the perfect base colors for glitch nail art, as they create a stark contrast that makes the neon accents pop.
Use a black base for a dark and edgy look, or a white base for a brighter, more futuristic vibe.
Neon colors, like lime green, electric blue, and bright magenta, can be used to paint glitchy lines and patterns, adding a digital, high-tech feel.
For a more cohesive design, try blending neon shades in a gradient effect, or use them to highlight specific areas of the text and patterns.
The combination of black, white, and neon creates a bold and modern look that’s perfect for gamers and tech enthusiasts.
Making Your Designs Look Distorted
To make your glitch designs look convincingly distorted, use layering techniques and varying line thicknesses.
Start by painting the main design, such as “Game Over” text or a pixelated symbol, in a solid color.
Then, add fragmented lines and smudges in lighter or darker shades, creating the illusion of a digital error.
Using a fine detail brush, draw tiny zig-zags and overlapping lines to give the design a disjointed, malfunctioning appearance.
You can also use a sponge to dab on patches of color for a more chaotic effect.
The goal is to create a sense of visual disruption, as if the design is caught in a digital glitch.
Minecraft Builder Nail Art
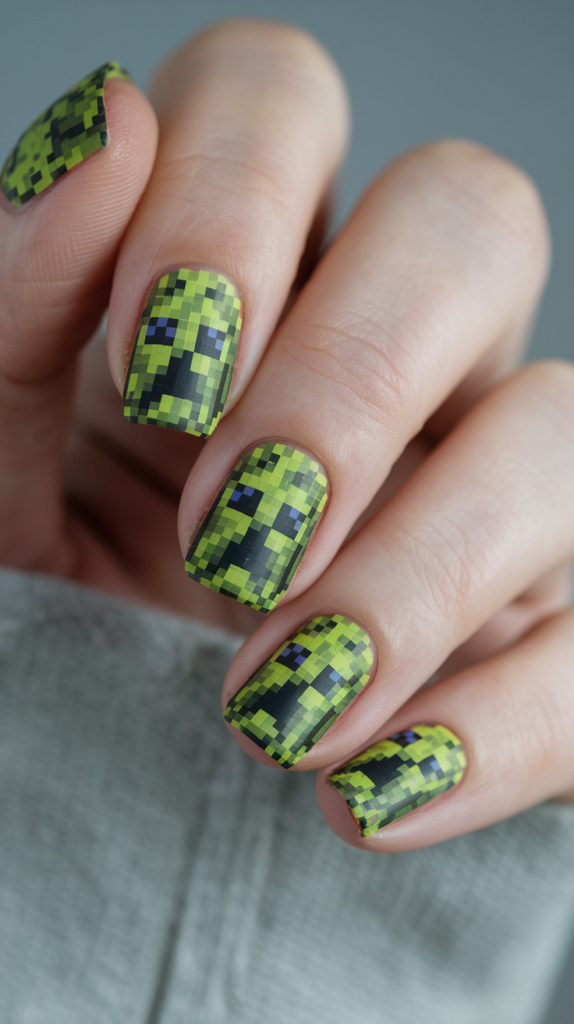
Pixelated Cubic Patterns and Creeper Faces
Minecraft-themed nail art is all about embracing the game’s signature pixelated style, featuring cubic patterns and iconic elements like Creeper faces.
Each nail can be painted to resemble a block from the game, such as grass, dirt, or stone, with small, square pixels carefully outlined to mimic the game’s graphics.
A Creeper face can be painted on one accent nail, using bright green polish for the background and black squares for the eyes and mouth.
To make the design even more authentic, use a matte top coat to give the nails a textured, earthy feel, just like the blocks in the game.
Earthy Shades for a Minecraft Look
Earthy shades of green, brown, and gray are essential for creating a true Minecraft look.
Use multiple shades to add depth and dimension, blending the colors smoothly to mimic the natural gradients found in the game’s terrain.
For grass blocks, start with a rich, forest green at the top and blend into a warm, earthy brown at the bottom.
Stone and cobblestone blocks can be painted in varying shades of gray, with small, white highlights to give them a more three-dimensional appearance.
This color palette captures the essence of Minecraft’s blocky, open world, making it instantly recognizable and fun.
Adding Matte Finishes for a Textured Feel
A matte top coat is the perfect finishing touch for Minecraft nail art, as it gives the design a textured, rugged look that complements the game’s pixelated graphics.
The matte finish adds a sense of realism, making the blocks look more like they’re made of natural materials.
For added dimension, consider using a matte top coat on some nails and a glossy finish on others, creating a contrast between different elements, like dirt blocks and shiny Creeper faces.
This combination of finishes adds depth and interest to the design, making it look as if the blocks are coming to life right on your nails.
Esports Tournament Nail Art
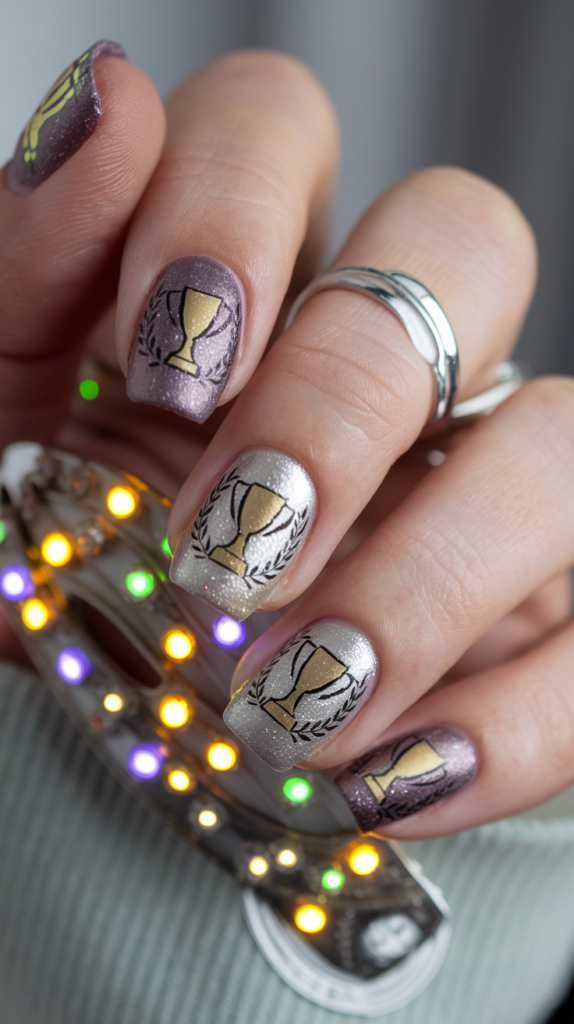
Painting Realistic Trophy and Championship Symbols
Esports tournaments are filled with excitement and energy, and what better way to celebrate than with nail art featuring realistic trophies and championship symbols? To start, choose a base color that reflects the intensity of the competition, such as a deep blue or black.
Using a fine nail art brush, carefully paint miniature trophies, complete with handles and shimmering metallic highlights in gold or silver polish.
These tiny trophies should be detailed with realistic shadows and highlights to give them a three-dimensional effect.
Add championship symbols, like laurel wreaths or victory stars, on accent nails to complete the look.
The combination of bold colors and metallic elements captures the grandeur of esports championships, making your nails a true celebration of victory.
Shimmering Gold and Silver Accents
Gold and silver accents are essential for creating a luxurious, championship-inspired look.
Use metallic polish to highlight key elements of your design, such as trophy handles, ribbons, or medal details.
A thin stripe of gold or silver along the edges of your nails can also add a touch of elegance, making the overall design feel more cohesive.
For a more dramatic effect, use metallic foils to create a shattered glass look, reminiscent of the energy and intensity of esports arenas.
These shimmering accents will catch the light beautifully, adding a sense of movement and excitement to your nail art.
LED-Inspired Details for a Modern Look
Esports events are known for their dazzling LED light displays, and incorporating these elements into your nail art can make your design truly stand out.
Start with a dark base color, like black or midnight blue, and use neon polishes in shades of electric blue, bright green, and hot pink to paint LED-inspired lines and patterns.
These lines can mimic the look of stadium lights or digital displays, creating a modern and futuristic vibe.
For an extra pop, use glow-in-the-dark or UV-reactive polish, which will make your nails light up in low-light settings.
This design captures the high-energy atmosphere of esports events, making it perfect for competitive gaming enthusiasts.
Streamer Aesthetic Designs
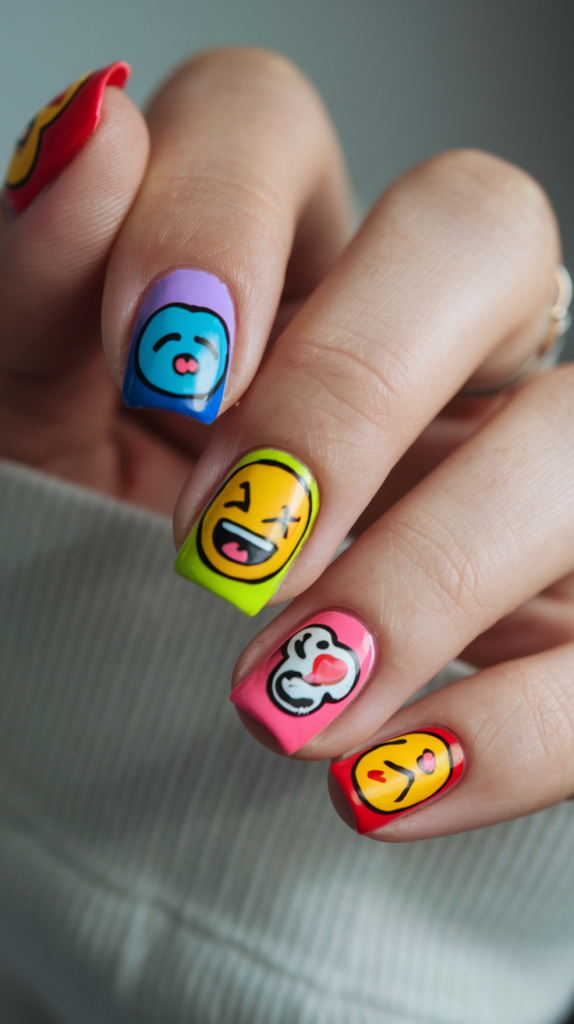
Emotes, Logos, and Streaming Icons
Streamer-themed nail art is a playful way to show your love for your favorite content creators and streaming platforms.
Each nail can feature a different element, such as popular emotes, streaming platform logos, or tiny microphones and headsets.
For example, you can paint the Twitch logo in its signature purple on one nail, while another nail features a laughing or crying emote, complete with exaggerated eyes and a cartoon-like expression.
Use vibrant colors to make the designs pop and give them a playful, energetic feel.
To tie everything together, consider adding small accents like hearts, stars, or the iconic “LIVE” symbol in bright red.
Adding Holographic Details for Flair
Holographic details can add a touch of flair and modernity to your streamer nail art.
Apply holographic powder over a base color to create a rainbow-like effect that shifts in the light.
This shimmering finish works well for accent nails or as a backdrop for your emotes and icons, adding depth and visual interest.
You can also use holographic stickers in the shape of hearts, stars, or arrows to emphasize certain areas of your design.
The holographic effect captures the lively and dynamic nature of streaming culture, making your nails look as vibrant and engaging as a live broadcast.
Tips for a Glittery, Eye-Catching Finish
To make your streamer-themed nails truly eye-catching, incorporate plenty of glitter and sparkle.
Use a glitter top coat to add a subtle shimmer over your entire design or apply chunky glitter in strategic areas, like around emotes or logos, to draw attention to those details.
Fine glitter can be used to outline symbols or add a touch of sparkle to the edges of your nails.
For a more dramatic effect, mix different sizes and colors of glitter to create a multi-dimensional look.
This glittery finish not only makes your nails stand out but also adds to the fun, celebratory atmosphere of the streaming world.
Magic Mana Nails
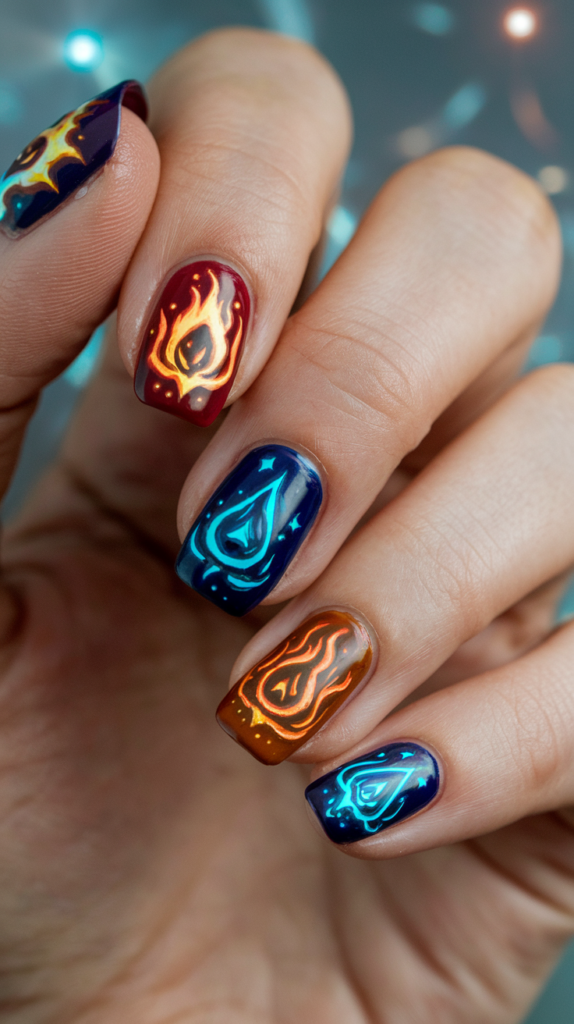
RPG Symbols and Elemental Designs
Magic mana nail art is inspired by the fantasy worlds of RPGs and collectible card games like Magic: The Gathering.
These designs often feature elemental symbols, such as fire, water, earth, and air, each represented in bold, jewel-toned colors.
Start by painting a deep, mystical background using shades like midnight blue, emerald green, or royal purple.
Then, use a fine brush to paint intricate symbols that represent each element, like a flaming torch for fire or a swirling wave for water.
Add subtle highlights and shadows to give the symbols a glowing, magical appearance.
The result is a set of nails that look like they’ve been enchanted with ancient spells.
Using Jewel Tones for a Magical Effect
Jewel tones are perfect for creating a magical, otherworldly vibe.
Rich shades of sapphire blue, ruby red, amethyst purple, and emerald green can be used to represent different types of mana or magical energy.
These colors should be applied in a gradient or layered effect to create a sense of depth and mystery.
Metallic accents in gold or silver can be added to highlight certain areas, like the edges of symbols or the outline of a spell circle.
For an even more enchanting look, use iridescent or duochrome polish that shifts colors as the light hits, adding a dynamic, ethereal quality to your design.
How to Paint Glowing Mana Circles
Glowing mana circles are a stunning addition to any magic-themed nail art.
To create this effect, start by painting a faint, circular outline in white or light blue.
Then, use a small detail brush to add intricate runes and symbols within the circle, making sure to keep the lines fine and delicate.
Using a translucent, glow-in-the-dark polish, paint over the circle to give it a subtle, magical glow.
You can also add tiny dots of light around the circle to create the illusion of floating mana particles.
The finished design should look like an enchanted spell ready to be cast, adding a mystical and captivating element to your nails.
Anime Gamer Style Nail Art
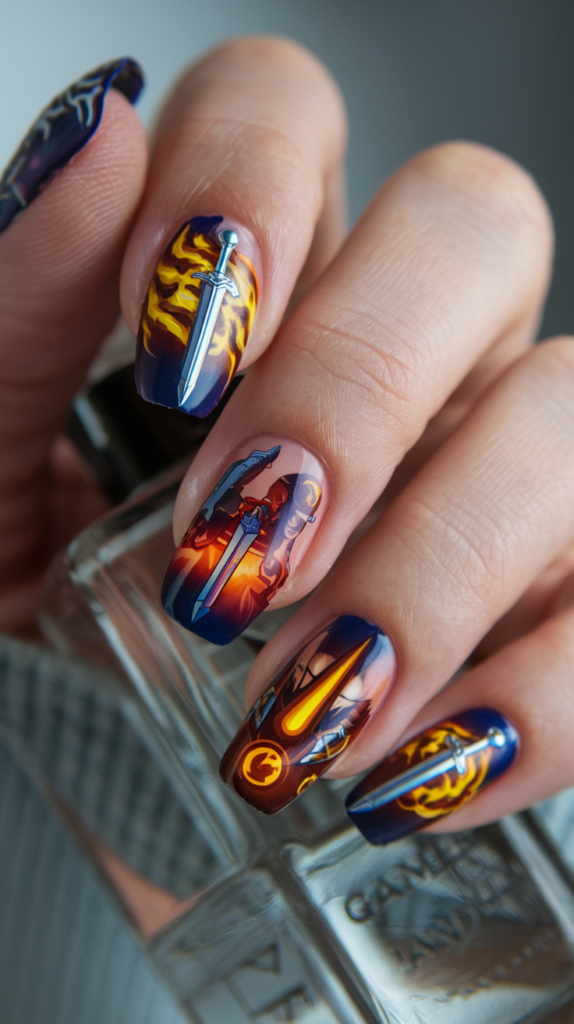
Anime Characters and Gaming Symbols
Anime gamer nail art combines the worlds of anime and video games, featuring designs that highlight your favorite characters and gaming elements.
Each nail can showcase a different anime character, painted in vivid colors and detailed with expressive facial features and dynamic poses.
Use references from anime-inspired games, like Genshin Impact or Sword Art Online, to create an authentic look.
For added flair, incorporate gaming symbols like swords, health potions, or magical orbs.
These elements can be painted in contrasting colors to make the characters and symbols stand out against the background.
The design should be full of energy and life, capturing the excitement of anime and gaming culture.
Painting Intricate Swords and Potions
Intricate swords and potions can add a fantasy element to your anime gamer nails.
Use metallic polish to paint swords, with fine lines and shading to give them a three-dimensional effect.
The hilt of the sword can be decorated with tiny jewels or intricate carvings, adding a touch of elegance.
Potions can be painted in glass-like, translucent colors, with small highlights to make them appear liquid and glowing.
For a magical touch, paint tiny bubbles or sparkles around the potions.
These details will make your nail art look like a scene straight out of an anime RPG, full of adventure and enchantment.
Adding Glowing Orbs for a Fantasy Feel
Glowing orbs are a staple in many anime and fantasy games, and they can add a magical, otherworldly feel to your nail art.
To create this effect, use a white or pastel base for the orb and layer translucent, shimmery polish over it.
Add a soft halo of light around the orb using a gradient technique, blending the colors outward to create a glowing effect.
You can also add small runes or symbols around the orbs, making them look like enchanted artifacts.
The key is to use soft, diffused lines to give the orbs a gentle, ethereal glow, making your nails look like they’re radiating magical energy.
8-Bit Love Nail Designs
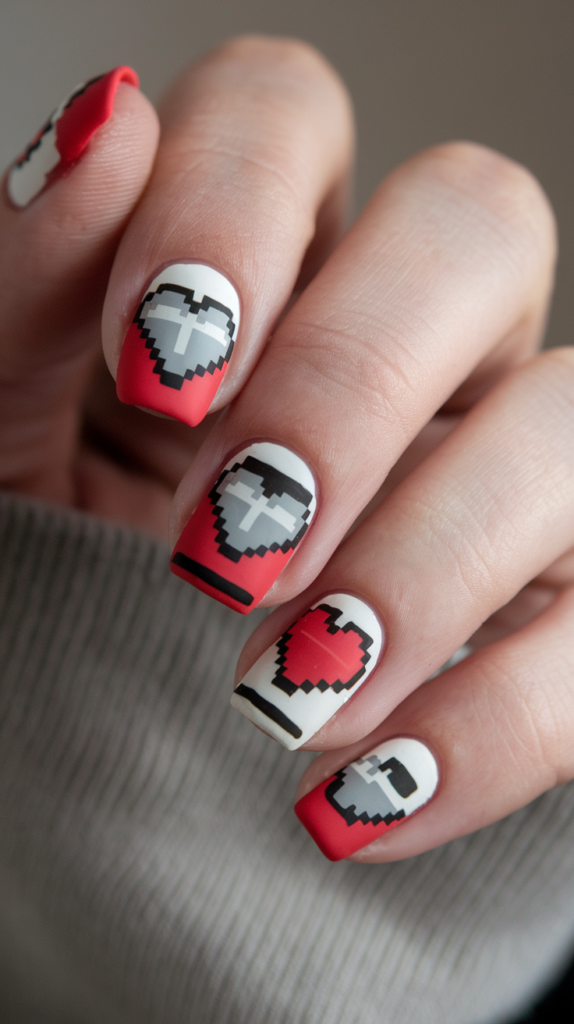
Simple 8-Bit Hearts, Diamonds, and Clubs
8-bit nail designs are a nostalgic throwback to the early days of gaming, featuring pixelated hearts, diamonds, clubs, and other classic symbols.
These designs are simple yet striking, with each shape made up of tiny, square pixels.
Start by painting a solid base color, such as pastel pink, sky blue, or classic black.
Then, use a fine brush to paint each pixel in a grid-like pattern, making sure the edges are clean and sharp.
The result is a set of nails that look like they belong in a retro video game, with bold and eye-catching symbols that capture the essence of 8-bit art.
Choosing Matte Pastel or Black Backgrounds
The choice of background color can make a big difference in how your 8-bit nail art is perceived.
Matte pastels, like mint green, soft lavender, or baby blue, create a playful and cheerful vibe, perfect for a light-hearted design.
On the other hand, a black or deep navy background adds a sense of contrast and drama, making the pixelated symbols stand out even more.
A matte finish is ideal for these designs, as it gives the nails a vintage, arcade-inspired look.
If you prefer a more modern twist, consider adding a glossy top coat to make the colors pop and give the design a polished finish.
Tips for Crisp, Pixelated Designs
To achieve crisp, pixelated designs, use a thin, square-tipped brush or a small nail art stencil to outline each pixel.
It’s important to work slowly and carefully, making sure that each square is the same size and evenly spaced.
Using a dotting tool can also be helpful for adding clean, rounded dots to fill in the shapes.
Let each layer of polish dry completely before adding the next, and use a matte top coat to seal the design and prevent smudging.
These techniques will ensure that your 8-bit nail art looks clean, precise, and true to the classic pixel art style.
Speedrunner Nails
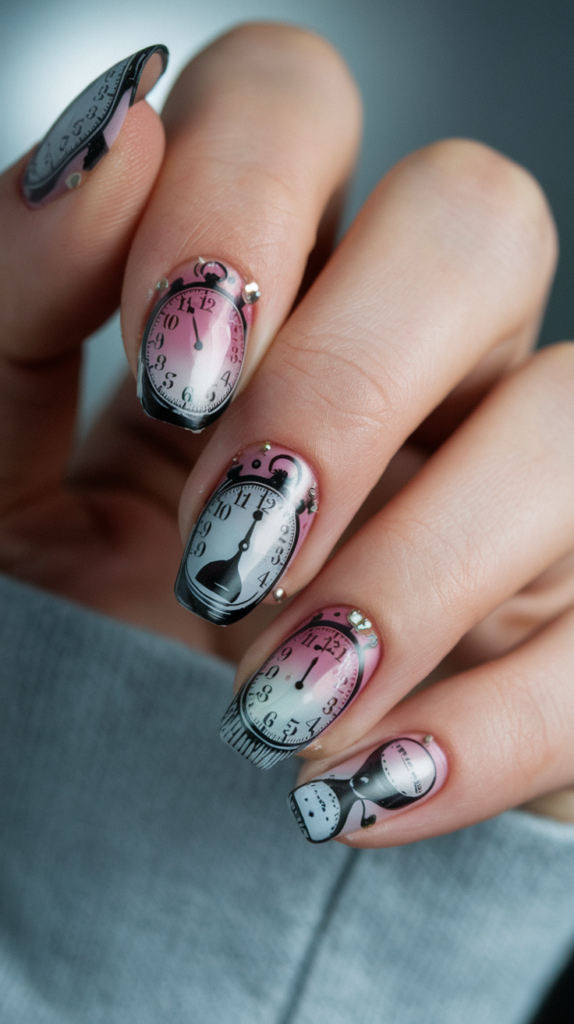
Time-Themed Symbols and Gradient Effects
Speedrunner nail art is all about capturing the sense of urgency and fast-paced action that defines speedrunning.
Time-themed symbols, like stopwatches, hourglasses, and digital clocks, can be painted in bold, high-contrast colors.
Use gradient effects to create a sense of movement and speed, blending shades of blue, red, or orange from one end of the nail to the other.
This gradient can serve as a dynamic background for your symbols, making them stand out even more.
The overall design should evoke the feeling of racing against the clock, with energetic lines and patterns that convey a sense of momentum.
Using Metallic Accents for a Speedy Look
Metallic accents can add a sleek, high-tech feel to your speedrunner nail art.
Silver or chrome polish can be used to outline symbols or add reflective details, like the shine on a stopwatch or the metallic frame of an hourglass.
These accents catch the light and give the design a modern, futuristic look.
For a more cohesive effect, use metallic polish to paint racing stripes or arrows, which can be placed diagonally across the nails to enhance the sense of speed.
The combination of bold colors and metallic elements creates a striking and energetic design that’s perfect for gamers who love the thrill of speedrunning.
How to Paint Hyper-Realistic Clock Designs
Hyper-realistic clock designs require precision and attention to detail.
Start by painting the clock face in a light color, like white or pale gold, and use a fine brush to add numbers, minute markers, and hands.
To make the clock look three-dimensional, add subtle shading around the edges and highlights on the glass cover.
A drop of clear gel polish can be applied over the clock face to create a glossy, domed effect, making it look like real glass.
You can also add small, broken gears or cogs around the clock to emphasize the passage of time, giving your nails a mechanical, steampunk-inspired vibe.
Quest Markers Nail Art
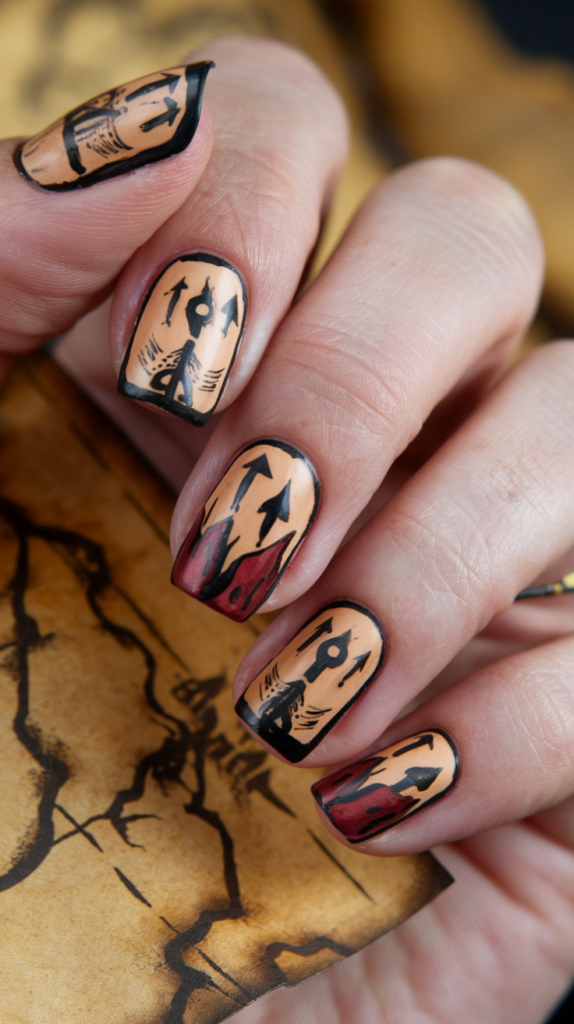
Arrows and Medieval Map Patterns
Quest marker nail art takes inspiration from adventure games and RPGs, featuring arrows, map patterns, and symbols that guide players on epic journeys.
To create this look, start with a base color that resembles old parchment, such as a warm, sepia-toned beige or pale brown.
Use a fine brush to paint arrows pointing in different directions, as if marking important locations on a map.
Add small, hand-drawn compass roses or X marks to represent treasure spots, and use darker shades of brown to draw crisscrossing lines that mimic the look of an ancient map.
The design should feel like a treasure map come to life, full of mystery and adventure.
Sepia Tones for an Old-World Feel
Sepia tones are perfect for achieving a vintage, old-world look that fits with the quest marker theme.
Start with a gradient background that blends shades of cream, tan, and brown, creating the appearance of aged paper.
To add depth, use a dry brush technique to apply darker shades around the edges of the nails, giving them a weathered, rustic feel.
Gold or bronze accents can be added to highlight key elements, like the points of a compass or the outline of a treasure chest.
These subtle details make the design look like it’s been pulled straight from the pages of a medieval adventure story.
Painting Precise Quest Symbols
Precise, detailed quest symbols are essential for completing the look.
Use a thin, detail brush to paint elements like shields, swords, and tiny scrolls, paying close attention to the placement and proportions.
For an extra touch of authenticity, add faint lines and dots around the symbols to mimic the look of ink on a map.
If you’re feeling ambitious, try adding a small dragon silhouette or a castle in the distance, creating a miniature scene on your nails.
A matte top coat will give the design a parchment-like finish, while a touch of gold foil can be added for a magical, treasure-like effect.
Retro Graphics Nail Designs
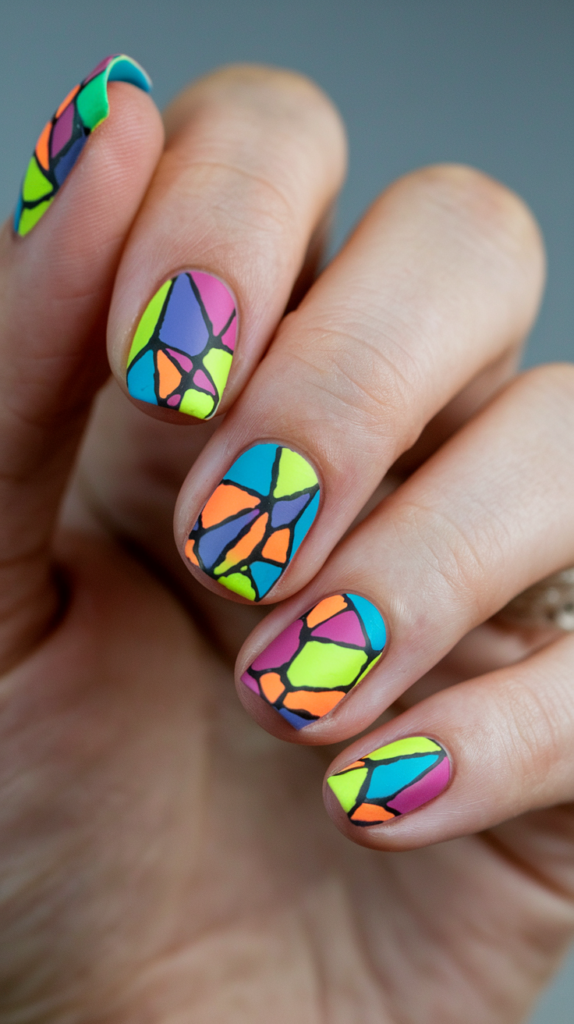
Low-Poly Geometric Shapes from the ’90s
Retro graphics nail art is a tribute to the low-poly, geometric shapes that defined the early days of 3D video games.
These designs feature sharp, angular shapes in bold, neon colors like magenta, cyan, and lime green, layered over a black or deep navy base.
The geometric patterns can be arranged in an abstract way, with triangles, cubes, and pyramids overlapping and intersecting.
Use crisp lines and clean angles to capture the simplicity and charm of ‘90s graphics, and consider adding a subtle gradient effect in the background to give the design a sense of depth.
This look is perfect for gamers who love the nostalgia of early 3D games and want to express that through their nail art.
Using Neon Colors for a Retro Vibe
Neon colors are essential for achieving a true retro vibe.
Bright pink, electric blue, and neon yellow are great choices for painting geometric shapes and lines, making the design look like it’s glowing against a dark backdrop.
Use a neon gradient to add movement and energy, or paint each shape in a different neon shade for a playful, eye-catching look.
For a more cohesive design, outline the shapes in white or black to make them stand out.
These bold, high-contrast colors create a vibrant and dynamic effect, reminiscent of arcade game graphics and retro computer animations.
Matte vs. Glossy: Choosing Your Finish
Choosing between a matte and glossy finish can change the entire feel of your retro graphics nail art.
A matte finish gives the design a modern, sophisticated look, making the neon colors appear bold and smooth.
On the other hand, a glossy top coat adds a polished, shiny effect that enhances the vibrancy of the colors, giving the nails a playful, arcade-inspired feel.
For a unique twist, try combining both finishes by keeping the base matte and applying a glossy top coat only to the geometric shapes.
This mix of textures adds an extra layer of visual interest, making your retro graphics design stand out.
Loot Crate Treasure Nail Art
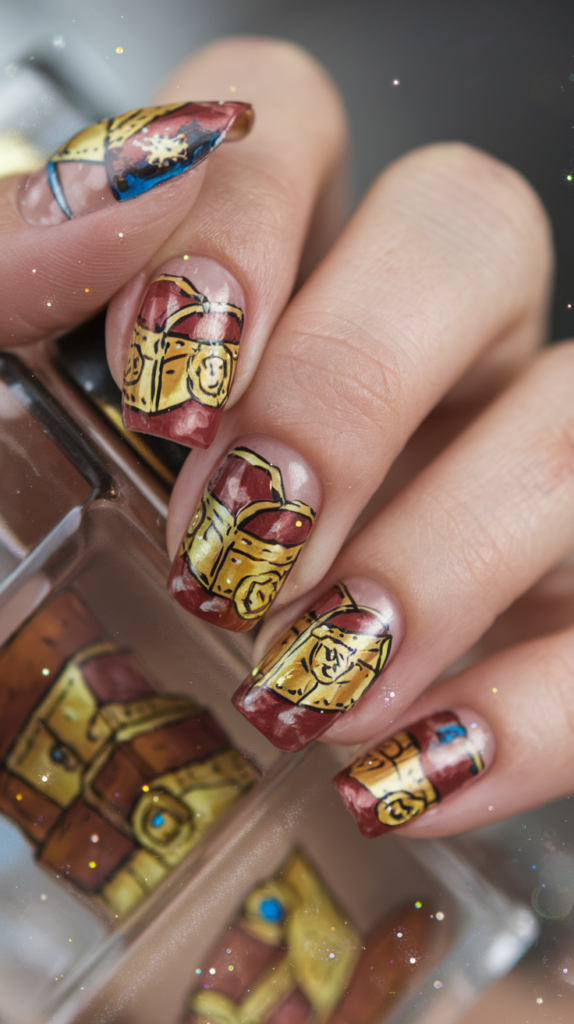
Shiny Treasure Chests and Gold Coins
Loot crate nail art is all about the thrill of discovery, featuring designs inspired by treasure chests, gold coins, and other valuable in-game loot.
Start with a rich, dark base color, like deep brown or midnight blue, to create the look of a treasure chest hidden in a secret cave.
Use metallic gold polish to paint tiny coins, complete with engraved details, and add shimmering gold foil to mimic the appearance of overflowing treasure.
A miniature treasure chest can be painted on one accent nail, complete with wooden planks and a glowing keyhole.
The overall design should sparkle and shine, capturing the excitement of opening a loot crate and finding valuable treasures inside.
Painting Shimmering Silver and Gold Accents
Gold and silver accents are crucial for creating a dazzling, treasure-filled look.
Use metallic polish to highlight key elements, like the edges of the treasure chest or the surface of the coins.
Silver polish can be used to paint tiny gems or enchanted relics, adding a touch of variety to the design.
To create a multi-dimensional effect, layer different shades of gold and silver, blending them together to create the illusion of depth and texture.
Adding a touch of holographic glitter can give the design an extra sparkle, making it look as if the treasure is shimmering in the light.
Adding Sparkles for a Rich, Luxurious Look
Sparkles and glitter are the perfect finishing touches for your loot crate nail art.
Use a glitter top coat to add a subtle shimmer over the entire design, or apply chunky glitter in gold and silver to specific areas, like the coins and treasure chest.
For a more opulent look, use rhinestones or small gems to represent precious jewels hidden among the loot.
These elements catch the light beautifully, adding a sense of luxury and extravagance.
The combination of metallic polish, glitter, and rhinestones creates a rich, textured effect that makes your nails look like they’re dripping with treasure.
Holographic Hero Nail Designs
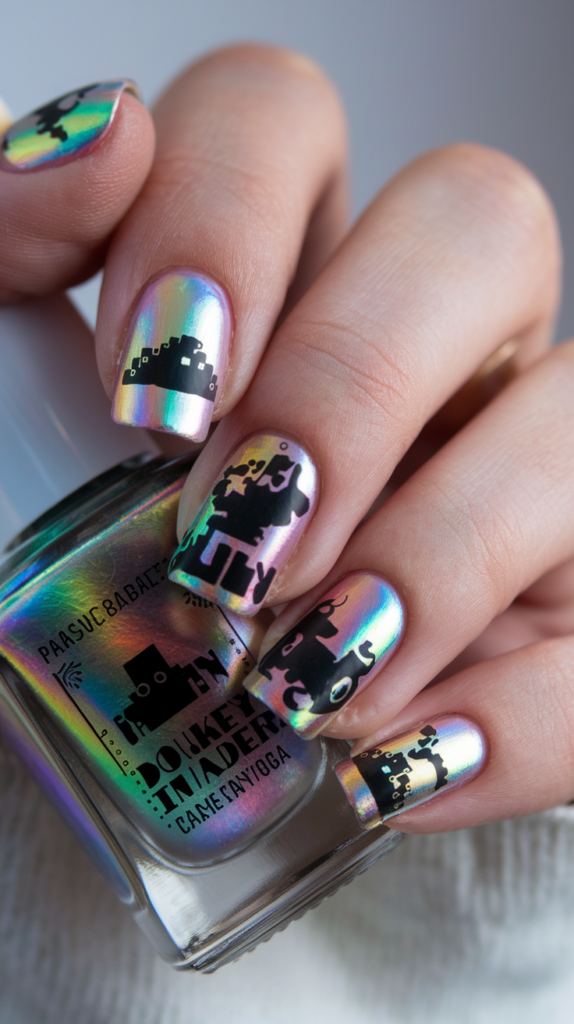
Holographic Foils and Character Silhouettes
Holographic nail art is a modern, eye-catching design that uses shimmering foils and bold silhouettes to create a futuristic look.
Start with a holographic base coat that shifts colors as the light hits, creating a rainbow-like effect.
Over this, paint the silhouettes of popular game characters, like Master Chief from Halo or Samus from Metroid, in bold black or deep navy.
The holographic background will make the silhouettes stand out, while also adding a sense of movement and energy.
To give the design a cohesive look, use thin, holographic lines to outline certain elements or add small, abstract shapes that mimic the look of digital particles.
Using Bold Outlines for Iconic Characters
Bold outlines are essential for making iconic characters recognizable in your holographic hero nail art.
Use a fine detail brush to paint the characters in solid, opaque colors, and outline them in black to make them pop.
This technique works especially well for silhouettes, as it creates a striking contrast against the shimmering, holographic background.
To add a bit of depth, use subtle shading or highlights within the characters, keeping the focus on the bold outlines.
The result is a set of nails that celebrate your favorite game characters in a futuristic, holographic style.
Creating a Shifting Rainbow Effect
To achieve a mesmerizing, shifting rainbow effect, use holographic nail powder or polish that reflects multiple colors under different lighting.
Apply the holographic powder over a black or dark base color for maximum impact, and seal it with a glossy top coat to enhance the shine.
The rainbow effect will change as you move your hands, adding a dynamic, otherworldly quality to the design.
You can also experiment with holographic foils, layering them in abstract patterns or cutting them into shapes to create a unique, fractured effect.
This technique adds an element of surprise and makes your holographic hero nails look truly out of this world.
RPG Adventure Nail Art
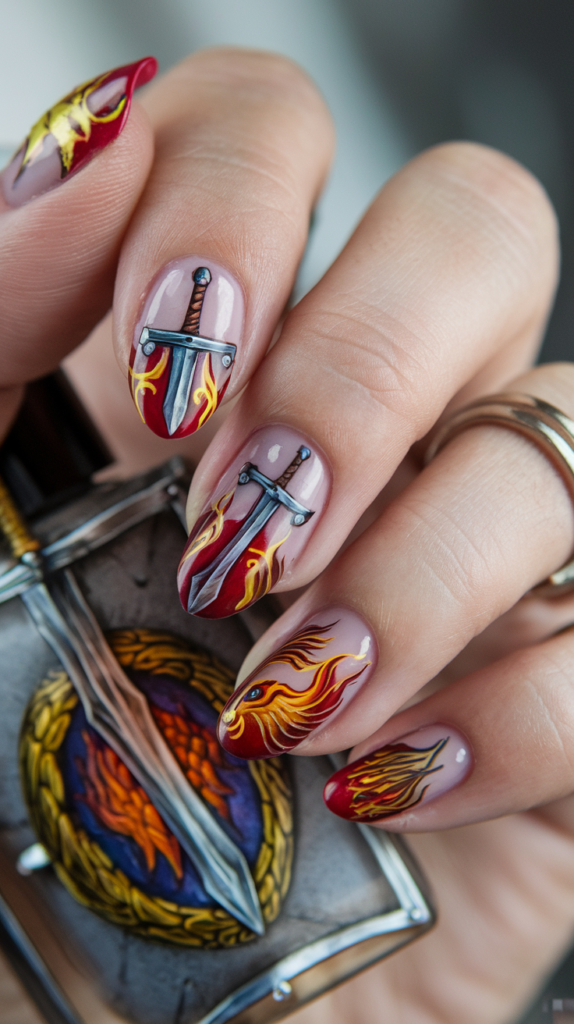
Fantasy Symbols Like Swords and Shields
RPG adventure nail art draws inspiration from fantasy games, featuring symbols like swords, shields, and magical runes.
Use a deep, mystical color palette, with shades of emerald green, royal purple, and midnight blue, to create a rich and adventurous background.
Paint intricate swords with metallic silver polish, adding fine details to the hilt and blade, and use gold polish to outline shields, giving them a regal appearance.
Magical runes can be painted in white or light blue, with subtle shading to make them look like they’re glowing with power.
The combination of fantasy symbols and jewel-toned colors creates a look that’s perfect for fans of epic RPGs.
Rich Jewel Tones and Metallic Tips
Jewel tones, like ruby red, sapphire blue, and amethyst purple, add a luxurious and enchanting feel to your RPG adventure nail art.
Use these colors as a base and add metallic tips in gold or silver for a touch of elegance.
The metallic polish can be used to create borders around each nail or to highlight specific elements, like the edges of a shield or the blade of a sword.
For a more magical effect, use a glittery top coat or iridescent shimmer powder, which will make the jewel tones sparkle and glow.
This design is both bold and sophisticated, capturing the essence of a fantasy world full of adventure and magic.
Techniques for a Magical Adventure Theme
To create a truly magical adventure theme, experiment with layering translucent colors and adding fine glitter to mimic the look of enchanted mist.
Use a sponge to apply gradients of jewel tones, blending them smoothly to create a mystical background.
Paint thin, swirling lines in silver or white to represent magical energy, and add tiny dots of light to create the illusion of glowing particles.
You can also use gel polish to create raised, 3D effects, such as runes that look like they’ve been carved into the nails.
These techniques add depth and complexity to the design, making your nails look like they’re part of a fantasy adventure.
Dungeon Crawl Designs
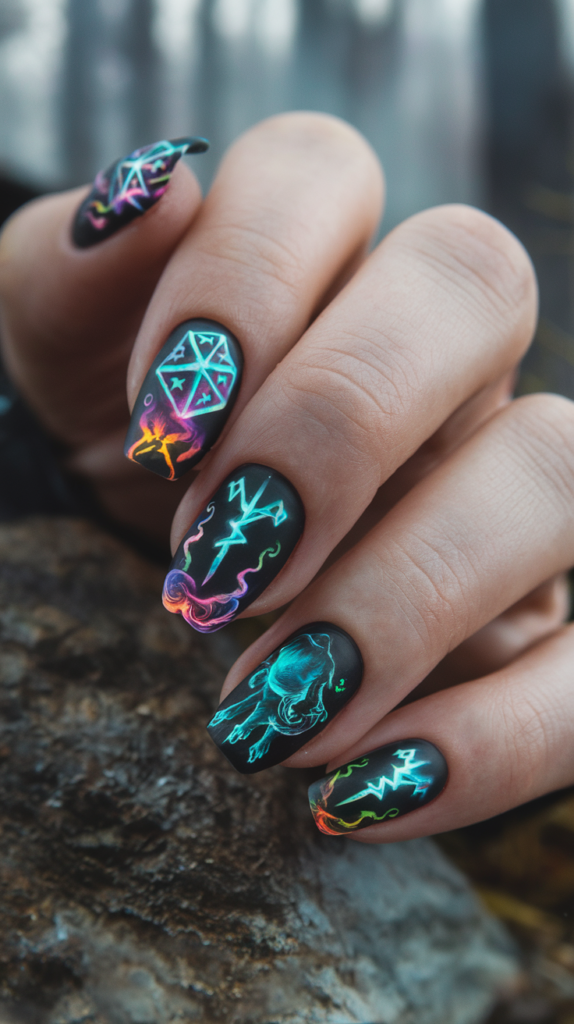
Dice, Spell Runes, and Mythical Creatures
Dungeon crawl nail art is inspired by tabletop RPGs like Dungeons & Dragons, featuring elements like dice, spell runes, and mythical creatures.
Each nail can showcase a different aspect of a dungeon adventure, such as a 20-sided die painted with metallic numbers, or a spell circle surrounded by glowing runes.
Mythical creatures, like dragons, griffins, or wizards, can be painted in intricate detail, using rich, dark colors to create a sense of mystery and magic.
For a cohesive design, use a consistent color palette of deep reds, purples, and blacks, accented with shimmering gold or silver.
These designs are perfect for anyone who loves the thrill of exploring dungeons and casting spells.
Dark, Matte Backgrounds for a Mystical Look
A dark, matte background adds a mystical and atmospheric feel to your dungeon crawl nail art.
Use matte black, deep indigo, or forest green as your base, and layer on your designs using metallic or neon polishes for contrast.
The matte finish gives the nails a velvety texture, making the symbols and creatures look more vivid and striking.
For added dimension, use a dry brush technique to apply subtle highlights in lighter shades, creating the illusion of shadows and depth.
The result is a set of nails that look like they belong in a dark and magical dungeon, full of secrets waiting to be discovered.
Adding Glow-in-the-Dark Elements
Glow-in-the-dark elements can bring your dungeon crawl nail art to life, especially in low-light settings.
Use glow-in-the-dark polish to outline runes, draw mystical symbols, or add a ghostly aura around mythical creatures.
These glowing details will make the design look like it’s radiating magical energy, perfect for a dungeon-themed adventure.
To enhance the effect, use a UV top coat that charges under light, making the glow even more vibrant.
This technique adds an interactive and playful element to your nail art, making it perfect for game nights or fantasy-themed events.
Gamer’s Paradise Nail Art
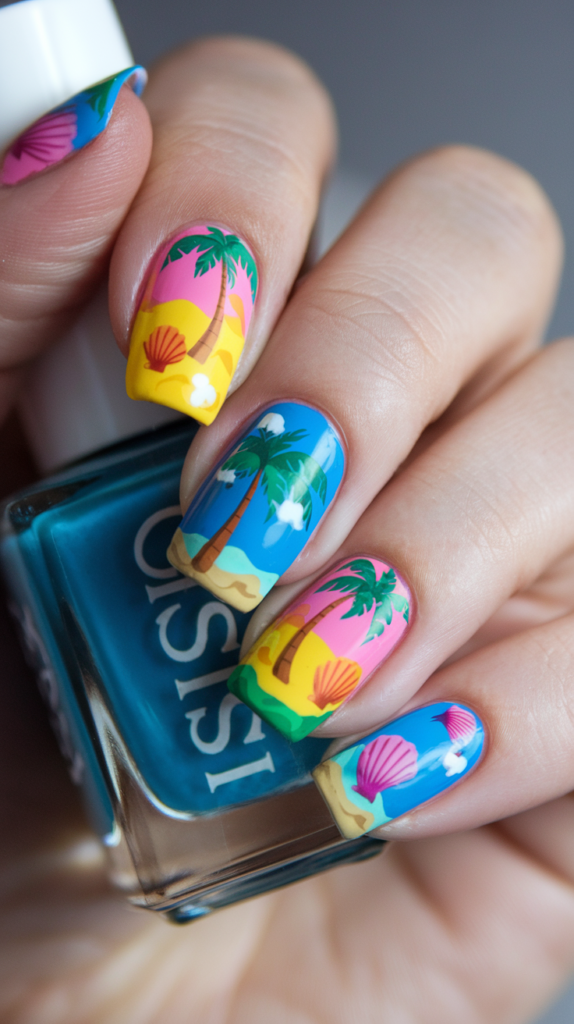
Tropical Island Designs Inspired by Animal Crossing
Gamer’s Paradise nail art is a fun and whimsical design inspired by relaxing island games like Animal Crossing.
Each nail can feature a different tropical element, such as palm trees, sandy beaches, or colorful seashells.
Use soft, pastel colors for the background, like sky blue, mint green, and sandy beige, to create a serene and beachy vibe.
Paint tiny palm trees swaying in the breeze, or add little island villagers with happy, cartoon-like expressions.
For a playful touch, include elements like coconuts, flowers, or a fishing rod.
This design is perfect for gamers who want to capture the laid-back, carefree atmosphere of a virtual island paradise.
Painting Realistic Sand and Water Details
To create realistic sand and water effects, use a sponge to dab on different shades of beige and light brown for the sand, blending them smoothly to create a natural gradient.
For the water, use shades of blue and turquoise, layering them to create depth and movement.
A clear, glossy top coat can be applied over the water to make it look wet and shiny, while a matte top coat over the sand will give it a more textured, realistic feel.
Tiny white dots and lines can be added to represent foam or gentle waves, making the water look more dynamic.
These details will make your tropical paradise nails look like a miniature beach scene, perfect for summer.
Adding Beachy Vibes with Palm Trees
Palm trees are a must for creating beachy, tropical vibes.
Use a thin brush to paint the trunk in dark brown or black, adding small, jagged lines for texture.
The palm fronds can be painted in shades of green, with each leaf carefully outlined to create a realistic look.
For an extra pop of color, add tiny flowers or fruit hanging from the trees, using bright shades like pink, orange, or yellow.
The combination of palm trees, sandy beaches, and clear blue water will make your nails look like a dreamy island getaway, perfect for escaping into a virtual paradise.
Speedy Sonic Designs
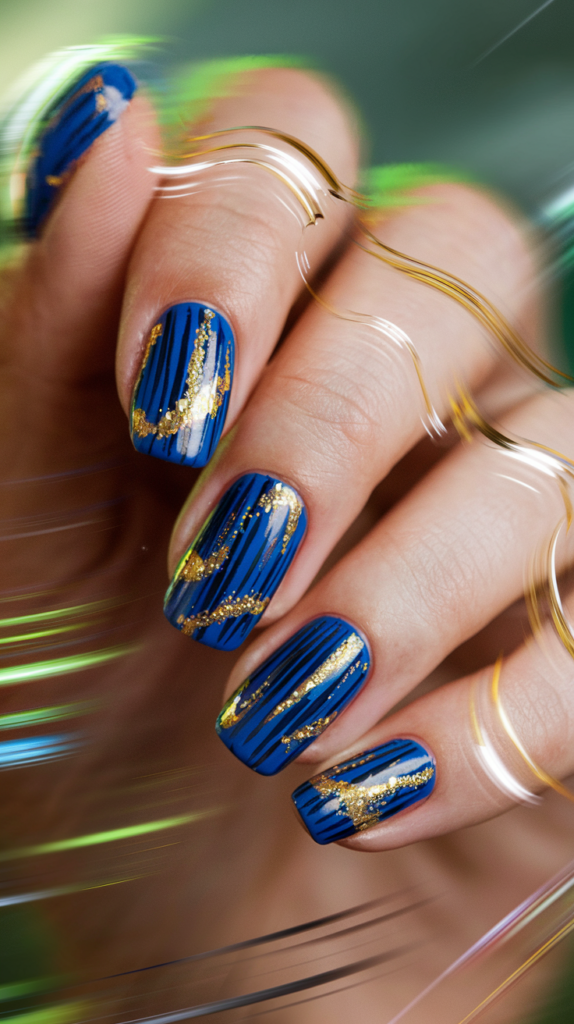
Blue Streaks and Golden Rings in Motion
Speedy Sonic nail art is all about capturing the fast-paced action and iconic symbols of Sonic the Hedgehog.
Start with a bright blue base, reminiscent of Sonic’s fur, and use white and silver polish to paint streaks of motion across the nails.
These streaks should be bold and dynamic, giving the illusion of Sonic speeding through the scene.
Golden rings, a signature element of the game, can be painted in metallic gold, with small highlights added to make them look shiny and three-dimensional.
The combination of blue streaks and golden rings creates a sense of excitement and energy, perfect for fans of the speedy blue hedgehog.
Using High-Gloss Finishes for Speed Effects
A high-gloss finish is essential for achieving a sleek and polished look that captures the essence of Sonic’s speed.
The glossy top coat will make the blue base color look vibrant and smooth, while also enhancing the metallic shine of the golden rings.
To add even more movement, consider using holographic or iridescent polish, which will catch the light and create a shimmering effect as you move your hands.
This high-gloss, reflective finish adds an extra layer of excitement to the design, making your nails look as if they’re racing through the world of Sonic the Hedgehog.
Painting Iconic Sonic Elements
In addition to blue streaks and golden rings, you can incorporate other iconic elements from the Sonic universe.
Paint tiny red sneakers on one nail, complete with white laces and a silver buckle, to represent Sonic’s famous footwear.
Green palm trees or checkered patterns can be added to mimic the look of the game’s levels, while small, pixelated animals can be painted to represent the characters Sonic rescues.
These details add a playful and nostalgic touch to the design, making it a perfect tribute to one of gaming’s most beloved franchises.
Tech and Mech Nail Art
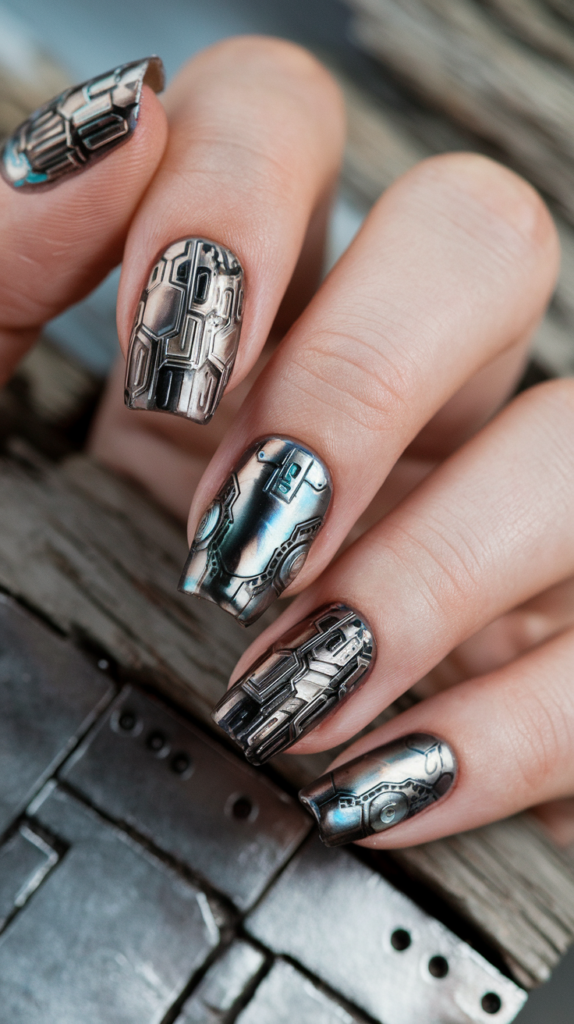
Robotic Circuits and Metallic Panels
Tech and mech nail art is inspired by the world of robotics and futuristic technology, featuring designs like circuit boards, metallic panels, and robotic arms.
Use a dark, glossy base, like black or gunmetal gray, and paint intricate circuit patterns in silver or neon green.
These patterns should look like they’re running across the nails, with tiny dots and lines connecting to create a realistic circuit effect.
Metallic panels can be painted using chrome polish, with small, rivet-like details added for texture.
The combination of shiny metallics and bright neon accents creates a high-tech, mechanical look that’s perfect for fans of sci-fi and mecha anime.
Mixing Chrome and Matte Finishes
Mixing chrome and matte finishes adds depth and contrast to your tech and mech nail art.
Use a chrome polish to paint robotic elements, like gears or metal plates, and pair them with a matte black or gray background to make the metallic details stand out.
For a more industrial look, use a matte top coat on the background and keep the chrome elements glossy.
This contrast creates a layered, three-dimensional effect, making the design look more complex and mechanical.
You can also add small, matte decals, like warning symbols or barcodes, to give the nails a futuristic, sci-fi feel.
Adding 3D Gears for a Mech-Inspired Look
3D elements, like tiny gears and screws, can take your mech-inspired nail art to the next level.
Use gel polish to create raised, gear-like shapes on the nails, and paint them in metallic shades for a realistic, industrial effect.
Small metallic studs or rhinestones can be added to represent screws or bolts, giving the design a tactile, interactive quality.
For an even more intricate look, layer the gears and use shading to create the illusion of depth, as if the gears are part of a functioning robotic mechanism.
These 3D elements add a sense of realism and make your tech and mech nails look like they belong in a futuristic factory or laboratory.
Social Party Games Nail Designs
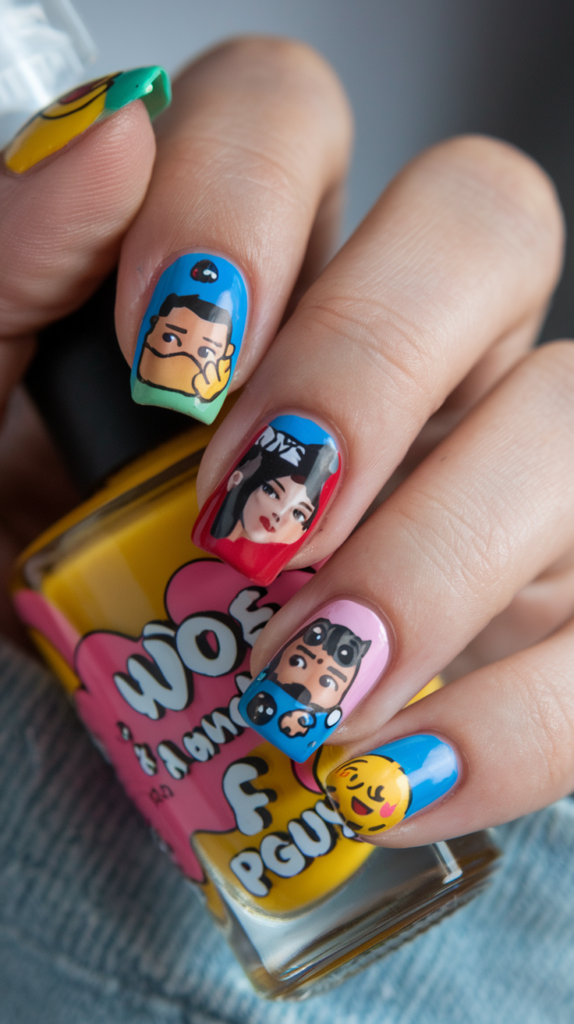
Fun Characters from Among Us and Fall Guys
Social party game nail art is inspired by the fun and colorful worlds of games like Among Us and Fall Guys.
Each nail can feature a different character, painted in bright, pastel colors with expressive faces and silly accessories.
For Among Us designs, paint the crewmates in their signature spacesuits, complete with small details like hats, pets, or emergency buttons.
Fall Guys characters can be painted in their playful, bean-like shapes, with colorful costumes and patterns.
Use a glossy top coat to give the characters a smooth, cartoonish finish, and add small, white highlights to make them look extra cute and lively.
Using Vibrant Backgrounds for Playful Vibes
Vibrant backgrounds are key to capturing the playful, chaotic energy of social party games.
Use a mix of bright colors, like neon pink, electric blue, and sunny yellow, as the base for your nail art.
You can also create gradient backgrounds, blending two or three colors to mimic the look of a lively game arena.
Adding fun details, like confetti or swirling patterns, will make the design feel even more festive and exciting.
The goal is to create a cheerful, eye-catching look that brings the fun of party games to life on your nails.
Adding Emojis and Text Bubbles
Emojis and text bubbles are a fun way to add personality to your social party game nail art.
Paint tiny, expressive emojis, like laughing faces, thumbs-up, or heart eyes, on one or two nails, using bright colors and bold outlines.
Text bubbles can be added to represent in-game chat messages, with phrases like “SUS!” for Among Us or “GO!” for Fall Guys.
Use a fine brush to outline the bubbles in black or white, and fill in the text with a contrasting color.
These playful elements add a humorous and interactive touch to the design, making it perfect for fans of social gaming.
Conclusion
Gamer nail art is a fantastic way to bring your favorite video game worlds to life and share your passion with others.
From bold and dramatic designs that capture the intensity of boss battles to fun and whimsical styles inspired by social party games, the possibilities are truly endless.
By experimenting with vibrant colors, intricate details, and unique finishes, you can create nail art that is both visually stunning and deeply personal.
We hope this collection of 35 Gamer nail art designs has inspired you to try something new and get creative with your next manicure.
So grab your favorite polishes, let your imagination run wild, and get ready to show off your love for gaming in the most stylish way possible.
Happy gaming and happy painting!
