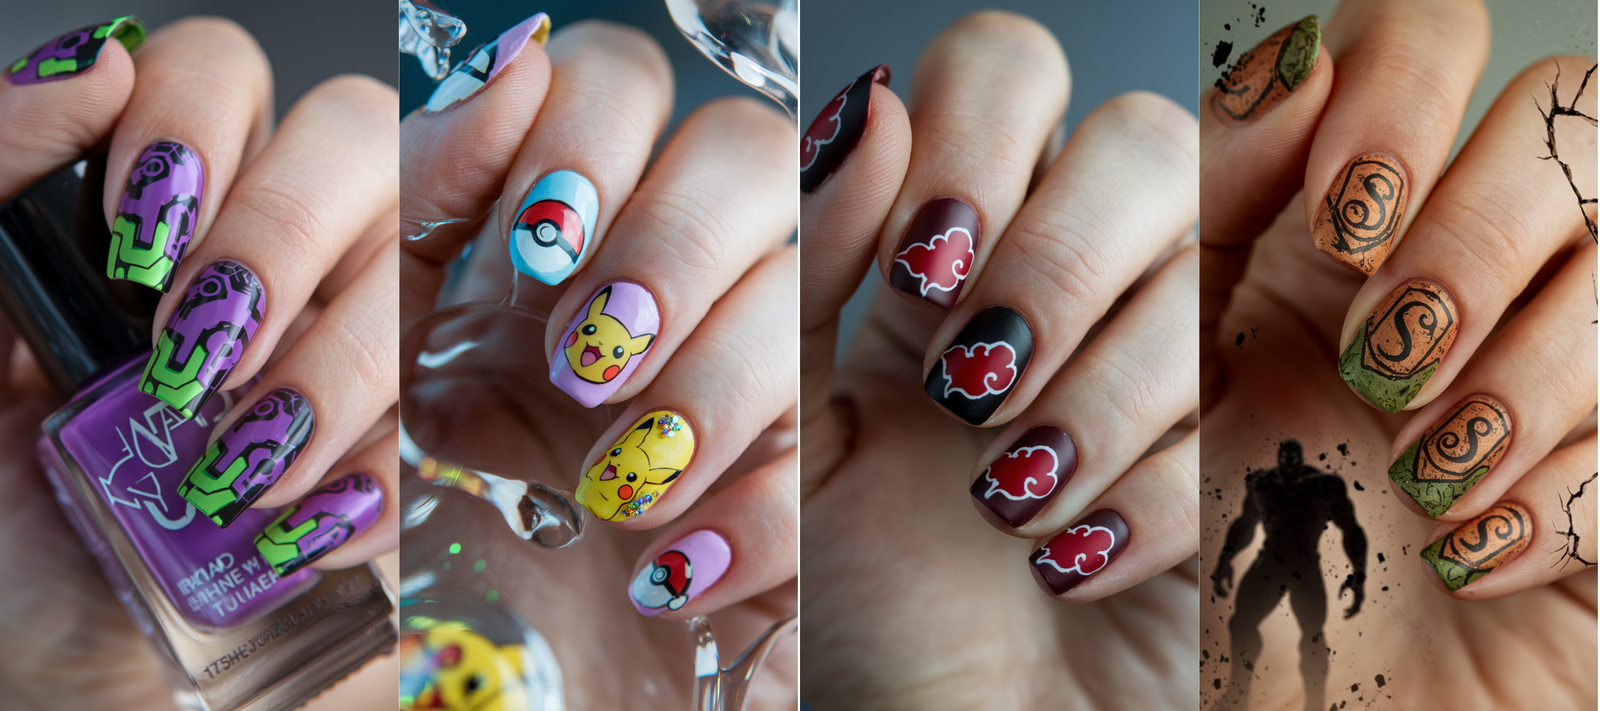
Anime-inspired nail art is more than a trend—it’s a vibrant celebration of storytelling, a canvas where the boundless worlds of your favorite series collide with the artistry of beauty.
From the shimmering magic of enchanted realms to the pulse-pounding chaos of epic battles, these designs weave iconic characters, symbols, and emotions into every brushstroke, turning your fingertips into a gallery of fandom.
Whether you’re drawn to the tender whimsy of Studio Ghibli or the fiery resolve of *Naruto*, this guide unveils 35 unique nail art creations, each a meticulously crafted homage to the anime that ignite your imagination.
Packed with rich inspiration and detailed steps, this collection invites you to wear your passion boldly, transforming your nails into a testament to the stories that shape you.
01. Sailor Moon’s Lunar Glow
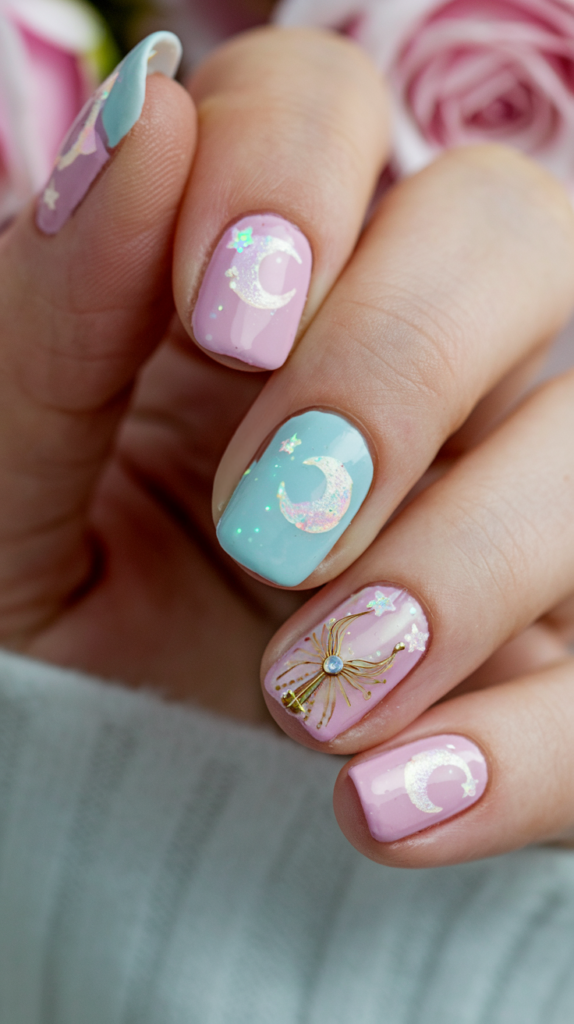
Summon the celestial elegance of the Moon Kingdom with Sailor Moon’s Lunar Glow, a design that bathes your nails in pastel pink and blue, adorned with crescent moons, twinkling stars, and the sacred symbols of the Sailor Scouts.
This isn’t just polish—it’s a shimmering portal to a universe of magical girls and cosmic destiny, perfect for twilight dates, cosplay showdowns, or moments when you want to wield the power of love and justice.
Each nail gleams like a fragment of the Silver Crystal, weaving a tale of heroism beneath a star-strewn sky.
Creating Sailor Moon’s Lunar Glow
Step 1: Prep and Base
Begin with a nourishing base coat to shield your nails from the battles ahead, then sweep on two coats of pastel pink polish across three nails and soft blue on the remaining two.
These hues echo Usagi’s tender heart and the Scouts’ celestial grace, drying into a smooth, dreamy foundation that catches the light like moonlight rippling across a still pond.
Step 2: Crescent Moons
Armed with a fine nail art brush, paint silver crescent moons onto the pink nails, curving each one to mirror Sailor Moon’s iconic tiara.
Apply a second layer for a luminous sheen that rivals the glow of a full moon, ensuring they stand as radiant guardians against the pastel backdrop. Let them dry to capture their ethereal sparkle.
Step 3: Starry Sky
Dip a dotting tool into white polish and scatter tiny stars across the blue nails—some pinpricks like distant galaxies, others bold like guiding beacons.
This mimics the cosmic tapestry of the Sailor Scouts’ universe, a subtle tribute to their eternal watch over the night. Clean any stray flecks with acetone-dipped brush for a pristine, starry finish.
Step 4: Scout Symbols
Invoke the Scouts’ power by painting their planetary symbols in gold on accent nails (like the ring fingers). Craft Venus’s heart, Mars’s fiery arrow, or Mercury’s winged staff—each a miniature emblem of their unique magic. Keep them small yet striking, letting them dry to lock in their heroic essence against the pastel glow.
Step 5: Seal with Top Coat
Brush on a glossy top coat to encase the design in a protective sheen, amplifying the pastel radiance and giving the moons and stars a crystalline finish.
Add a second layer for durability, ensuring your nails shine like the Moon Kingdom through every transformation and triumph.
Why It Works
This design is a love letter to *Sailor Moon*’s timeless charm, where the pink-and-blue palette cradles your nails like a lunar embrace, soft yet unyielding.
The crescent moons rise as silent sentinels, their silver curves whispering of Usagi’s quiet strength, while the stars twinkle with the hope of every Scout’s dream—distant yet ever-present.
The golden symbols pulse with the heartbeat of their planetary magic, tying the look together with a thread of cosmic destiny.
It’s a versatile masterpiece, pairing effortlessly with a flowing gown for a moonlit rendezvous or a bold Sailor Scout cosplay, turning your nails into a shimmering ode to courage, friendship, and the beauty of the night sky.
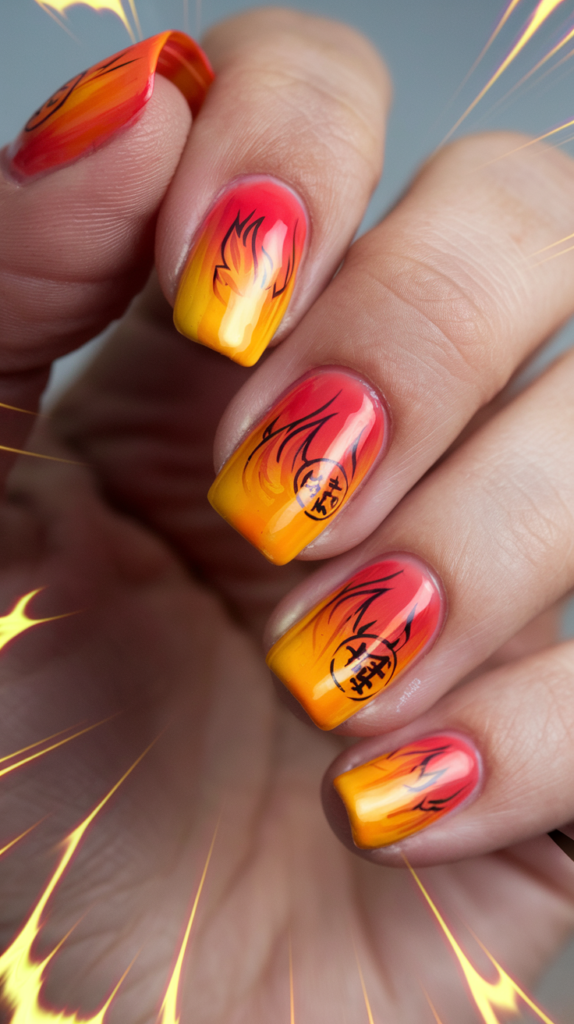
02. Naruto’s Hidden Spark
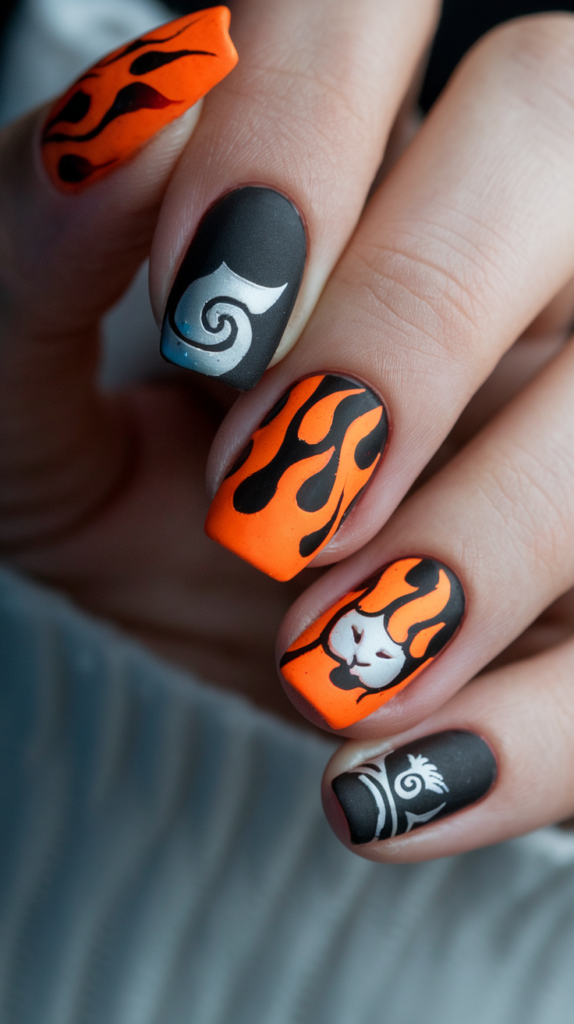
Unleash the fire of the Hidden Leaf with Naruto’s Hidden Spark, a design that blazes with bold orange and black, etched with the Konoha crest and Naruto’s whisker markings aflame with chakra.
This is more than nail art—it’s a roaring tribute to a shinobi’s journey from outcast to legend, perfect for marathon watch parties, ramen-fueled hangouts, or days when you need to summon the will of the Nine-Tails.
Each nail pulses with the raw energy of a ninja who never gives up, a testament to resilience painted in vivid hues.
Creating Naruto’s Hidden Spark
Step 1: Prep and Base
Start with a strengthening base coat to fortify your nails for the ninja path ahead, then blaze on two coats of vibrant orange polish across three nails and deep black on the remaining two.
These colors echo Naruto’s iconic jumpsuit and the shadowy depths of the shinobi world, drying into a canvas as fearless as the boy who dreams of becoming Hokage.
Step 2: Konoha Crest
With a fine brush, carve the Konoha leaf symbol in black onto an orange nail (like the thumb), first outlining its rugged edges to capture the village’s enduring pride.
Fill it with a steady hand, letting it stand as a bold emblem of Naruto’s roots—the community that forged his spirit through every trial. Let it dry to anchor its legacy.
Step 3: Whisker Flames
Use a striping brush to etch three thin black whisker lines on each side of an orange nail (ring finger), then flare their tips with subtle red polish to mimic the fiery chakra of Kurama seeping through.
This transforms the whiskers into a living symbol of Naruto’s untamed power, crackling against the orange like embers in the wind.
Step 4: Smoky Depth
Sponge a faint gray gradient across the black nails, blending it into a smoky haze that evokes the stealth of a ninja vanishing into the night.
Add a whisper of orange at the edges for a flicker of hidden fire, then clean with acetone to keep the contrast sharp, infusing the design with layers of mystery and grit.
Step 5: Seal with Top Coat
Seal the design with a glossy top coat, amplifying the orange’s fiery brilliance and the black’s enigmatic depth.
Add a second layer for endurance, ensuring your nails withstand every mission like Naruto’s unbreakable resolve, shining with the promise of a Hokage’s dawn.
Why It Works
This design is a spark that ignites *Naruto*’s soul—the orange blazes like a sunrise over the Hidden Leaf, a defiant flare against the black’s brooding shadows, mirroring the clash of hope and hardship in his tale.
The Konoha crest roots it in tradition, a jagged leaf etched with the weight of belonging, while the whisker flames flicker with the wild, untamed heart of the Nine-Tails, a reminder of the power within.
The smoky gradients weave a ninja’s stealth into the mix, making it a manicure that carries the grit of a shinobi’s path.
Pair it with a ramen-stained hoodie or a full-on Naruto cosplay, and it radiates determination and dreams with every bold stroke.
03. My Hero Academia’s Quirk Unleashed
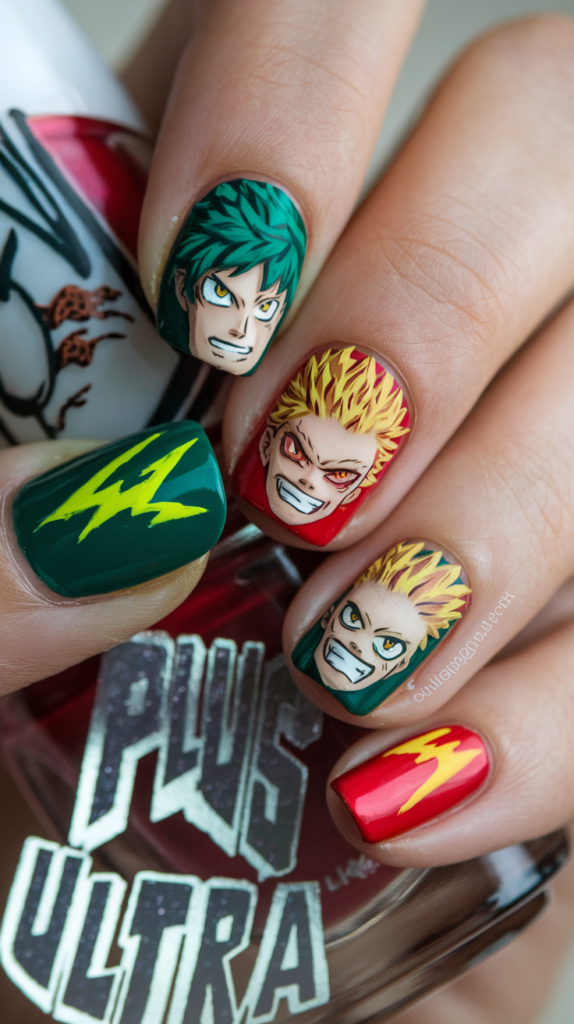
Go beyond with My Hero Academia’s Quirk Unleashed, a dynamic design that explodes with Deku’s green energy, Bakugo’s fiery blasts, and All Might’s heroic shine across a vivid palette.
This isn’t just a manicure—it’s a call to action, perfect for convention halls buzzing with fans, high-energy watch parties, or days when you need to tap into your own Plus Ultra spirit.
Each nail surges with the power of UA’s greatest heroes, a tribute to their quirks and the dreams they fight for.
Creating My Hero Academia’s Quirk Unleashed
Step 1: Prep and Base
Lay down a protective base coat to ready your nails for heroics, then paint two nails green for Deku, two orange for Bakugo, and one blue for All Might, applying two coats each.
These colors burst with their signature vibes—Deku’s hopeful resolve, Bakugo’s explosive fury, and All Might’s towering presence—drying into a vibrant stage for their quirks.
Step 2: Deku’s One For All
With a fine brush, sketch jagged black electric lines zigzagging across the green nails, channeling the crackling power of One For All.
Layer a second coat for intensity, then dab faint white sparks at the tips with a toothpick, evoking the raw energy surging through Midoriya’s fists as he leaps into battle.
Step 3: Bakugo’s Explosions
Sponge bold red bursts onto the orange nails, blending outward to mimic the fiery chaos of Bakugo’s blasts.
Add jagged white lines radiating from the center with a striping brush, capturing the heat and fury of his quirk in mid-detonation, ready to blow away any obstacle.
Step 4: All Might’s Symbol
Paint yellow stars and red lightning bolts on the blue nail (thumb) with a dotting tool, arranging them in a heroic burst that screams “I am here!”
Layer gold polish over the stars for a metallic sheen, letting them shine like the Symbol of Peace against a sky of valor.
Step 5: Seal with Top Coat
Finish with a glossy top coat to lock in the quirks and amplify their vibrancy, giving each nail a glass-like finish that reflects their power.
Add a second layer for durability, ensuring your nails stand tall like UA’s heroes through every challenge.
Why It Works
This design is a heroic symphony—green crackles with Deku’s boundless potential, a verdant storm of will; orange and red sear with Bakugo’s untamed rage, a volatile dance of fire and defiance; and blue shines with All Might’s golden legacy, a beacon of hope piercing the chaos.
Together, they weave a tale of quirks clashing and uniting, each nail a burst of energy that mirrors the heart-pounding battles of *My Hero Academia*.
It’s a look that thrives in the spotlight—pair it with a UA uniform or a casual tee, and it screams Plus Ultra with every flex of your fingers, a tribute to the heroes who push beyond their limits.
04. Dragon Ball Z’s Saiyan Fury
Unleash the power within with Dragon Ball Z’s Saiyan Fury, a blazing design that fuses fiery orange and yellow gradients with Dragon Balls and radiant Super Saiyan auras.
This is no mere manicure—it’s a supernova of energy, perfect for epic anime nights, cosplay clashes, or moments when you need to tap into your inner warrior.
Each nail roars with the intensity of Goku’s transformation, a tribute to the battles that shook the heavens.
Creating Dragon Ball Z’s Saiyan Fury
Step 1: Prep and Base
Fortify your nails with a durable base coat, then sponge an orange-to-yellow gradient across all five nails, blending from deep orange at the base to bright yellow at the tips.
This fiery fade mirrors the glow of a Super Saiyan’s aura, drying into a canvas that pulses with the heat of a thousand suns.
Step 2: Dragon Balls
Use a dotting tool to paint two orange Dragon Balls on nails (index and ring), each adorned with red stars—three on one, four on the other—to summon Shenron’s might.
Outline them in black for definition, layering the stars for a glowing depth that feels ready to grant a wish.
Step 3: Saiyan Aura
With a striping brush, sketch jagged yellow lines radiating from the tips of the middle and pinky nails, mimicking the electric surge of a Super Saiyan’s power-up.
Add a second layer for intensity, letting them flare like lightning against the fiery gradient.
Step 4: Energy Sparks
Dot white sparks around the aura lines with a toothpick, scattering them unevenly to evoke the chaotic energy of a Saiyan in battle.
Blend faint orange flecks at the edges with a sponge for a smoldering effect, cleaning stray marks with acetone for precision.
Step 5: Seal with Top Coat
Finish with a glossy top coat to lock in the fury and amplify the fiery shine, giving the design a glass-like finish that reflects its explosive power.
Add a second layer for resilience, ensuring your nails endure like a Saiyan through every clash.
Why It Works
This design is a supernova igniting your fingertips—the orange-to-yellow gradient blazes like Goku’s hair in Super Saiyan form, a radiant storm of power that consumes the nails in a fiery embrace.
The Dragon Balls glow with ancient promise, their red stars pulsing with the hope of victory, while the jagged auras crackle with the untamed energy of a warrior’s soul.
Sparks dance like echoes of a Kamehameha, tying the look together with a visceral intensity that feels ready to shatter planets.
Pair it with a gi or a bold jacket, and it’s a roaring tribute to *Dragon Ball Z*’s legacy, a manicure that screams strength and defiance with every fiery gleam.
05. Demon Slayer’s Blade Harmony
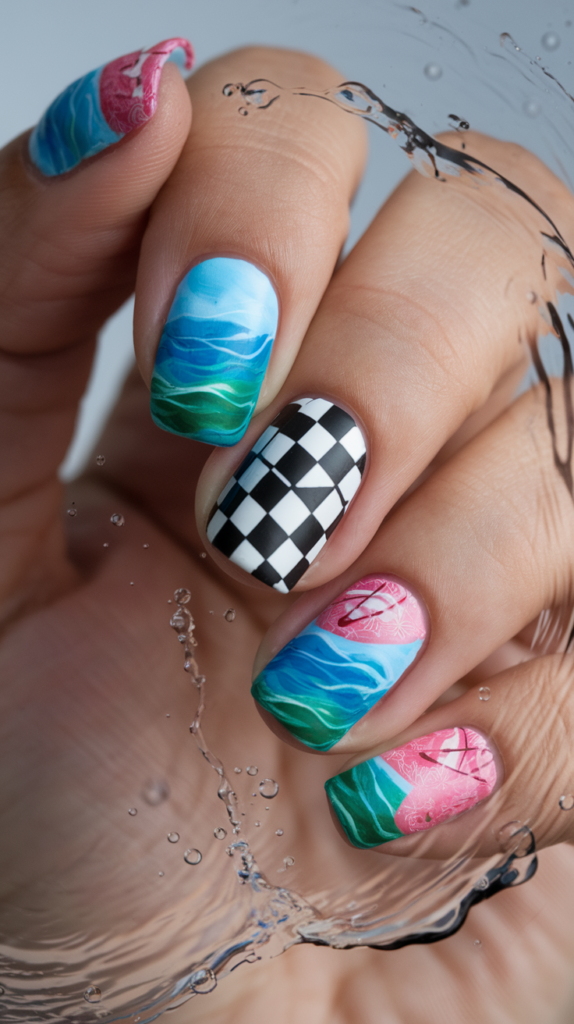
Find peace amid the chaos with Demon Slayer’s Blade Harmony, a serene design that blends Tanjiro’s green checkered haori and Nezuko’s pink kimono in soft, watercolor hues.
This isn’t just nail art—it’s a quiet bond between siblings forged in battle, perfect for reflective days, anime meetups, or moments when you need to carry their strength and grace.
Each nail whispers of resilience and love, a delicate tribute to the Demon Slayer Corps etched in pastel defiance.
Creating Demon Slayer’s Blade Harmony
Step 1: Prep and Base
Start with a hydrating base coat to nurture your nails, then paint three nails with a soft green polish and two with a gentle pink, applying two coats each.
These colors reflect Tanjiro’s steadfast spirit and Nezuko’s tender resolve, drying into a soothing foundation that feels like a breath of calm before the storm.
Step 2: Tanjiro’s Haori
With a fine brush, paint black checkers across the green nails, spacing them evenly to echo Tanjiro’s iconic haori.
Layer a second coat for bold contrast, then sponge faint white edges to soften them into a watercolor blur, capturing the worn fabric of a warrior’s life on the road.
Step 3: Nezuko’s Kimono
Draw geometric pink lines crisscrossing the pink nails with a striping brush, adding a tiny black bamboo dot on one (ring finger) to nod at her muzzle.
Layer the lines for depth, then dab a subtle white fade at the tips to blend them into a gentle, kimono-like flow.
Step 4: Blade Echo
Paint a faint silver Nichirin Blade silhouette on a green nail (thumb) with a fine brush, letting it curve subtly to hint at Tanjiro’s sword.
Add a whisper of red at the base for his fiery spirit, cleaning edges with acetone to keep it sharp yet understated.
Step 5: Seal with Top Coat
Finish with a glossy top coat to protect the harmony and enhance the watercolor glow, giving the design a lustrous finish that reflects their quiet strength.
Add a second layer for endurance, ensuring your nails carry their bond through every trial.
Why It Works
This design is a tender duet of *Demon Slayer*’s heart—the green checkers rustle like Tanjiro’s haori in the wind, a patchwork of resolve stitched with every breath he takes for his sister, while the pink kimono flows with Nezuko’s silent grace, a soft defiance wrapped in love.
The watercolor effect blurs the edges like memories of their lost home, softening the harshness of their world with a gentle, unbreakable bond. The blade’s echo slices through with purpose, a silver thread tying their story together.
Pair it with a kimono-inspired top or a cozy scarf, and it’s a poignant tribute to their journey, a manicure that hums with the quiet power of family and the will to protect.
06. Attack on Titan’s Wallbreaker Grit
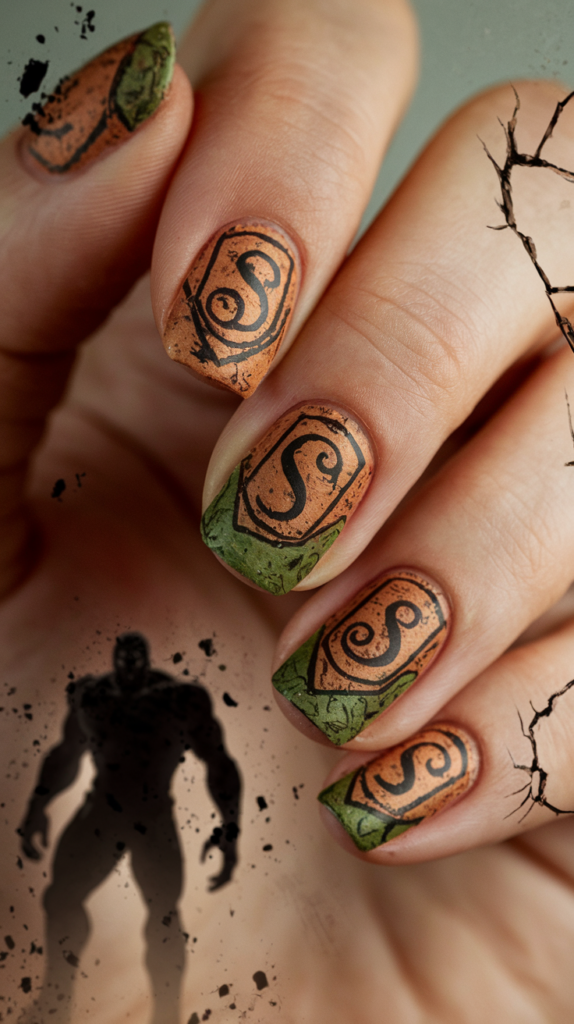
Stand against the Titans with Attack on Titan’s Wallbreaker Grit, a rugged design of earthy browns and greens etched with the Survey Corps emblem,
Titan cracks, and battle-worn textures. This isn’t just a manicure—it’s a war cry carved into your nails, perfect for intense anime binges, cosplay sieges, or days when you need to channel the unyielding spirit of humanity’s last defenders.
Each nail bears the scars of a world under siege, a tribute to the fight beyond the walls.
Creating Attack on Titan’s Wallbreaker Grit
Step 1: Prep and Base
Lay down a protective base coat to brace your nails for the battlefield, then paint three nails with a deep brown polish and two with a muted green, applying two coats each.
These tones evoke the dirt of the earth and the forest beyond the walls, drying into a gritty foundation that feels like the ground trodden by Titans.
Step 2: Survey Corps Emblem
With a fine brush, paint the Survey Corps’ crossed swords and wings in silver on a brown nail (thumb), outlining first to capture the emblem’s defiant edges.
Fill it with a metallic sheen, letting it stand as a beacon of hope amid the chaos, drying to anchor its resolve.
Step 3: Titan Cracks
Use a striping brush to carve jagged black cracks across the green nails, mimicking the shattered stone of Wall Maria under a Titan’s fist.
Layer a second coat for depth, then sponge faint gray dust around them to evoke the rubble of a breached defense.
Step 4: Battle Texture
Sponge patchy gray and brown smudges onto a brown nail (ring finger), blending them into a weathered, battle-scarred surface.
Add faint red streaks with a toothpick for bloodied grit, cleaning edges with acetone to keep the texture raw yet defined.
Step 5: Seal with Top Coat
Finish with a matte top coat to lock in the grit and mute the shine, giving the design a dusty, war-torn finish that mirrors the Survey Corps’ struggle.
Add a second layer for endurance, ensuring your nails stand firm like the walls against every Titan assault.
Why It Works
This design is a gritty elegy to *Attack on Titan*’s brutal world—the browns and greens churn like the earth beyond the walls, a scarred landscape where hope clings to survival.
The Survey Corps emblem rises like a silver oath, its wings fluttering with the fragile promise of freedom, while the Titan cracks splinter across the nails like echoes of a collapsing world, raw and unrelenting.
The battle texture grinds with the weight of every fallen soldier, a testament to the cost of defiance.
Pair it with a cloak or a rugged jacket, and it’s a fierce tribute to the Survey Corps’ unbreakable will, a manicure that bears the scars of humanity’s fight with stoic pride.
07. One Piece’s Pirate Odyssey
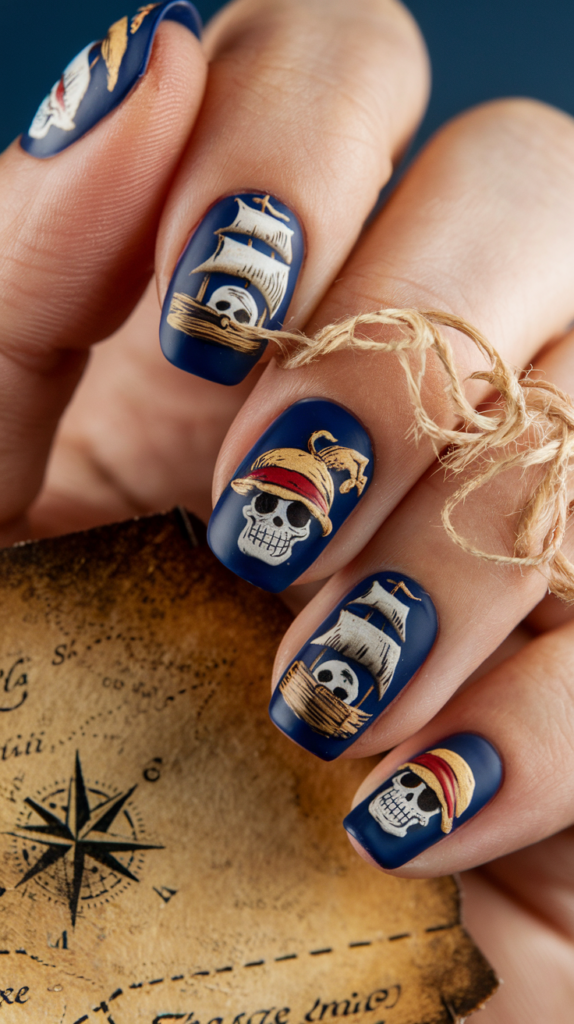
Sail the Grand Line with One Piece’s Pirate Odyssey, a nautical design awash in deep blues and turquoises, crowned with Luffy’s straw hat, treasure maps, and pirate skulls.
This isn’t just a manicure—it’s a treasure hunt etched in polish, perfect for beachside adventures, pirate-themed parties, or days when you need to chase the horizon with Straw Hat swagger.
Each nail charts a course through the seas of *One Piece*, a vibrant ode to freedom and the quest for One Piece itself.
Creating One Piece’s Pirate Odyssey
Step 1: Prep and Base
Begin with a smoothing base coat to ready your nails for the open sea, then paint three nails with deep blue polish and two with turquoise, applying two coats each.
These hues ripple with the ocean’s vast mystery and the sunlit waves of the Grand Line, drying into a canvas that beckons adventure.
Step 2: Straw Hat
With a fine brush, paint Luffy’s straw hat in yellow on a blue nail (ring finger), tilting it jauntily to capture his carefree grin.
Add a red band with a striping brush, layering for a weathered texture that feels kissed by sea spray and sun.
Step 3: Treasure Map
Use a toothpick to sketch faint brown island outlines and a bold X on a turquoise nail (index), crafting a vintage map that whispers of buried gold.
Sponge subtle tan edges for a parchment-like fade, letting it dry to evoke the thrill of the hunt.
Step 4: Pirate Skulls
Paint white skulls with black crossbones on a blue nail (thumb), layering twice for a stark, menacing grin that marks the Straw Hats’ defiance.
Add faint gray shadows with a sponge for a weathered, bone-dry look, cleaning edges with acetone for sharpness.
Step 5: Seal with Top Coat
Finish with a glossy top coat to lock in the odyssey and amplify the sea’s shine, giving the design a wet, wave-slicked finish.
Add a second layer for durability, ensuring your nails sail through every storm like the Going Merry herself.
Why It Works
This design is a pirate’s ballad sung in color—the blues and turquoises crash like waves against the Thousand Sunny, a restless sea alive with the promise of adventure.
Luffy’s straw hat bobs with his unshakable spirit, a sun-bleached crown of freedom, while the treasure map unfurls with the allure of the unknown, its X a siren call to dreamers.
The skulls grin with the Straw Hats’ reckless courage, weathered yet unbowed.
Pair it with a straw hat or a nautical tee, and it’s a vibrant tribute to *One Piece*’s boundless quest, a manicure that charts the heart of a pirate king with every swashbuckling stroke.
08. Tokyo Ghoul’s Masked Shadows
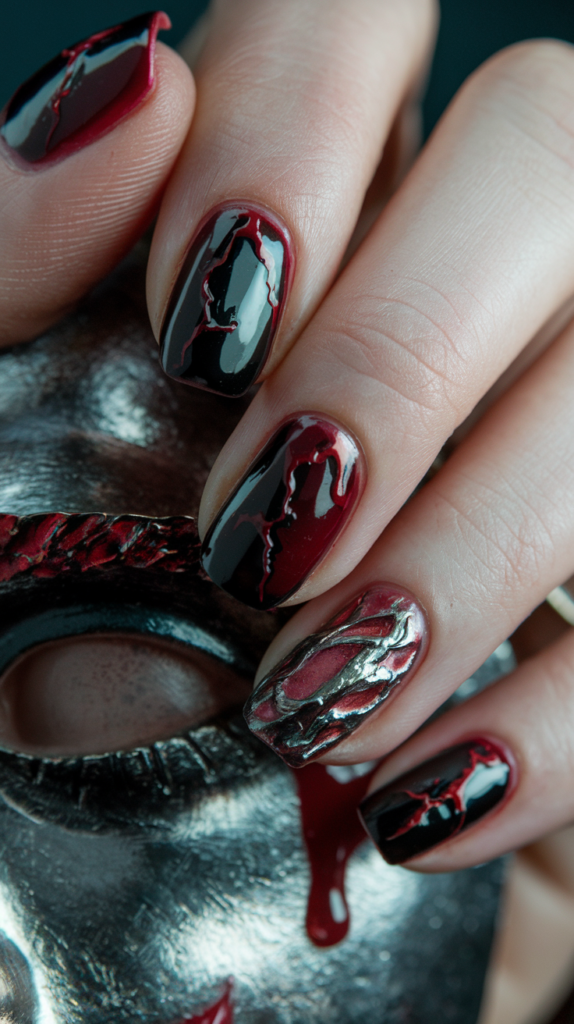
Descend into darkness with Tokyo Ghoul’s Masked Shadows, a chilling design of glossy black and blood-red nails etched with Ken Kaneki’s ghoul mask and splattered with crimson chaos.
This isn’t just a manicure—it’s a descent into the fractured soul of a half-ghoul, perfect for late-night horror binges, edgy gatherings, or moments when you feel the pull of something primal.
Each nail drips with the tension of *Tokyo Ghoul*, a haunting tribute to a world where humanity and monstrosity blur.
Creating Tokyo Ghoul’s Masked Shadows
Step 1: Prep and Base
Lay down a protective base coat to brace your nails for the darkness, then paint four nails with glossy black polish and one (ring finger) with deep red, applying two coats each.
The black seethes with Kaneki’s inner abyss, while the red bleeds with the hunger of his ghoul side, drying into a canvas that glints like wet shadows.
Step 2: Ghoul Mask
With a fine brush, paint Kaneki’s mask in stark white on a black nail (index), carving its unsettling smile and sharp teeth with precision.
Add a single red eye with a black pupil, layering for a piercing glow that stares out from the void, a chilling echo of his transformation.
Step 3: Blood Splatters
Flick red polish onto the black nails with a toothpick, creating chaotic splatters that streak and pool like fresh blood.
Vary the size—some thick like wounds, others fine like spray—letting them dry into a visceral mess that mirrors the carnage of a ghoul’s feast.
Step 4: Red Eye Glow
Paint a lone red eye with a black slit on the red nail (ring finger), outlining it sharply to pierce through the crimson haze.
Sponge a faint white glow around it with a makeup sponge, evoking the eerie light of a ghoul’s gaze, and clean edges with acetone for a haunting clarity.
Step 5: Seal with Top Coat
Finish with a glossy top coat to lock in the shadows and amplify the blood’s wet shine, giving the design a slick, glassy finish that drips with menace.
Add a second layer for endurance, ensuring your nails endure like Kaneki through every tortured night.
Why It Works
This design is a plunge into *Tokyo Ghoul*’s tormented heart—the black cloaks your nails in a suffocating darkness, a void where Kaneki’s humanity wrestles with his ghoul nature, while the red seeps like blood through the cracks of his soul.
The mask grins with a fractured innocence, its red eye a window into his torment, while the splatters stain the design with the raw violence of his world.
The lone glowing eye stares out with a predator’s hunger, tying the look together with a shiver of dread.
Pair it with a leather jacket or a dark hoodie, and it’s a chilling tribute to Kaneki’s struggle, a manicure that haunts with every glossy, blood-streaked gleam.
09. Studio Ghibli’s Whimsical Echoes
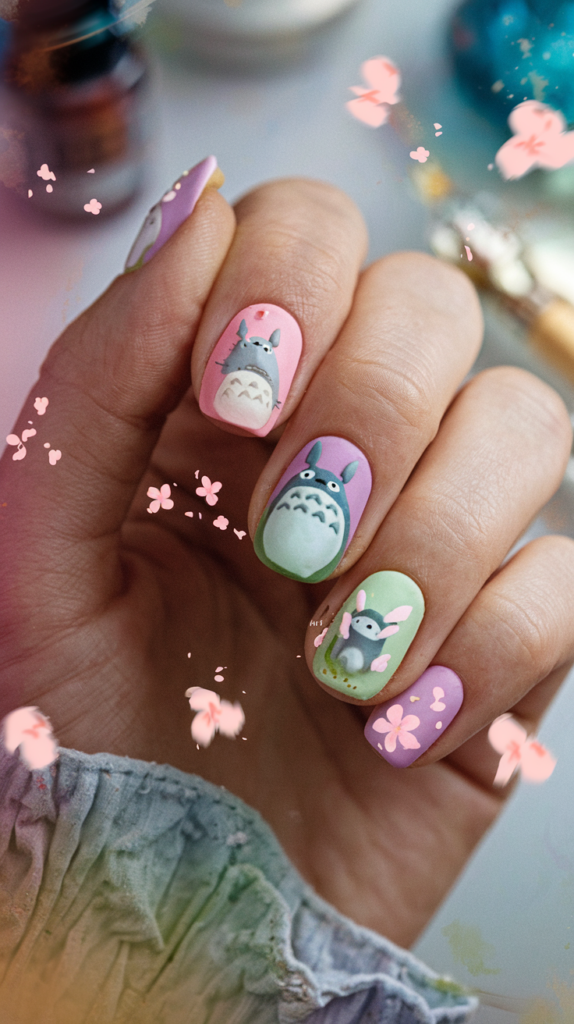
Drift into enchantment with Studio Ghibli’s Whimsical Echoes, a tender design of soft pastels whispering with Totoro’s gentle grin, No-Face’s haunting mask, and Haku’s swirling dragon form.
This isn’t just a manicure—it’s a fleeting dream of Ghibli’s magical worlds, perfect for cozy afternoons, rainy-day marathons, or moments when you need a touch of wonder to lift your spirits.
Each nail hums with the quiet magic of Miyazaki’s tales, a minimalist ode to nature, spirits, and the beauty of the unseen.
Creating Studio Ghibli’s Whimsical Echoes
Step 1: Prep and Base
Begin with a hydrating base coat to cradle your nails in care, then paint two nails soft blue, two pale pink, and one mint green, applying two coats each.
These pastels ripple with the gentle hues of Ghibli’s landscapes—sky, blossoms, and forest—drying into a canvas that feels like a whisper of magic.
Step 2: Totoro’s Smile
With a fine brush, paint Totoro’s wide eyes and small smile in black on a blue nail (thumb), keeping it minimalist yet warm.
Add gray whiskers and a faint white belly, layering for a soft depth that captures his cuddly charm beneath a rainy sky.
Step 3: No-Face’s Mask
Draw No-Face’s mask in white on a pink nail (ring finger), tracing its eerie oval with a fine brush and adding purple mouth details.
Layer a second coat for a ghostly glow, letting it float against the pastel like a spirit lost in the bathhouse’s glow.
Step 4: Haku’s Dragon
Sketch Haku’s dragon form in white on the green nail (index), swirling its serpentine body with a striping brush to evoke his flight through the sky.
Add light green scales with a toothpick, blending them faintly for a shimmering, river-like grace.
Step 5: Seal with Top Coat
Finish with a glossy top coat to lock in the whimsy and enhance the pastel shine, giving the design a dewy, dreamlike finish.
Add a second layer for endurance, ensuring your nails carry Ghibli’s magic through every quiet moment.
Why It Works
This design is a soft lullaby from Studio Ghibli’s heart—the pastels drift like petals on a breeze, a tender echo of Totoro’s forest, No-Face’s bathhouse, and Haku’s river.
Totoro’s smile beams with the innocence of a rainy day’s friend, No-Face’s mask haunts with a silent plea, and Haku’s dragon coils with the grace of a spirit unbound.
Together, they weave a tapestry of minimalist magic, each nail a fleeting glimpse into Miyazaki’s worlds where nature and wonder intertwine.
Pair it with a cozy sweater or a flowing skirt, and it’s a gentle tribute to Ghibli’s soul, a manicure that whispers enchantment with every delicate stroke.
10. Hunter x Hunter’s Nen Pulse
Unleash your aura with Hunter x Hunter’s Nen Pulse, a neon-charged design that surges with electric blue, green, and yellow, etched with the Hunter Association symbol and Nen abilities in glowing bursts.
This isn’t just a manicure—it’s a crackling surge of power, perfect for high-stakes anime nights, cosplay hunts, or days when you need to tap into Gon and Killua’s boundless energy.
Each nail vibrates with the thrill of the chase, a tribute to the hunters who wield Nen like a living force.
Creating Hunter x Hunter’s Nen Pulse
Step 1: Prep and Base
Start with a strengthening base coat to brace your nails for the hunt, then paint two nails neon blue, two neon green, and one neon yellow, applying two coats each.
These colors blaze with the raw energy of Nen—Killua’s lightning, Gon’s strength, and the wild unknown—drying into a canvas that hums with potential.
Step 2: Hunter Symbol
With a fine brush, paint the Hunter Association symbol in crisp white on a blue nail (thumb), outlining its bold curves to capture the guild’s prestige.
Fill it with a steady hand, layering for a stark glow that stands as a badge of honor amid the neon storm.
Step 3: Gon’s Aura
Sponge swirling green energy onto a green nail (index), blending outward to mimic Gon’s Nen bursting free in a Jajanken clash.
Add white streaks with a striping brush for a radiant pulse, letting it flare like his unyielding spirit in the face of danger.
Step 4: Killua’s Lightning
Draw jagged blue lightning bolts on the yellow nail (ring finger) with a striping brush, layering twice for a charged, electric snap.
Sponge faint white glows at the base to evoke his speed and power, cleaning edges with acetone for a sharp, deadly edge.
Step 5: Seal with Top Coat
Finish with a glossy top coat to lock in the Nen and amplify the neon shine, giving the design a slick, energized finish.
Add a second layer for resilience, ensuring your nails pulse with Hunter x Hunter’s thrill through every adventure.
Why It Works
This design is a live wire of *Hunter x Hunter*’s essence—the neon hues crackle like Nen unleashed, blue surging with Killua’s lightning-fast fury, green pulsing with Gon’s raw determination, and yellow glowing with the wild promise of the unknown.
The Hunter symbol stands tall, a white-hot emblem of their relentless pursuit, while Gon’s aura swirls with the force of a rock-shattering punch and Killua’s bolts strike with assassin’s precision.
It’s a manicure that thrums with the heartbeat of the hunt, perfect for a leather jacket or a Hunter badge, radiating the electric thrill of Nen with every vivid, glowing stroke.
11. Fairy Tail’s Dragon Fire
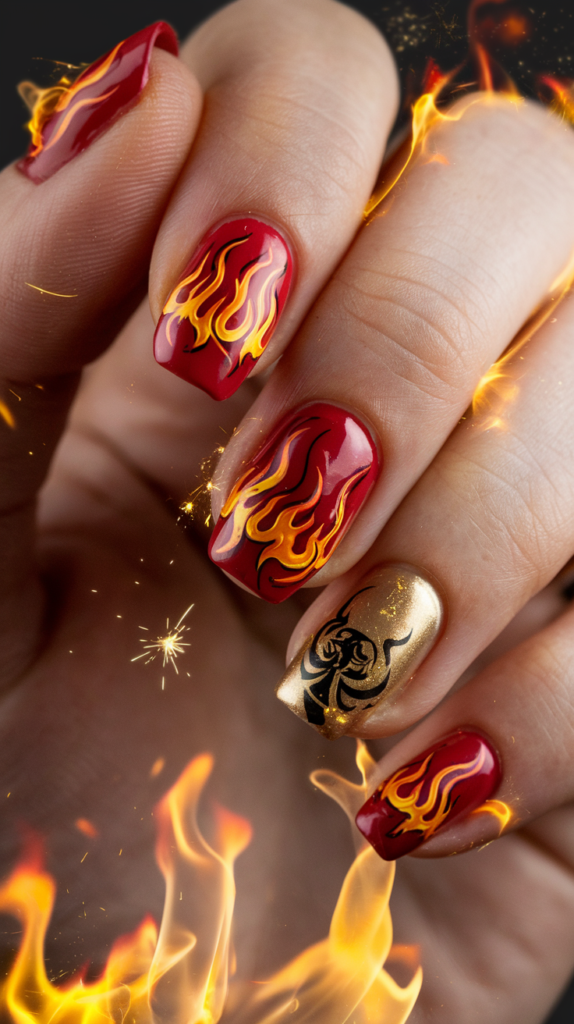
Roar with guild pride in Fairy Tail’s Dragon Fire, a scorching design of red, orange, and gold nails emblazoned with the Fairy Tail emblem and Natsu’s blazing fire magic.
This isn’t just a manicure—it’s a dragon’s breath unleashed, perfect for fiery cosplay nights, guild gatherings, or days when you need to burn with Natsu’s unquenchable spirit.
Each nail crackles with the heat of Fairy Tail’s unbreakable bonds, a tribute to the family that fights as one.
Creating Fairy Tail’s Dragon Fire
Step 1: Prep and Base
Lay down a durable base coat to shield your nails from the flames, then sponge a red-to-orange-to-gold gradient across all five nails, blending from deep red at the base to molten gold at the tips.
This fiery cascade mirrors Natsu’s dragon slayer magic, drying into a canvas that sears with guild passion.
Step 2: Guild Emblem
With a fine brush, paint the Fairy Tail emblem in gold on a red nail (thumb), outlining its bold curves to capture the guild’s fiery heart.
Fill it with a metallic sheen, layering twice for a glowing mark that shines like a beacon of camaraderie amid the flames.
Step 3: Natsu’s Flames
Draw swirling orange flames on two nails (index and middle) with a striping brush, curling them upward to mimic Natsu’s Fire Dragon’s Roar.
Add yellow tips with a second layer for a blazing intensity, letting them dance like embers in a dragon’s breath.
Step 4: Ember Sparks
Dot white sparks around the flames on a nail (ring finger) with a toothpick, scattering them unevenly to evoke the chaotic heat of a guild brawl.
Sponge faint red flecks at the base for a smoldering glow, cleaning edges with acetone for precision.
Step 5: Seal with Top Coat
Finish with a glossy top coat to lock in the fire and amplify the shine, giving the design a slick, molten finish that radiates heat.
Add a second layer for endurance, ensuring your nails burn bright like Natsu through every guild clash.
Why It Works
This design is a furnace of *Fairy Tail*’s spirit—the red-to-gold gradient ignites like Natsu’s flames, a roaring cascade that consumes the nails in a dragon’s fiery embrace.
The guild emblem gleams with the golden pride of a family forged in battle, its curves a testament to their unshakable bond, while the swirling flames leap with Natsu’s wild, untamed magic, crackling with the heat of a thousand fights.
Sparks flare like echoes of a guild hall brawl, tying the look together with a visceral energy that feels alive.
Pair it with a scarf or a guild tattoo, and it’s a blazing tribute to Fairy Tail’s heart, a manicure that roars with dragon fire and the will to protect what matters most.
12. JoJo’s Bizarre Glamour
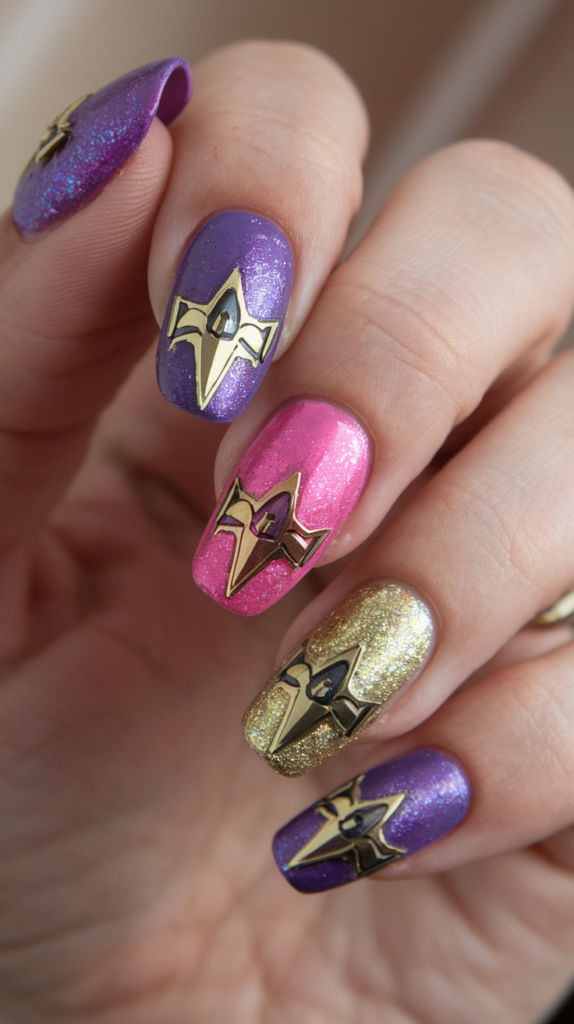
Strike a pose with JoJo’s Bizarre Glamour, a dazzling design of neon pinks, purples, and blues drenched in glitter, adorned with Stand emblems and dramatic patterns.
This isn’t just a manicure—it’s a runway strut through *JoJo’s Bizarre Adventure*, perfect for glamorous nights, cosplay catwalks, or days when you need to channel the over-the-top flair of the Joestar lineage.
Each nail sparkles with the audacity of a Stand user, a tribute to a world where fashion and power collide.
Creating JoJo’s Bizarre Glamour
Step 1: Prep and Base
Begin with a strengthening base coat to brace your nails for the spotlight, then paint two nails neon pink, two neon purple, and one neon blue, applying two coats each.
These colors scream with the flamboyant chaos of JoJo’s world, drying into a canvas that demands attention like a dramatic pose.
Step 2: Glitter Cascade
Sponge gold glitter polish over all nails, layering from the tips downward for a cascading shimmer that mimics a Stand’s radiant power.
Tap gently with a makeup sponge for even sparkle, letting it dry into a dazzling veil that catches every light like a Joestar entrance.
Step 3: Stand Emblems
With a fine brush, paint metallic silver Stand symbols—like Star Platinum’s star or The World’s clock—on a purple nail (ring finger), outlining for precision.
Layer a second coat for a bold, reflective shine, anchoring the design in the power of JoJo’s spectral warriors.
Step 4: Dramatic Swirls
Draw swirling black lightning bolts on a pink nail (index) with a striping brush, curving them extravagantly to echo the dramatic flair of a Stand clash.
Add faint white streaks for a lightning strike effect, cleaning edges with acetone for a sharp, theatrical finish.
Step 5: Seal with Top Coat
Finish with a glossy top coat to lock in the glamour and amplify the glitter’s shine, giving the design a slick, polished finish that dazzles like a JoJo pose.
Add a second layer for endurance, ensuring your nails strut through every scene with unyielding style.
Why It Works
This design is a dazzling crescendo of *JoJo’s Bizarre Adventure*’s soul—the neon pinks, purples, and blues strut like the Joestars’ wild fashion, a kaleidoscope of audacity that refuses to fade into the background.
The glitter cascades like a Stand’s aura, a golden storm of power and pizzazz, while the emblems gleam with the metallic might of spectral guardians, anchoring the chaos in JoJo’s legacy.
The swirling bolts strike with the theatricality of a Dio showdown, tying the look together with a flair that’s larger than life.
Pair it with a bold coat or a Stand-inspired accessory, and it’s a glamorous tribute to JoJo’s world, a manicure that poses with every shimmering, over-the-top stroke.
13. Sword Art Online’s Digital Realm
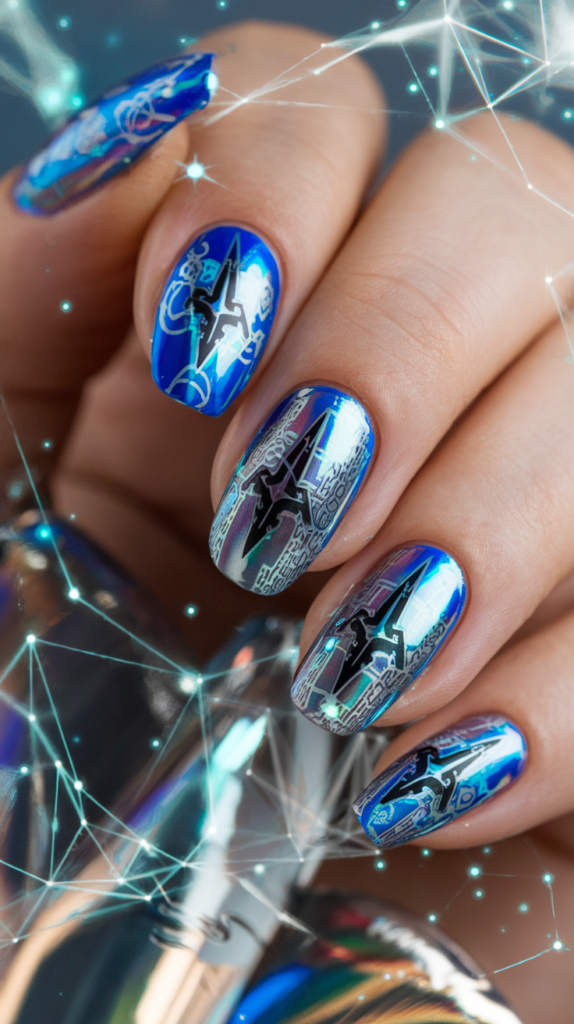
Log into the future with Sword Art Online’s Digital Realm, a holographic design that shimmers with swords, virtual symbols, and glowing digital effects across a metallic sheen.
This isn’t just a manicure—it’s a dive into SAO’s virtual battlefield, perfect for gaming marathons, tech-savvy hangouts, or days when you need to wield Kirito’s dual blades in spirit.
Each nail pulses with the thrill of Aincrad, a tribute to a world where courage meets code.
Creating Sword Art Online’s Digital Realm
Step 1: Prep and Base
Start with a protective base coat to shield your nails for the virtual dive, then layer a holographic polish across all five nails, buffing with a sponge for a shifting metallic sheen that dances between blues and silvers.
This mirrors SAO’s digital landscape, drying into a canvas that hums with futuristic energy.
Step 2: Dual Swords
With a fine brush, paint Kirito’s dual swords in black on a nail (index), crossing them sharply to capture his signature stance.
Add silver edges with a second layer for a blade-like gleam, letting them slice through the hologram like Elucidator and Dark Repulser in battle.
Step 3: Virtual Symbols
Draw small white circuit patterns on a nail (ring finger) with a dotting tool, arranging them in jagged lines to mimic SAO’s system code.
Layer a second coat for a crisp, glowing effect, evoking the interface of a world where life hangs by a pixel.
Step 4: Digital Glow
Sponge faint blue glows around the swords and symbols on a nail (middle), blending outward for a radiant pulse that feels like a respawn point’s light.
Add subtle green flecks with a toothpick for a glitchy vibe, cleaning edges with acetone for precision.
Step 5: Seal with Top Coat
Finish with a glossy top coat to lock in the realm and amplify the holographic shine, giving the design a sleek, digital finish that reflects its virtual soul.
Add a second layer for endurance, ensuring your nails endure like Kirito through every logout.
Why It Works
This design is a pixelated plunge into *Sword Art Online*’s heart—the holographic sheen flickers like Aincrad’s skyline, a shifting tapestry of code and courage that captures the thrill of the game.
The dual swords slash with Kirito’s relentless will, their silver edges glinting like hope against the odds, while the circuit symbols hum with the quiet menace of a virtual trap.
The glowing effects pulse like a health bar on the brink, tying the look together with a futuristic edge that feels alive.
Pair it with a headset or a black coat, and it’s a sleek tribute to SAO’s digital saga, a manicure that logs you into the fight with every shimmering stroke.
14. Pokémon’s Pocket Pals
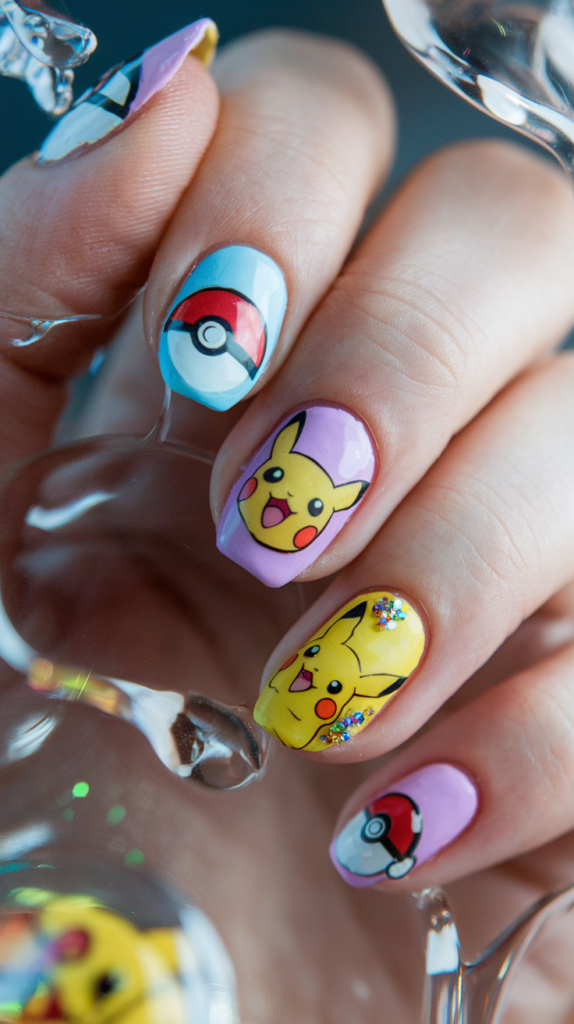
Catch the joy with Pokémon’s Pocket Pals, a playful design bursting with sunny yellows, fiery reds, and cool blues, starring Pikachu, Pokéballs, and fan-favorite companions like Charizard.
This isn’t just a manicure—it’s a Pokédex brought to life, perfect for Pokémon hunts, cheerful meetups, or days when you need a spark of adventure to light your way.
Each nail chirps with the thrill of the catch, a tribute to the world where friendship meets battle.
Creating Pokémon’s Pocket Pals
Step 1: Prep and Base
Lay down a hydrating base coat to nurture your nails for the journey, then paint two nails bright yellow, two electric red, and one bold blue, applying two coats each.
These colors sing with Pikachu’s spark, Charizard’s flame, and the sky of a Pokémon trainer’s world, drying into a canvas that buzzes with excitement.
Step 2: Pikachu’s Face
With a fine brush, paint Pikachu’s big black eyes and red cheeks on a yellow nail (thumb), keeping his grin small yet beaming.
Add tiny yellow ears with black tips, layering for a cuddly depth that sparks with a cheerful “Pika Pika!”
Step 3: Pokéball
Draw a half-red, half-white circle with a black line on a red nail (index) with a dotting tool, placing a white button at the center.
Layer the red and white for a bold, glossy shine, letting it dry into a perfect sphere ready to catch ‘em all.
Step 4: Charizard’s Flame
Sponge orange flames onto a blue nail (ring finger), blending upward to mimic Charizard’s fiery breath in flight.
Add yellow streaks with a striping brush for a blazing tail, cleaning edges with acetone to keep the fire fierce yet contained.
Step 5: Seal with Top Coat
Finish with a glossy top coat to lock in the pals and amplify the colors, giving the design a vibrant, playful finish that pops like a Pokéball burst.
Add a second layer for endurance, ensuring your nails shine through every gym battle.
Why It Works
This design is a joyful romp through *Pokémon*’s world—the yellow zaps with Pikachu’s electric charm, a bolt of friendship that lights up your nails, while the red and blue clash like a gym leader’s challenge, bold and unyielding.
Pikachu’s face beams with the innocence of a trainer’s first catch, the Pokéball rolls with the promise of adventure, and Charizard’s flames soar with the might of a champion’s ace.
Together, they weave a tapestry of playful power, a manicure that chirps with the thrill of the wild.
Pair it with a cap or a Pokéball prop, and it’s a vibrant tribute to Pokémon’s heart, sparking joy with every colorful stroke.
15. Bleach’s Soul Reaper Clash
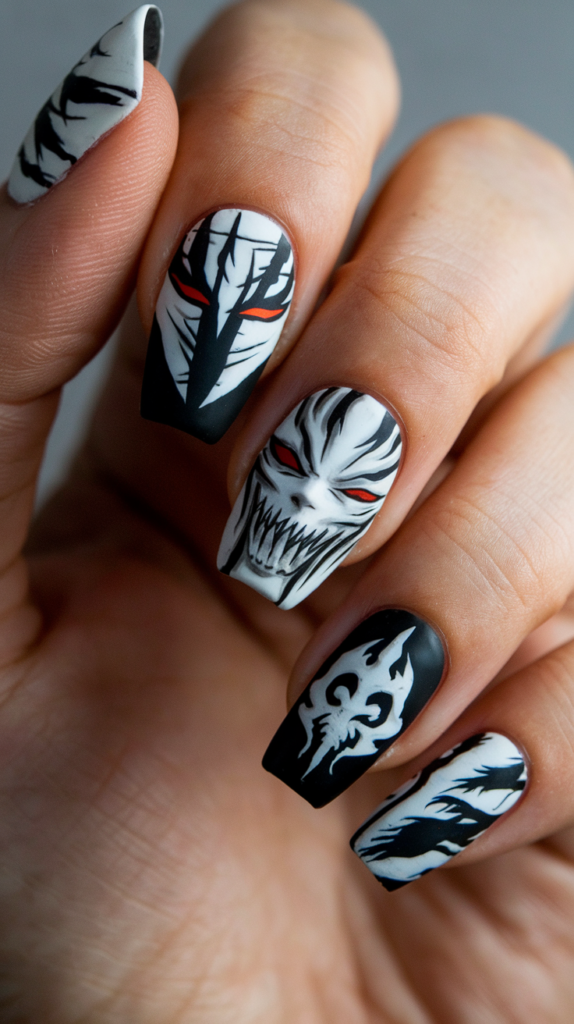
Cut through the veil with Bleach’s Soul Reaper Clash, a stark design of glossy black and white nails etched with Ichigo’s Hollow mask and the Soul Society insignia, pulsing with spiritual tension.
This isn’t just a manicure—it’s a blade drawn between worlds, perfect for intense anime nights, cosplay duels, or days when you need to channel Ichigo’s dual nature.
Each nail slices with the weight of a Soul Reaper’s duty, a tribute to the clash of human and Hollow within.
Creating Bleach’s Soul Reaper Clash
Step 1: Prep and Base
Start with a protective base coat to brace your nails for the spirit world, then paint three nails glossy black and two stark white, applying two coats each.
The black hums with the void of the Hollows, while the white glows with the purity of the Soul Society, drying into a canvas that teeters on the edge of balance.
Step 2: Hollow Mask
With a fine brush, paint Ichigo’s Hollow mask in white on a black nail (index), tracing its skeletal grin and jagged red stripes with precision.
Layer a second coat for a bone-chilling glow, letting it dry into a menacing echo of his inner beast.
Step 3: Soul Society Insignia
Draw the Soul Society insignia in silver on a white nail (ring finger), outlining its elegant curves to capture the order of the Gotei 13.
Fill it with a metallic sheen, layering for a bold mark that stands as a beacon of duty against the chaos.
Step 4: Zangetsu’s Swirl
Sketch faint black swirls on a black nail (thumb) with a striping brush, curling them to mimic Zangetsu’s spiritual energy slicing through the void.
Add a whisper of red at the center for Ichigo’s fire, cleaning edges with acetone for a sharp, ethereal edge.
Step 5: Seal with Top Coat
Finish with a glossy top coat to lock in the clash and amplify the contrast, giving the design a slick, polished finish that reflects its spiritual weight.
Add a second layer for endurance, ensuring your nails endure like Ichigo through every Hollow hunt.
Why It Works
This design is a jagged dance of *Bleach*’s soul—the black seethes with the Hollow’s abyss, a shadow that swallows light, while the white shines with the Soul Society’s austere grace, a fragile order against chaos.
The Hollow mask leers with Ichigo’s fractured fury, its red stripes bleeding with the rage of his other self, while the insignia stands firm with the weight of centuries, a silver oath of duty.
Zangetsu’s swirls cut through with a whisper of power, tying the look together with a spiritual edge that feels alive.
Pair it with a black robe or a bold scarf, and it’s a striking tribute to Ichigo’s war, a manicure that clashes with every glossy, defiant stroke.
16. Black Clover’s Grimoire Glow
Cast your magic with Black Clover’s Grimoire Glow, a mystical design of deep black and purple nails shimmering with the Clover Kingdom’s runes and glowing grimoire effects.
This isn’t just a manicure—it’s a spellbook unbound, perfect for enchanted nights, anime quests, or days when you need to wield Asta’s anti-magic grit.
Each nail hums with the mana of *Black Clover*, a tribute to a world where power blooms from the pages of destiny.
Creating Black Clover’s Grimoire Glow
Step 1: Prep and Base
Lay down a durable base coat to shield your nails for the magic ahead, then paint four nails deep black and one (ring finger) dark purple, applying two coats each.
The black pulses with the mystery of a grimoire’s depths, while the purple glows with the Clover Kingdom’s arcane heart, drying into a canvas that whispers of spells.
Step 2: Black Bull Insignia
With a fine brush, paint the Black Bull emblem in silver on a black nail (thumb), outlining its rugged bull head to capture the squad’s wild spirit.
Fill it with a metallic sheen, layering for a bold mark that shines like a badge of defiance amid the darkness.
Step 3: Magical Runes
Draw white runes on two black nails (index and middle) with a dotting tool, scattering them in jagged patterns to mimic the Clover Kingdom’s spellcraft.
Layer a second coat for a glowing effect, letting them shimmer like mana etched into the night.
Step 4: Grimoire Glow
Sponge a faint neon green glow onto the purple nail (ring finger), blending outward to evoke Asta’s anti-magic bursting free.
Add white swirls with a striping brush for a radiant pulse, cleaning edges with acetone to keep the glow sharp and enchanted.
Step 5: Seal with Top Coat
Finish with a glossy top coat to lock in the glow and amplify the shine, giving the design a slick, mystical finish that radiates power.
Add a second layer for endurance, ensuring your nails shine like a grimoire through every magical clash.
Why It Works
This design is a spell woven from *Black Clover*’s core—the black seethes with the untamed chaos of Asta’s world, a shadow alive with potential, while the purple hums with the Clover Kingdom’s arcane legacy, a royal thread of magic.
The Black Bull insignia stomps with the squad’s fierce loyalty, its silver gleam a rallying cry, while the runes flicker with the secrets of a grimoire’s pages, glowing with the promise of power.
The neon glow bursts like Asta’s defiance, tying the look together with a mystical edge that feels alive.
Pair it with a cape or a dark tee, and it’s an enchanted tribute to Black Clover’s heart, a manicure that pulses with mana and the will to rise.
17. Neon Genesis Evangelion’s Mech Pulse
Sync with the future in Neon Genesis Evangelion’s Mech Pulse, a neon design of green, purple, and orange nails thrumming with tech-inspired EVA patterns and the NERV logo.
This isn’t just a manicure—it’s a cockpit humming with tension, perfect for sci-fi marathons, cosplay missions, or days when you need to pilot your own EVA through life’s chaos.
Each nail beats with the rhythm of *Evangelion*’s dystopian soul, a tribute to the machines that guard humanity’s edge.
Creating Neon Genesis Evangelion’s Mech Pulse
Step 1: Prep and Base
Start with a strengthening base coat to brace your nails for the sync, then paint two nails neon green, two neon purple, and one neon orange, applying two coats each.
These colors blaze with the EVA units’ raw power—Unit-01’s ferocity, Unit-00’s mystery, and Unit-02’s fire—drying into a canvas that pulses with mech energy.
Step 2: NERV Logo
With a fine brush, paint the NERV logo in black on a purple nail (thumb), outlining its sharp leaf and text to capture the organization’s cold precision.
Fill it with a steady hand, layering for a stark mark that stands as a command amid the neon storm.
Step 3: EVA Patterns
Draw angular silver lines on a green nail (index) with a striping brush, crisscrossing them to mimic EVA armor circuits.
Layer a second coat for a metallic gleam, letting them hum like the tech binding man and machine in a desperate fight.
Step 4: Neon Glow
Sponge faint white glows around the patterns on an orange nail (ring finger), blending outward to evoke the eerie hum of an EVA’s core awakening.
Add subtle blue flecks with a toothpick for a flickering sync signal, cleaning edges with acetone to keep the glow sharp and futuristic.
Step 5: Seal with Top Coat
Finish with a glossy top coat to lock in the pulse and amplify the neon shine, giving the design a slick, mechanical finish that reflects its high-tech soul.
Add a second layer for resilience, ensuring your nails endure like an EVA through every apocalyptic clash.
Why It Works
This design is a throbbing heartbeat of *Neon Genesis Evangelion*’s dystopia—the neon green, purple, and orange flare like the EVA units’ armor under floodlights, a trinity of raw power and fragile humanity synced in a desperate dance.
The NERV logo looms with cold authority, its black lines slicing through the chaos like a directive from the abyss, while the EVA patterns hum with the circuitry of a world on the brink, metallic and unrelenting.
The neon glow pulses like an AT Field flickering under strain, tying the look together with a futuristic tension that feels alive.
Pair it with a pilot suit or a sleek jacket, and it’s a stark tribute to Evangelion’s mech-driven soul, a manicure that syncs with every shuddering beat of survival.
18. Inuyasha’s Feudal Grace

Journey through time with Inuyasha’s Feudal Grace, a refined design of soft red and white nails adorned with sakura petals, Inuyasha’s Tessaiga sword, and Sesshomaru’s crescent moon.
This isn’t just a manicure—it’s a tapestry of feudal Japan’s beauty and brutality, perfect for serene evenings, romantic strolls, or moments when you need to wield the elegance of a half-demon’s world.
Each nail blooms with the delicate strength of *Inuyasha*, a tribute to a tale of love and conflict beneath cherry blossoms.
Creating Inuyasha’s Feudal Grace
Step 1: Prep and Base
Begin with a hydrating base coat to nurture your nails for the journey, then sponge a red-to-white gradient across all five nails, blending from deep red at the base to pure white at the tips.
This fade mirrors Inuyasha’s fiery spirit and Sesshomaru’s icy calm, drying into a canvas that whispers of feudal winds.
Step 2: Tessaiga Sword
With a fine brush, paint Inuyasha’s Tessaiga in silver on a red nail (index), curving its blade subtly to capture its raw power.
Add black hilt details with a second layer, letting it gleam like a weapon forged in battle, drying to anchor its feudal might.
Step 3: Sakura Petals
Draw pink sakura petals on two nails (middle and ring) with a dotting tool, scattering them unevenly to mimic their gentle fall through a spring breeze.
Add white centers with a toothpick for a soft bloom, layering for a delicate depth that evokes Kagome’s tender touch.
Step 4: Sesshomaru’s Moon
Paint a purple crescent moon on a white nail (thumb) with a striping brush, keeping its curve sleek and regal to reflect Sesshomaru’s cold grace.
Layer a faint silver outline for a lunar glow, cleaning edges with acetone to sharpen its ethereal edge.
Step 5: Seal with Top Coat
Finish with a glossy top coat to lock in the grace and enhance the gradient’s shine, giving the design a lustrous finish that reflects its timeless beauty.
Add a second layer for endurance, ensuring your nails endure like Inuyasha’s quest through every era.
Why It Works
This design is a fleeting dance of *Inuyasha*’s soul—the red-to-white gradient flows like blood and snow across a feudal battlefield, a tender clash of Inuyasha’s passion and Sesshomaru’s restraint.
Tessaiga slashes with the weight of a half-demon’s loyalty, its silver blade a thread of protection, while the sakura petals drift with Kagome’s quiet hope, soft pink blooms against the storm.
The crescent moon glows with Sesshomaru’s icy elegance, tying the look together with a regal serenity that feels eternal.
Pair it with a kimono or a flowing scarf, and it’s a graceful tribute to Inuyasha’s world, a manicure that blooms with the beauty and brutality of a timeless tale.
19. Cardcaptor Sakura’s Spellbound Charm
Seal the magic with Cardcaptor Sakura’s Spellbound Charm, a delicate design of soft pink and gold nails twinkling with Sakura’s staff, Clow cards, and ethereal wings.
This isn’t just a manicure—it’s a spell cast in polish, perfect for whimsical afternoons, magical meetups, or moments when you need to summon Sakura’s gentle courage.
Each nail glimmers with the innocence and power of *Cardcaptor Sakura*, a tribute to a girl who captures hearts and cards alike.
Creating Cardcaptor Sakura’s Spellbound Charm
Step 1: Prep and Base
Lay down a protective base coat to cradle your nails in care, then paint four nails soft pink and one (ring finger) shimmering gold, applying two coats each.
The pink glows with Sakura’s tender spirit, while the gold shines with the magic of the Clow, drying into a canvas that hums with enchantment.
Step 2: Magical Staff
With a fine brush, paint Sakura’s staff in gold on a pink nail (index), tracing its star-tipped elegance with precision.
Add pink wings at the head with a second layer, letting them flutter with a metallic gleam that captures her spellcasting grace.
Step 3: Clow Cards
Draw a rectangular card outline in black on a pink nail (middle), filling it with red runes to mimic the Windy card’s power.
Layer a faint white border with a toothpick for a glowing edge, drying into a miniature spell ready to be sealed.
Step 4: Winged Whimsy
Paint tiny white wings on the gold nail (ring finger) with a dotting tool, scattering them like Kero’s flight across the sky.
Add pink tips with a second layer for a soft blush, cleaning edges with acetone to keep them dainty yet bold.
Step 5: Seal with Top Coat
Finish with a glossy top coat to lock in the charm and enhance the shine, giving the design a dewy, magical finish that radiates Sakura’s light.
Add a second layer for endurance, ensuring your nails shine through every card-capturing adventure.
Why It Works
This design is a sweet incantation of *Cardcaptor Sakura*’s essence—the pink bathes your nails in her gentle warmth, a blush of courage that blooms like cherry blossoms, while the gold glimmers with the Clow’s ancient magic, a radiant thread of power.
The staff stands as Sakura’s wand of wonder, its wings fluttering with her boundless heart, while the Clow card whispers of spells yet to be cast, a tiny relic of her destiny.
The winged accents dance with Kero’s playful spirit, tying the look together with a whimsical charm that feels alive.
Pair it with a frilly dress or a magical wand, and it’s a tender tribute to Sakura’s journey, a manicure that seals the magic with every sparkling stroke.
20. Fullmetal Alchemist’s Alchemical Forge
Transmute your nails with Fullmetal Alchemist’s Alchemical Forge, a metallic design of silver nails etched with alchemy circles and the glowing red Philosopher’s Stone.
This isn’t just a manicure—it’s a forge of science and sacrifice, perfect for steampunk gatherings, anime deep dives, or days when you need to channel the Elric brothers’ relentless pursuit.
Each nail hums with the weight of *Fullmetal Alchemist*, a tribute to a world where truth burns brighter than gold.
Creating Fullmetal Alchemist’s Alchemical Forge
Step 1: Prep and Base
Begin with a durable base coat to brace your nails for the transmutation, then layer a metallic silver polish across all five nails, buffing with a sponge for a weathered, industrial sheen.
This mirrors the steel of Amestris’ machinery, drying into a canvas that grinds with alchemical grit.
Step 2: Alchemy Circles
With a fine brush, paint white alchemy circles on two nails (index and middle), tracing their intricate runes with precision to capture the laws of equivalent exchange.
Layer a second coat for a glowing depth, letting them shine like sigils etched into stone.
Step 3: Philosopher’s Stone
Draw a glowing red stone on a nail (ring finger) with a dotting tool, outlining its jagged edges in black to mimic its cursed brilliance.
Add a faint white glow with a sponge for a crystalline pulse, drying into a relic of sacrifice and power.
Step 4: Mechanical Grind
Sketch faint black gear lines on a nail (thumb) with a striping brush, crisscrossing them to evoke Ed’s automail in motion.
Sponge subtle gray smudges for a worn, steampunk texture, cleaning edges with acetone to keep the grind sharp.
Step 5: Seal with Top Coat
Finish with a glossy top coat to lock in the forge and amplify the metallic shine, giving the design a polished, industrial finish that reflects its alchemical soul.
Add a second layer for endurance, ensuring your nails endure like the Elrics through every truth.
Why It Works
This design is a molten crucible of *Fullmetal Alchemist*’s essence—the silver grinds like the steel of automail, a cold, unyielding surface scarred by the Elrics’ journey, while the alchemy circles glow with the ancient science that binds their world, white runes pulsing with the cost of power.
The Philosopher’s Stone burns red with the blood of its making, a cursed gem that haunts the nails, while the gear lines churn with the mechanical heartbeat of Ed’s resolve.
Together, they forge a look that’s raw and radiant, a manicure that hums with the weight of truth.
Pair it with a trench coat or a red cape, and it’s a steely tribute to Fullmetal’s saga, transmuting your nails with every industrial gleam.
21. Death Note’s Lethal Scribbles
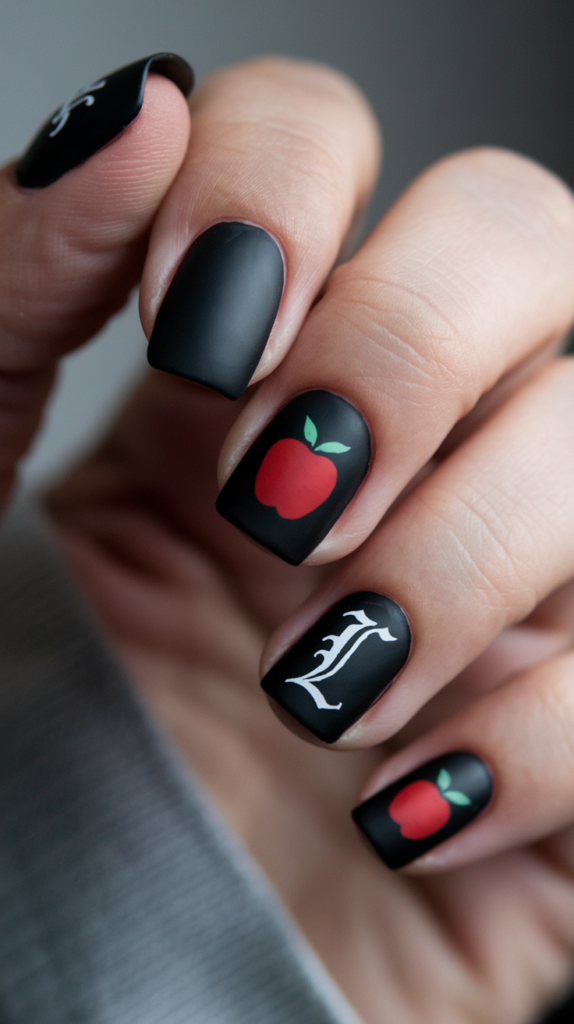
Write your fate with Death Note’s Lethal Scribbles, a dark design of glossy black nails etched with a red apple, the ‘L’ symbol, and cryptic fonts dripping with menace.
This isn’t just a manicure—it’s a death warrant inked in polish, perfect for suspenseful nights, mind-game marathons, or moments when you need to channel Light’s cunning or L’s quiet genius.
Each nail whispers of *Death Note*’s deadly dance, a tribute to a world where every name holds power.
Creating Death Note’s Lethal Scribbles
Step 1: Prep and Base
Lay down a protective base coat to shield your nails from the shadows, then paint all five nails with glossy black polish, applying two coats for a deep, inky shine.
This void reflects the Death Note’s abyss, drying into a canvas that glints like Ryuk’s sinister grin.
Step 2: Red Apple
With a dotting tool, paint a red apple on a nail (index), adding a green leaf with a fine brush for a crisp, tempting bite. Layer a second coat for a juicy glow, letting it dry into a fruit that lures like Ryuk’s hunger amid the darkness.
Step 3: ‘L’ Symbol
Draw the calligraphic ‘L’ in white on a nail (ring finger) with a striping brush, tracing its elegant curves to capture L’s enigmatic mind.
Layer for a stark contrast, drying into a mark that stands as a quiet challenge to Light’s reign.
Step 4: Cryptic Font
Write tiny white Death Note script on a nail (thumb) with a fine brush, mimicking the book’s eerie text in jagged, uneven lines.
Add faint red smudges with a sponge for a blood-stained effect, cleaning edges with acetone to keep the scribbles sharp.
Step 5: Seal with Top Coat
Finish with a glossy top coat to lock in the scribbles and amplify the shine, giving the design a wet, inky finish that drips with menace.
Add a second layer for endurance, ensuring your nails endure like Light’s schemes through every twist.
Why It Works
This design is a lethal whisper from *Death Note*’s core—the black cloaks your nails in a suffocating darkness, an abyss where every name is a death knell, while the red apple tempts with Ryuk’s gluttonous glee, a crimson lure in the void.
The ‘L’ symbol cuts through with a white-hot intellect, a quiet defiance against the chaos, while the cryptic font scrawls with the weight of a Shinigami’s judgment, its red stains bleeding with every fatal stroke.
Together, they weave a look that’s chilling and cunning, a manicure that hums with the thrill of the game.
Pair it with a notebook or a dark suit, and it’s a haunting tribute to Death Note’s mind games, lethal with every glossy scribble.
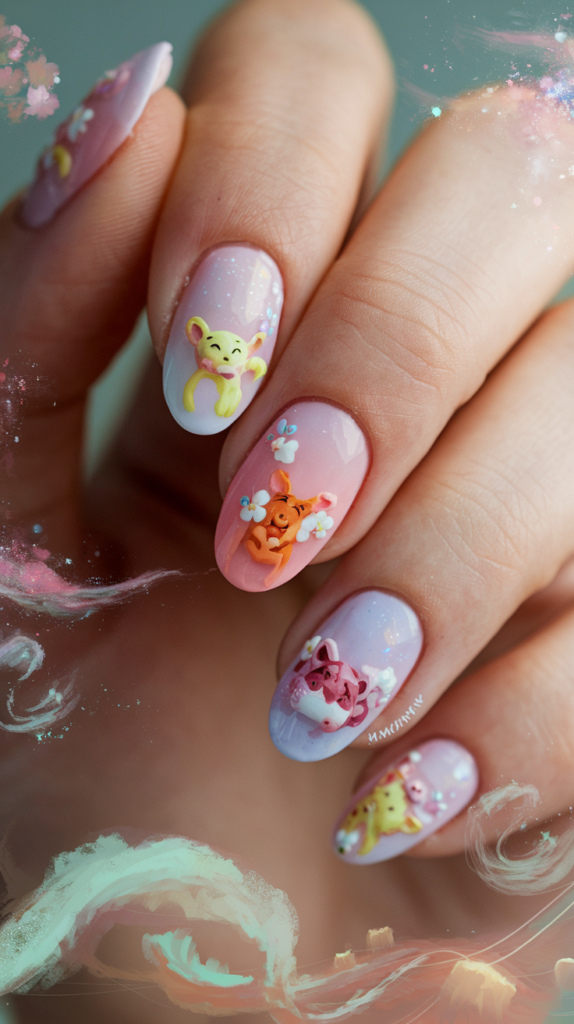
22. Kawaii Chibi Cuties
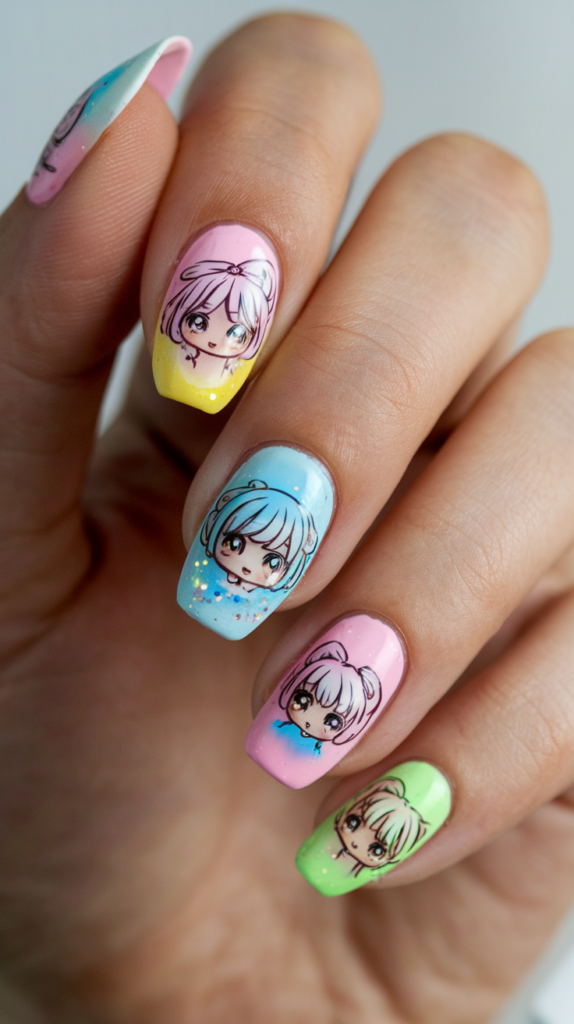
Bubble with adorableness in Kawaii Chibi Cuties, a playful design of pastel nails twinkling with chibi versions of anime icons, hearts, and stars in a sugary burst.
This isn’t just a manicure—it’s a hug from your favorite characters, perfect for cheerful days, kawaii meetups, or moments when you need a dose of cuteness to brighten your world.
Each nail giggles with the charm of chibi art, a tribute to the sweetest side of anime fandom.
Creating Kawaii Chibi Cuties
Step 1: Prep and Base
Start with a hydrating base coat to nurture your nails for the fun, then paint two nails pastel pink, two baby blue, and one mint green, applying two coats each.
These colors bubble with kawaii sweetness—pink for love, blue for dreams, green for whimsy—drying into a canvas that sparkles with joy.
Step 2: Chibi Faces
With a fine brush, paint chibi Sailor Moon on a pink nail (index) with big eyes and blonde pigtails, and chibi Pikachu on a blue nail (ring finger) with red cheeks.
Layer black outlines and pink blushes for a cuddly depth, letting them beam with kawaii glee.
Step 3: Hearts
Dot red hearts around the chibis on a green nail (middle) with a dotting tool, scattering them unevenly for a playful flutter.
Add pink outlines with a second layer for a soft pop, drying into a love-filled accent that hugs the design.
Step 4: Stars
Paint white stars on a pink nail (thumb) with a toothpick, adding gold glitter flecks with a sponge for a twinkling shine.
Keep them small yet bold, cleaning edges with acetone to sharpen their kawaii sparkle.
Step 5: Seal with Top Coat
Finish with a glossy top coat to lock in the cuties and amplify the shine, giving the design a sugary, glossy finish that radiates joy.
Add a second layer for endurance, ensuring your nails sparkle through every kawaii adventure.
Why It Works
This design is a sugary burst of kawaii delight—the pastels bubble like a candy-coated dream, pink giggling with Sailor Moon’s charm, blue chirping with Pikachu’s spark, and green twinkling with pure whimsy.
The chibi faces beam with oversized eyes and tiny smiles, a hug in every stroke, while the hearts flutter with love and the stars shine with playful magic, tying the look together with a sweetness that melts the heart.
Pair it with a frilly skirt or a plush toy, and it’s a joyful tribute to anime’s cute side, a manicure that dances with chibi cheer in every pastel gleam.
23. Haikyuu’s Volley Spirit
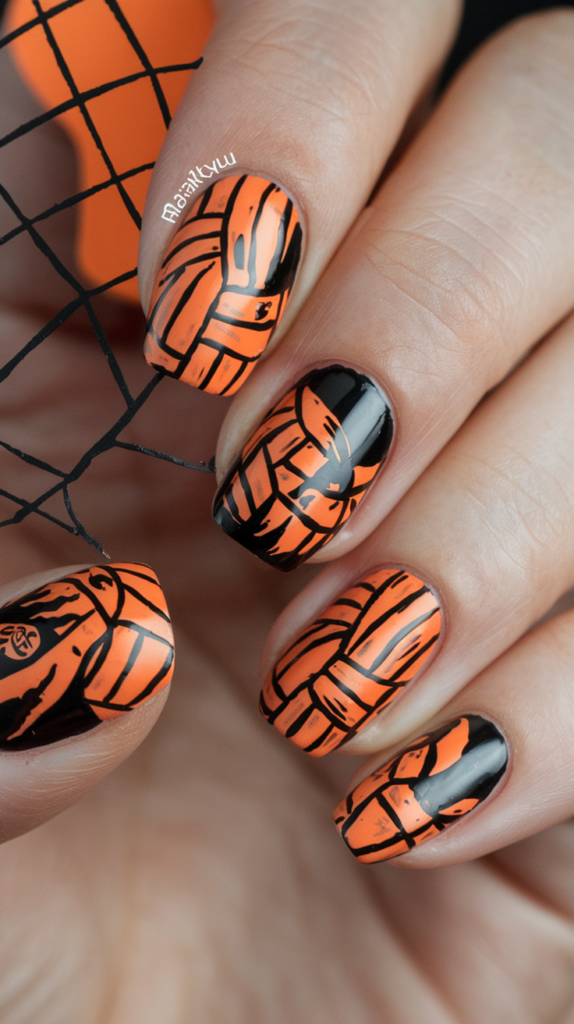
Spike the court with Haikyuu’s Volley Spirit, a dynamic design of vibrant orange, black, and white nails bouncing with volleyballs, team logos, and energetic motion lines.
This isn’t just a manicure—it’s a rally cry for the underdogs, perfect for game-day watch parties, team meetups, or moments when you need to soar like Karasuno’s crows.
Each nail leaps with the thrill of *Haikyuu*, a tribute to the sweat and spirit of volleyball’s heart.
Creating Haikyuu’s Volley Spirit
Step 1: Prep and Base
Begin with a strengthening base coat to brace your nails for the spike, then paint two nails vibrant orange, two deep black, and one crisp white, applying two coats each.
These colors roar with Karasuno’s fire, Nekoma’s shadow, and the court’s purity, drying into a canvas that pulses with team pride.
Step 2: Karasuno Crow
With a fine brush, paint the Karasuno crow emblem in black on an orange nail (thumb), outlining its fierce wings to capture the team’s soaring spirit.
Fill it with a bold stroke, layering for a stark mark that caws with Hinata’s relentless drive.
Step 3: Volleyball
Draw a white volleyball with black lines on a black nail (index) with a dotting tool, curving the lines for a spinning serve.
Layer a second coat for a glossy pop, letting it dry into a ball ready to soar over the net.
Step 4: Motion Lines
Sketch red motion lines on a white nail (ring finger) with a striping brush, curving them sharply to mimic Kageyama’s pinpoint set.
Add faint orange streaks with a sponge for a dynamic blur, cleaning edges with acetone to keep the energy sharp.
Step 5: Seal with Top Coat
Finish with a glossy top coat to lock in the spirit and amplify the shine, giving the design a slick, sporty finish that bounces with life.
Add a second layer for endurance, ensuring your nails leap through every rally like Haikyuu’s champs.
Why It Works
This design is a high-flying ace from *Haikyuu*’s court—the orange blazes with Karasuno’s fiery heart, a crow’s ascent against the odds, while the black lurks with Nekoma’s stealthy precision, and the white shines with the purity of every spike.
The crow emblem soars with the team’s unyielding will, the volleyball spins with the thrill of a perfect serve, and the motion lines leap with the kinetic rush of a match point, tying the look together with a sweaty, spirited energy.
Pair it with a jersey or a sporty cap, and it’s a dynamic tribute to Haikyuu’s soul, a manicure that rallies with every vibrant bounce.
24. Akatsuki’s Crimson Dawn
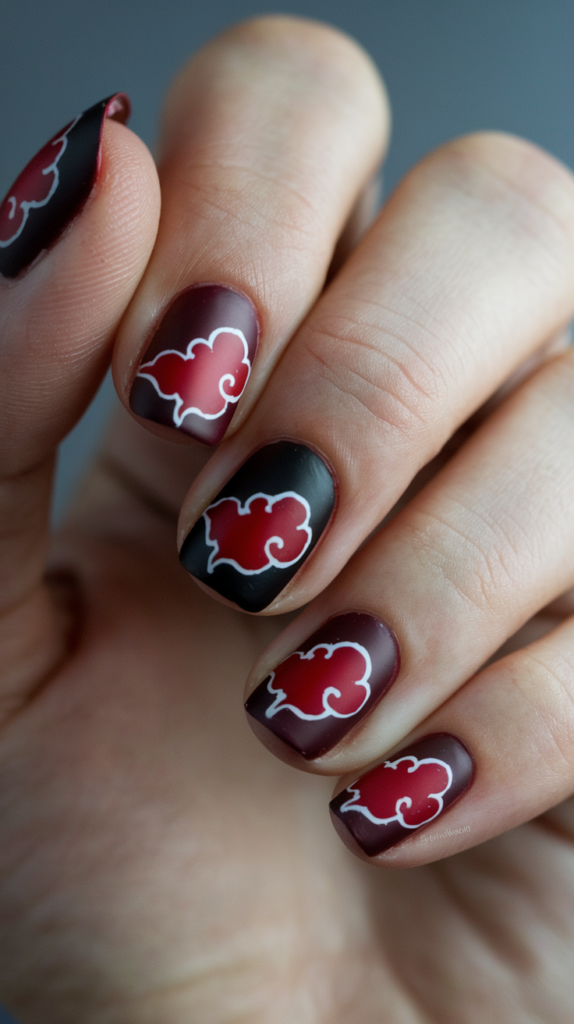
Shroud the light with Akatsuki’s Crimson Dawn, a menacing design of deep red and black nails looming with the Akatsuki cloud symbol and swirling mists of dread.
This isn’t just a manicure—it’s a shadow cast by Naruto’s most feared villains, perfect for dark anime nights, cosplay showdowns, or moments when you need to wield the power of the rogue shinobi.
Each nail seethes with the tension of *Naruto*’s underworld, a tribute to a dawn stained with blood.
Creating Akatsuki’s Crimson Dawn
Step 1: Prep and Base
Lay down a protective base coat to brace your nails for the darkness, then paint three nails deep black and two dark red, applying two coats each.
The black cloaks with the void of the Akatsuki’s schemes, while the red bleeds with their ruthless intent, drying into a canvas that glints like a blood-soaked night.
Step 2: Akatsuki Clouds
With a fine brush, paint red clouds with white outlines on two black nails (index and middle), tracing their jagged edges to capture the group’s ominous mark.
Layer a second coat for a bold, crimson glow, letting them loom like storm clouds over a doomed village.
Step 3: Misty Swirls
Draw faint black swirls around the clouds on a red nail (ring finger) with a striping brush, curling them to mimic the eerie mists of the Akatsuki’s presence.
Add subtle white wisps with a sponge for a ghostly haze, drying into a shroud of dread.
Step 4: Shadow Flecks
Dot tiny white flecks on a black nail (thumb) with a toothpick, scattering them unevenly to evoke the flicker of a hidden threat.
Sponge faint red smudges at the edges for a bloodied echo, cleaning with acetone to keep the menace sharp.
Step 5: Seal with Top Coat
Finish with a glossy top coat to lock in the dawn and amplify the shine, giving the design a wet, sinister finish that drips with villainy.
Add a second layer for endurance, ensuring your nails endure like the Akatsuki through every shadowed strike.
Why It Works
This design is a crimson storm from *Naruto*’s dark heart—the black seethes with the Akatsuki’s shadowy reign, a void that swallows hope, while the red dawns with the blood of their ambition, a relentless tide of power.
The clouds loom with Itachi’s quiet menace and Pain’s godly wrath, their red glow a harbinger of doom, while the misty swirls drift with the stealth of a ninja’s blade, tying the look together with a chilling grace.
The shadow flecks flicker like eyes in the dark, a whisper of the terror they wield.
Pair it with a cloak or a rogue’s mask, and it’s a haunting tribute to the Akatsuki’s legacy, a manicure that casts a deadly dawn with every glossy stroke.
25. Fruits Basket’s Zodiac Whispers
Embrace the tender curse with Fruits Basket’s Zodiac Whispers, a gentle design of pastel nails adorned with the Chinese zodiac animals of the Sohma family in soft, cartoonish charm.
This isn’t just a manicure—it’s a hug from a broken family, perfect for quiet days, heartfelt watch parties, or moments when you need to carry Tohru’s warmth.
Each nail murmurs with the love and pain of *Fruits Basket*, a tribute to a bond that defies fate.
Creating Fruits Basket’s Zodiac Whispers
Step 1: Prep and Base
Start with a hydrating base coat to nurture your nails for the tale, then paint two nails pale pink, two mint green, and one baby blue, applying two coats each.
These pastels glow with the softness of Tohru’s heart—pink for love, green for healing, blue for hope—drying into a canvas that whispers of home.
Step 2: Rat and Rabbit
With a fine brush, paint a gray rat with big eyes on a pink nail (index) and a white rabbit with floppy ears on a green nail (middle), keeping them chibi and cute.
Layer black outlines and pink blushes for a tender depth, letting them hop with Yuki’s and Kisa’s quiet charm.
Step 3: Dragon
Draw a green dragon with swirling tails on a blue nail (ring finger), curling its body to capture Hatori’s stoic grace.
Add white scales with a dotting tool for a shimmering touch, drying into a gentle beast that guards the family’s secrets.
Step 4: Floral Vines
Sketch faint green vines around the animals on a pink nail (thumb) with a striping brush, dotting tiny pink flowers for a garden bloom.
Sponge subtle white fades at the edges for a soft glow, cleaning with acetone to keep the whispers delicate.
Step 5: Seal with Top Coat
Finish with a glossy top coat to lock in the whispers and enhance the shine, giving the design a dewy, tender finish that radiates love.
Add a second layer for endurance, ensuring your nails carry the Sohmas’ bond through every gentle moment.
Why It Works
This design is a soft embrace from *Fruits Basket*’s soul—the pastels murmur with Tohru’s warmth, pink blooming with her endless kindness, green soothing with her healing touch, and blue dreaming with her quiet hope.
The rat and rabbit hop with Yuki’s grace and Kisa’s innocence, tiny guardians of a cursed family, while the dragon coils with Hatori’s silent strength, a whisper of the zodiac’s weight.
The floral vines weave Tohru’s love through the design, tying it together with a garden of tenderness that feels alive.
Pair it with a cozy sweater or a rice ball prop, and it’s a gentle tribute to Fruits Basket’s heart, a manicure that whispers of family with every pastel stroke.
26. Your Name’s Starlit Threads
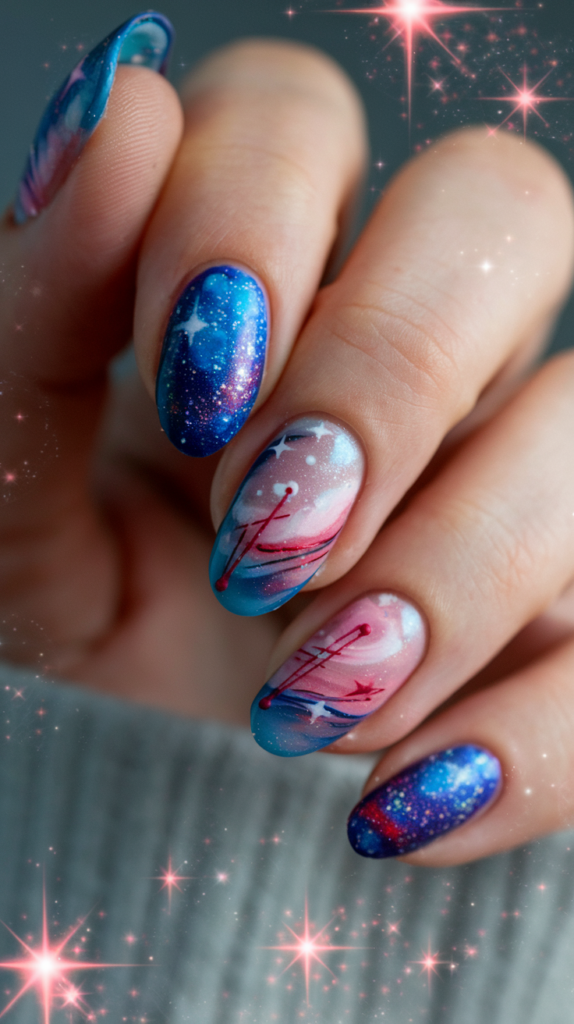
Weave destiny with Your Name’s Starlit Threads, a celestial design of cosmic gradients threading with shooting stars and the red string of fate across a twilight sky.
This isn’t just a manicure—it’s a love story written in the stars, perfect for romantic nights, stargazing dates, or moments when you need to feel Taki and Mitsuha’s timeless bond.
Each nail glimmers with the beauty of *Your Name*, a tribute to a connection that defies time and space.
Creating Your Name’s Starlit Threads
Step 1: Prep and Base
Lay down a protective base coat to cradle your nails for the cosmic journey, then sponge a blue-to-purple-to-pink gradient across all five nails, blending from midnight blue at the base to soft pink at the tips.
This twilight sky mirrors the film’s ethereal beauty, drying into a canvas that hums with starlight.
Step 2: Shooting Stars
With a fine brush, paint white shooting stars with trailing tails on two nails (index and middle), curving them to capture their fleeting dance across the sky.
Layer silver flecks with a sponge for a twinkling glow, letting them dry into wishes streaking through the night.
Step 3: Red String
Draw a thin red string winding across a nail (ring finger) with a striping brush, looping it gently to mimic the thread tying Taki and Mitsuha.
Layer a second coat for a bold, fateful line, drying into a bond that stretches beyond the stars.
Step 4: Cosmic Glow
Sponge faint white glows around the stars on a nail (thumb), blending outward for an ethereal pulse that evokes the comet’s light.
Add subtle blue flecks with a toothpick for a starry haze, cleaning edges with acetone to keep the glow sharp.
Step 5: Seal with Top Coat
Finish with a glossy top coat to lock in the threads and amplify the gradient’s shine, giving the design a glassy, celestial finish that radiates love.
Add a second layer for endurance, ensuring your nails shine through every twist of fate.
Why It Works
This design is a celestial poem from *Your Name*’s heart—the gradient paints a twilight sky, blue fading into purple and pink like the moments when Taki and Mitsuha’s worlds brush, a fleeting beauty that lingers.
The shooting stars streak with the comet’s fleeting promise, their silver tails whispering of chances lost and found, while the red string weaves their fate, a crimson thread that binds across time.
The cosmic glow hums with the film’s quiet magic, tying the look together with a tender, starlit grace.
Pair it with a ribbon or a starry accessory, and it’s a romantic tribute to Your Name’s soul, a manicure that threads love through every shimmering stroke.
27. Fire Force’s Blazing Brigade
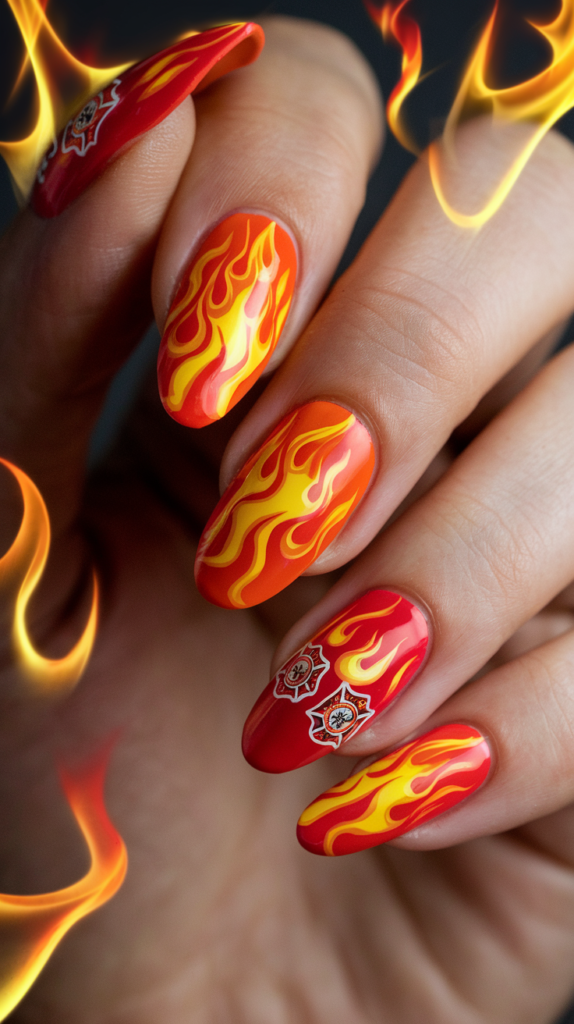
Burn through the inferno with Fire Force’s Blazing Brigade, a fiery design of vibrant red and orange nails roaring with flame patterns and company emblems in a dynamic blaze.
This isn’t just a manicure—it’s a firefighter’s oath etched in heat, perfect for action-packed nights, cosplay battles, or days when you need to ignite Shinra’s relentless spirit.
Each nail crackles with the fury of *Fire Force*, a tribute to the brigade that fights fire with fire.
Creating Fire Force’s Blazing Brigade
Step 1: Prep and Base
Start with a durable base coat to shield your nails from the flames, then sponge a red-to-orange gradient across all five nails, blending from deep red at the base to bright orange at the tips.
This fiery cascade mirrors the infernals’ blaze, drying into a canvas that sears with brigade passion.
Step 2: Flame Patterns
With a fine brush, paint swirling orange flames on two nails (index and middle), curling them upward to mimic Shinra’s Ignition Ability.
Layer yellow tips with a second coat for a blazing intensity, letting them leap like fire against the night.
Step 3: Company Emblem
Draw a Fire Force emblem in black on a red nail (ring finger), outlining its sharp cross to capture the brigade’s resolve.
Fill it with a bold stroke, layering for a stark mark that stands as a shield amid the heat.
Step 4: Ember Sparks
Dot white sparks around the flames on a nail (thumb) with a toothpick, scattering them unevenly for a chaotic flare.
Sponge faint red flecks at the base for a smoldering glow, cleaning edges with acetone to keep the fire sharp.
Step 5: Seal with Top Coat
Finish with a glossy top coat to lock in the blaze and amplify the shine, giving the design a molten, fiery finish that radiates heat.
Add a second layer for endurance, ensuring your nails burn through every inferno like the Fire Force.
Why It Works
This design is a furnace of *Fire Force*’s soul—the red-to-orange gradient ignites like an infernal’s wrath, a searing wave that consumes the nails in a firefighter’s fury, while the flames leap with Shinra’s blazing speed, curling with the heat of his resolve.
The emblem stands firm with Company 8’s oath, a black cross against the chaos, while the ember sparks flare with the brigade’s relentless fight, tying the look together with a visceral energy that burns alive.
Pair it with a uniform or a bold scarf, and it’s a fiery tribute to Fire Force’s heart, a manicure that blazes with every scorching stroke.
28. Spirited Away’s Bathhouse Dreams
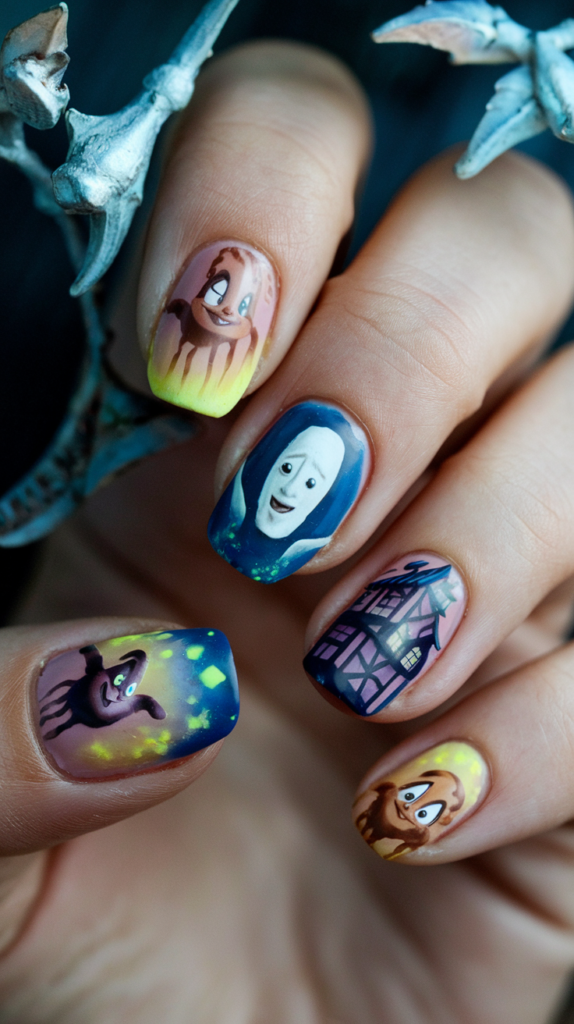
Drift into enchantment with Spirited Away’s Bathhouse Dreams, a mystical design of pastel nails whispering with No-Face’s haunting mask, soot sprites, and bathhouse symbols in a soft, dreamlike haze.
This isn’t just a manicure—it’s a journey to Ghibli’s spirit realm, perfect for rainy evenings, cozy marathons, or moments when you need to feel Chihiro’s quiet courage.
Each nail hums with the magic of *Spirited Away*, a tribute to a world where wonder meets the unknown.
Creating Spirited Away’s Bathhouse Dreams
Step 1: Prep and Base
Begin with a hydrating base coat to cradle your nails in care, then sponge a blue-to-purple-to-white gradient across all five nails, blending from pale blue at the base to soft white at the tips.
This dreamy haze mirrors the bathhouse’s glow, drying into a canvas that whispers of spirits.
Step 2: No-Face’s Mask
With a fine brush, paint No-Face’s mask in black on a purple nail (index), tracing its eerie oval with precision and adding white eyes for a haunting stare.
Layer a subtle purple mouth for depth, letting it float like a lost soul in the twilight.
Step 3: Soot Sprites
Dot tiny black soot sprites with white eyes on a blue nail (middle) with a dotting tool, scattering them unevenly for a playful crawl.
Layer a second coat for a fluffy charm, drying into little helpers that scurry through the bathhouse’s glow.
Step 4: Bathhouse Symbol
Draw a small red bathhouse mark on a white nail (ring finger) with a striping brush, curving it subtly to capture its ancient grace.
Add faint gold accents with a toothpick for a lantern-like shimmer, cleaning edges with acetone to keep it delicate.
Step 5: Seal with Top Coat
Finish with a glossy top coat to lock in the dreams and enhance the shine, giving the design a dewy, mystical finish that radiates Ghibli’s wonder.
Add a second layer for endurance, ensuring your nails shine through every spirit-filled night.
Why It Works
This design is a soft reverie from *Spirited Away*’s heart—the gradient drifts like steam through the bathhouse, blue fading into purple and white like Chihiro’s journey from fear to courage, a twilight haze alive with magic.
No-Face’s mask haunts with a silent plea, its black void a whisper of loneliness, while the soot sprites scurry with the playful innocence of unseen helpers.
The bathhouse symbol glows with the warmth of a lantern-lit night, tying the look together with a gentle, otherworldly charm.
Pair it with a yukata or a cozy blanket, and it’s a tender tribute to Spirited Away’s soul, a manicure that dreams with every pastel shimmer.
29. Violet Evergarden’s Letterbound Heart
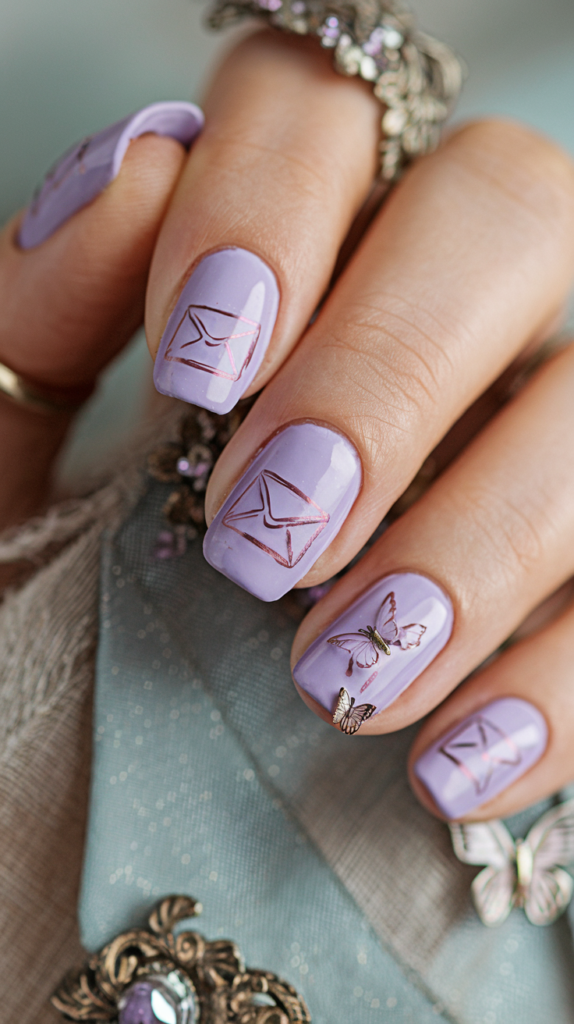
Pen your emotions with Violet Evergarden’s Letterbound Heart, a refined design of soft purple nails etched with letter envelopes, Violet’s brooch, and mechanical arms in a tender, steampunk embrace. This isn’t just a manicure—it’s a love letter in polish, perfect for quiet afternoons, heartfelt screenings, or moments when you need to feel Violet’s delicate strength.
Each nail whispers with the grace of *Violet Evergarden*, a tribute to a soul written in ink and steel.
Creating Violet Evergarden’s Letterbound Heart
Step 1: Prep and Base
Lay down a protective base coat to nurture your nails for the tale, then paint all five nails soft purple, applying two coats for a gentle, lilac glow. This hue reflects Violet’s quiet resolve, drying into a canvas that hums with her tender heart.
Step 2: Letter Envelope
With a fine brush, paint a white envelope with a red wax seal on a nail (index), tracing its edges with precision to capture a letter’s weight.
Layer a second coat for a crisp glow, letting it dry into a missive filled with unspoken words.
Step 3: Violet’s Brooch
Draw a gold brooch with a green gem on a nail (ring finger) with a dotting tool, outlining its elegant curves to mimic her keepsake.
Add a shimmer coat with a sponge for a crystalline shine, drying into a token of her past.
Step 4: Mechanical Arms
Sketch faint silver gear lines on a nail (thumb) with a striping brush, crisscrossing them to evoke Violet’s automail fingers typing her truth.
Sponge subtle gray smudges for a worn texture, cleaning edges with acetone to keep the steel sharp.
Step 5: Seal with Top Coat
Finish with a glossy top coat to lock in the heart and enhance the shine, giving the design a polished, tender finish that radiates her grace.
Add a second layer for endurance, ensuring your nails carry her story through every letter.
Why It Works
This design is a fragile elegy from *Violet Evergarden*’s soul—the purple bathes your nails in her quiet strength, a lilac whisper of a girl finding her heart, while the envelope seals her journey in ink, a white relic heavy with unsaid love.
The brooch glimmers with the gold of her past, a keepsake that shines through her pain, while the mechanical arms grind with the steampunk grace of her resolve, tying the look together with a tender, industrial beauty.
Pair it with a typewriter or a soft dress, and it’s a poignant tribute to Violet’s tale, a manicure that writes her heart with every delicate stroke.
30. Blue Exorcist’s Hellfire Dance
Burn with defiance in Blue Exorcist’s Hellfire Dance, a fiery design of deep blue nails blazing with demonic flames and the True Cross Academy insignia in a radiant clash.
This isn’t just a manicure—it’s a devil’s waltz with Rin’s blue fire, perfect for intense nights, cosplay crusades, or moments when you need to wield his rebellious spirit.
Each nail sears with the heat of *Blue Exorcist*, a tribute to a half-demon’s fight for redemption.
Creating Blue Exorcist’s Hellfire Dance
Step 1: Prep and Base
Start with a durable base coat to brace your nails for the flames, then paint all five nails deep blue, applying two coats for a dark, infernal depth.
This hue mirrors Rin’s hellfire, drying into a canvas that pulses with demonic power.
Step 2: Demonic Flames
With a fine brush, paint bright blue flames on two nails (index and middle), curling them upward to mimic Rin’s blazing outburst.
Layer white tips with a second coat for a searing glow, letting them dance like hellfire against the night.
Step 3: Academy Insignia
Draw the True Cross insignia in white on a nail (ring finger), outlining its sharp cross to capture the exorcists’ resolve.
Fill it with a bold stroke, layering for a stark mark that stands as a shield amid the chaos.
Step 4: Hellfire Glow
Sponge faint blue glows around the flames on a nail (thumb), blending outward for a radiant pulse that evokes Satan’s blood in Rin’s veins.
Add subtle white flecks with a toothpick for a flickering spark, cleaning edges with acetone to keep the fire sharp.
Step 5: Seal with Top Coat
Finish with a glossy top coat to lock in the dance and amplify the shine, giving the design a slick, fiery finish that radiates defiance.
Add a second layer for endurance, ensuring your nails burn through every demon like Rin.
Why It Works
This design is a fiery clash from *Blue Exorcist*’s soul—the deep blue sears with Rin’s hellfire, a storm of demonic power that consumes the nails, while the flames leap with his untamed fury, curling with the heat of his heritage.
The True Cross insignia shines with the exorcists’ oath, a white beacon against the chaos, while the hellfire glow pulses with the blood of a half-demon’s fight, tying the look together with a radiant, rebellious energy.
Pair it with a sword prop or a dark jacket, and it’s a blazing tribute to Blue Exorcist’s heart, a manicure that dances with every infernal stroke.
31. The Promised Neverland’s Silent Escape
Plan your freedom with The Promised Neverland’s Silent Escape, a minimalist design of stark white nails etched with barcodes, cryptic codes, and subtle escape symbols in a haunting whisper.
This isn’t just a manicure—it’s a quiet rebellion against fate, perfect for tense anime nights, cosplay mysteries, or moments when you need to channel Emma’s cunning resolve.
Each nail hums with the dread of *The Promised Neverland*, a tribute to a fight cloaked in innocence.
Creating The Promised Neverland’s Silent Escape
Step 1: Prep and Base
Lay down a protective base coat to brace your nails for the plan, then paint all five nails matte white, applying two coats for a stark, innocent glow.
This purity mirrors Grace Field’s façade, drying into a canvas that hides a chilling truth.
Step 2: Barcodes
With a fine brush, paint black barcodes on two nails (index and middle), tracing uneven lines to capture the children’s branded fate.
Layer a second coat for a sharp, mechanical edge, letting them dry into a mark of captivity.
Step 3: Cryptic Codes
Draw tiny black numbers along the edges of a nail (ring finger) with a striping brush, scattering them in jagged patterns to mimic the farm’s secrets.
Add faint gray smudges with a sponge for a faded, desperate scrawl, drying into a whisper of resistance.
Step 4: Escape Key
Paint a small black key on a nail (thumb) with a dotting tool, curving its bow to symbolize Emma’s hope for freedom.
Layer a subtle white outline for a ghostly glow, cleaning edges with acetone to keep the symbol sharp.
Step 5: Seal with Top Coat
Finish with a matte top coat to lock in the escape and mute the shine, giving the design a dusty, silent finish that radiates tension.
Add a second layer for endurance, ensuring your nails endure like the children’s plan through every shadow.
Why It Works
This design is a hushed cry from *The Promised Neverland*’s core—the white cloaks your nails in a deceptive innocence, a façade as fragile as Grace Field’s walls, while the barcodes brand with the cold precision of a farm’s lie, black lines heavy with dread.
The cryptic codes scrawl with Emma’s quiet genius, a desperate map to freedom, while the key glimmers with her unyielding hope, tying the look together with a minimalist menace that feels alive.
Pair it with a white dress or a hidden notebook, and it’s a haunting tribute to the children’s fight, a manicure that escapes with every silent stroke.
32. K-On!’s Melody Jam
Strum the beat with K-On!’s Melody Jam, a vibrant design of colorful nails ringing with musical notes, instruments, and chibi band members in a playful symphony.
This isn’t just a manicure—it’s a Light Music Club jam session, perfect for music-filled days, cheerful hangouts, or moments when you need to dance to Yui’s carefree tune.
Each nail sings with the joy of *K-On!*, a tribute to friendship and the power of a good riff.
Creating K-On!’s Melody Jam
Step 1: Prep and Base
Lay down a hydrating base coat to nurture your nails for the fun, then paint two nails electric yellow, two hot pink, and one sky blue, applying two coats each.
These colors burst with the band’s energy—yellow for Yui’s cheer, pink for Mio’s spark, blue for Ritsu’s vibe—drying into a canvas that hums with melody.
Step 2: Guitar Strum
With a fine brush, paint a black guitar on a yellow nail (index), tracing its curves to capture Yui’s beloved Giita.
Add white strings with a second layer for a crisp strum, letting it dry into a riff ready to rock the clubroom.
Step 3: Musical Notes
Draw black notes and clefs on a pink nail (middle) with a dotting tool, scattering them unevenly for a playful tune.
Layer a subtle white outline for a glowing pop, drying into a melody that dances through the air.
Step 4: Chibi Yui
Paint a chibi Yui with big eyes and brown hair on a blue nail (ring finger), adding a pink bow with a fine brush for her bubbly charm.
Layer black outlines and a pink blush for a cuddly depth, letting her giggle with club spirit.
Step 5: Seal with Top Coat
Finish with a glossy top coat to lock in the jam and amplify the shine, giving the design a vibrant, glossy finish that sings with life.
Add a second layer for endurance, ensuring your nails play through every after-school session.
Why It Works
This design is a joyful riff from *K-On!*’s heart—the yellow strums with Yui’s boundless cheer, a sunny chord that lights the nails, while the pink hums with Mio’s shy spark, and the blue beats with Ritsu’s wild rhythm.
The guitar rocks with the club’s soul, its strings vibrating with every note, while the musical notes dance with Azusa’s precision, and chibi Yui giggles with the band’s unbreakable bond, tying the look together with a playful, melodic energy.
Pair it with a school uniform or a guitar strap, and it’s a vibrant tribute to K-On!’s spirit, a manicure that jams with every colorful stroke.
33. Tokyo Revengers’ Street Rebellion
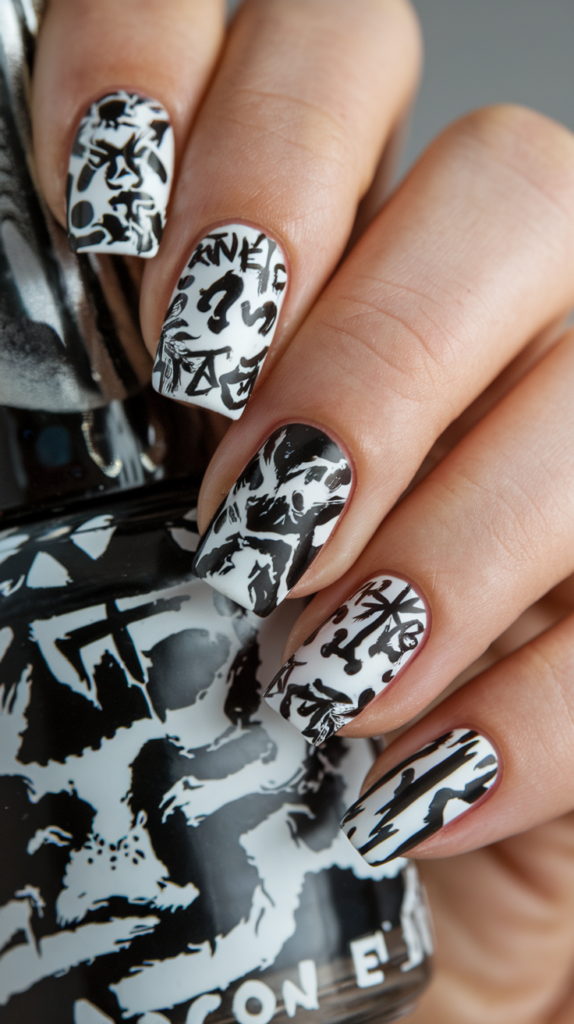
Fight through time with Tokyo Revengers’ Street Rebellion, a gritty design of black and white nails etched with gang symbols, dragons, and urban splashes in a fierce clash. This isn’t just a manicure—it’s a brawl in Tokyo’s backstreets, perfect for rebellious nights, cosplay turf wars, or moments when you need to channel Takemichi’s desperate grit. Each nail rumbles with the chaos of *Tokyo Revengers*, a tribute to a gang’s unbreakable code.
Creating Tokyo Revengers’ Street Rebellion
Step 1: Prep and Base
Lay down a strengthening base coat to brace your nails for the fight, then paint three nails glossy black and two stark white, applying two coats each.
The black grinds with the streets’ shadows, while the white flares with Mikey’s fierce light, drying into a canvas that hums with gang tension.
Step 2: Manji Symbol
With a fine brush, paint the Manji symbol in red on a black nail (index), tracing its sharp curves to capture Toman’s fierce pride.
Layer a second coat for a bold, bloody glow, letting it dry into a mark that roars with gang loyalty.
Step 3: Dragon Roar
Draw a black dragon with red eyes on a white nail (ring finger), coiling its body to mimic Draken’s tattooed fury.
Add gray scales with a dotting tool for a rugged depth, drying into a beast that guards the streets.
Step 4: Graffiti Splash
Sponge faint gold splashes on a black nail (thumb), scattering them unevenly for an urban tag.
Add subtle red streaks with a toothpick for a bloodied edge, cleaning with acetone to keep the rebellion sharp.
Step 5: Seal with Top Coat
Finish with a glossy top coat to lock in the rebellion and amplify the shine, giving the design a slick, street finish that radiates grit.
Add a second layer for endurance, ensuring your nails fight through every timeline like Takemichi.
Why It Works
This design is a street brawl from *Tokyo Revengers*’ core—the black rumbles with the shadows of Tokyo’s alleys, a void alive with gang chaos, while the white flares with Mikey’s untamed light, a beacon of loyalty.
The Manji symbol roars with Toman’s fierce heart, its red glow bleeding with every punch, while the dragon coils with Draken’s protective fury, a black storm of scales.
The graffiti splashes tag the look with urban defiance, tying it together with a gritty, rebellious energy that feels alive.
Pair it with a jacket or a gang patch, and it’s a fierce tribute to Tokyo Revengers’ soul, a manicure that rebels with every bold stroke.
34. Jujutsu Kaisen’s Cursed Pulse
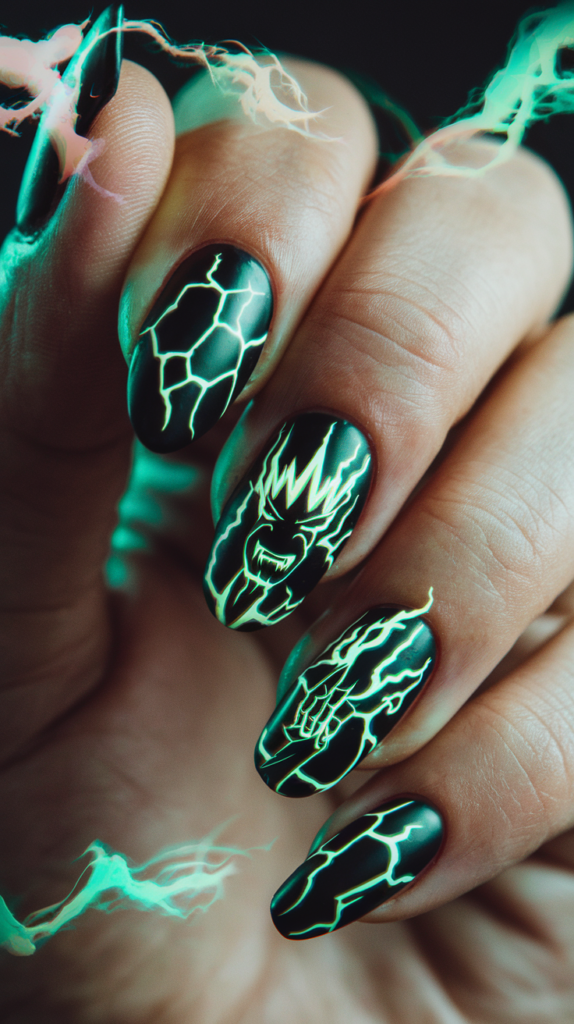
Unleash the curse with Jujutsu Kaisen’s Cursed Pulse, an edgy design of smoky gray nails surging with Gojo’s mask, cursed energy marks, and Sukuna’s fingers in a neon-charged clash.
This isn’t just a manicure—it’s a jujutsu battle etched in polish, perfect for dark anime nights, cosplay showdowns, or moments when you need to wield Gojo’s limitless power or Sukuna’s malice.
Each nail thrums with the dread of *Jujutsu Kaisen*, a tribute to a world where curses reign.
Creating Jujutsu Kaisen’s Cursed Pulse
Step 1: Prep and Base
Lay down a protective base coat to brace your nails for the curse, then paint all five nails smoky gray, applying two coats for a dark, ominous depth.
This hue seethes with the shadows of cursed energy, drying into a canvas that pulses with menace.
Step 2: Gojo’s Mask
With a fine brush, paint Gojo’s mask in white on a nail (index), tracing its sleek curves to capture his limitless gaze.
Add a blue glow with a sponge for a radiant edge, layering for a piercing shine that cuts through the gray.
Step 3: Cursed Marks
Draw neon green swirls on two nails (middle and ring) with a striping brush, curling them to mimic cursed energy flowing free.
Layer purple accents with a second coat for a chaotic pulse, drying into a storm of jujutsu power.
Step 4: Sukuna’s Fingers
Paint a black finger with red marks on a nail (thumb) with a dotting tool, tracing its jagged edge to capture Sukuna’s malice.
Add faint white streaks with a sponge for a cursed glow, cleaning edges with acetone to keep the evil sharp.
Step 5: Seal with Top Coat
Finish with a glossy top coat to lock in the pulse and amplify the shine, giving the design a slick, cursed finish that radiates dread.
Add a second layer for endurance, ensuring your nails endure like Gojo through every domain expansion.
Why It Works
This design is a cursed storm from *Jujutsu Kaisen*’s heart—the gray seethes with the shadows of sorcery, a void alive with dread, while Gojo’s mask shines with his limitless power, a white beacon cutting through the chaos.
The cursed marks swirl with Yuji’s fight against the tide, neon green and purple pulsing with a sorcerer’s fury, while Sukuna’s finger looms with the king’s malice, a black shard of evil that haunts the nails.
Together, they weave a look that’s edgy and electrifying, a manicure that hums with the tension of a cursed battlefield.
Pair it with a blindfold or a dark hoodie, and it’s a fierce tribute to Jujutsu Kaisen’s soul, pulsing with every neon-charged stroke like a sorcerer’s last stand against the abyss.
35. Re:Zero’s Frozen Bonds
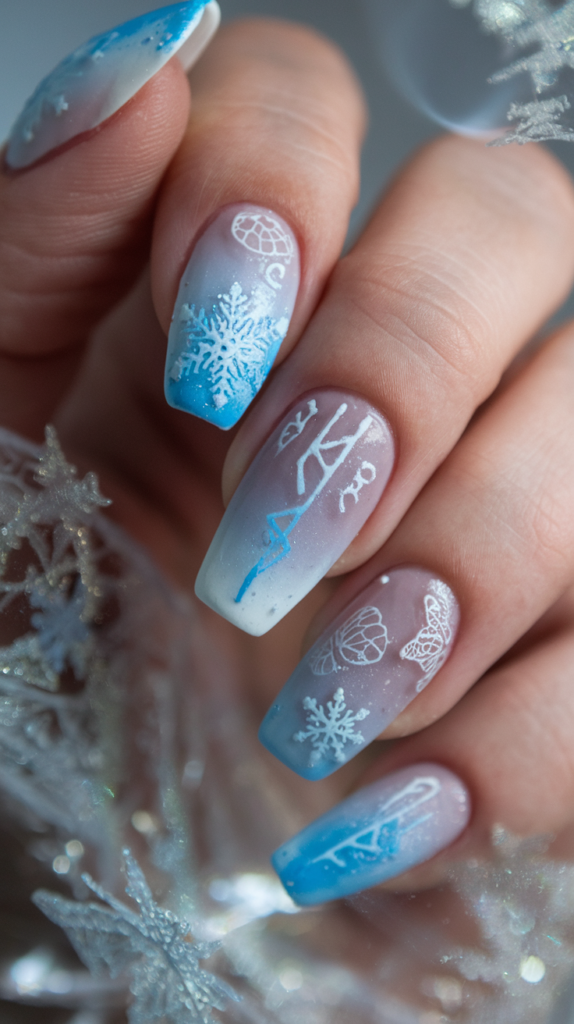
Embrace the chill of fate with Re:Zero’s Frozen Bonds, a haunting design of icy blue and white nails etched with magical runes and delicate butterflies fluttering in a wintry glow.
This isn’t just a manicure—it’s a frozen heartbeat from Subaru’s endless loops, perfect for introspective nights, emotional marathons, or moments when you need to feel Rem and Emilia’s tender strength.
Each nail shivers with the beauty of *Re:Zero*, a tribute to bonds forged in frost and defiance.
Creating Re:Zero’s Frozen Bonds
Step 1: Prep and Base
Lay down a hydrating base coat to cradle your nails through the cycles, then sponge an icy blue-to-white gradient across all five nails, blending from deep blue at the base to pure white at the tips.
This frosty fade mirrors Rem’s devotion and Emilia’s ethereal grace, drying into a canvas that hums with winter’s breath.
Step 2: Magical Runes
With a fine brush, paint silver runes on two nails (index and middle), tracing jagged patterns to capture the arcane pulse of Re:Zero’s magic.
Layer a second coat for a glowing shimmer, letting them glint like spells etched into the frost.
Step 3: Butterfly Wings
Draw delicate white butterflies with lavender wings on a nail (ring finger) using a dotting tool, curling their shapes to mimic Rem’s quiet flight through Subaru’s heart.
Add a faint shimmer coat with a sponge for a crystalline flutter, drying into a symbol of fragile hope.
Step 4: Frosty Haze
Sponge faint blue flecks across a nail (thumb), scattering them unevenly to evoke snowflakes falling through a frozen dawn.
Add subtle silver streaks with a striping brush for an icy mist, cleaning edges with acetone to keep the chill sharp and ethereal.
Step 5: Seal with Top Coat
Finish with a glossy top coat to lock in the bonds and amplify the shine, giving the design a glassy, frosted finish that radiates Re:Zero’s magic.
Add a second layer for endurance, ensuring your nails endure like Subaru through every reset.
Why It Works
This design is a frozen elegy from *Re:Zero*’s soul—the blue-to-white gradient shivers like a winter dawn over Lugunica, a chilling embrace of Rem’s steadfast love and Emilia’s silver-haired grace, fragile yet unyielding.
The runes glow with the arcane threads of fate, silver sigils that bind Subaru’s loops, while the butterflies flutter with the tender hope of a maid’s devotion and a half-elf’s dream, their lavender wings a whisper against the frost.
The frosty haze drifts like snow over a cursed world, tying the look together with an ethereal beauty that feels alive with longing.
Pair it with a blue ribbon or a white coat, and it’s a poignant tribute to Re:Zero’s heart, a manicure that freezes bonds in every icy, shimmering stroke.
Conclusion
These 35 anime-inspired nail designs are a kaleidoscope of passion and artistry, threading the blazing fury of Dragon Ball Z’s Saiyan Fury with the tender whispers of Violet Evergarden’s Letterbound Heart, and every vibrant tale in between.
From the cosmic threads of Jujutsu Kaisen, each creation transforms your nails into a gallery of fandom, a canvas where iconic characters, symbols, and emotions collide in vivid hues.
Whether you’re drawn to the gritty rebellion of Tokyo Revengers’ Street Rebellion, the whimsical echoes of Studio Ghibli, or the fiery dance of Fire Force’s Blazing Brigade, this collection offers a design for every soul touched by anime’s magic.
These aren’t just manicures—they’re stories etched in polish, each nail a chapter of courage, love, or chaos that resonates with the worlds you cherish.
With detailed steps and boundless inspiration, you’re equipped to recreate these looks or remix them into your own masterpiece, perfect for cosplay showdowns, quiet nights, or bold days out.
Every brushstroke invites you to wear your passion—be it the silent escape of *The Promised Neverland* or the melody jam of K-On!—and let your fingertips sing with the spirit of anime.
Embrace the infinite realms of these tales, from Sailor Moon’s Lunar Glow to Re:Zero’s Frozen Bonds, and let your nails become a beacon of creativity, glowing with the fire, grace, and wonder of anime all year round.