
As the days grow longer and the warmth of late spring settles in, May invites us to embrace vibrancy and sparkle.
It’s the perfect time to adorn our nails with designs that reflect the season’s cheerful energy and the promise of sunny days ahead.
Glitter nail polish, in its myriad forms, offers endless possibilities to capture the light and add a touch of glamour, whether you prefer subtle shimmers or full-on festive bursts.
From sunset-inspired ombrés to delicate floral overlays and bold neon pops, this curated list of 36 stunning glitter nail ideas for May provides inspiration for every style and occasion.
Let your fingertips dazzle and dance in the May sunshine with these captivating looks that are sure to turn heads and brighten your mood.
Golden Hour Glitter Nails

Capture the breathtaking beauty of a warm May sunset right on your fingertips with this stunning design.
It features a rich ombré effect, transitioning smoothly from a deep rose gold at the cuticle to a bright, sunny golden glitter at the tip.
Design Features
This look is defined by its seamless gradient, evoking the changing colors of the sky as the sun dips below the horizon.
The blend between the warm, romantic rose gold and the radiant yellow gold creates a mesmerizing visual flow.
The choice of glitter often includes a mix of fine and medium particles, providing a multi-dimensional sparkle that catches the light beautifully.
This texture adds depth and mimics the shimmering quality of twilight.
The ombré transition is typically vertical, running from the base of the nail to the free edge.
This orientation helps to visually elongate the fingers, adding an elegant touch to the overall appearance.
Metallic warmth is central to this design, with rose gold and classic gold taking center stage.
These specific shades offer a luxurious and universally flattering appeal, suitable for the vibrant energy of May.
How To Achieve This Look
Start by meticulously preparing your nails, ensuring they are clean, shaped, and buffed smooth, with cuticles gently pushed back.
Apply a quality base coat to protect your natural nails and create an ideal canvas for the glitter application.
You may apply a neutral base color like nude or soft peach first, allowing it to dry or cure completely.
Alternatively, the glitter can be applied directly over the clear base coat for a more translucent effect.
Take a small makeup sponge and apply the rose gold glitter polish to the section corresponding to the cuticle area.
Apply the golden glitter polish to the sponge section that will meet the nail tip.
Carefully dab the sponge onto the nail, pressing gently and slightly overlapping the colors in the middle to initiate the blend.
Build the opacity and refine the gradient by repeating this dabbing process, allowing adequate drying or curing time between layers.
Use a small brush dipped in nail polish remover or acetone to meticulously clean any stray glitter from around the cuticle and sidewalls.
This step is crucial for achieving a crisp, professional-looking manicure.
Finally, apply one or two coats of a high-shine, durable top coat to encapsulate the glitter, smooth out any texture, and provide a brilliant finish.
Make sure the edges are capped to prevent premature chipping and extend the life of your golden hour look.
Why This Stands Out
The ombré technique itself provides a dynamic and sophisticated alternative to single-color glitter nails.
Its gradual color shift is inherently captivating and reflects the natural beauty of May evenings.
Rose gold and gold are timeless metallics that radiate warmth, luxury, and elegance.
This combination is highly versatile, complementing various outfits and skin tones beautifully throughout the spring season.
This design carries a deeply romantic and evocative quality, directly inspired by the magical light of sunset.
It transforms your nails into miniature canvases showcasing one of nature’s most beautiful daily spectacles.
Its inherent sparkle and warmth make it suitable for a wide range of May activities, from casual daytime outings to more formal evening events.
The Golden Hour Glitter nail is guaranteed to attract attention and compliments wherever you go.
Mermaid Lagoon Sparkle

Dive into enchantment with nails that evoke the mystical beauty of a hidden mermaid lagoon.
This design combines iridescent aqua and lavender glitter, enhanced with delicate seashell decals and finished with a shimmering topcoat.
Design Features
The core of this look lies in its iridescent glitter, which shifts color beautifully in the light, mimicking underwater luminescence.
Aqua blue and soft lavender are the primary shades, creating a dreamy, aquatic color palette.
Tiny seashell decals or other marine-themed embellishments are strategically placed on some or all nails.
These details add a whimsical, narrative element, directly referencing the mermaid theme.
A shimmering or holographic top coat is often used to amplify the sparkle and add another layer of dimension.
This finishing touch enhances the watery, magical effect of the design.
The glitter application can vary from a full coverage sparkle to a more scattered effect over a base color.
This allows for customization in the intensity of the glitter look.
How To Achieve This Look
Begin with clean, prepped nails and apply a reliable base coat to ensure longevity and nail health.
Allow the base coat to dry fully before proceeding with color.
Apply one or two coats of a base color if desired, perhaps a sheer aqua, pale lavender, or even a pearly white.
Alternatively, apply the glitter directly over the base coat for a more transparent, lagoon-like feel.
Using a sponge or a detail brush, apply the aqua and lavender iridescent glitters, either mixed together or placed in distinct areas.
You might create a subtle gradient or a random scattering effect, depending on your preference.
While the polish is still slightly tacky, carefully apply the seashell decals using tweezers for precision.
Press them gently into place, ensuring they adhere well to the nail surface.
Allow the glitter and decals to set properly; if using gel, cure each layer according to the lamp’s instructions.
Patience during application ensures the details remain sharp and secure.
Seal the entire design with a shimmering or iridescent top coat, making sure to cover the decals completely for protection.
Add a second layer of top coat for extra durability and shine, capping the free edges.
Why This Stands Out
The combination of iridescent glitter and aquatic colors instantly transports the viewer to a magical underwater realm.
It’s a whimsical and imaginative design perfect for unleashing your inner mermaid.
Seashell decals add a charming and specific thematic element that clearly communicates the mermaid inspiration.
These small details significantly enhance the narrative and visual appeal of the manicure.
The use of iridescent and shimmering finishes creates a captivating play of light and color.
This multi-tonal effect ensures the nails look dynamic and eye-catching from every angle.
This look is perfect for beach vacations, summer parties, or anytime you want to add a splash of fantasy and fun to your style.
It embodies the playful and dreamy side of spring and summer.
Pink Lemonade Drip Glitter

Quench your thirst for vibrant nails with this playful Pink Lemonade Drip Glitter design.
It features bright pink and lemon-yellow glitter, often applied with a fun jelly-drip effect that truly pops in the May sunlight.
Design Features
This design is characterized by its cheerful and zesty color combination of hot pink and bright lemon yellow.
These colors are reminiscent of the refreshing summer drink and instantly evoke a sense of fun.
A key feature is the “drip” effect, where glitter polish is applied near the cuticles or tips to mimic liquid dripping down the nail.
This adds a unique, graphic element to the manicure.
The glitter used is often fine to medium, ensuring a dense sparkle that enhances the vibrancy of the pink and yellow shades.
Sometimes, a jelly polish base is used to create a translucent, juicy appearance.
The contrast between the bright pink and sunny yellow makes this design incredibly eye-catching.
The drip effect further enhances its playful and unconventional aesthetic.
How To Achieve This Look
Prepare your nails by cleaning, shaping, and applying a protective base coat.
Let it dry completely to create a smooth foundation for the vibrant colors.
Apply your chosen base color, perhaps a sheer nude, a pale pink, or even a clear jelly polish.
Allow this layer to dry or cure thoroughly before adding the glitter details.
Using a thin nail art brush or a dotting tool, carefully apply the pink or yellow glitter polish near the cuticle or tip.
Drag the tool downwards slightly in uneven lines to create the signature dripping effect.
Alternate or combine the pink and yellow glitter drips across different nails or even on the same nail for maximum impact.
Build up the glitter in the ‘drip’ area for opacity and texture.
Ensure the drips have varied lengths and thicknesses to look more organic and playful.
Clean up any mistakes immediately with a clean-up brush and remover for sharp lines.
Once the glitter drips are dry or cured, apply a glossy top coat to seal the design and add a brilliant shine.
This top coat will also smooth the surface and protect the drip effect from wear.
Why This Stands Out
The bright, contrasting colors of pink and yellow create an undeniably cheerful and energetic vibe.
It’s a perfect representation of the lively spirit of late spring and early summer.
The unique drip effect adds a playful, artistic, and slightly edgy twist to a standard glitter manicure.
It’s an unconventional detail that immediately draws attention and sparks conversation.
The combination of vibrant colors and dense glitter makes this design exceptionally eye-catching, especially in sunlight.
It’s a bold statement look that radiates fun and confidence.
Inspired by a refreshing drink, this nail art carries a whimsical theme that’s perfect for warmer weather, parties, and casual gatherings.
It’s a wearable reminder of sunny days and sweet treats.
Blooming Garden Glitter
Celebrate the peak of spring with nails that resemble a flourishing garden bathed in morning dew.
This design features delicate floral glitter overlays on soft pastel bases, often adorned with tiny 3D daisies and butterflies.
Design Features
The foundation of this look is a soft pastel base color, such as baby pink, mint green, sky blue, or pale lilac.
These colors provide a gentle backdrop reminiscent of spring blossoms.
A sheer glitter polish, often containing floral-shaped glitter pieces or iridescent micro-glitter, is layered over the pastel base.
This adds a subtle sparkle that mimics dew drops on petals.
The standout feature is the addition of tiny 3D embellishments like miniature daisies, roses, or butterflies.
These elements add texture and bring the garden theme to life in a tangible way.
The overall aesthetic is soft, romantic, and distinctly feminine.
It captures the delicate beauty of a garden in full bloom during the month of May.
How To Achieve This Look
Start with immaculately prepped nails and apply a base coat for protection and adherence.
Allow this initial layer to dry completely before moving on to the color application.
Apply one or two coats of your chosen soft pastel nail polish.
Ensure each coat is smooth and opaque, allowing sufficient drying or curing time between layers.
Once the pastel base is fully dry, apply a thin layer of floral or iridescent glitter polish over the top.
Distribute the glitter evenly for a delicate, shimmering effect across the nail surface.
While the glitter layer is still slightly wet, or using nail glue for better adhesion, carefully place the 3D floral or butterfly embellishments onto the nail.
Use tweezers for precise placement, perhaps focusing on one or two accent nails.
Allow ample time for the glitter polish and any nail glue used for the embellishments to dry or cure completely.
Ensuring the 3D elements are secure is key to the longevity of the design.
Gently apply a generous layer of top coat, carefully working around the 3D elements to seal them without obscuring their detail.
Apply a second layer if needed for extra protection and shine, ensuring the entire nail surface is covered.
Why This Stands Out
This design beautifully encapsulates the essence of spring with its soft colors, floral elements, and delicate sparkle.
It’s a direct nod to the blooming landscapes characteristic of May.
The inclusion of 3D embellishments adds a unique textural dimension and a touch of whimsy.
These tiny details elevate the design from a simple glitter manicure to intricate nail art.
The combination of pastel shades and subtle glitter creates a look that is inherently feminine, romantic, and elegant.
It’s perfect for spring weddings, garden parties, or simply celebrating the beauty of the season.
Despite the detailed elements, the overall effect can be quite sophisticated and wearable.
It offers a way to embrace floral themes in a chic and modern interpretation.
Glitter French Fade

Experience a modern and glamorous update to the timeless French manicure with the Glitter French Fade.
This style features holographic or fine glitter concentrated at the tips, subtly fading into a soft nude or pink base towards the cuticle.
Design Features
This look reimagines the classic French tip by replacing the stark white line with sparkling glitter.
The glitter is densest at the very tip and gradually becomes sparser as it moves down the nail.
A natural-looking nude, sheer pink, or milky white base color is used to mimic the appearance of a healthy nail bed.
This provides a sophisticated contrast to the glittering tips.
Often, holographic or multi-chrome glitter is used to maximize the sparkle and create a dazzling, light-catching effect.
The fade, or ombré effect, ensures a softer transition than the traditional crisp French line.
The result is a chic, elegant, and contemporary nail look that blends classic style with modern sparkle.
It maintains the clean aesthetic of a French manicure but adds a significant touch of glamour.
How To Achieve This Look
Begin the process with perfectly prepared nails, applying a base coat to ensure a smooth and protected surface.
Let the base coat dry thoroughly before applying any color.
Apply one or two coats of your chosen nude or sheer pink base polish, aiming for a natural and even finish.
Allow each coat to dry completely or cure under a lamp if using gel polish.
Using a makeup sponge or a small brush, apply the glitter polish to the tip of the nail.
Concentrate the glitter heavily at the free edge for maximum impact.
Gently drag or dab the glitter downwards towards the middle of the nail, reducing the pressure or amount of glitter as you move away from the tip.
This action creates the desired soft fade or gradient effect.
Build up the glitter density at the tip and refine the fade with additional thin layers as needed.
Allow each layer to dry or cure to prevent smudging the gradient effect.
Finish with a glossy top coat, ensuring the glittery tips are fully sealed and the entire nail has a smooth, high-shine finish.
Capping the free edge with the top coat will help prevent chipping.
Why This Stands Out
The Glitter French Fade offers a sophisticated and modern twist on one of the most enduring nail styles.
It retains the elegance of the French manicure while introducing contemporary sparkle.
The faded glitter effect is softer and more subtle than a harsh line, making it very wearable yet undeniably glamorous.
The holographic element adds an unexpected pop of multi-dimensional color.
This design is incredibly versatile, suitable for everyday wear, professional settings, and special occasions like weddings or parties.
It strikes a perfect balance between understated chic and eye-catching detail.
The combination of a natural base with glittering tips enhances the perceived length and health of the nails.
It’s a flattering look for various nail shapes and lengths, offering universal appeal.
Peach Bellini Sparkle

Toast to the vibrant hues of May with nails inspired by the delightful Peach Bellini cocktail.
This design features warm peach-toned bases accented with fine gold and orange glitter that beautifully catches the light.
Design Features
The foundation of this look is a soft, juicy peach nail polish color, ranging from pale apricot to a richer coral-peach.
This base evokes the fruity freshness of the namesake cocktail.
Fine gold and orange glitter particles are used as accents, often concentrated near the tips, cuticles, or scattered delicately over the entire nail.
These glitters add warmth and a sparkling effervescence.
The glitter application is typically subtle rather than full coverage, aiming for an accent shimmer that complements the peach base.
This maintains a sophisticated and light feel appropriate for spring.
The overall effect is warm, inviting, and subtly glamorous, much like sipping a refreshing Bellini on a sunny afternoon.
It combines fruity color with a delicate metallic sparkle.
How To Achieve This Look
Start with clean, shaped nails and apply a protective base coat.
Allow it to dry completely to provide a smooth canvas for the peach polish.
Apply one or two coats of your chosen peach nail polish, ensuring even coverage and full opacity.
Let each coat dry thoroughly or cure it under an LED/UV lamp.
Once the peach base is set, strategically apply the fine gold and orange glitter.
You could use a sponge for a gradient effect at the tips, a detail brush for accents near the cuticle, or simply layer a sheer glitter topper over the entire nail.
Control the density of the glitter application based on the desired look, from a hint of sparkle to a more noticeable shimmer.
Ensure the glitter lies flat against the nail for a smooth finish.
Allow the glitter accents ample time to dry or cure fully before proceeding to the final step.
This prevents any smearing and locks the glitter particles in place.
Seal the design with a high-gloss top coat to enhance the shine, protect the glitter, and ensure a smooth finish.
Make sure to cap the free edges for extended wear.
Why This Stands Out
The warm peach base color is incredibly flattering on a wide range of skin tones and perfectly suited for the spring season.
It offers a cheerful yet sophisticated alternative to traditional pinks or nudes.
The combination of peach with gold and orange glitter creates a warm, sunny, and effervescent effect.
It genuinely captures the delightful essence of a Peach Bellini cocktail.
This design provides a subtle way to incorporate glitter into your manicure without being overwhelming.
The accent sparkle adds just the right amount of glamour for everyday wear or special events.
It’s a chic and refreshing look that feels both modern and timelessly appealing.
The fruity inspiration gives it a playful undertone perfect for May celebrations.
Confetti Burst Glitter Nails

Get ready to party with nails that look like they’ve been sprinkled with festive confetti.
This fun design features chunky neon and pastel glitter flakes scattered over a clear or nude base.
Design Features
The defining characteristic of this look is the use of chunky glitter flakes in a mix of bright neon and soft pastel shades.
These larger glitter pieces resemble colorful party confetti.
The glitter is typically suspended in a clear polish or applied over a neutral nude base.
This allows the colorful confetti flakes to be the main focus of the design.
The placement of the glitter is often random and scattered, mimicking the joyful explosion of confetti.
The density can vary from a light sprinkling to a more concentrated burst effect.
The overall vibe is playful, festive, and energetic.
It’s a celebratory look perfect for birthdays, parties, or simply adding a pop of fun to your everyday style in May.
How To Achieve This Look
Begin with prepared nails and apply a clear base coat for protection and adhesion.
Let this layer dry completely before adding the confetti glitter.
If desired, apply one or two coats of a nude or sheer pink polish as a base to provide a subtle backdrop.
Ensure this base color is fully dry or cured.
Apply a coat of clear polish containing the chunky confetti glitter, or use a clear polish and manually place the glitter flakes onto the wet polish using a dotting tool or tweezers.
Distribute the flakes randomly across the nail surface.
Build up the density of the confetti glitter as desired, adding more flakes where needed.
Ensure the larger glitter pieces lie as flat as possible against the nail.
Allow the glitter polish or the clear polish with placed glitter to dry or cure thoroughly.
This step is crucial to ensure the chunky flakes are securely embedded.
Apply one or two generous coats of a thick, glossy top coat (sometimes called a ‘glitter smoother’ or ‘glitter food’) to encapsulate the chunky glitter flakes completely.
This creates a smooth surface and provides a high-shine, durable finish.
Why This Stands Out
The use of chunky, multi-colored glitter flakes immediately creates a fun, festive, and celebratory atmosphere on the nails.
It’s an instant mood booster and conversation starter.
The combination of bright neons and soft pastels within the confetti mix provides vibrant contrast and visual interest.
This eclectic mix works beautifully against the neutral base.
The scattered, random placement gives the design an effortless and playful look, like an actual burst of party confetti.
It feels spontaneous and full of joyful energy.
This design is perfect for injecting personality and fun into your look, especially for festive occasions or during the cheerful month of May.
It’s a bold yet wearable way to embrace maximalist sparkle.
Starry Night In May

Capture the magic of a clear spring night sky with this enchanting Starry Night in May design.
It features a deep midnight blue or black base adorned with twinkling silver glitter stars and delicate constellation patterns.
Design Features
The foundation of this look is a dark, inky base color, typically midnight blue or deep black.
This creates the perfect canvas representing the vastness of the night sky.
Fine silver glitter is scattered across the dark base to mimic distant, twinkling stars.
Larger silver star-shaped glitter or decals might also be used for more prominent celestial bodies.
Delicate lines or dots, often in silver or white polish, are sometimes added to create recognizable constellation patterns.
This adds an intricate and personalized touch to the design.
The overall effect is mysterious, magical, and celestial.
It evokes the wonder of stargazing on a clear, cool May evening.
How To Achieve This Look
Start with clean, prepped nails and apply a protective base coat.
Allow it to dry fully before applying the dark base color.
Apply one or two coats of your chosen midnight blue or black nail polish, ensuring full, even opacity.
Let each coat dry completely or cure it properly under a lamp.
Once the dark base is set, apply a layer of clear polish containing fine silver glitter, or use a sponge to dab silver glitter polish sparsely across the nail.
For larger stars, use a dotting tool or tweezers to place star-shaped glitter or decals onto wet polish.
If adding constellations, use a very fine nail art brush dipped in silver or white polish to carefully draw thin lines and dots connecting the ‘stars’.
Referencing actual constellation patterns can add authenticity.
Allow all glitter and painted details ample time to dry or cure thoroughly.
Precision and patience are key for achieving crisp lines and well-placed stars.
Seal the entire celestial masterpiece with a high-shine top coat.
Ensure all glitter and details are fully covered for protection and a glossy, unified finish.
Why This Stands Out
The stark contrast between the dark base and the sparkling silver elements creates a visually striking and dramatic effect.
It beautifully captures the depth and mystery of the night sky.
The addition of constellation patterns adds a layer of intricate detail and personalization.
It transforms the manicure into a miniature map of the heavens.
This design has a magical, dreamy quality that evokes a sense of wonder and romance.
It’s perfect for evening events or for anyone who loves astronomy and celestial themes.
While intricate, the look remains sophisticated and elegant due to the classic color combination and the fine details.
It’s a unique way to wear glitter that feels both artistic and chic for May nights.
Lavender Fields Shine

Immerse yourself in the calming beauty of Provençal landscapes with Lavender Fields Shine nails.
This design features a lovely lilac base generously coated with coordinating lavender micro-glitter, often accented with subtle chrome detailing.
Design Features
A soft, soothing lilac or lavender shade serves as the base color for this manicure.
This hue immediately evokes the image of sprawling lavender fields in bloom.
The nails are covered in a dense layer of fine lavender micro-glitter, creating a uniform, shimmering texture.
This gives the impression of countless tiny blossoms sparkling in the sun.
Subtle chrome powder accents or fine chrome lines may be added to some nails.
This introduces a modern, metallic element that contrasts beautifully with the soft glitter texture.
The overall aesthetic is serene, feminine, and subtly glamorous.
It balances the softness of lavender with the sophisticated shimmer of micro-glitter and chrome.
How To Achieve This Look
Begin with properly prepared nails, applying a base coat to protect the natural nail and enhance polish adhesion.
Allow this foundation layer to dry completely.
Apply one or two coats of your chosen lilac or lavender nail polish, ensuring a smooth and opaque finish.
Let each coat dry thoroughly or cure it if using a gel system.
Once the base color is set, apply a lavender micro-glitter polish over the entire nail.
Alternatively, apply a clear polish and dip the nail into loose lavender micro-glitter, gently pressing it in before brushing off excess.
Build up the glitter layer for full, even coverage, ensuring a dense sparkle.
Allow the glitter layer to dry or cure completely.
If adding chrome accents, apply a no-wipe top coat, cure it, and then gently rub lavender or silver chrome powder onto the desired areas using an applicator.
Seal the chrome powder immediately with another layer of top coat.
Finish the entire manicure with a final layer of glossy top coat to seal in the glitter and chrome, smooth the surface, and provide lasting shine.
Ensure the edges are properly capped.
Why This Stands Out
The monochromatic use of lavender creates a cohesive, soothing, and elegant look.
Lavender is a perennially popular shade for spring, evoking feelings of calm and beauty.
The dense micro-glitter provides a unique, almost velvety shimmer that is different from chunkier glitters.
It offers full coverage sparkle with a refined texture.
The addition of subtle chrome details introduces a contemporary edge and a sophisticated contrast.
It elevates the design beyond a simple glitter manicure.
This design captures the romantic and serene beauty of lavender fields in a wearable art form.
It’s perfect for those who appreciate soft colors, refined sparkle, and a touch of modern elegance during May.
Sunset Chrome Glitter
Experience the fiery intensity of a late May sunset with this radiant Sunset Chrome Glitter design.
It features a blend of magenta, orange, and coral glitter, fused with chrome powder for an exceptionally luminous glow.
Design Features
This look is characterized by its warm, vibrant color palette, blending shades of magenta, fiery orange, and bright coral.
These colors mimic the intense hues seen during a spectacular sunset.
Both glitter and chrome powder are integral to this design, often blended or layered together.
The glitter provides texture and sparkle, while the chrome powder adds a smooth, metallic, high-shine radiance.
The colors are typically blended in an ombré or gradient effect across the nail.
This creates a seamless transition reminiscent of the changing colors in the sky.
The overall effect is incredibly vibrant, fiery, and luminous.
It combines the sparkle of glitter with the intense reflectivity of chrome for a truly show-stopping manicure.
How To Achieve This Look
Start with meticulously prepped nails and apply a reliable base coat.
Allow it to dry fully to create the perfect foundation.
Apply a base color if desired, perhaps a light coral or orange, or proceed directly to blending the sunset shades.
Using a makeup sponge, apply stripes of magenta, orange, and coral glitter polish or regular polish.
Gently dab the sponge onto the nail, slightly overlapping the colors to create a smooth gradient effect.
Repeat this process, allowing layers to dry or cure, until the desired opacity and blend are achieved.
Once the gradient is set, apply a no-wipe top coat and cure it.
Then, carefully rub chrome powder (perhaps gold, copper, or a sunset multi-chrome) over the gradient using an applicator, focusing on enhancing the metallic glow.
Brush off any excess chrome powder gently.
Be precise during application to maintain the integrity of the underlying gradient.
Seal the entire design with one or two layers of a high-quality glossy top coat.
This protects the chrome and glitter, enhances the shine, and ensures a durable, radiant finish.
Why This Stands Out
The combination of intense sunset colors—magenta, orange, coral—creates an incredibly vibrant and eye-catching palette.
It’s a bold celebration of color perfect for the energy of May.
The fusion of glitter sparkle with the high-shine, metallic finish of chrome powder results in exceptional luminosity.
The nails appear to glow from within, capturing light intensely.
The gradient blending technique mirrors the natural beauty of a sunset, adding an artistic and evocative quality.
It’s a dynamic and visually interesting effect.
This design is a true statement manicure, perfect for those who love bold colors and maximum shine.
It exudes confidence, warmth, and a passion for dramatic beauty.
Champagne Sparkle Tips

Elevate your nail game with understated glamour using Champagne Sparkle Tips.
This chic design features transparent or nude nails with a delicate gradient of champagne-toned glitter concentrated on the tips.
Design Features
This look utilizes a clear, sheer nude, or pale pink base, maintaining a natural and clean aesthetic for the main nail bed.
The focus is entirely on the sparkling tips.
A fine to medium champagne-colored glitter is used, known for its sophisticated, neutral metallic tone.
Champagne offers a softer, warmer alternative to silver and a less yellow alternative to gold.
The glitter is applied in a gradient or ombré effect, starting denser at the free edge and fading softly towards the middle of the nail.
This creates a subtle transition rather than a harsh line.
The overall vibe is elegant, sophisticated, and subtly glamorous.
It’s a minimalist approach to glitter nails, perfect for a soft glam or ‘clean girl’ aesthetic.
How To Achieve This Look
Begin with perfectly manicured nails, applying a clear base coat for protection and smoothness.
Let the base coat dry completely.
Apply one or two coats of a sheer nude, pale pink, or simply use a clear polish for the base.
Ensure this layer is smooth, even, and fully dry or cured.
Using a small sponge or a brush, apply the champagne glitter polish to the tips of the nails.
Concentrate the glitter density at the very edge.
Gently fade the glitter downwards towards the nail bed by dabbing lightly or using a dry brush to diffuse the particles.
Aim for a soft, seamless transition from sparkle to sheer.
Build up the glitter at the tip if needed for more impact, ensuring the gradient remains soft.
Allow the glitter sufficient time to dry or cure.
Finish with a glossy top coat, sealing the glitter tips and providing a high-shine finish over the entire nail.
Capping the edges will help maintain the integrity of the glitter tips.
Why This Stands Out
Champagne glitter offers a uniquely sophisticated and versatile sparkle.
It’s a neutral metallic that complements all skin tones and outfits, exuding quiet luxury.
The combination of a sheer or nude base with glittering tips creates a clean, polished, and elongated look for the nails.
It enhances the natural beauty of the hands.
The gradient application provides a modern, soft alternative to a traditional French tip or full glitter nail.
It’s subtle enough for professional settings yet glamorous enough for evening events.
This design embodies effortless chic and understated elegance, making it a perfect choice for May weddings, parties, or simply everyday sophistication.
It’s timelessly appealing.
Mint Mojito Glitter

Refresh your style with nails inspired by the cool and zesty Mint Mojito cocktail.
This invigorating design features a mint green base adorned with icy silver glitter and often includes fun citrus slice nail art.
Design Features
A fresh, cool mint green polish forms the base of this design.
This color is instantly refreshing and perfectly captures the essence of spring and mint leaves.
Icy silver glitter, usually fine or micro-glitter, is layered over the mint green base or used as an accent.
The silver provides a cool contrast and mimics the crushed ice in a mojito.
Tiny citrus slice decals or hand-painted lime segments are often added to one or two accent nails.
These details reinforce the cocktail theme and add a playful, zesty touch.
The overall look is cool, refreshing, and fun, with a crisp color combination and playful accents.
It’s like a refreshing sip of a mojito on a warm May day.
How To Achieve This Look
Start with clean, prepped nails and apply a protective base coat.
Allow it to dry completely before applying the mint green color.
Apply one or two coats of your chosen mint green nail polish, ensuring smooth, opaque coverage.
Let each coat dry fully or cure under a lamp.
Once the mint base is set, apply the icy silver glitter.
You can use a silver glitter top coat, sponge on loose glitter, or apply glitter polish strategically for accents.
If adding citrus details, carefully place pre-made lime slice decals onto slightly tacky polish or use nail glue.
Alternatively, use green and white nail art paints and a fine brush to paint tiny lime wedges.
Allow all elements—glitter, decals, or paint—to dry or cure completely.
Precision is key for sharp-looking citrus details.
Seal the entire design with a high-gloss top coat to protect the artwork, smooth the glitter, and add a brilliant shine.
Ensure the edges are capped for better wear.
Why This Stands Out
The combination of mint green and icy silver is incredibly refreshing and clean.
It provides a cool contrast that feels perfect for the transition into warmer weather in May.
The mojito theme, especially with the addition of citrus slice art, is fun, playful, and unique.
It adds a whimsical touch and a conversation-starting element to your manicure.
Silver glitter adds a touch of cool glamour without overpowering the fresh mint base.
It enhances the design with sophisticated sparkle.
This look is perfect for daytime events, vacations, or anytime you want a manicure that feels crisp, cheerful, and stylishly quirky.
It embodies the refreshing spirit of spring cocktails.
Stardust Nude Nails
Elevate your everyday nude manicure with a touch of celestial magic using the Stardust Nude design.
This look involves layering ultra-fine iridescent or holographic glitter over a classic nude base for a subtle yet captivating shimmer.
Design Features
The foundation is a classic nude polish carefully chosen to complement your skin tone.
This creates a sophisticated, ‘your-nails-but-better’ base.
A layer of ultra-fine iridescent or holographic glitter is applied over the nude base.
This type of glitter catches the light beautifully, revealing flashes of different colors as the hand moves.
The glitter is typically sheer and subtle, providing a delicate veil of sparkle rather than opaque coverage.
The goal is an ethereal shimmer that enhances the nude base.
The overall effect is understated, elegant, and modern, with a hidden holographic or iridescent surprise.
It’s a sophisticated way to wear glitter for any occasion.
How To Achieve This Look
Begin with perfectly manicured nails, applying a base coat suited to your nail type.
Allow it to dry completely.
Apply one or two coats of your chosen nude nail polish, ensuring a flawless, even application that matches your skin tone well.
Let each coat dry thoroughly or cure it.
Once the nude base is completely set, apply a thin, even layer of a top coat containing ultra-fine iridescent or holographic glitter.
Alternatively, use a clear top coat and lightly dust loose micro-glitter over the wet polish before it sets.
Ensure the glitter application is delicate and evenly distributed, creating a subtle shimmer rather than dense sparkle.
Avoid thick layers which can obscure the nude base.
Allow the glitter layer or top coat to dry or cure completely.
The subtlety is key to achieving the ‘stardust’ effect.
If you applied loose glitter, finish with another layer of clear, glossy top coat to seal everything in and provide a smooth, high-shine finish.
If you used a glitter top coat, an extra layer of clear top coat can enhance shine and durability.
Why This Stands Out
This design offers a highly sophisticated and subtle way to incorporate glitter into a manicure.
The iridescent or holographic shimmer adds intrigue without being overly bold.
The use of ultra-fine glitter creates a delicate, ethereal effect, like a sprinkling of magical dust.
It enhances the nude base beautifully, catching the light in unexpected ways.
It’s an incredibly versatile look, suitable for professional environments, everyday wear, and even formal events.
It elevates a simple nude manicure to something special yet remains understated.
The holographic or iridescent flashes add a modern, captivating element that changes with movement and lighting.
It’s a chic, contemporary take on minimalist nail art for May.
Rose Quartz Sparkle

Channel the gentle, loving energy of rose quartz crystals with this beautiful manicure.
It features a translucent pink marble base enhanced with delicate rosy glitter veins and optional gemstone decals.
Design Features
The base mimics the look of natural rose quartz, typically achieved with a sheer pink polish and subtle white marbling effects.
This creates a soft, translucent, stone-like appearance.
Fine rosy pink or champagne glitter is used to create delicate veins running through the marble base.
This adds sparkle and dimension, mimicking the natural inclusions in the crystal.
Small gemstone decals or tiny rhinestones might be added as accents.
These enhance the crystalline theme and add extra points of light.
The overall aesthetic is soft, feminine, romantic, and imbued with a gentle energy.
It captures the subtle beauty and reputed healing properties of the rose quartz stone.
How To Achieve This Look
Start with prepped nails and apply a base coat.
Let it dry completely.
Apply one or two coats of a sheer, milky pink polish as the base color.
While the last coat is still wet, use a fine brush or a piece of plastic wrap to swirl in thin lines of white polish, creating a soft marble effect.
Blend gently for subtlety.
Allow the marble base to dry or cure completely.
The key is a soft, translucent effect rather than sharp, defined lines.
Using a very fine nail art brush dipped in rosy pink or champagne glitter polish (or clear polish mixed with loose glitter), draw delicate, slightly wavy lines across the marble base to mimic crystalline veins.
Keep these lines thin and subtle.
If desired, apply tiny gemstone decals or rhinestones near the cuticle or along the glitter veins using nail glue or wet polish.
Use tweezers for precision.
Allow all elements to dry or cure thoroughly.
Ensure the glitter veins and any embellishments are secure.
Seal the design with a high-gloss top coat to enhance the shine, smooth the surface, and protect the delicate details.
Apply generously to cover any texture from the glitter or gems.
Why This Stands Out
This design beautifully replicates the appearance of rose quartz, known for its soft pink hue and gentle energy.
It brings a touch of natural crystal beauty to your fingertips.
The combination of the soft marble effect with delicate glitter veins creates a look that is both intricate and understatedly elegant.
It’s visually interesting without being overwhelming.
The use of rosy glitter adds a warm, romantic sparkle that perfectly complements the pink base.
Optional gemstone decals enhance the luxurious, crystalline feel.
It’s a feminine, sophisticated design suitable for various occasions in May, carrying connotations of love, peace, and beauty.
It aligns well with wellness and natural aesthetics trends.
Firefly Glow Glitter

Capture the enchanting sight of fireflies lighting up a warm May night with this magical design.
It features a dark base, usually black, illuminated by scattered yellow-green glitter that seems to glow in the dark.
Design Features
A deep black or midnight blue polish serves as the base, representing the darkness of a spring night.
This dark canvas makes the ‘firefly’ glitter pop dramatically.
The key element is yellow-green glitter, often iridescent or even genuinely glow-in-the-dark.
This specific color perfectly mimics the bioluminescent light of fireflies.
The glitter is applied sparsely and randomly across the dark base, like individual fireflies blinking in the night.
The placement aims for a natural, scattered effect rather than uniform coverage.
The overall look is mysterious, enchanting, and evocative of warm evenings spent outdoors.
It captures a specific, magical moment of nature in late spring.
How To Achieve This Look
Begin with clean, prepared nails and apply a protective base coat.
Allow it to dry completely before applying the dark polish.
Apply one or two coats of black or deep midnight blue nail polish, ensuring full, opaque coverage.
Let each coat dry thoroughly or cure fully under a lamp.
Once the dark base is set, carefully apply the yellow-green glitter.
You can use a glitter polish with sparse particles, or use a dotting tool to place individual dots of glitter polish or loose glitter mixed with clear polish onto the nail.
Scatter the glitter ‘fireflies’ randomly across the nail surface, varying the placement and size slightly for a more organic look.
If using glow-in-the-dark glitter, ensure it gets adequate light exposure beforehand.
Allow the glitter dots ample time to dry or cure completely.
Avoid smudging the small points of light.
Finish with a glossy top coat to seal in the glitter, add shine, and protect the design.
Ensure the top coat covers the glitter smoothly.
Why This Stands Out
The stark contrast between the dark base and the bright yellow-green glitter creates a captivating and eye-catching effect.
It immediately evokes the image of fireflies against a night sky.
The use of yellow-green, especially iridescent or glow-in-the-dark glitter, perfectly captures the unique light of fireflies.
It adds an element of magic and wonder to the manicure.
The scattered placement mimics nature, giving the design an organic and enchanting feel.
It’s like holding a tiny piece of a magical May night on your fingertips.
This design is unique, evocative, and perfect for evening events or for anyone who appreciates the subtle magic found in nature.
It’s a conversation starter that glows with charm.
Cotton Candy Dreams

Indulge your sweet tooth with nails inspired by fluffy, sugary cotton candy.
This dreamy design features a soft swirl of pastel blue and pink, topped with a coordinating iridescent glitter topper.
Design Features
The base of this look involves swirling or marbling soft pastel blue and baby pink polishes together.
This creates a dreamy, cloud-like effect reminiscent of spun sugar.
A sheer glitter top coat, often containing iridescent or holographic micro-glitter, is applied over the swirl base.
This adds a magical sparkle, like sugar crystals catching the light.
The color palette is strictly pastel blue and pink, defining the cotton candy theme.
The swirl effect is key to achieving the fluffy, airy look.
The overall aesthetic is sweet, dreamy, whimsical, and distinctly playful.
It perfectly captures the sugary delight of cotton candy enjoyed at spring fairs.
How To Achieve This Look
Start with prepped nails and apply a base coat.
Let it dry completely.
Apply one coat of either pastel blue or baby pink as a base layer, or proceed directly to the swirl.
To create the swirl, place dots of both pastel blue and pink polish onto the nail while they are still wet.
Use a thin nail art brush, toothpick, or marbling tool to gently swirl the colors together.
Aim for a soft, blended effect rather than sharp lines, mimicking the texture of cotton candy.
Allow the swirled base to dry or cure completely.
The blending should look effortless and cloud-like.
Once the base is set, apply a thin layer of an iridescent or holographic glitter top coat over the entire nail.
This adds the sugary sparkle effect.
Ensure the glitter coat is evenly applied for a consistent shimmer.
Allow it to dry or cure thoroughly.
Finish with a final layer of glossy clear top coat to enhance the shine, smooth the surface, and protect the swirled design and glitter layer.
Cap the free edges for longevity.
Why This Stands Out
The combination of pastel pink and blue instantly evokes the image of classic cotton candy.
It’s a sweet, nostalgic, and universally recognized theme.
The soft swirl or marble technique creates a dreamy, cloud-like texture that perfectly mimics spun sugar.
It adds visual interest and a gentle flow to the design.
The iridescent glitter topper provides a magical, sugary sparkle that enhances the theme.
It makes the nails look enchanting and delectable.
This design is perfect for those who love pastel colors, whimsical themes, and a touch of sweet nostalgia.
It’s a fun and charming look for May festivities or everyday wear.
Fairy Dust Ombre

Embrace enchantment with the Fairy Dust Ombre nail design.
This delicate look features a soft pastel ombré base lightly dusted with a sheer layer of ultra-fine iridescent glitter, like magical fairy dust.
Design Features
The foundation is a gentle ombré or gradient using two or more soft pastel shades, such as pink, lilac, baby blue, or mint green.
The transition between colors is smooth and subtle.
A very sheer layer of ultra-fine iridescent glitter, often referred to as ‘fairy dust,’ is applied over the entire pastel ombré base.
This glitter catches the light with multi-tonal flashes without obscuring the gradient beneath.
The focus is on subtlety and ethereal beauty.
The glitter provides a delicate shimmer rather than intense sparkle, enhancing the softness of the pastels.
The overall effect is dreamy, magical, and delicate.
It evokes images of fairy wings, enchanted forests, and soft morning light in spring.
How To Achieve This Look
Begin with prepared nails and apply a base coat.
Let it dry fully.
Create the pastel ombré base using a makeup sponge.
Apply stripes of your chosen pastel polishes onto the sponge and gently dab onto the nail, overlapping the colors to blend.
Repeat the dabbing process, allowing layers to dry or cure, until the desired gradient opacity and smoothness are achieved.
Clean up the cuticles afterward.
Once the ombré base is completely dry or cured, apply a very thin, even layer of a sheer iridescent glitter top coat (‘fairy dust’).
Alternatively, apply a clear top coat and lightly dust loose iridescent micro-glitter over the wet polish.
Ensure the glitter application is sparse and delicate, providing just a hint of magical shimmer.
Avoid covering the pastel gradient too heavily.
Allow the fairy dust layer to dry or cure completely.
The key is maintaining the softness and translucency of the shimmer.
Finish with a final layer of glossy clear top coat if needed (especially if using loose glitter) to seal everything, smooth the surface, and enhance the overall shine.
Cap the free edges.
Why This Stands Out
The combination of a soft pastel ombré with sheer iridescent glitter creates an incredibly ethereal and delicate look.
It’s the epitome of magical, fairy-like beauty.
The use of ultra-fine ‘fairy dust’ glitter provides a subtle, multi-tonal shimmer that enhances the pastel base without overpowering it.
It catches the light in a mesmerizing way.
The gradient background adds depth and visual interest, showcasing a beautiful blend of soft spring colors.
The ombré technique itself is elegant and sophisticated.
This design is perfect for spring weddings, special occasions, or anyone who loves a touch of subtle magic and romance in their manicure.
It’s a truly enchanting look for May.
Neon Glitter Pop

Make a bold statement this May with Neon Glitter Pop nails.
This high-energy design features vibrant neon base colors splashed with holographic silver glitter and often defined with sharp black outlines.
Design Features
The base of this look uses electrifying neon polishes in shades like hot pink, electric lime, vibrant orange, or highlighter yellow.
These colors demand attention and radiate energy.
Holographic silver glitter is typically splashed or splattered across the neon base.
This adds a contrasting sparkle and a touch of edgy glamour.
Sharp black outlines are often added around the nail edges or specific shapes within the design.
These outlines provide definition and enhance the graphic, pop-art feel.
The overall aesthetic is bold, edgy, energetic, and reminiscent of 80s or 90s pop culture.
It’s a high-impact look that combines vibrant color with dazzling sparkle and graphic elements.
How To Achieve This Look
Start with prepped nails and apply a base coat, potentially a white base coat to make the neon colors truly pop.
Let it dry completely.
Apply two to three coats of your chosen neon nail polish, ensuring full, vibrant opacity.
Neon polishes can sometimes be streaky, so take care with application and allow thorough drying or curing between coats.
Once the neon base is fully set, create the glitter splash effect.
You can use a glitter polish and flick the brush towards the nail, use a toothbrush dipped in glitter polish, or strategically place glitter polish with a brush for a controlled splatter.
Focus the holographic silver glitter splashes randomly across the neon background.
Aim for an energetic, slightly messy look.
If adding outlines, use a very fine nail art brush dipped in black polish or acrylic paint to carefully draw thin lines around the nail edge or around the glitter splashes.
Keep the lines crisp and clean.
Allow all elements—neon base, glitter splashes, and black outlines—to dry or cure completely.
Patience ensures sharp details.
Seal the entire design with a glossy top coat to protect the artwork, smooth out any texture from the glitter, and provide a high-shine finish.
Ensure the black outlines are fully covered.
Why This Stands Out
The use of intense neon colors guarantees that this manicure will not go unnoticed.
It’s a vibrant and fearless expression of style perfect for the lively energy of May.
The combination of neon with holographic silver glitter creates a striking contrast between bright color and dazzling sparkle.
The holographic effect adds multi-dimensional shine.
Black outlines add a graphic, almost cartoonish edge that enhances the pop-art vibe.
They provide definition and make the neon colors appear even brighter.
This design is perfect for parties, festivals, or anyone looking to make a bold fashion statement.
It’s energetic, fun, and exudes confidence and playful rebellion.
Glass Slipper Sparkle
Feel like royalty with the Glass Slipper Sparkle manicure, inspired by Cinderella’s iconic footwear.
This enchanting design features clear or transparent nails adorned with chunky holographic glitter and subtle icy blue accents.
Design Features
The base of the nail is often kept clear or uses a transparent builder gel or extensions to mimic the look of glass.
This creates a unique, see-through effect.
Chunky holographic glitter is the star of this design, generously applied to the clear base.
The large glitter pieces catch the light dramatically, creating a dazzling, prismatic effect like fractured glass or magic.
Subtle accents of icy blue polish or glitter are sometimes incorporated.
These hints of blue nod to Cinderella’s ballgown and add a cool, ethereal touch to the design.
The overall look is magical, ethereal, and incredibly sparkly.
It captures the fantasy and elegance of a fairy tale princess.
How To Achieve This Look
This look often works best with nail extensions (like gel or acrylic) to achieve the truly transparent ‘glass’ effect, but can be adapted for natural nails.
Start with impeccably clean and prepped nails or extensions, applying a clear base coat or builder gel.
Embed chunky holographic glitter into the wet builder gel or apply it using a clear polish base.
Concentrate the glitter generously, ensuring the large pieces lie relatively flat.
Cure if using gel.
If adding blue accents, use a fine brush to apply small touches of icy blue polish or fine blue glitter strategically.
Keep these accents subtle to maintain the ‘glass’ illusion.
Encapsulate the glitter (and blue accents) within another layer of clear builder gel or a thick, clear top coat.
This step is crucial for creating a smooth, glass-like surface and securing the chunky glitter.
Cure thoroughly.
Shape and buff the nail smooth if necessary after encapsulation.
Ensure the final shape is elegant and the surface is perfectly clear and glossy.
Finish with a high-shine, non-yellowing top coat to maximize the clarity and sparkle.
Ensure all edges are sealed for durability.
Why This Stands Out
The clear or transparent base creates a unique and captivating ‘glass nail’ effect.
It’s a modern, high-fashion look that stands out from typical opaque manicures.
The use of chunky holographic glitter provides maximum sparkle and a multi-dimensional, prismatic light show.
It truly mimics the magical quality of Cinderella’s slipper.
The subtle icy blue accents add a touch of color and reinforce the fairy tale theme beautifully.
They provide a cool contrast to the holographic sparkle.
This design is pure fantasy and elegance, perfect for formal events, proms, weddings, or anytime you want to feel like a princess.
It’s an unforgettable, show-stopping manicure for a magical May.
Tropical Sunset Glitter Nails
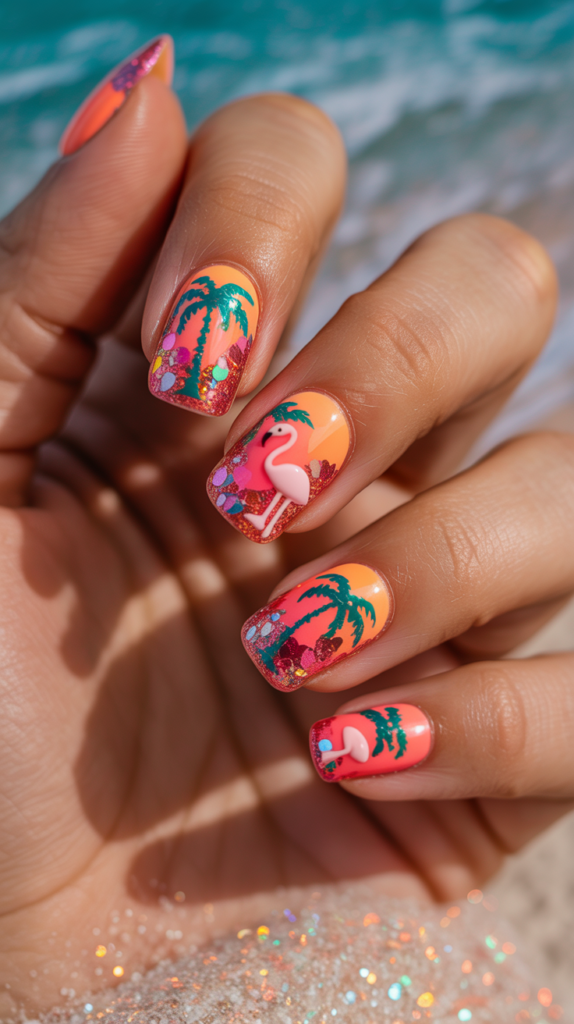
Transport yourself to a tropical paradise with nails that capture the vibrant colors of an island sunset.
This design features a gradient of coral, fuchsia, and tangerine, adorned with chunky glitter shaped like palm trees and flamingos.
Design Features
A warm, tropical gradient forms the base, blending shades like bright coral, hot fuchsia pink, and sunny tangerine orange.
These colors evoke the intense beauty of a sunset over the ocean.
The standout feature is the use of chunky, shaped glitter, specifically pieces resembling palm trees, flamingos, or other tropical motifs.
These add a fun, thematic element to the design.
The base gradient provides a vibrant backdrop for the shaped glitter pieces.
The overall look is colorful, playful, and evocative of a vacation getaway.
This design screams summer fun and tropical vibes, making it perfect for the warmer days of late May and the upcoming summer season.
It’s bold, cheerful, and full of personality.
How To Achieve This Look
Start with prepared nails and apply a base coat.
Let it dry completely.
Create the tropical sunset gradient using a makeup sponge.
Apply stripes of coral, fuchsia, and tangerine polish onto the sponge and dab onto the nail, blending the edges smoothly.
Build opacity with multiple layers, drying or curing between each.
Clean up the skin around the nails after creating the gradient.
Ensure the blend is smooth and vibrant.
While the final gradient layer is slightly tacky, or using a dab of clear polish or nail glue, carefully place the shaped glitter pieces (palm trees, flamingos) onto the nail.
Use tweezers for precision, arranging them artfully against the sunset background.
Press the shaped glitter gently to ensure it adheres well and lies as flat as possible.
Allow sufficient time for drying or curing.
Apply one or two generous coats of a clear, glossy top coat to encapsulate the shaped glitter and smooth the nail surface.
Ensure the glitter pieces are fully covered for protection and shine.
Why This Stands Out
The vibrant gradient of coral, fuchsia, and tangerine instantly creates a warm, energetic, and tropical feel.
These colors are synonymous with stunning sunsets and summer fun.
The use of chunky, themed glitter shapes like palm trees and flamingos adds a unique and playful narrative element.
It clearly communicates the tropical vacation theme.
This design is incredibly colorful and eye-catching, perfect for making a statement.
It combines a beautiful ombré technique with fun, maximalist embellishments.
It’s the ideal manicure for anticipating or enjoying a vacation, or simply bringing a touch of exotic paradise to your everyday life in May.
It radiates warmth, happiness, and adventure.
Glitter Jelly Nails

Dive into the fun and playful trend of Glitter Jelly Nails.
This look features translucent ‘jelly’ polishes in various colors, with glitter particles suspended within the polish, creating a see-through, candy-like effect.
Design Features
The key characteristic is the use of jelly nail polish, which is known for its translucent, sheer finish, unlike opaque cream polishes.
This allows light to pass through, creating a unique depth.
Glitter particles, often holographic or iridescent, are suspended within the jelly polish itself or layered between coats.
This makes the glitter appear embedded within the ‘jelly’.
Popular jelly colors include juicy shades like pink, purple, blue, red, or even yellow and green.
The translucent quality gives them a gummy candy or stained glass appearance.
The overall effect is fun, youthful, and dimensional.
The suspended glitter adds sparkle and intrigue to the see-through color.
How To Achieve This Look
Start with clean, prepped nails and apply a clear base coat.
This enhances the translucent effect.
Apply one coat of your chosen colored jelly nail polish.
Jelly polishes are sheer by nature, so don’t expect full opacity.
If your jelly polish doesn’t contain glitter, apply a layer of glitter polish (ideally with glitter suspended in a clear base) over the first jelly coat.
Alternatively, place loose glitter onto the wet jelly polish.
Apply a second coat of the colored jelly polish over the glitter layer.
This ‘sandwiches’ the glitter, creating the signature suspended look.
Build up layers of jelly polish and glitter until you achieve the desired sheerness and sparkle density.
Allow each layer to dry thoroughly or cure properly.
The layering is key to the dimensional, embedded glitter effect.
Finish with a high-shine, glossy top coat to enhance the jelly-like appearance and protect the layers.
The glossier the finish, the more candy-like the nails will look.
Why This Stands Out
The translucent quality of jelly polish creates a unique, dimensional look that is different from standard opaque manicures.
It offers a see-through effect with intriguing depth.
Suspending glitter within the jelly layers makes the sparkle appear embedded and almost liquid-like.
It adds a playful and captivating element.
Jelly nails have a fun, youthful, and almost edible appearance, reminiscent of gummy candies or stained glass.
They are perfect for a playful and trendy look in May.
This style allows for creative layering and customization with different jelly colors and glitter types.
It’s a versatile trend that can be adapted from subtle to bold.
Lemon Zest Sparkle

Add a refreshing zing to your manicure with Lemon Zest Sparkle nails.
This cheerful design features a bright, zesty yellow base complemented by sparkling gold glitter and cute lemon-slice nail art decals.
Design Features
A vibrant, sunny lemon-yellow polish forms the base of this look.
This color is instantly uplifting and perfect for the bright days of May.
Gold glitter, often fine or micro-glitter, is used to add sparkle and warmth.
It complements the yellow base beautifully, adding a touch of sunshiney shimmer.
The defining accent is the inclusion of lemon-slice nail art, either through pre-made decals or hand-painted details.
This element reinforces the zesty theme.
The overall vibe is cheerful, bright, and energetic, with a fun citrus twist.
It’s like a burst of sunshine and lemonade for your fingertips.
How To Achieve This Look
Start with prepped nails and apply a base coat; consider a white base coat to make the yellow polish more vibrant.
Let it dry completely.
Apply two to three coats of your chosen zesty yellow nail polish, ensuring smooth, opaque coverage.
Yellows can be tricky, so allow ample drying or curing time between coats.
Once the yellow base is set, add the gold glitter accents.
You could apply a gold glitter top coat, sponge glitter onto the tips, or use a detail brush for specific placements.
Carefully apply lemon-slice decals onto designated accent nails while the polish is slightly tacky or using nail glue.
If painting, use white, yellow, and potentially a darker yellow or orange for the segment details, using a fine brush.
Allow all elements—glitter, decals, or painted art—to dry or cure completely.
Ensure the lemon slices look crisp and recognizable.
Seal the design with a glossy top coat to protect the artwork, enhance the shine of the yellow base and gold glitter, and provide a durable finish.
Cap the free edges.
Why This Stands Out
The bright lemon-yellow color is inherently cheerful and optimistic, perfectly capturing the sunny disposition of late spring.
It’s an instant mood-lifter.
The combination of yellow with warm gold glitter creates a beautiful, sunny sparkle.
It enhances the vibrancy of the base color.
Lemon-slice nail art adds a fun, specific, and playful thematic element.
It clearly communicates the zesty inspiration and adds a unique touch.
This design is refreshing, energetic, and perfect for daytime wear during May.
It brings a touch of playful sophistication and summery brightness to your look.
Glitter Lined Cuticles

Embrace minimalist sparkle with the chic Glitter Lined Cuticles trend.
This understated design features nude or bare-looking nails with a fine line of metallic glitter applied precisely along the cuticle area.
Design Features
The majority of the nail is kept natural-looking, usually with a sheer nude polish that matches the skin tone or just a clear base coat.
The focus is entirely on the cuticle line detail.
A thin, precise line of fine metallic glitter (often gold, silver, or rose gold) is applied directly along the curve of the cuticle.
This creates a delicate, jewelry-like accent.
The look is characterized by its minimalism and subtlety.
The sparkle is concentrated in one specific area, leaving the rest of the nail clean and simple.
The overall aesthetic is modern, chic, and sophisticated.
It’s a subtle way to incorporate glitter for a touch of unexpected elegance.
How To Achieve This Look
Start with impeccably clean and manicured nails, paying special attention to the cuticle area for a neat baseline.
Apply a clear base coat or a sheer nude polish that complements your skin tone.
Allow the base layer to dry or cure completely.
Ensure the nail surface is smooth and flawless.
Using a very fine nail art brush or a striper brush, carefully dip it into metallic glitter polish or clear polish mixed with fine loose glitter.
Draw a thin, precise line following the natural curve of your cuticle.
Keep the line consistent in thickness and as close to the cuticle as possible without touching the skin.
Work slowly and steadily for precision.
Clean up any mistakes immediately with a clean-up brush dipped in remover.
A crisp, clean line is essential for this look.
Allow the glitter line to dry or cure completely.
Once set, apply a glossy top coat over the entire nail to seal the glitter line, add shine, and provide a unified finish.
Why This Stands Out
This design offers a highly sophisticated and minimalist approach to glitter nails.
The sparkle acts as a subtle accent rather than the main feature.
Placing the glitter along the cuticle line is unexpected and modern.
It draws attention to the base of the nail in a chic, jewelry-like way.
It’s an incredibly versatile look suitable for any occasion, from everyday wear to formal events, and particularly fitting for professional settings where bold nails might be discouraged.
It adds elegance without being distracting.
The contrast between the clean nude nail and the fine metallic line creates a sharp, polished aesthetic.
It enhances the natural beauty of the nail shape and length.
Aquamarine Crush

Dive into the cool, refreshing depths of the ocean with Aquamarine Crush nails.
This design features stunning ocean-blue polishes combined with shimmering aquamarine foil glitter and delicate shell flakes.
Design Features
The base color palette revolves around shades of aquamarine and ocean blue, ranging from light seafoam to deeper teal.
These colors evoke the clarity and depth of seawater.
Shards or flakes of aquamarine-toned metallic foil glitter are crushed or applied onto the blue base.
This foil adds intense metallic shine and texture, mimicking light reflecting off water or gemstones.
Fine, iridescent shell flakes or glitter may also be incorporated.
These add another layer of oceanic texture and pearlescent shimmer.
The overall effect is cool, refreshing, and reminiscent of sparkling ocean waters, hidden treasures, and aquamarine gemstones.
It combines color, metallic shine, and texture beautifully.
How To Achieve This Look
Begin with prepared nails and apply a base coat.
Let it dry completely.
Apply one or two coats of your chosen ocean-blue or aquamarine nail polish, ensuring smooth, even coverage.
Allow each coat to dry or cure properly.
While the last coat of blue polish is still slightly tacky, or using a clear polish/gel base, apply the aquamarine foil glitter pieces.
You can use larger foil sheets and break them into smaller shards, or use pre-cut foil flakes, pressing them gently onto the nail.
Optionally, sprinkle fine iridescent shell flakes over the nail as well, integrating them with the foil pieces for added texture and shimmer.
Arrange the elements artfully.
Allow the foil and flakes to adhere properly, ensuring they lie as flat as possible.
Cure if using gel products.
Encapsulate the foil and shell flakes with a clear top coat or builder gel to create a smooth surface.
Apply one or two coats as needed to fully cover any texture.
Finish with a final layer of glossy top coat to maximize the shine and clarity, enhancing the watery, gemstone-like appearance.
Cap the free edges.
Why This Stands Out
The aquamarine and ocean blue color palette is instantly calming and refreshing, perfect for spring and evoking coastal vibes.
It’s a beautiful alternative to standard blues.
The use of crushed foil glitter provides intense metallic shine and a unique textured effect that mimics gemstones or light on water.
It adds a luxurious and eye-catching element.
Incorporating shell flakes enhances the oceanic theme and adds subtle iridescence and texture.
It creates a multi-dimensional, treasure-like appearance.
This design feels both glamorous and connected to nature, capturing the beauty of the sea.
It’s a sophisticated and refreshing look ideal for the month of May.
Barbiecore Glitter Nails

Embrace the ultra-feminine and playful Barbiecore trend with nails that are unapologetically pink and sparkly.
This design features bright hot pink polish drenched in coordinating pink holographic glitter and accented with dazzling rhinestones.
Design Features
The defining feature is the use of a vibrant, unmistakable hot pink or bubblegum pink nail polish.
This color is the cornerstone of the Barbie aesthetic.
The nails are generously coated in pink holographic glitter.
This provides intense sparkle and a rainbow flash effect, maximizing the glamorous, playful vibe.
Rhinestones, often pink or clear crystal, are added as embellishments.
These gems enhance the sparkle factor and add a touch of luxury and doll-like charm.
The overall aesthetic is bold, hyper-feminine, fun, and overtly glamorous.
It’s a full embrace of pink, sparkle, and playful extravagance.
How To Achieve This Look
Start with prepped nails and apply a base coat.
Let it dry completely.
Apply two to three coats of your chosen vibrant hot pink nail polish, aiming for full, flawless opacity.
Allow each coat to dry thoroughly or cure under a lamp.
Once the pink base is set, apply one or two coats of a dense pink holographic glitter polish over the entire nail.
Ensure even coverage for maximum sparkle and holographic effect.
While the glitter polish is still slightly tacky, or using nail glue for better hold, carefully place pink or clear rhinestones onto the nails.
Arrange them near the cuticle, at the tip, or in patterns, using tweezers for precision.
Allow the glitter polish and rhinestone adhesive ample time to dry or cure completely.
Ensure the rhinestones are securely attached.
Seal the entire design with a glossy top coat, making sure to encapsulate the glitter and go around the base of the rhinestones to secure them without covering their facets.
Apply a second coat if needed for smoothness and durability.
Why This Stands Out
This design fully embraces the popular Barbiecore trend with its unabashed use of hot pink and sparkle.
It’s a fun, fashionable, and instantly recognizable aesthetic.
The combination of vibrant pink, holographic glitter, and rhinestones creates maximum impact.
It’s an incredibly eye-catching, glamorous, and playful look.
Pink holographic glitter offers intense sparkle with mesmerizing rainbow flashes.
It elevates the design beyond simple glitter, adding a magical quality.
Perfect for parties, themed events, or anyone who loves pink and isn’t afraid to make a bold statement.
It radiates confidence, fun, and hyper-feminine energy, ideal for a cheerful May.
Buttercup Shimmer

Welcome the gentle side of spring with Buttercup Shimmer nails.
This lovely design features a soft pastel yellow base enhanced with a subtle micro-glitter sheen and often accented with dainty floral details.
Design Features
A soft, buttery pastel yellow polish serves as the base color.
This shade is cheerful yet gentle, reminiscent of delicate buttercup flowers blooming in May meadows.
A fine micro-glitter, often gold or iridescent, is layered over the yellow base or incorporated into the polish itself.
This provides a subtle, all-over shimmer rather than chunky sparkle.
Dainty floral accents, such as tiny white daisies or other small blossoms, may be hand-painted or applied as decals on some nails.
These details enhance the spring garden theme.
The overall aesthetic is soft, cheerful, delicate, and feminine.
It captures the gentle warmth and blooming beauty of a sunny spring day.
How To Achieve This Look
Begin with clean, prepared nails and apply a base coat.
Allow it to dry fully.
Apply two to three coats of your chosen pastel yellow nail polish, ensuring smooth, even coverage without streaks.
Let each coat dry thoroughly or cure properly.
Once the yellow base is set, apply a thin layer of a top coat containing fine gold or iridescent micro-glitter.
Alternatively, use a sheer polish with a built-in shimmer effect over the yellow base.
Ensure the shimmer is subtle and evenly distributed across the nail.
The goal is a gentle sheen, not intense glitter.
If adding floral accents, use a dotting tool and a fine brush with white and yellow polish to create tiny daisies or other simple flowers on accent nails.
Or, apply small floral decals carefully onto slightly tacky polish.
Allow all elements—shimmer layer and floral details—to dry or cure completely.
Keep the floral accents delicate and small.
Finish with a glossy top coat to seal the design, enhance the subtle shimmer, and protect the floral artwork.
Cap the free edges for longer wear.
Why This Stands Out
Pastel yellow is a soft, cheerful color that perfectly embodies the gentle warmth and optimism of spring.
It’s a less common but beautiful alternative to pinks and lilacs.
The micro-glitter provides a subtle, sophisticated sheen that enhances the base color without being overwhelming.
It adds a touch of elegance and light.
Dainty floral accents reinforce the spring theme and add a touch of charming detail.
They elevate the manicure beyond a simple shimmer finish.
This design is delicate, feminine, and perfect for everyday wear during May, spring weddings, or garden parties.
It’s a sweet and sophisticated nod to the season’s beauty.
Sparkling French Tips With Gems

Add a touch of luxury to a classic style with Sparkling French Tips adorned with Gems.
This elegant design takes the traditional French manicure, overlays the white tip with clear glitter polish, and embellishes each nail with sparkling gemstone accents.
Design Features
This look starts with the foundation of a classic French manicure: a sheer pink or nude base and crisp white tips.
This provides a timelessly elegant canvas.
A layer of clear polish containing fine silver or iridescent glitter is applied specifically over the white tips.
This adds a subtle sparkle to the classic French line.
The distinguishing feature is the addition of small gemstone embellishments or rhinestones.
These are typically placed near the smile line (where the white tip meets the pink base) or at the corner of the tip on each nail.
The overall effect is classic, elegant, and luxurious.
It elevates the traditional French manicure with sophisticated sparkle and gemstone accents.
How To Achieve This Look
Start with perfectly prepped nails and apply a base coat.
Let it dry completely.
Apply one or two coats of sheer pink or nude polish for the base of the French manicure.
Allow it to dry or cure fully.
Using white polish and a fine brush or nail guides, create crisp, clean French tips.
Let the white tips dry or cure completely.
Apply a thin layer of clear glitter polish (with fine silver or iridescent glitter) carefully over just the white tips.
Avoid getting glitter on the pink base.
While the glitter layer is still slightly tacky, or using a small dot of nail glue, carefully place a small rhinestone or gemstone onto each nail.
Common placements include the center of the smile line or one corner of the white tip.
Use tweezers for precision.
Allow the glitter polish and adhesive for the gems to dry or cure completely.
Ensure the gems are securely attached.
Finish with a glossy top coat over the entire nail, sealing the glitter tip and securing the gem.
Be careful not to cover the facets of the gem completely to maintain its sparkle.
Why This Stands Out
This design offers a luxurious and modern update to the universally beloved French manicure.
It retains the classic elegance while adding sophisticated sparkle.
The combination of glittery tips and gemstone accents creates a look that is both refined and eye-catching.
It adds just the right amount of glamour.
It’s an incredibly versatile style, perfect for brides, formal events, or elevating your everyday look.
It exudes timeless sophistication with a contemporary twist.
The precise placement of the gems draws attention and adds a focal point of light to each nail.
It’s a detail that signifies quality and luxury.
Confetti Heart Glitter

Wear your heart on your nails with this adorable Confetti Heart Glitter design.
This sweet look features heart-shaped glitter pieces suspended within a sheer baby pink or lavender jelly base.
Design Features
The base is typically a sheer jelly polish in a soft color like baby pink or pale lavender.
This translucent quality allows the heart glitter to be the main focus.
The key element is the use of confetti glitter specifically shaped like small hearts.
These hearts often come in various colors, like red, pink, silver, or holographic shades.
The heart glitter pieces are suspended within the jelly polish layers, appearing embedded and scattered randomly.
This creates a playful, dimensional effect.
The overall aesthetic is sweet, romantic, and playful.
It’s a charming way to incorporate hearts and glitter into a manicure, perfect for May’s cheerful vibe.
How To Achieve This Look
Start with clean, prepped nails and apply a clear base coat.
Allow it to dry.
Apply one thin coat of your chosen sheer pink or lavender jelly polish.
Let it dry or cure.
Apply another layer of the jelly polish, and while it’s still wet, carefully place the heart-shaped glitter pieces onto the nail using a dotting tool, toothpick, or tweezers.
Scatter them randomly or create specific patterns.
Press the hearts gently to ensure they adhere well and lie relatively flat within the wet polish.
Avoid clumping them too closely together.
Apply another thin coat of the sheer jelly polish over the hearts to encapsulate them.
This creates the signature suspended, embedded look.
Build layers if needed for desired sheerness and heart density.
Allow each layer to dry or cure thoroughly.
Patience is needed to build the layers correctly.
Finish with a high-shine, glossy top coat to enhance the jelly effect, smooth the surface over the hearts, and protect the design.
Cap the free edges.
Why This Stands Out
The use of heart-shaped glitter immediately creates a sweet, romantic, and charming vibe.
It’s an adorable and universally understood symbol of affection.
Suspending the hearts within a sheer jelly base gives the design a unique, dimensional, and playful quality.
It looks like tiny hearts floating in candy.
The combination of soft pastel jelly colors with colorful or metallic hearts is visually appealing and fun.
It’s a youthful and cheerful aesthetic.
This design is perfect for expressing sweetness and affection, suitable for dates, parties, or simply adding a touch of love-themed fun to your May manicure.
It’s irresistibly cute.
Gold Foil Shatter Nails

Achieve an edgy yet luxurious look with Gold Foil Shatter Nails.
This design features shards of metallic gold and champagne glitter foil applied over a nude or blush pink base, creating a shattered glass or abstract metallic effect.
Design Features
A neutral base color, typically nude, blush pink, or sometimes white or black for more contrast, serves as the canvas.
This allows the metallic foil to take center stage.
Small, irregular pieces of metallic foil in gold and champagne tones are applied to the nail surface.
These are often referred to as transfer foils or nail foils, applied to create a broken, shattered look.
The foil pieces are applied randomly, often overlapping slightly, to create texture and abstract patterns.
The effect resembles shattered glass, distressed metal, or luxurious Kintsugi repair.
The overall aesthetic is modern, edgy, and sophisticated, with a touch of abstract artistry.
It blends neutral tones with high-impact metallic texture.
How To Achieve This Look
Start with prepped nails and apply a base coat.
Let it dry completely.
Apply one or two coats of your chosen base color (nude, blush pink, etc.).
Allow it to dry or cure fully.
Apply a layer of nail foil adhesive or clear polish over the base color where you want the foil to stick.
Let it become tacky (usually turns clear or slightly matte when ready, follow product instructions).
Press the gold and champagne foil sheets (shiny side up) firmly onto the tacky areas.
Rub gently with a silicone tool or your finger to transfer the metallic layer.
Lift the sheet away quickly; the foil should remain on the nail in a shattered pattern.
Repeat the process, layering different foil colors or filling in gaps until you achieve the desired shattered effect.
Aim for an abstract, random placement of the foil shards.
Gently brush away any loose foil flakes that didn’t adhere properly.
Ensure the adhered foil lies as flat as possible.
Seal the design thoroughly with one or two coats of a glossy top coat.
Encapsulating the foil is crucial to prevent it from peeling or catching, ensuring a smooth finish and longevity.
Why This Stands Out
The shattered foil technique creates a unique, textured, and abstract metallic effect that is visually striking.
It offers a modern and edgy alternative to traditional glitter.
The combination of luxurious gold and champagne foils against a neutral base is sophisticated and chic.
It balances boldness with understated elegance.
The random, abstract placement of the foil shards gives each nail a unique look.
It feels artistic and effortlessly cool.
This design is perfect for those seeking a contemporary, high-fashion manicure that incorporates metallic elements in an unconventional way.
It’s edgy yet elegant for May events.
Dreamy Holo Clouds
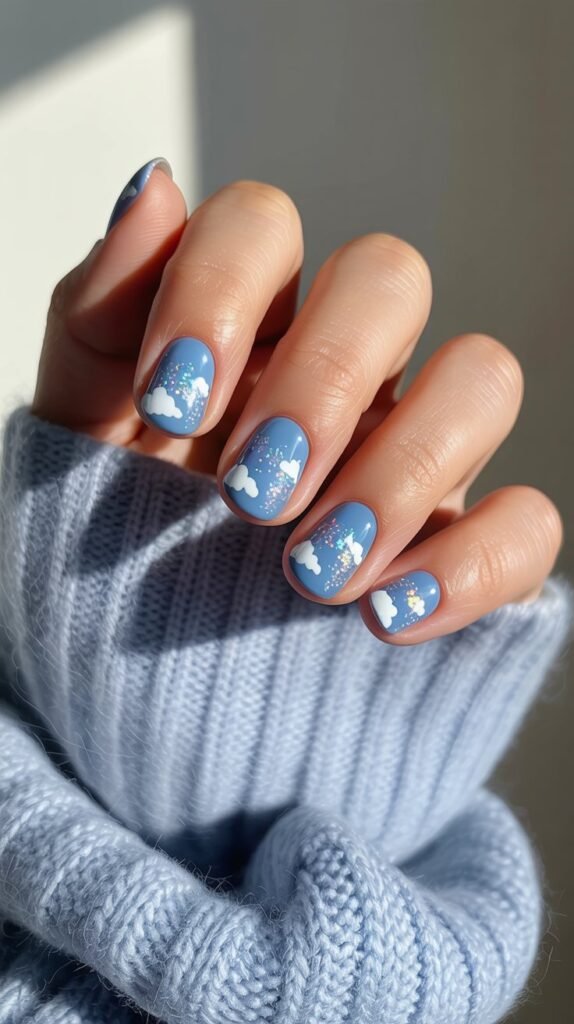
Float away on a cloud of holographic dreams with this ethereal nail design.
It features a soft sky blue base adorned with fluffy white cloud nail art, all overlaid with a sparkling holographic glitter top coat.
Design Features
A gentle sky blue polish provides the base, evoking a clear spring day sky.
This soft blue creates a serene and dreamy canvas.
Fluffy white clouds are painted onto the blue base, often using a dotting tool or sponge to create soft, puffy shapes.
These clouds add a whimsical, atmospheric element.
A holographic glitter top coat is applied over the entire design.
This adds a magical, multi-colored sparkle that enhances the dreamy quality, like rainbows appearing after a spring shower.
The overall aesthetic is soft, ethereal, whimsical, and calming.
It combines a peaceful sky scene with enchanting holographic sparkle.
How To Achieve This Look
Start with prepared nails and apply a base coat.
Let it dry completely.
Apply two coats of your chosen sky blue nail polish, ensuring smooth, even coverage.
Allow each coat to dry or cure fully.
Using a dotting tool or a small piece of sponge dipped in white polish, gently dab onto the blue base to create soft, fluffy cloud shapes.
Vary the size and placement of the clouds for a natural look.
Allow the white clouds to dry or cure completely.
Keep the edges soft and diffused rather than sharp lines.
Once the clouds are set, apply a thin, even layer of a holographic glitter top coat over the entire nail surface.
This will add sparkle to both the blue sky and the white clouds.
Ensure the holographic glitter is distributed evenly for a consistent shimmer.
Allow this layer to dry or cure thoroughly.
Finish with a final layer of glossy clear top coat if desired for extra shine and protection, especially if the holo top coat isn’t sufficiently glossy on its own.
Cap the free edges.
Why This Stands Out
The combination of a soft sky blue base and fluffy white clouds creates an instantly recognizable and calming sky scene.
It’s a peaceful and universally appealing motif.
The addition of holographic glitter transforms the simple sky scene into something magical and dreamy.
The multi-colored sparkle adds an enchanting dimension.
This design is whimsical, ethereal, and perfect for capturing the light, airy feeling of a beautiful May day.
It evokes feelings of peace and wonder.
It’s a gentle yet captivating look suitable for everyday wear, offering a touch of fantasy and serene beauty to your fingertips.
Glitter Marble Swirls

Combine the elegance of marble with the allure of glitter in this sophisticated design.
It features classic marble nails, typically in soft blush and white, interwoven with delicate threads of metallic glitter veining.
Design Features
The base mimics the natural patterns of marble stone, usually created by swirling white polish into a soft blush pink or nude base while wet.
This creates soft, flowing lines and blended areas.
Fine veins or threads of metallic glitter (often gold, silver, or rose gold) are added, following or accenting the marble swirls.
These glitter veins replace or enhance some of the traditional darker marble lines.
The color palette is typically soft and neutral, like blush pink, white, and nude, keeping the look elegant and understated.
The metallic glitter adds a touch of luxury.
The overall aesthetic is sophisticated, elegant, and luxurious, blending a natural stone pattern with glamorous sparkle.
It’s a modern take on classic marble nails.
How To Achieve This Look
Start with prepped nails and apply a base coat.
Let it dry completely.
Apply one coat of your base color (e.g., blush pink or nude).
While it’s still wet, add small dots or lines of white polish.
Use a fine brush, toothpick, or marbling tool to gently swirl the white polish into the base color, creating soft, blended marble patterns.
Avoid over-blending; allow distinct swirls to remain.
Let this layer dry or cure.
Using a very fine nail art brush dipped in metallic glitter polish (or clear polish mixed with loose glitter), carefully draw thin, wavy lines following some of the marble swirls.
These are your glitter veins.
Keep the glitter veins delicate and integrated into the marble pattern.
Allow them to dry or cure completely.
Clean up any smudges or uneven lines for a polished look.
Precision in the veining enhances the elegance.
Finish with a high-gloss top coat to smooth the surface, enhance the shine, and protect the marble and glitter details.
Ensure the entire design is sealed.
Why This Stands Out
This design beautifully merges the timeless elegance of marble patterns with the modern appeal of glitter.
It’s a sophisticated fusion of textures and finishes.
Using glitter for the veins adds an unexpected touch of luxury and sparkle to the marble effect.
It elevates the design beyond a standard marble manicure.
The typical soft, neutral color palette makes this look incredibly versatile and chic, suitable for both everyday wear and special occasions in May.
It complements various styles.
It mimics a luxurious natural material, giving the nails a high-end, polished appearance.
The glitter adds just the right amount of glamour without being ostentatious.
Pastel Rainbow Sparkle

Celebrate the full spectrum of spring colors with Pastel Rainbow Sparkle nails.
This cheerful design features each nail painted a different soft pastel shade, with a coordinating fine glitter layered over the top for a cohesive shimmer.
Design Features
Each nail showcases a different pastel color, creating a soft rainbow effect across the hand.
Typical shades include baby pink, pale yellow, mint green, sky blue, and soft lilac.
A fine glitter, often iridescent or silver to complement all colors, is applied as a top layer over each pastel nail.
This ties the different colors together with a uniform sparkle.
The glitter application is usually a full coverage shimmer rather than chunky or sparse glitter.
It aims for a delicate, consistent sparkle across all nails.
The overall look is bright, cheerful, playful, and perfectly captures the soft yet colorful palette of springtime.
It’s a fun celebration of color and light.
How To Achieve This Look
Start with prepared nails and apply a base coat.
Let it dry completely.
Assign a different pastel color to each nail (e.g., thumb pink, index yellow, middle green, ring blue, pinky lilac).
Apply two to three coats of each respective pastel polish until opaque and smooth.
Allow each colored nail to dry or cure completely.
Ensure the base colors are flawless before adding glitter.
Once all the pastel bases are set, apply a thin, even layer of a fine iridescent or silver glitter top coat over each nail.
Ensure the glitter coverage is consistent across all colors.
Alternatively, apply a clear top coat to each nail one by one, and while wet, dip the nail into loose fine glitter or sprinkle it over, then gently brush off the excess.
This provides denser glitter coverage.
Allow the glitter layer to dry or cure thoroughly.
Ensure a uniform shimmer finish on every nail.
Finish with a final layer of glossy clear top coat if needed to smooth the glitter texture and maximize shine.
Cap the free edges for durability.
Why This Stands Out
The use of a different pastel color on each nail creates a visually delightful and cheerful rainbow effect.
It’s a playful and optimistic expression of spring color.
Applying a uniform fine glitter top coat ties the different colors together cohesively.
It adds a sophisticated sparkle that elevates the simple pastel arrangement.
This design is inherently fun and youthful, perfect for celebrating the vibrancy and diversity of May.
It allows you to wear multiple favorite spring shades at once.
It’s a versatile look that is bright and eye-catching yet soft enough for everyday wear, bringing a touch of playful elegance and coordinated shimmer to your style.
Dandelion Wishes Glitter Nails

Capture the whimsical magic of blowing dandelion seeds on a breezy May day with this enchanting design.
It features soft white and nude tones accented with delicate glittery dandelion details.
Design Features
The base colors are typically soft and airy, like sheer white, creamy nude, or a very pale sky blue.
This creates a light, natural canvas reminiscent of a spring sky or meadow.
The key element is the depiction of dandelions, often showing the fluffy seed head (pappus) with tiny seeds blowing away.
This is usually achieved with fine white lines and dots.
Fine silver or iridescent glitter is incorporated into the dandelion details, particularly the blowing seeds.
This adds a touch of sparkle and magic, like wishes floating on the breeze.
The overall aesthetic is whimsical, delicate, airy, and nostalgic.
It evokes childhood memories and the simple beauty of nature in spring.
How To Achieve This Look
Start with prepped nails and apply a base coat.
Let it dry fully.
Apply one or two coats of your chosen base color (sheer white, nude, pale blue).
Allow it to dry or cure completely.
Using a very fine nail art brush dipped in white polish, carefully paint a dandelion stem and the central part of the seed head on one or two accent nails.
Keep the lines delicate.
Create the fluffy seed head by painting many fine lines radiating outwards or using tiny white dots.
Then, paint small V-shapes or dots drifting away from the main head to represent the blowing seeds.
While the white paint for the blowing seeds is still slightly wet, or using a fine brush dipped in clear polish with glitter, add tiny touches of fine silver or iridescent glitter to the ‘seeds’.
This makes them sparkle like wishes.
Allow the detailed dandelion artwork and glitter accents to dry or cure completely.
Precision and delicate lines are key.
Finish with a glossy top coat to protect the intricate design, smooth the surface, and add shine.
Ensure the delicate lines are fully sealed.
Why This Stands Out
The dandelion motif is unique, whimsical, and evokes powerful feelings of nostalgia, wishes, and the transient beauty of nature.
It tells a charming story on the nails.
The combination of soft base colors with delicate white artwork creates an airy and ethereal feel.
It’s a subtle yet intricate design.
Incorporating fine glitter into the blowing seeds adds a touch of magic and sparkle.
It beautifully represents the ‘wish’ aspect of blowing dandelion seeds.
This design is perfect for those who appreciate nature-inspired art, whimsical themes, and delicate details.
It’s a conversation-starting manicure with a touch of enchantment for May.
Rose Gold Galaxy Nails

Explore the cosmos with a glamorous twist using Rose Gold Galaxy Nails.
This mesmerizing design features a deep black or navy base adorned with swirling metallic rose gold patterns and scattered glitter resembling stars and nebulae.
Design Features
The base is a dark, deep color like black or navy blue, representing the vast expanse of outer space.
This provides a dramatic contrast for the metallic elements.
Swirls, patches, or nebulae-like clouds of metallic rose gold polish or pigment are applied over the dark base.
This adds a warm, luxurious metallic element to the galaxy theme.
Fine glitter, often in rose gold, silver, or holographic shades, is scattered across the nail to represent stars and distant galaxies.
Tiny painted white dots can also be used for stars.
The overall effect is cosmic, mysterious, and glamorous, blending the depth of space with the warmth and luxury of rose gold.
It’s a unique take on the popular galaxy nail trend.
How To Achieve This Look
Start with prepped nails and apply a base coat.
Let it dry completely.
Apply two coats of your chosen dark base color (black or navy blue), ensuring full opacity.
Let it dry or cure thoroughly.
Using a sponge or a brush, dab or swirl patches of metallic rose gold polish onto the dark base.
Blend the edges softly to create a nebulae-like effect.
While the rose gold patches are still slightly wet, or using a clear polish, sprinkle or sponge on fine glitter (rose gold, silver, holographic) sparsely across the nail to mimic stars.
Concentrate glitter in some areas for depth.
Optionally, use a dotting tool dipped in white polish to add tiny star dots for extra detail.
Keep them small and scattered.
Allow all the galaxy elements—rose gold swirls, glitter, and dots—to dry or cure completely.
Layering creates the best depth.
Finish with a high-shine top coat to seal the design, enhance the cosmic depth, and add a glossy finish.
Ensure all glitter and layers are smooth.
Why This Stands Out
This design offers a unique and luxurious twist on galaxy nails by incorporating trendy rose gold.
It blends cosmic mystery with warm metallic elegance.
The contrast between the dark base and the shimmering rose gold and glitter creates a visually stunning and dramatic effect.
It captures the beauty and vastness of space.
The swirling patterns and scattered glitter mimic celestial phenomena like nebulae and star fields.
It’s an artistic and imaginative representation of the cosmos.
Perfect for evening events or for anyone who loves celestial themes with a touch of modern glamour.
It’s a sophisticated and eye-catching look for starry May nights.
Bridal Glow Glitter Nails

Achieve the perfect touch of subtle glamour for wedding season with Bridal Glow Glitter Nails.
This elegant design features a sheer, natural-looking base enhanced with pearlescent shimmer and delicately scattered crystal or diamond glitter.
Design Features
The base is typically a very sheer pink, nude, or milky white polish that enhances the natural nail bed.
The goal is a clean, healthy, and polished look.
A soft pearlescent shimmer is often incorporated into the base polish or layered over it.
This provides a subtle, luminous glow rather than overt sparkle.
Very fine crystal, diamond dust, or iridescent micro-glitter is delicately scattered over the nail.
The sparkle is subtle, refined, and catches the light beautifully without being distracting.
The overall aesthetic is elegant, timeless, sophisticated, and subtly glamorous.
It’s designed to complement a bridal look or any formal attire without overpowering it.
How To Achieve This Look
Start with immaculately manicured nails – shape, cuticle care, and buffing are key for this look.
Apply a high-quality base coat for a smooth foundation.
Apply one or two coats of your chosen sheer nude, pink, or milky white polish.
Aim for a clean, translucent finish that enhances the natural nail.
Add a layer of pearlescent polish if desired.
Allow the base layers to dry or cure completely.
The smoothness of the base is crucial.
Apply a very thin layer of clear polish or top coat, and while it’s wet, delicately sprinkle ultra-fine crystal or iridescent glitter (‘diamond dust’) over the nail.
Use a very light hand for a subtle scattering.
Alternatively, use a top coat that already contains very fine, sparse micro-glitter or shimmer.
Ensure the effect is subtle and refined.
Allow the delicate glitter layer to dry or cure thoroughly.
Avoid clumps or dense patches of glitter.
Finish with a high-gloss, non-yellowing top coat to seal the subtle sparkle, enhance the glow, and provide a flawless, elegant finish.
Cap the free edges.
Why This Stands Out
This design epitomizes bridal elegance with its clean base, subtle pearlescent glow, and refined sparkle.
It enhances natural beauty perfectly.
The use of very fine crystal or diamond dust glitter provides a sophisticated, high-end sparkle that catches the light beautifully.
It’s luminous rather than flashy.
The overall look is timeless, versatile, and universally flattering.
It complements any formal attire and is suitable for brides, bridesmaids, or wedding guests during the May wedding season.
It achieves a perfect balance between natural elegance and subtle glamour, ensuring the nails look polished, radiant, and impeccably sophisticated.
Conclusion
May truly blossoms with opportunities to express personal style, and what better way to add a touch of seasonal brilliance than with sparkling glitter nails.
From the warm glow of a Golden Hour Ombré to the whimsical charm of Blooming Garden accents, the possibilities are as varied as the flowers blooming this month.
This extensive list of thirty-six designs demonstrates the sheer versatility of glitter, proving it can be adapted for any aesthetic preference or occasion.
Whether you gravitate towards the subtle elegance of Stardust Nude, the playful energy of Neon Glitter Pop, or the sophisticated edge of Gold Foil Shatter, there is a glitter look waiting to adorn your fingertips.
The themes explored capture the essence of May, drawing inspiration from sunsets, cocktails, gardens, starry nights, and even fairy tales.
Each design offers a unique way to celebrate the light, color, and joyful spirit associated with late spring, encouraging creativity and self-expression through nail art.
As you embrace the vibrant energy of May 2025, consider trying one of these dazzling glitter nail ideas to brighten your days and add sparkle to your moments.
Let your nails reflect the beauty and excitement of the season, experimenting with colors, textures, and effects to find the perfect glittering statement that makes you shine.